
The installation is decided before the turf is laid
A site assessment can review soil, drainage, irrigation, obstacles, measurements, and project scope before installation begins. A proper base supports the turf, contributes to drainage, and helps prevent an uneven finished surface. The turf is the visible layer; the ground beneath it determines how the finished area can perform.
For a residential yard in Kansas City, Overland Park, Lee’s Summit, Olathe, Shawnee, Lenexa, Liberty, Independence, Blue Springs, Johnson County, or Jackson County, use the same decision sequence: assess the property, prepare the foundation, fit the material, secure the joins and edges, then decide whether the project is manageable as a DIY installation. A clean-looking turf product cannot correct an unstable or poorly draining base.
Your first practical decision is not which tool to buy. It is whether you understand the site well enough to plan the work. A simple, accessible area with a clear surface may be suitable for careful DIY planning, while drainage problems, difficult access, multiple joins, existing structures, or uncertain sub-base conditions call for a more detailed assessment. We recognize both DIY and professional turf-grass installation as available options. The rest of this guide gives you the checks needed to make that choice deliberately.
Gate 1: inspect the existing yard and intended use
A residential turf site needs an inspection before excavation begins. The assessment should cover the existing soil or surface, drainage patterns, irrigation, obstacles, measurements, and the way you intend to use the area. Uneven surfaces and drainage issues can change both the preparation plan and the turf selection.
Walk the proposed footprint and record:
- Whether the ground is natural grass, soil, concrete, or another surface.
- Low areas, soft spots, uneven sections, and places where water tends to collect.
- Irrigation lines, tree roots, utility lines, edging, steps, patios, pool decks, and other structures.
- The dimensions and shape of the area, including corners, narrow sections, and transitions.
- Whether the space is primarily a lawn, pet area, play space, or another residential use.
This record gives you more than a measurement. It identifies the conditions that may require excavation, additional base work, drainage planning, special cuts, or professional review.
Intended use should guide turf selection after the site has been assessed. Turf for a residential lawn does not face the same functional requirements as turf selected for a higher-use application. Write down the expected foot traffic, whether children or pets will use the area, and whether the surface connects to landscaping, hardscaping, or a pool area. Then use those requirements to compare suitable turf types rather than choosing from appearance alone.
Measure the area carefully and sketch the footprint before ordering materials. Precise measurements help establish project scope and material requirements, but they do not determine the amount of excavation, base material, drainage work, or joining that the site may need.
Gate 2: identify conditions that change the preparation plan
Site conditions change the installation plan when the footprint includes water-management problems, existing structures, irrigation, or a surface that needs its own assessment. A yard beside a patio or pool deck needs drainage planned so runoff has somewhere to go instead of collecting against the edge. Irrigation lines inside the planned turf area may need to be capped so they do not continue sending water beneath the new surface.
Concrete requires a separate condition check. Before artificial grass is installed over concrete, the concrete’s condition should be assessed to ensure that it provides a solid foundation. Do not treat a concrete footprint as interchangeable with excavated soil; document cracks, uneven areas, edges, transitions, and the way water moves across the surface.
A difficult sub-base, known flooding, or complicated drainage path is a preparation issue rather than a turf-selection issue.
Pause the installation plan when you cannot explain where water will go, what lies below the planned footprint, or how the turf will meet a pool deck, patio, retaining edge, or other structure. Mark those conditions in your site record and seek a site-specific assessment before committing to excavation or material quantities.
Gather the installation kit before excavation
Gather the kit before you remove the existing surface so the work does not stop midway through preparation.
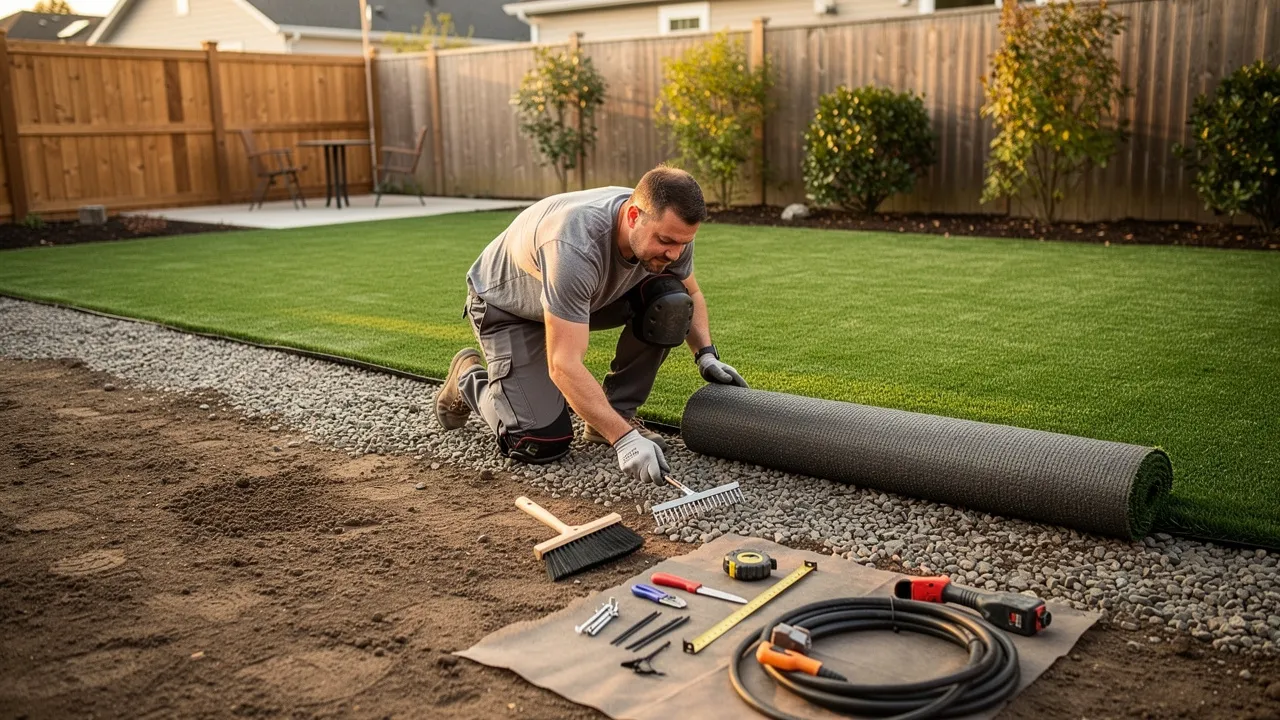
Typical ground-preparation tools include:
- Shovel or spade for removing grass, soil, and debris.
- Wheelbarrow for moving excavated material and base material.
- Landscape rake for spreading and leveling the base.
- Plate compactor, tamper, or lawn roller for compacting the prepared area.
- Spirit level or other level for checking the surface.
- Tape measure for measuring the footprint and checking placement.
- Utility knife for trimming turf.
The installation materials identified by Hall Turf include landscape fabric, grass nails or staples, seam tape, and adhesive, in addition to the turf and base materials. Keep the fastening and joining materials together with the tools so you can plan those stages rather than treating them as finishing details.
Your kit checklist should match the actual footprint. A single, open rectangle may need fewer cuts and joins than a yard with several corners, narrow strips, or separate sections. Count the sections you expect to join, note the edges that need fastening, and identify any transition where turf meets concrete, pavers, soil, or another landscape surface.
Do not use the tool list as a substitute for the site plan. Tools help you perform the work; they do not resolve poor drainage, an uncertain foundation, or a mismatch between the turf and the intended use.
Build the foundation in the correct order
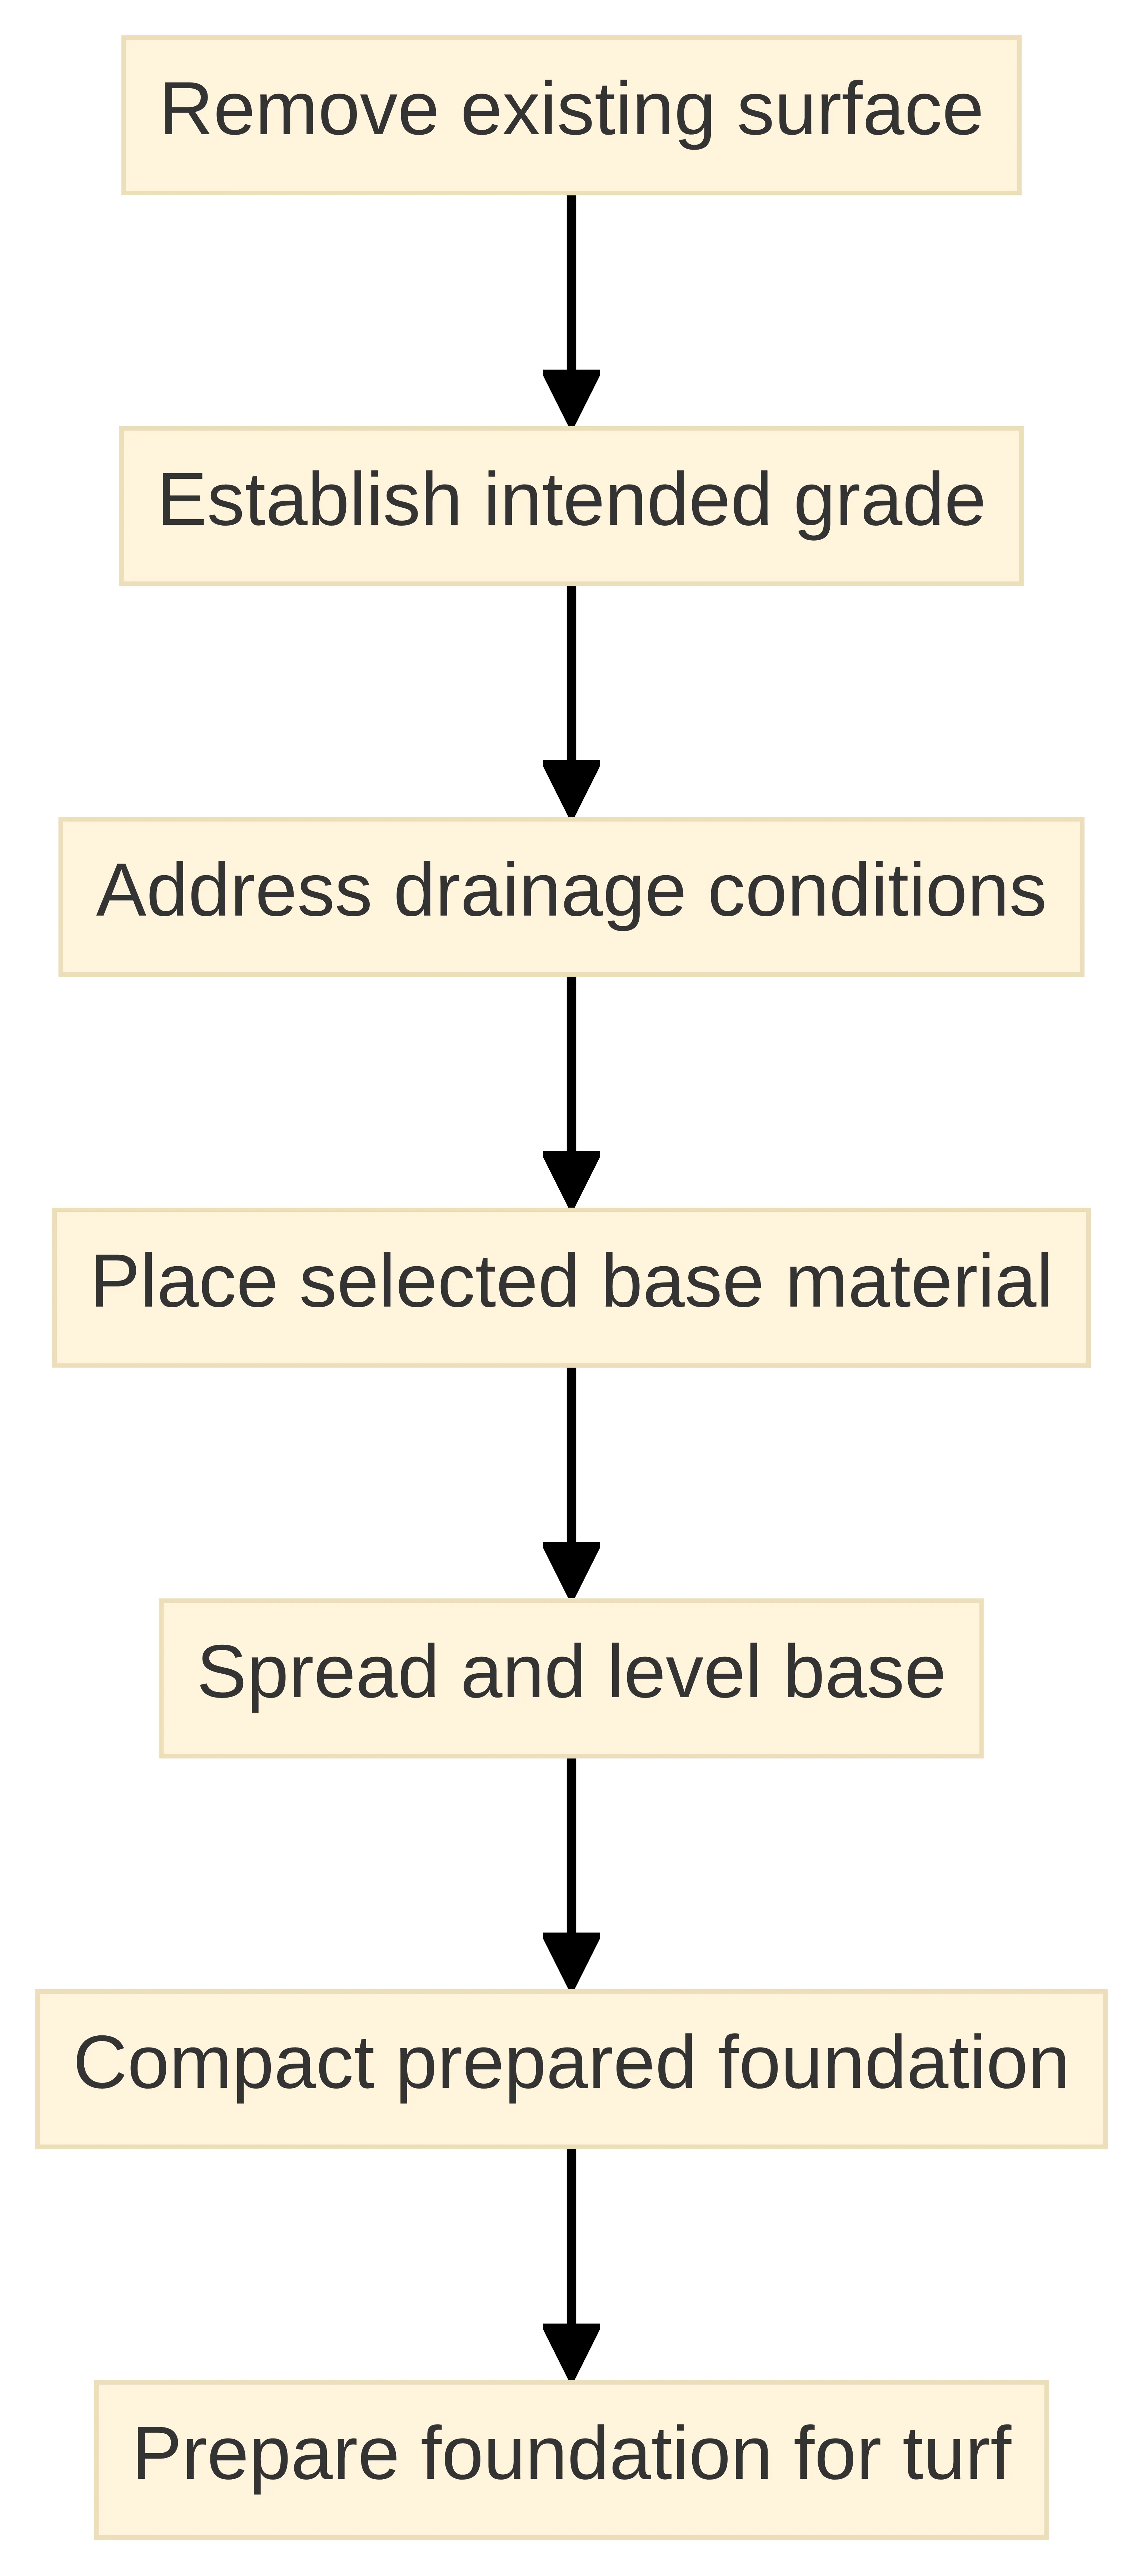
Ground preparation follows a sequence: remove the existing lawn or other surface material, level the installation area, and install an appropriate base. Artificial turf should not be placed over an unprepared natural lawn simply because the surface looks generally flat. The base supports the turf, contributes to drainage, and helps prevent an uneven finished surface.
Use this order for a typical soil-based area:
- Remove the existing grass, weeds, debris, and other surface material from the planned footprint.
- Establish the intended grade and level the area, correcting obvious uneven sections.
- Address the drainage conditions identified during the inspection before covering them with the base.
- Place the selected base material across the prepared area.
- Spread and level the base with a landscape rake.
- Compact the base with a plate compactor, tamper, or lawn roller, then check the surface again.
- Prepare the finished foundation for turf placement and joining.
The exact preparation depth and material quantity depend on the site, so do not turn this sequence into a universal excavation specification.
A foundation check should happen before the turf arrives over it. Walk the prepared area, use a level to identify irregularities, and look for soft or unsettled sections that need attention. The compactor or tamper is not merely a convenience; it is the tool identified for creating a stable base. If the foundation remains uneven or the planned base does not address the site’s water path, stop before laying the turf and revise the preparation plan.
Make drainage a base decision, not a turf-product assumption
Drainage depends on the complete installed system, not only on the turf product. A turf product rated to drain 30+ inches per hour does not mean the underlying sub-base can drain at that rate. Poor sub-base conditions can prevent proper drainage and contribute to flooding.
That distinction matters in a residential yard because the visible turf may be permeable while the soil or sub-base beneath it is not. Inspect the existing grade, low areas, soil condition, and nearby hardscape before selecting the base approach. Then make the water path part of the installation plan rather than expecting the turf to solve it after placement.
Drainage planning should respond to the condition you find:
- If the sub-base is poor, the cited guidance recommends over-excavating and replacing it with quality imported drainage materials.
- If the footprint borders a pool deck or patio edge, plan runoff so it does not collect against that structure.
- If active irrigation crosses the footprint, identify the lines that may need to be capped before the turf is installed.
These are preparation decisions. Record the condition that led to each one. For Kansas and Missouri yards, use seasonal conditions as inspection prompts: after heavy rain, check low areas and whether runoff collects against nearby hardscape; during seasonal drought, identify irrigation lines that could keep sending water beneath the planned turf. Note hot-summer and hail exposure when setting maintenance and durability expectations, because the actual yard—not the turf product’s drainage rating alone—determines the preparation and drainage plan.
Fit the turf before committing the final cuts
Turf placement begins with orientation and fit, not immediate trimming. Align every turf section so the grass blades face the same direction. Position the sections across the prepared footprint, check the fit at corners and transitions, and keep the seams under control before making the final outer-edge cuts.
Use your measured sketch to guide placement, but compare it with the actual prepared area. Preparation can change the usable footprint, and a corner that looked simple on paper may require a different cut once the material is positioned. Keep the sections aligned and avoid treating each piece as an independent patch.
Turf seams deserve their own check before the perimeter is finalized. Work on one seam at a time, and delay final trimming of the outer edges until the seams are satisfactory. This order gives you a chance to correct alignment before the cuts become permanent.
Use a utility knife for controlled trimming and measure each cut against the actual edge. A careful fit is more useful than a fast first cut. Keep the blade direction consistent with the cut you need, protect the prepared foundation, and leave the next joining or fastening step visible rather than burying it under loose offcuts.
Join, secure, and finish the surface
Joining and securing the turf turns positioned material into a fixed surface. Hall Turf identifies seam tape and adhesive among the materials used to join multiple rolls, while the installation guidance recommends handling one seam at a time and aligning the sections before fastening. Keep the blades facing the same direction, bring the sections together carefully, and complete the seam before moving to the next one.
Fastening materials also need to match the installation plan. Hall Turf identifies grass nails or staples for securing the grass, and proper use of suitable nails or staples and installation techniques can help prevent shifting, wrinkling, and lifting. Use the fastening approach selected for the project rather than assuming that an attractive surface will stay in position without mechanical securing.
The finishing stage includes final edge cuts, fastening, seam review, and brushing. Do not finalize the outer edges until the seams are satisfactory. After the turf is secured, we use a stiff-bristled broom to brush the turf fibers upright and distribute infill evenly for a finished appearance.
Review the completed area in this order:
- Check that the sections remain aligned and the seams are closed as planned.
- Check that the turf is secured against shifting, wrinkling, or lifting.
- Check the edges and transitions for incomplete cuts or loose sections.
- Brush the fibers upright and distribute the infill evenly.
- Revisit any place where the surface, edge, or drainage path does not match the site plan.
A final visual pass cannot replace a sound foundation, but it can identify fitting and finishing problems before you treat the project as complete.
Use complexity to decide between DIY and professional installation
DIY installation is an available option when you can assess the site, perform the excavation and base work, operate the compaction equipment, handle the turf accurately, and complete the joining and fastening sequence. A straightforward footprint with accessible edges and a clear drainage plan is easier to organize than a yard with several transitions or unresolved ground conditions.
Choose the DIY path only after you can answer these questions:
- Do you know what surface and conditions lie beneath the planned area?
- Can you remove and dispose of the existing material and move the base material?
- Can you create and compact a suitable foundation?
- Can you measure, align, trim, join, and secure the turf without rushing the final cuts?
- Can you identify where irrigation, drainage, structures, and transitions affect the work?
If any answer is uncertain, treat that uncertainty as a reason to seek an assessment rather than as a detail to solve after the turf is down.
We consider professional installation important for artificial turf projects. These conditions affect preparation and scope before the turf is fitted. Project cost varies with area size, turf selection, base preparation, drainage, accessories, and whether the work is DIY or professional.
That cost distinction is why comparing only a turf price or a cost per square foot can mislead your planning. Record the full scope: removal, base work, drainage, materials, joins, edges, access, and installation labor. Request a site-specific review when the property conditions make those items uncertain.
Turn the completed checks into a quote-ready next step
A quote-ready turf project record should describe the property before it describes the product. Assemble one short file with the measured footprint, intended use, existing surface, drainage observations, irrigation and structures, access constraints, photos, and the preparation questions that remain open. Include whether the project is a lawn, pet area, play space, or another residential use so the turf selection can be matched to the functional requirements.
Use the record to separate known conditions from assumptions. A site-specific review can then address soil, drainage, irrigation, obstacles, measurements, project scope, and the relationship between the planned turf and nearby hardscaping.
The completed record gives you a clear basis for choosing between carefully managed DIY work and professional installation. It also gives the installation team the information needed to discuss preparation, drainage, fitting, and the parts of the project that cannot be resolved from area measurements alone.
What should a homeowner confirm before requesting an artificial turf quote?
What should I assess before installing artificial turf?
Before installation, evaluate the existing surface, drainage patterns, and any obstacles like tree roots or utility lines. This assessment helps determine the necessary preparation and turf selection.
What is the main preparation sequence for installing artificial turf?
The main steps include removing the existing grass or surface material, leveling the area, installing a suitable base, and ensuring proper drainage before laying the turf.
What tools and materials do I need for a typical artificial turf installation?
Essential tools include a shovel, wheelbarrow, plate compactor, spirit level, landscape rake, utility knife, and tape measure. Materials may include landscape fabric, grass nails or staples, seam tape, and adhesive.
How do I ensure proper drainage when installing artificial turf?
Drainage planning should consider the existing site conditions. If the sub-base is poor, it may need to be over-excavated and replaced with quality drainage materials to prevent flooding.
When should I consider professional installation for artificial turf?
Professional installation is advisable if there are poor sub-base conditions, known flooding, complex drainage needs, or if the project involves multiple sections or difficult access.
What factors can affect the cost of installing artificial turf?
Costs can vary based on project size, turf selection, base preparation requirements, drainage conditions, and whether the installation is DIY or performed by professionals.
How can I prepare for a quote on artificial turf installation?
Compile a record detailing the property dimensions, intended use, existing surface conditions, drainage observations, and any obstacles. This information will help in obtaining an accurate quote.