
Introduction
Transforming a yard into a lush, green oasis often leads homeowners to consider the benefits of artificial grass. This low-maintenance alternative enhances the aesthetic appeal of outdoor spaces while offering long-term durability and reduced upkeep. However, the installation process can appear daunting. Homeowners may wonder about the essential steps to ensure a flawless setup. This guide clarifies the art of installing artificial grass, providing a comprehensive, step-by-step approach that equips homeowners with the knowledge to tackle this project confidently.
Prepare Your Yard for Artificial Grass Installation
-
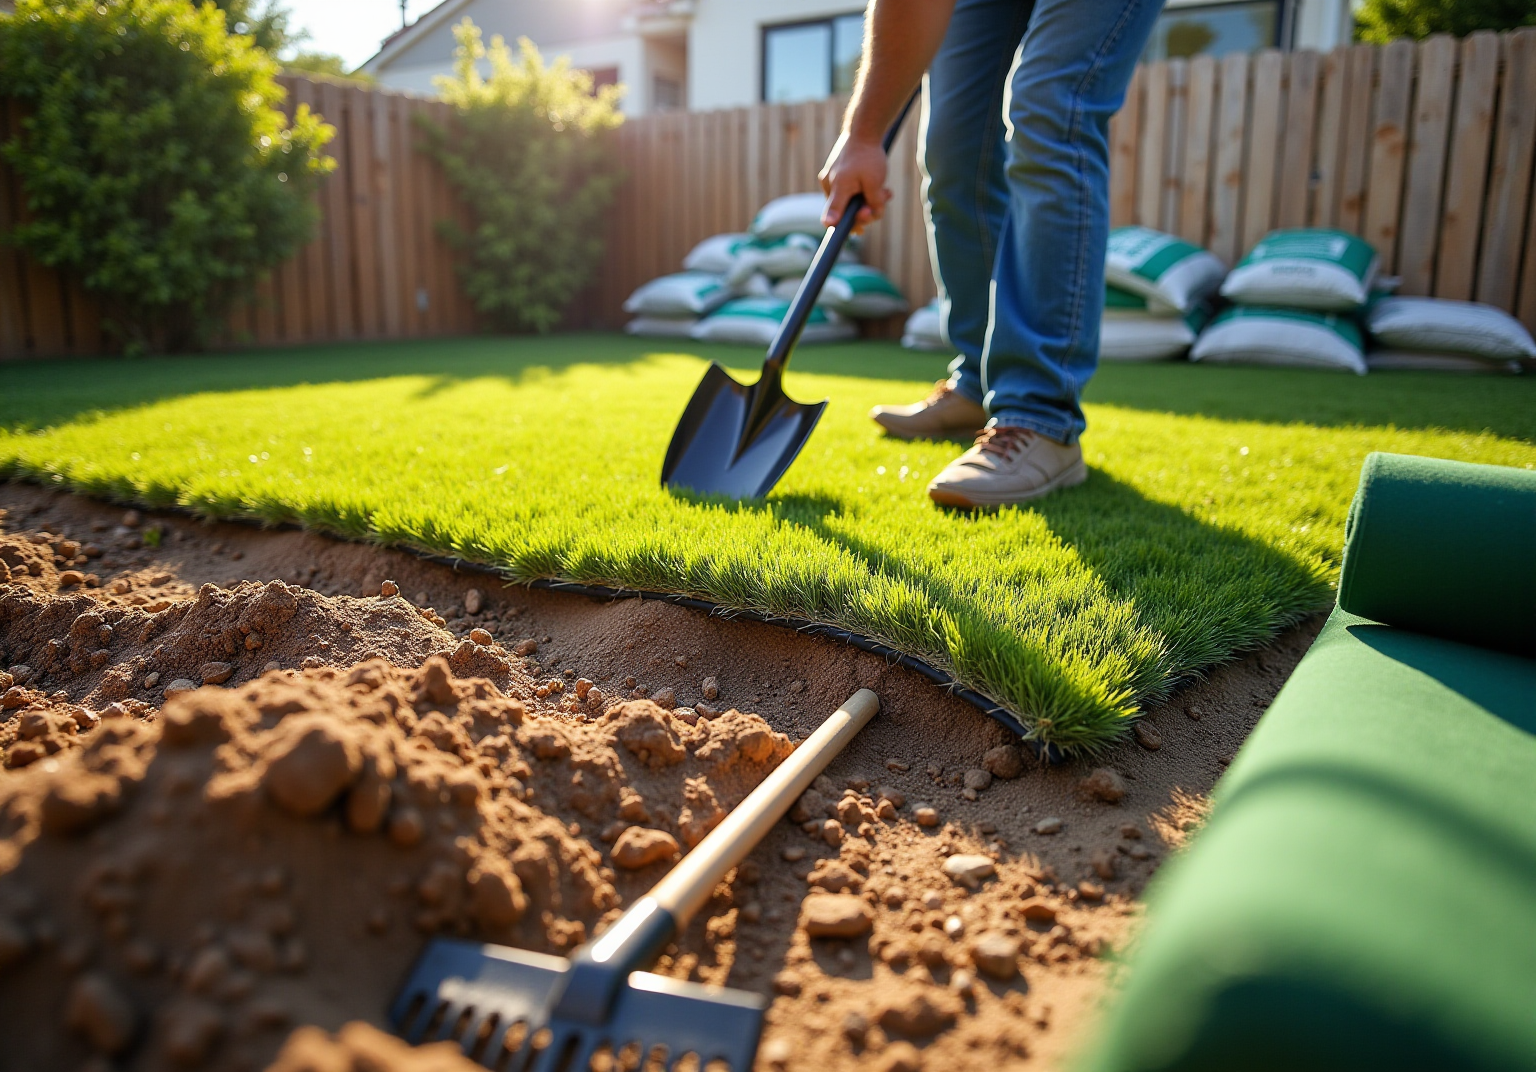
Clear the Area: Start by removing any existing grass, weeds, and debris from the setup site. Use a shovel or spade to excavate the top 2-4 inches of soil, creating a clean slate for your artificial grass. This initial step is crucial for ensuring a smooth process when installing artificial grass.
-
Level the Ground: Achieve an even area by eliminating any bumps or dips. Employ a rake to smooth out the surface, and consider using a compactor to establish a solid base. Proper leveling is essential to prevent uneven surfaces that could affect the appearance and functionality of your turf.
-
Install a Weed Barrier: Lay down a weed barrier fabric to inhibit future weed growth beneath your artificial grass. This step is vital for preserving the integrity of your setup and reducing maintenance efforts in the long run.
-
Check for Drainage: Ensure the area has adequate drainage to prevent water pooling. If necessary, create a slight slope away from structures to facilitate proper drainage. Effective drainage is critical, as artificial grass is designed to drain water efficiently through its backing, but it still requires proper site preparation.
-
Compact the Foundation: After leveling, compact the soil to create a stable foundation. This process helps prevent settling and ensures that your artificial grass remains stable over time. A properly compacted foundation is crucial for the durability of your setup, as it can significantly minimize the risk of issues such as sinkholes or uneven surfaces.
By adhering to these best practices for yard preparation, homeowners can lay the groundwork for installing artificial grass, enhancing both the aesthetic appeal and functionality of their outdoor spaces.

Step-by-Step Installation Process for Artificial Grass
-
Lay the Base Material: Start by spreading a layer of crushed stone or decomposed granite, approximately 2-4 inches thick, over the prepared area. This layer serves as the essential support when installing artificial grass.
-
Compact the Foundation: Use a plate compactor to thoroughly compress the foundation material. This crucial step prevents future settling and ensures a stable ground for the grass.
-
Add Leveling Sand: Apply a thin layer of leveling sand, about 1 inch, over the compacted base. Rake it smooth to create an even surface, which is vital for the grass’s performance.
-
Roll Out the Turf: Unroll the artificial grass and lay it over the prepared area. Allow the grass to acclimate for a few hours to minimize wrinkling during installing artificial grass.
-
Cut and Fit the Grass: Trim the edges of the grass using a utility knife for a precise fit. Ensure the seams are tight and properly aligned.
-
Secure the Grass: Use landscape staples or grass nails to secure the edges of the grass to the ground. Position them every 6-12 inches along the perimeter and seams for optimal stability.
-
Infill the Grass: If your grass requires infill, evenly distribute it across the surface using a drop spreader. This process helps compress the grass and maintain the vertical orientation of the blades.
-
Brush the Turf: Finally, use a stiff-bristled broom to brush the turf fibers upright, enhancing its natural appearance. This step also aids in evenly distributing the infill, ensuring a professional finish.
Proper methods and attention to detail are essential for successful installations, especially when installing artificial grass. As industry experts emphasize, ‘Correct setup and utilizing the appropriate materials makes all the difference.’ With an average expert setup time of 4-6 hours for most residential projects, investing in skilled installers can significantly enhance the quality and longevity of your artificial grass.

Troubleshoot Common Installation Issues
-
Uneven Surface: If you notice bumps or dips after installation, inspect the underlying material. It may be necessary to raise the sod and add or remove foundational material to achieve a flat area.
-
Poor Drainage: If water accumulates on the surface, verify that the base was compacted properly and that there is an adequate slope for drainage. Adjusting the grading may be required.
-
Visible Seams: If seams are apparent, ensure they are tightly secured. Utilizing seam tape and adhesive can help bond the edges more securely.
-
Grass Lifting: If the edges of the grass are lifting, confirm that sufficient staples or nails have been used to secure it. Additional fasteners may be necessary.
-
Infill Issues: If the infill appears uneven, use a broom to redistribute it evenly across the surface. Ensure that the infill is the correct type and quantity for your specific turf.

Conclusion
In conclusion, successfully installing artificial grass hinges on meticulous preparation and a systematic approach, which together create a beautiful and functional outdoor space. By adhering to the steps outlined in this guide, homeowners can confidently transform their yards into lush, green areas that demand minimal maintenance.
Key steps in this process include:
- Clearing and leveling the ground
- Installing a weed barrier
- Ensuring proper drainage
- Carefully laying down the turf
Each of these steps is crucial for achieving a stable and visually appealing result. Moreover, addressing common installation issues – such as uneven surfaces or inadequate drainage – ensures that potential problems are resolved promptly, thereby preserving the integrity of the installation.
Ultimately, dedicating time and effort to the installation process not only enhances the yard’s appearance but also contributes to the artificial grass’s longevity and durability. Homeowners are encouraged to adopt these best practices and consider seeking professional assistance if necessary, as a well-executed installation can significantly enhance the enjoyment and usability of outdoor spaces for years to come.
Frequently Asked Questions
What is the first step in preparing my yard for artificial grass installation?
The first step is to clear the area by removing any existing grass, weeds, and debris. You should excavate the top 2-4 inches of soil to create a clean slate for the artificial grass.
How can I ensure the ground is level before installing artificial grass?
To achieve an even area, eliminate any bumps or dips by using a rake to smooth out the surface. You may also consider using a compactor to establish a solid base, which is essential to prevent uneven surfaces.
Why is it important to install a weed barrier?
Installing a weed barrier fabric is important to inhibit future weed growth beneath the artificial grass. This helps preserve the integrity of your setup and reduces maintenance efforts over time.
How can I check for proper drainage in the installation area?
Ensure the area has adequate drainage to prevent water pooling. If necessary, create a slight slope away from structures to facilitate proper drainage, as effective drainage is critical for the performance of artificial grass.
What should I do after leveling the ground?
After leveling the ground, you should compact the soil to create a stable foundation. This process helps prevent settling and ensures that your artificial grass remains stable over time.
Why is compacting the foundation important?
Compacting the foundation is crucial for the durability of your artificial grass setup, as it minimizes the risk of issues such as sinkholes or uneven surfaces, ensuring long-lasting stability.