

Introduction
Transforming a concrete surface into a lush, green oasis presents homeowners with a unique opportunity to enhance their outdoor spaces with minimal upkeep. This guide outlines the essential steps and materials required for successfully installing artificial turf on concrete, ensuring a beautiful and functional lawn.
However, challenges may arise during installation that could jeopardize the aesthetic and durability of this investment. By exploring these common issues and their solutions, homeowners can achieve a flawless turf installation that withstands the test of time.
Prepare the Concrete Surface for Turf Installation
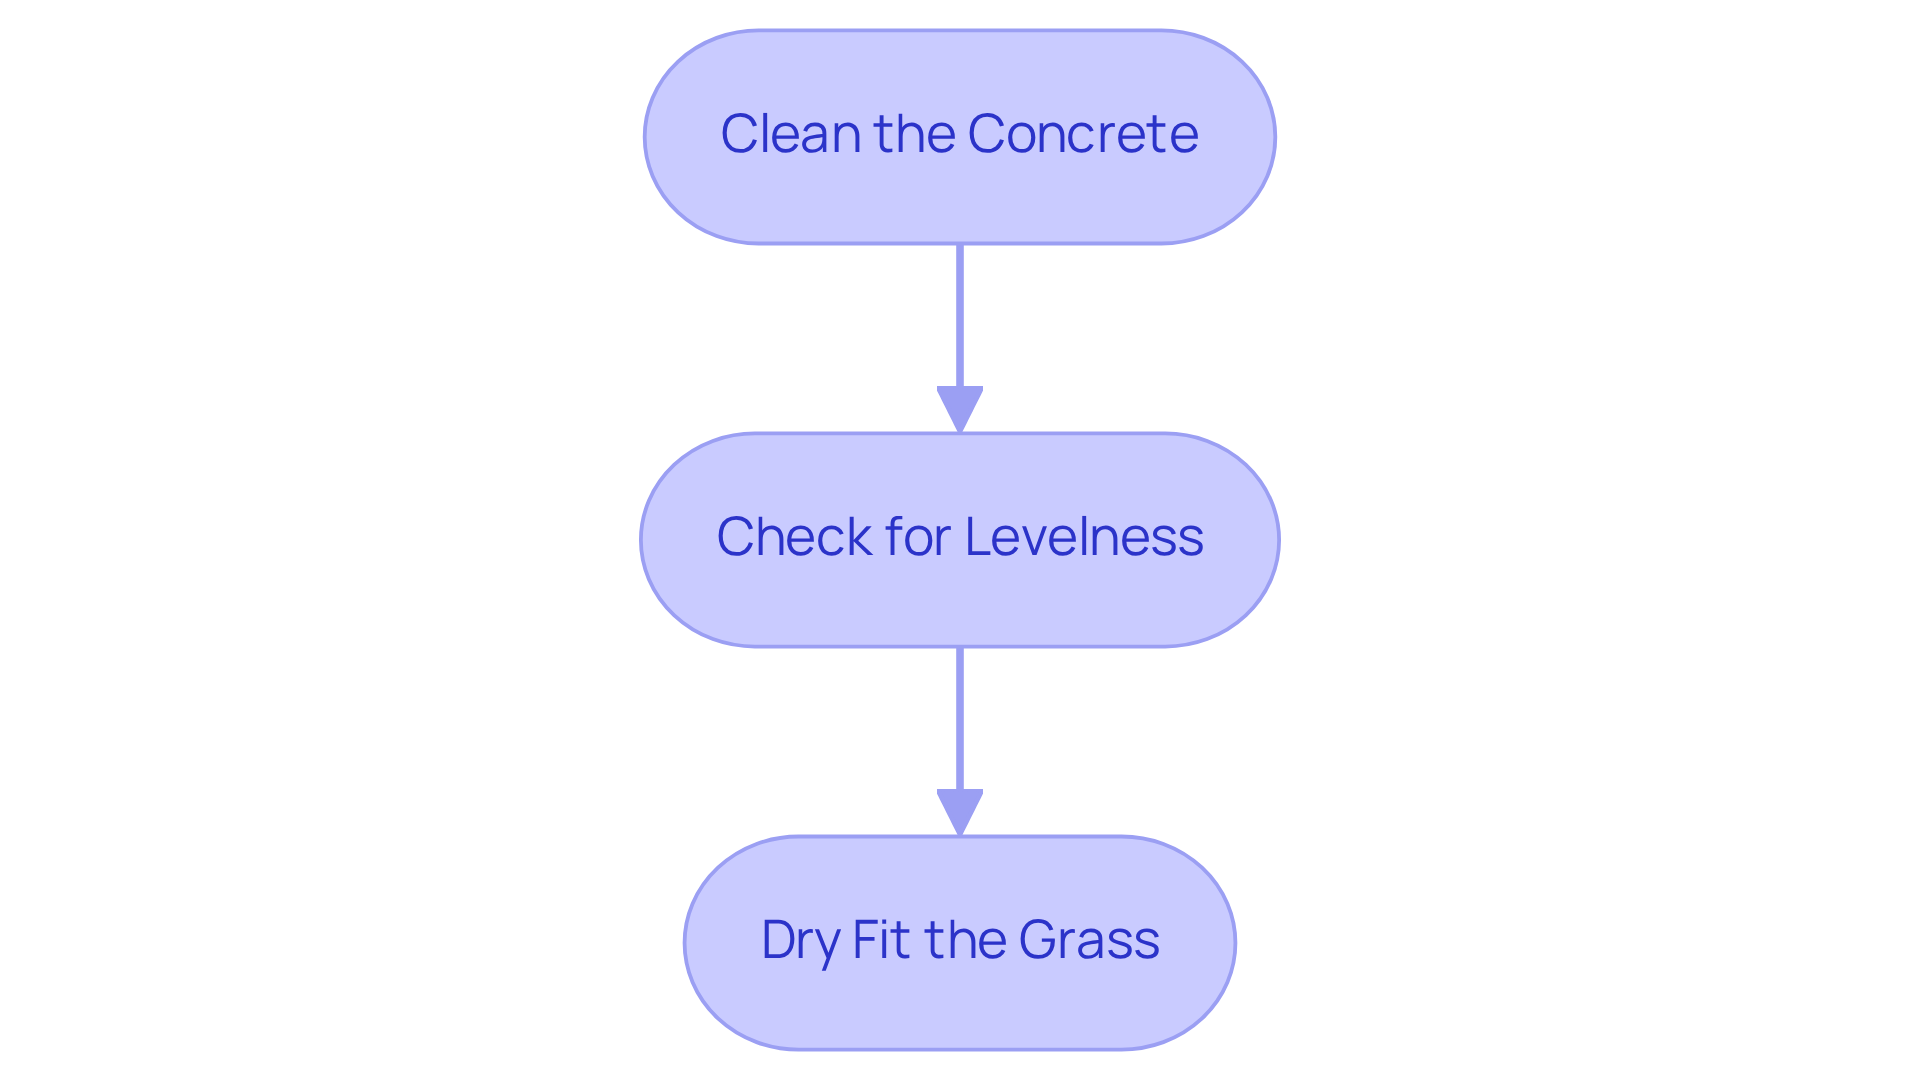
- Clean the Concrete: Start by sweeping the concrete area to eliminate any debris, dirt, or dust. For more stubborn stains, utilize a pressure washer with an appropriate cleaning solution to ensure the surface is thoroughly clean. This process highlights the importance of preparation, as noted by satisfied customers, to guarantee a smooth installation.
- Check for Levelness: Examine the surface for any uneven areas or cracks. Employ a level to pinpoint high and low spots. If necessary, fill in cracks with a patching material and allow it to cure. Clients have praised Brock for his meticulous attention to detail during this critical step, which ensures a solid foundation for the installation.
- Dry Fit the Grass: Prior to applying any adhesive, position the grass over the slab to confirm fit and make any necessary adjustments. This step aids in visualizing the final layout and ensures proper alignment. Clients, such as Les Boatright, have expressed satisfaction with Brock’s detailed approach, which guarantees that the grass aligns perfectly and meets their expectations.
Gather Essential Tools and Materials
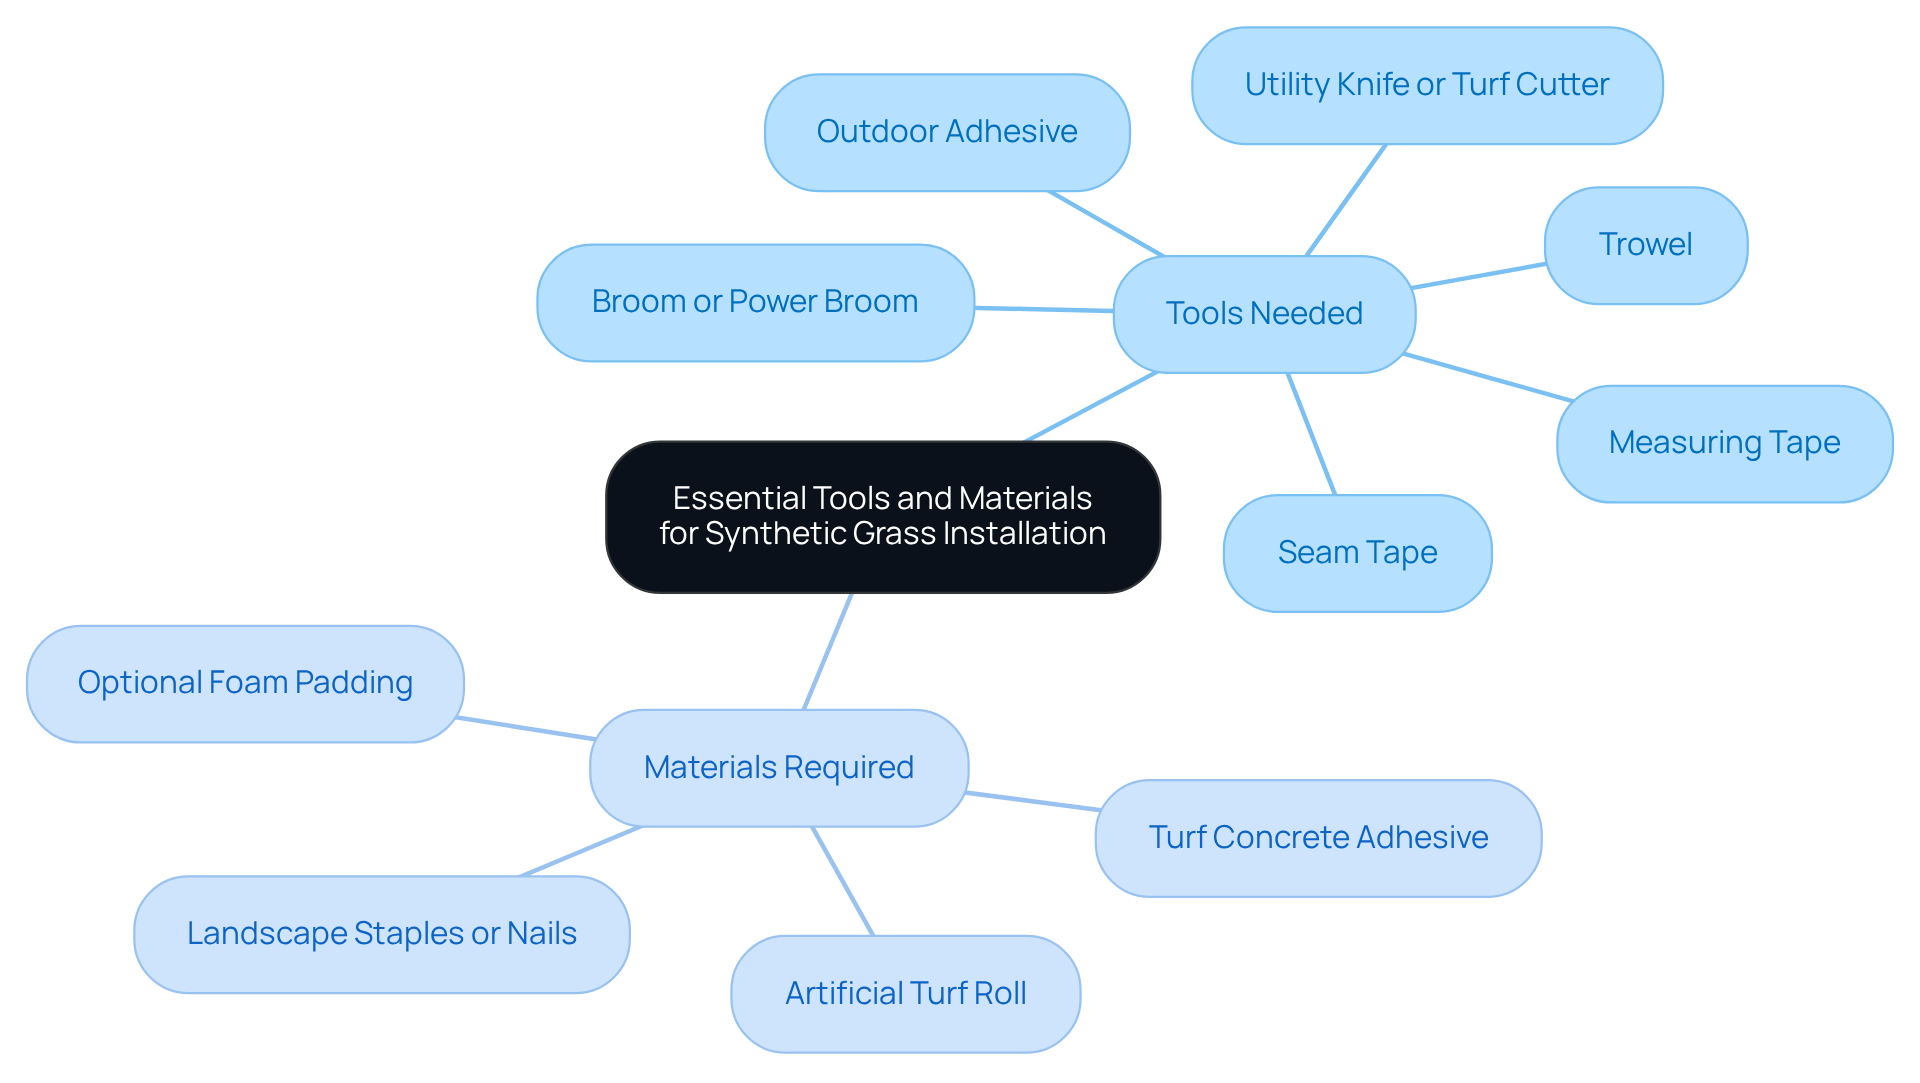
To successfully install turf on concrete, it is essential to gather the right tools and materials. Here’s what you’ll need:
Tools Needed:
- Utility Knife or Turf Cutter: This is essential for trimming the turf to fit your designated area.
- Measuring Tape: Ensures accurate measurements for a precise fit.
- Trowel: Used for applying adhesive to secure the grass.
- Broom or Power Broom: For cleaning the surface prior to setup.
- Outdoor Adhesive: Choose a strong adhesive suitable for outdoor use to ensure durability.
- Seam Tape: Necessary for joining pieces of grass seamlessly.
Materials Required:
- Turf Roll: Select the type that best suits your needs, considering factors like durability. Turf, with many installations enduring up to 20 years or beyond, making it a valuable investment.
- Adhesive: This will bond the grass securely to the surface.
- Optional Foam Padding: Adding this underlayment can enhance comfort and improve drainage, providing a more enjoyable experience.
- Landscape Staples or Nails: Use these to secure the edges of the grass, ensuring it stays in place. It is recommended to use 6-inch galvanized nails or landscape anchors for optimal security.
Gathering the right materials not only enables a smoother setup process but also enhances the durability and efficiency of your installation. As one expert observes, ‘Utilizing the appropriate materials is essential for attaining a professional finish that endures.’ Additionally, turf installation is cost-effective, making it a cost-effective choice. With the right preparation, your turf installation can provide a beautiful landscape for years to come.
Follow the Step-by-Step Installation Process
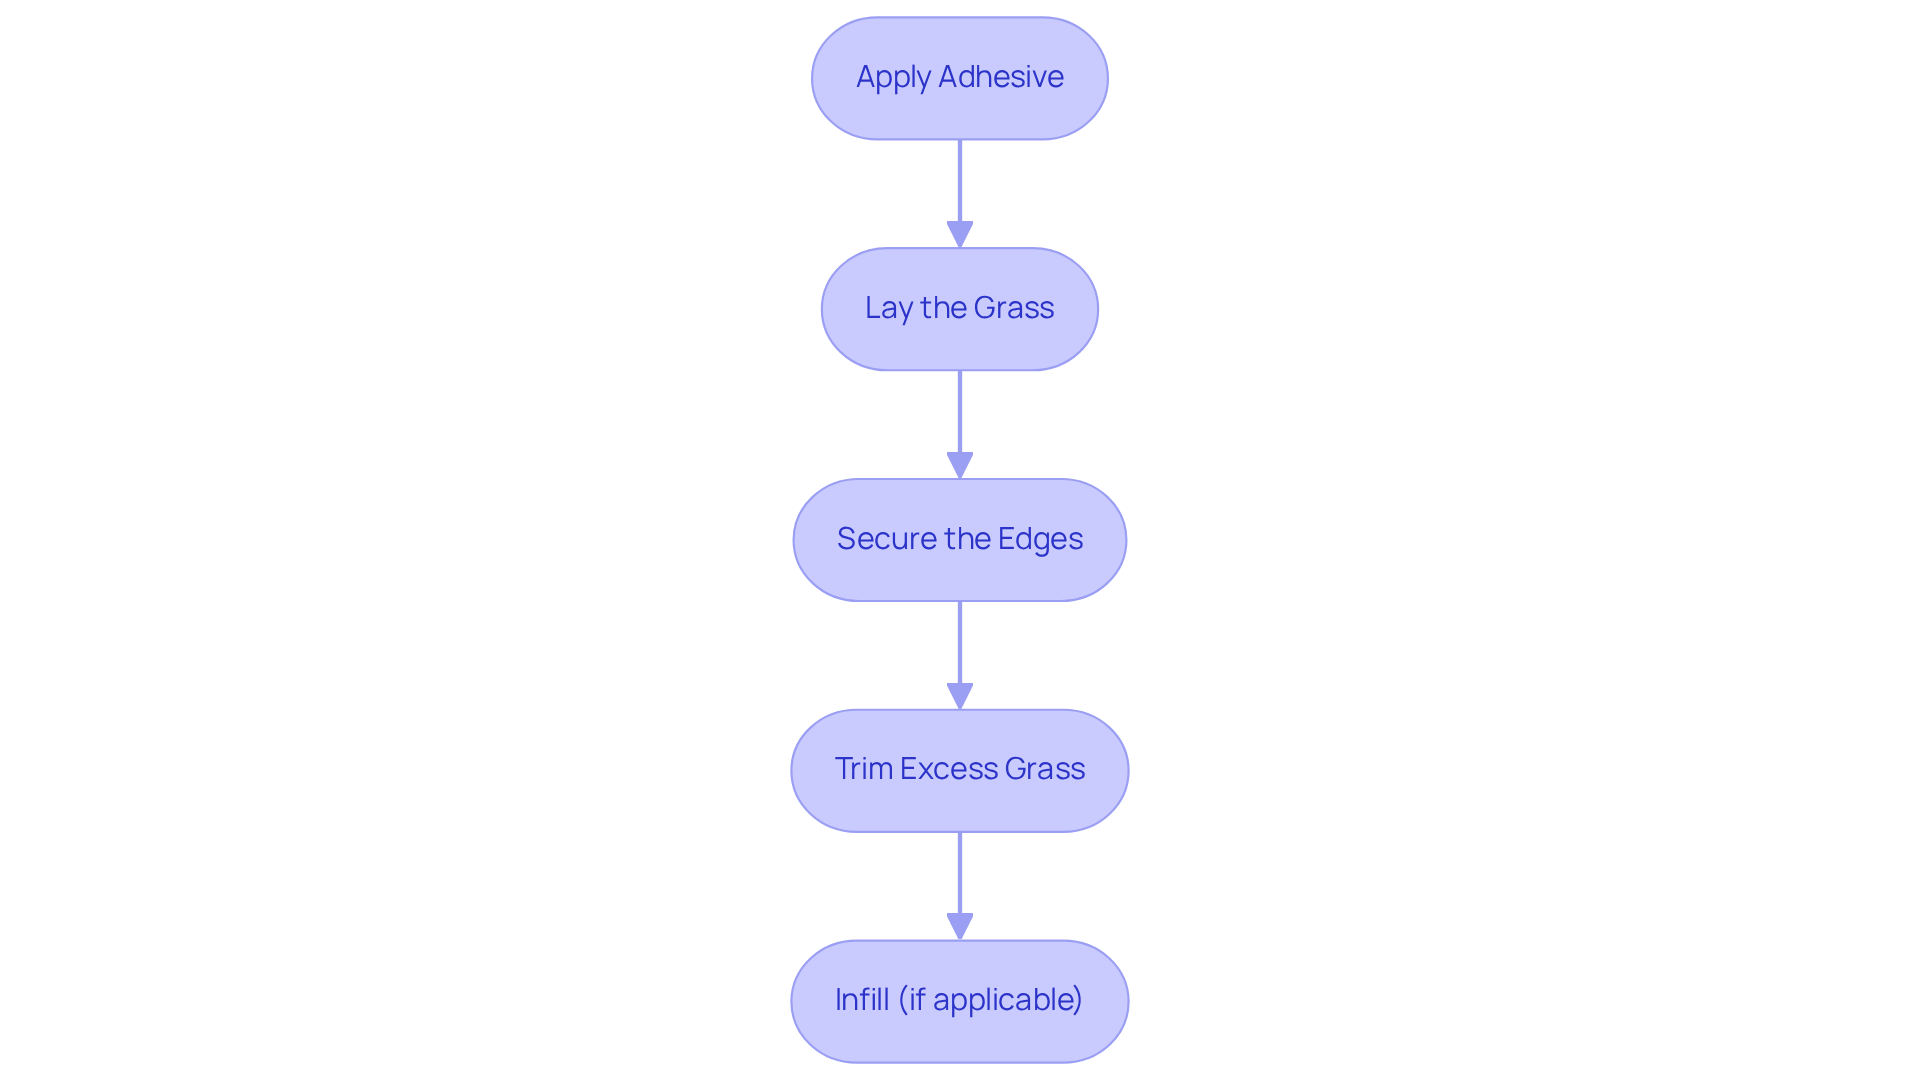
- Apply Adhesive: Begin by ensuring the flooring is clean, dry, and free of debris. Next, evenly spread the adhesive using a trowel, following the manufacturer’s guidelines for drying times to ensure optimal bonding.
- Lay the Grass: Carefully roll out the grass onto the adhesive, starting from one end and progressing to the other. It is crucial to maintain the grain direction of the synthetic grass to achieve a smooth appearance and eliminate any wrinkles or bubbles during this process.
- Secure the Edges: Use landscape staples or nails to secure the edges, paying close attention to corners and seams to prevent lifting or shifting over time. Ensure that nails are properly secured to avoid safety hazards.
- Trim Excess Material: After laying the grass, utilize a utility knife to trim any excess material along the edges, achieving a neat and professional finish.
- Infill (if applicable): If your grass requires infill, distribute it evenly across the surface and use a broom to work it into the fibers, enhancing stability and appearance.
The average time for installing turf on concrete typically ranges from 1 to 3 days, depending on the complexity of the project and the size of the area. Industry experts emphasize that proper techniques are essential for achieving a long-lasting and visually appealing outcome. Successful projects, such as the implementation of turf concrete in residential areas, demonstrate the effectiveness of these methods, ensuring durability.
Troubleshoot Common Installation Issues
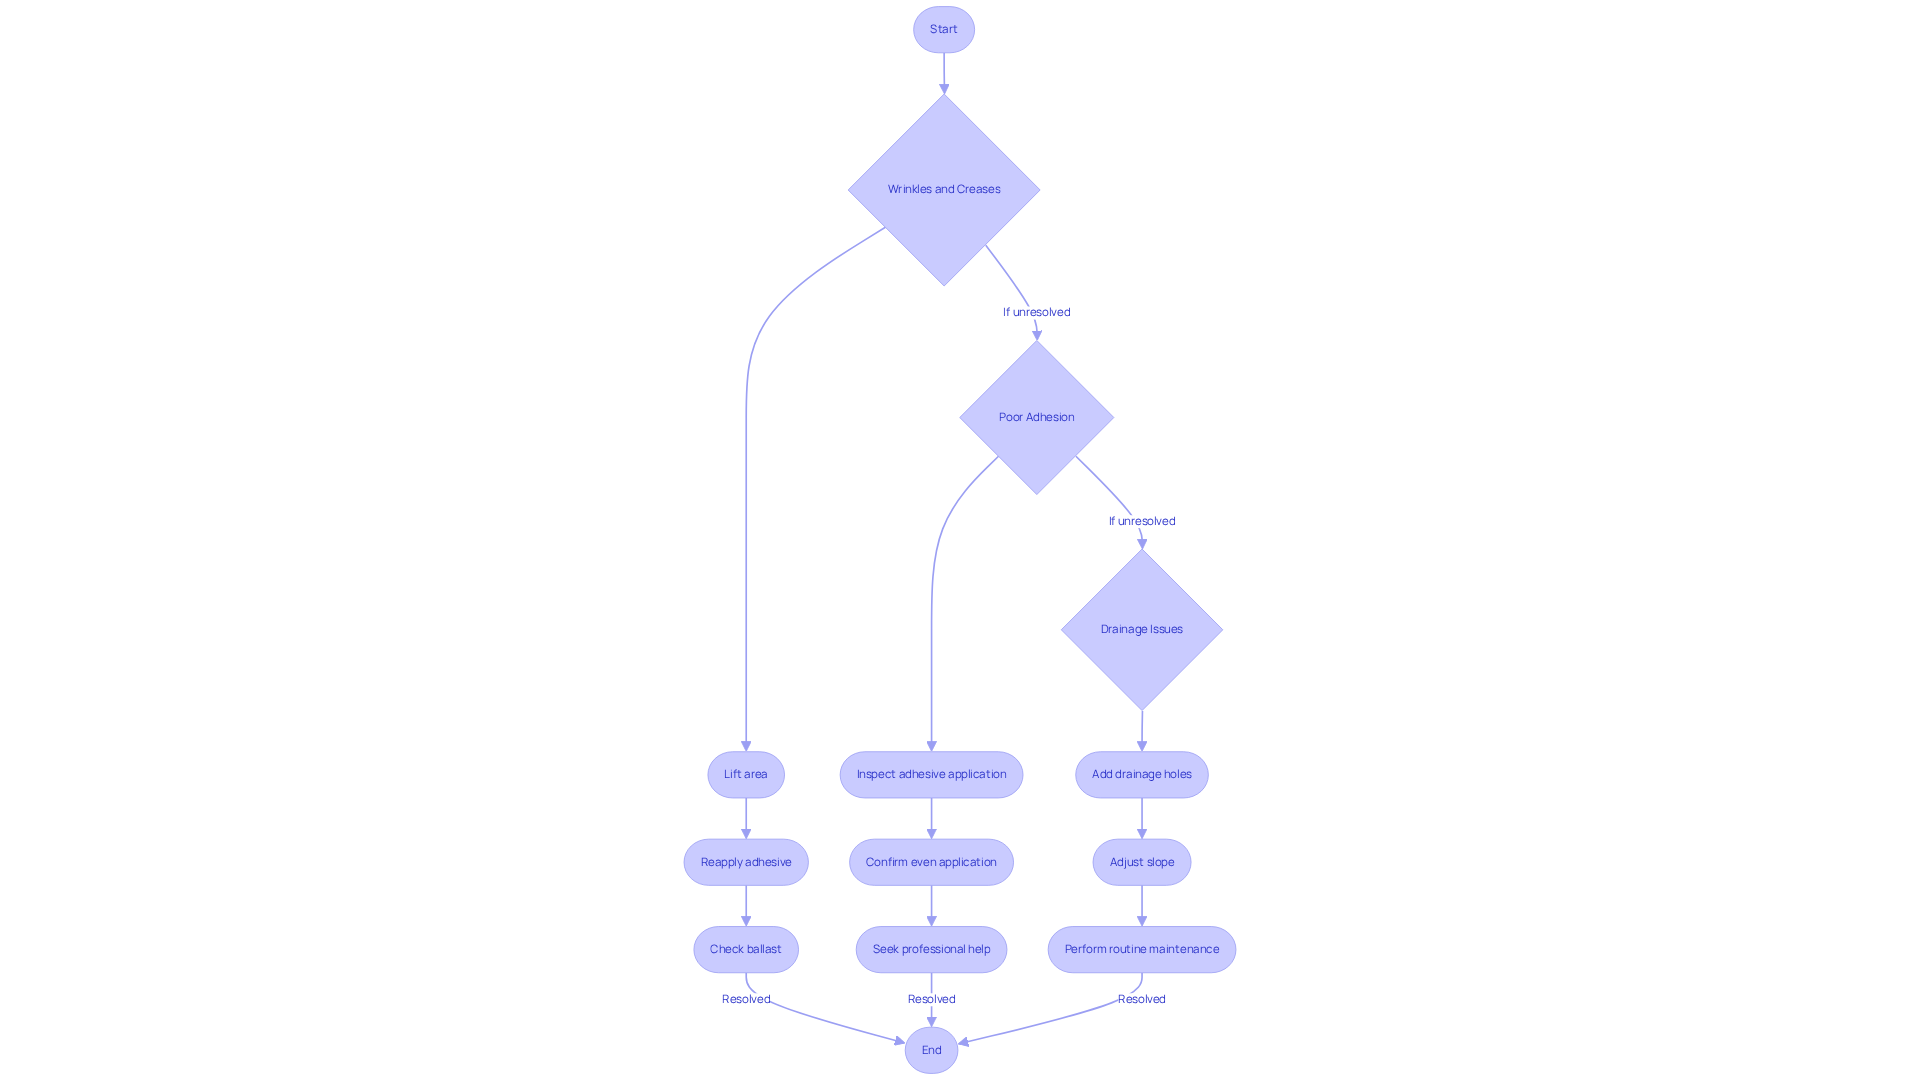
- Wrinkles: To effectively address wrinkles, lift the affected area and reapply adhesive, smoothing it out as you proceed. Ensuring the installation process during setup is crucial to prevent future issues. Experts stress that proper installation and preventing wrinkling, especially in high-temperature conditions, is essential. Conducting regular checks can help identify and resolve these issues early.
- Poor Adhesion: If the grass is not adhering properly, check the adhesive. Confirm that it was applied evenly and allowed to set according to the manufacturer’s guidelines. Inadequate adhesion can lead to significant problems, making for a poor installation. Customer experiences, such as that of Scott Sachse, underscore the importance of proper techniques in avoiding such issues.
- Drainage Issues: If water accumulates on the surface, consider adding drainage solutions to enhance proper drainage. It is important to ensure that the underlying turf concrete is sloped appropriately to facilitate water flow. Regular maintenance, including debris removal, is crucial to prevent clogs and maintain the lawn’s appearance. Les Boatright’s satisfaction with the final product illustrates how skilled setup and ongoing maintenance can prevent common issues.
Consider Adding a Shock-Absorbing Underlay
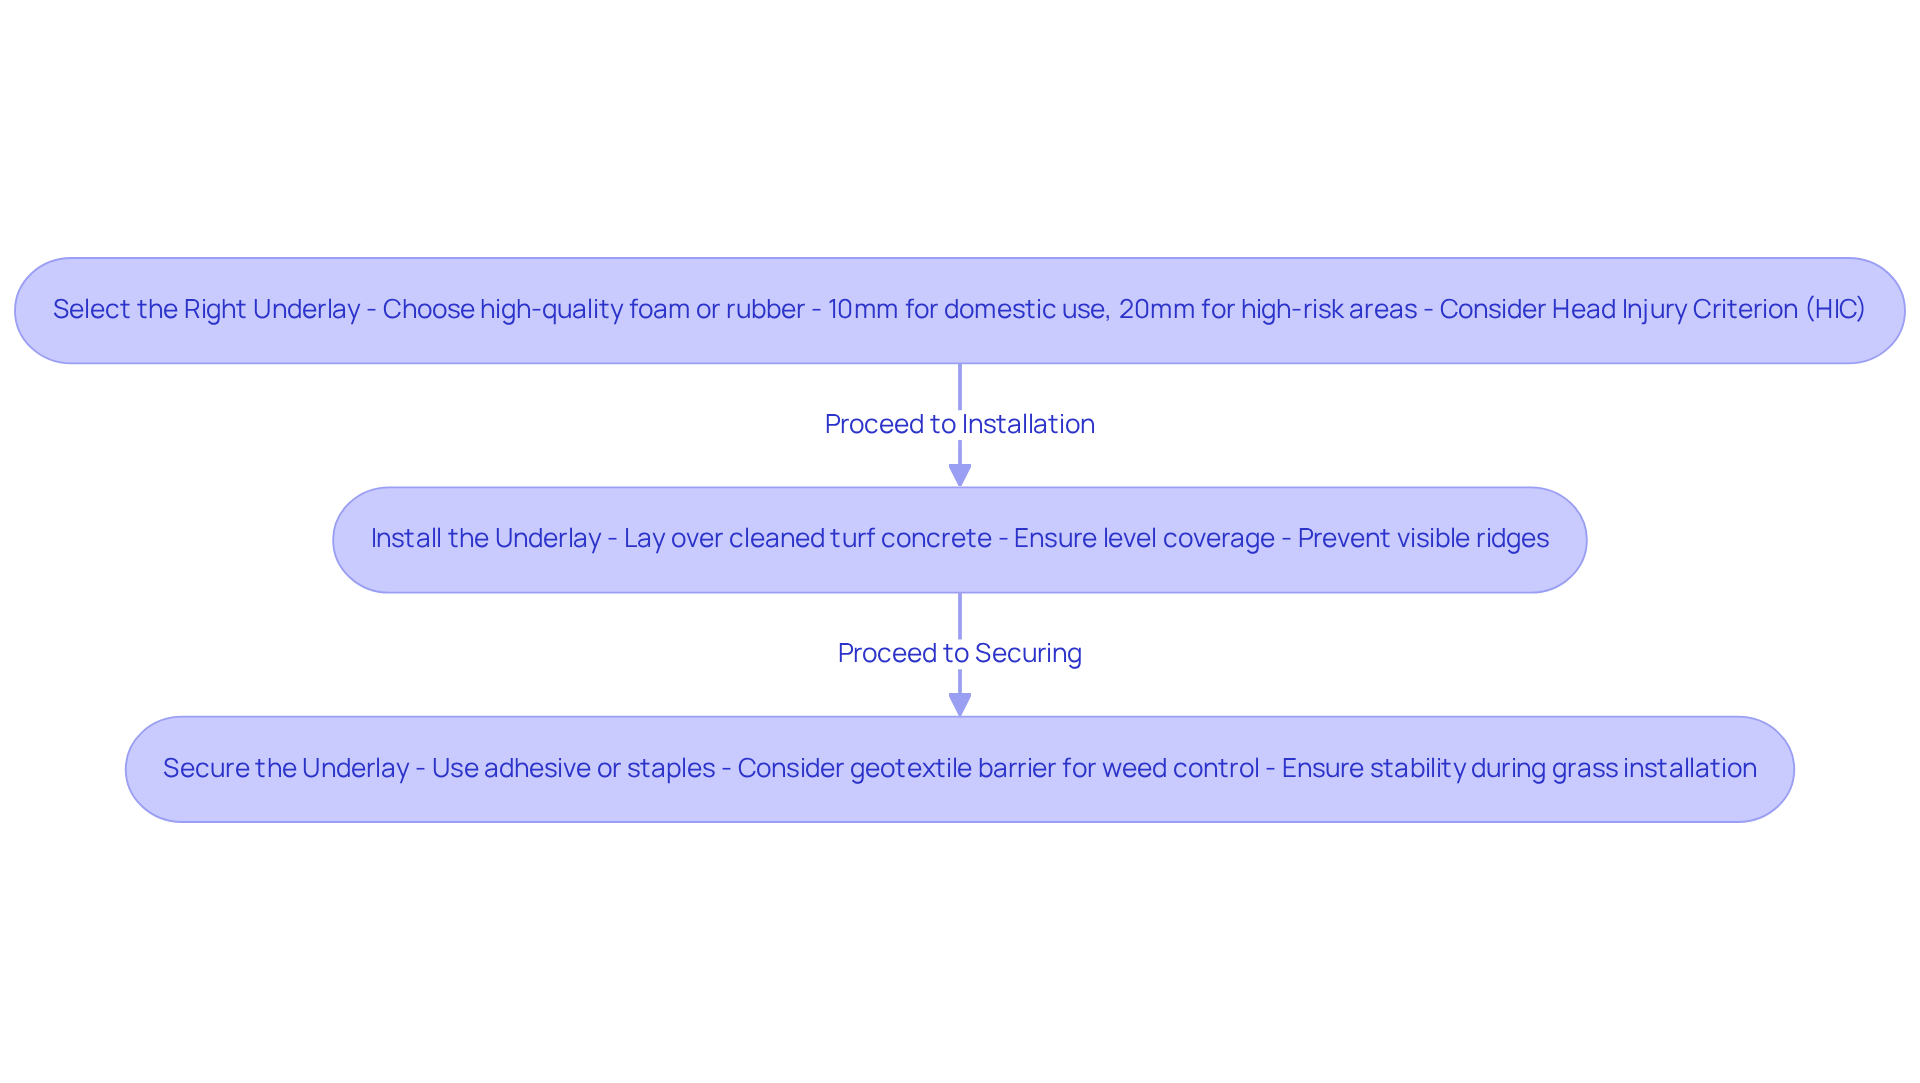
- Select the Right Underlay: It is crucial to choose a product that aligns with your specific needs. Opt for a product suitable for your selected surface, ensuring it provides adequate cushioning. Typically, a 10mm underlay suffices for most domestic applications, while a 20mm option is advisable for areas prone to falls, such as playgrounds. Notably, around 200,000 children are injured annually due to playground falls, underscoring the importance of implementing safety measures. Furthermore, the Head Injury Criterion (HIC) indicates that in environments like schools and parks, thicker underlays offer better protection against head impacts.
- Install the underlay by laying it over a thoroughly cleaned concrete surface. Ensure it is level and covers the entire area designated for grass placement. This step is vital, as a well-laid underlay prevents visible ridges and imperfections from showing through the artificial grass, resulting in a smooth finish. Additionally, using foam underlay can simplify the installation process and reduce costs, making it a practical choice for homeowners.
- Secure the Underlay: To keep the underlay in place during the grass installation, apply adhesive or staples. Properly securing the underlay is essential to prevent any shifting, which could compromise the integrity of the turf and the overall appearance of your lawn. Moreover, consider using a drainage layer to enhance drainage, ensuring a durable setup. Experts emphasize that selecting the right underlay is critical for achieving a successful installation.
Conclusion
Installing turf on concrete can significantly enhance an outdoor space, creating a beautiful and low-maintenance area that improves the overall aesthetic. By adhering to the detailed steps outlined in this guide, homeowners can achieve a successful installation that not only looks appealing but also endures over time.
The installation process hinges on several key aspects:
- Thorough preparation of the concrete surface
- Gathering the appropriate tools and materials
- Following a systematic installation method
Each phase, from cleaning the concrete to applying adhesive and securing the turf, is essential for achieving a professional finish. Common challenges, such as wrinkles and poor adhesion, can be effectively mitigated with the right techniques, ensuring that the final product meets expectations.
Ultimately, dedicating time and effort to a meticulous installation process yields substantial rewards. Homeowners should take these insights seriously, ensuring that their synthetic grass installation is both aesthetically pleasing and durable. With the right approach, turf on concrete can create a vibrant and inviting space that enhances outdoor living for years to come.
Frequently Asked Questions
What is the first step in preparing the concrete surface for turf installation?
The first step is to clean the concrete by sweeping the area to remove debris, dirt, or dust. For stubborn stains, a pressure washer with an appropriate cleaning solution should be used.
How do I check for levelness on the concrete surface?
Examine the surface for uneven areas or cracks using a level to identify high and low spots. If necessary, fill in any cracks with a patching material and allow it to cure.
What does “dry fitting” the grass involve?
Dry fitting the grass involves positioning the grass over the concrete slab to confirm fit and make any necessary adjustments before applying adhesive, helping to visualize the final layout.
What tools are needed for installing synthetic grass on turf concrete?
Essential tools include a utility knife or turf cutter, measuring tape, trowel, broom or power broom, outdoor adhesive, and seam tape.
What materials are required for the installation?
Required materials include an artificial turf roll, turf concrete adhesive, optional foam padding, and landscape staples or nails to secure the edges of the grass.
How long does quality synthetic grass typically last?
Quality synthetic grass typically lasts 12-15 years, with many installations enduring up to 20 years or beyond.
What is the benefit of investing in quality tools and materials for turf installation?
Investing in quality tools and materials enables a smoother setup process and enhances the durability and efficiency of the synthetic grass, leading to a professional finish.
Can homeowners save money on materials for turf installation?
Yes, homeowners can save 10-15% on materials through bulk purchasing, making it a cost-effective choice.
List of Sources
- Gather Essential Tools and Materials
- A Step-by-Step Guide to Installing Artificial Turf Grass (https://lowes.com/n/how-to/install-artificial-grass)
- 5 Tools That Contractors Installing Artificial Grass Should Use | Purchase Green Artificial Grass (https://purchasegreen.com/blog/crucial-tools-contractors-installing-artificial-grass-should-use)
- italgreen.org (https://italgreen.org/en/blog/synthetic-turf-quote-ask-italgreen-for-it)
- maslandscaping.com (https://maslandscaping.com/artificial-turf-installation-estimate)
- Artificial Turf Market, Industry Size Forecast [Latest] (https://marketsandmarkets.com/Market-Reports/artificial-turf-market-121486580.html)
- Follow the Step-by-Step Installation Process
- Artificial Turf Market, Industry Size Forecast [Latest] (https://marketsandmarkets.com/Market-Reports/artificial-turf-market-121486580.html)
- Artificial Grass Installation Steps (https://installartificial.com/how/artificial-grass-installation-steps)
- Installing Artificial Grass on Concrete | US Turf (https://usturfsandiego.com/news/installing-artificial-grass-on-concrete)
- fieldform.co.uk (https://fieldform.co.uk/case_studies/3g-synthetic-turf-football-pitch)
- How Long Does It Take to Install Artificial Grass (https://syntheticturftc.com/how-long-does-it-take-to-install-artificial-grass)
- Troubleshoot Common Installation Issues
- syntheticgrasswarehouse.com (https://syntheticgrasswarehouse.com/company/ask-an-expert/ask-jw/preventing-wrinkles-in-turf)
- greenkidsdoc.wordpress.com (https://greenkidsdoc.wordpress.com/2021/01/06/chemical-and-heat-hazards-of-artificial-turf-athletic-fields)
- Artificial Grass Installation: Overcome Common Challenges (https://yavapailandscaping.com/overcoming-common-challenges-in-artificial-grass-installation)
- forbes.com (https://forbes.com/sites/mikeozanian/2017/02/02/artificial-turf-maker-says-30-percent-failure-rate-means-fields-not-defective)
- Consider Adding a Shock-Absorbing Underlay
- maslandscaping.com (https://maslandscaping.com/underlay-for-artificial-grass-on-soil)
- neograss.co.uk (https://neograss.co.uk/6-benefits-using-artificial-grass-foam-underlay)
- scribd.com (https://scribd.com/document/486384003/Peter-Culley-John-Pascoe-Sports-Facilities-and-Technologies-Routledge-2009-pdf)
- unreallawns.co.nz (https://unreallawns.co.nz/shock-absorbing-turf-improves-playground-safety)