

Introduction
Many homeowners face significant challenges when attempting to transform their yards into lush, green oases. Installing synthetic grass not only enhances the aesthetic appeal of outdoor spaces but also offers a low-maintenance solution that withstands the test of time. However, understanding the essential steps is crucial for ensuring a successful installation. This guide delves into the intricacies of synthetic grass installation, offering insights and practical tips to navigate common pitfalls and achieve a beautiful lawn.
Prepare the Site for Synthetic Grass Installation
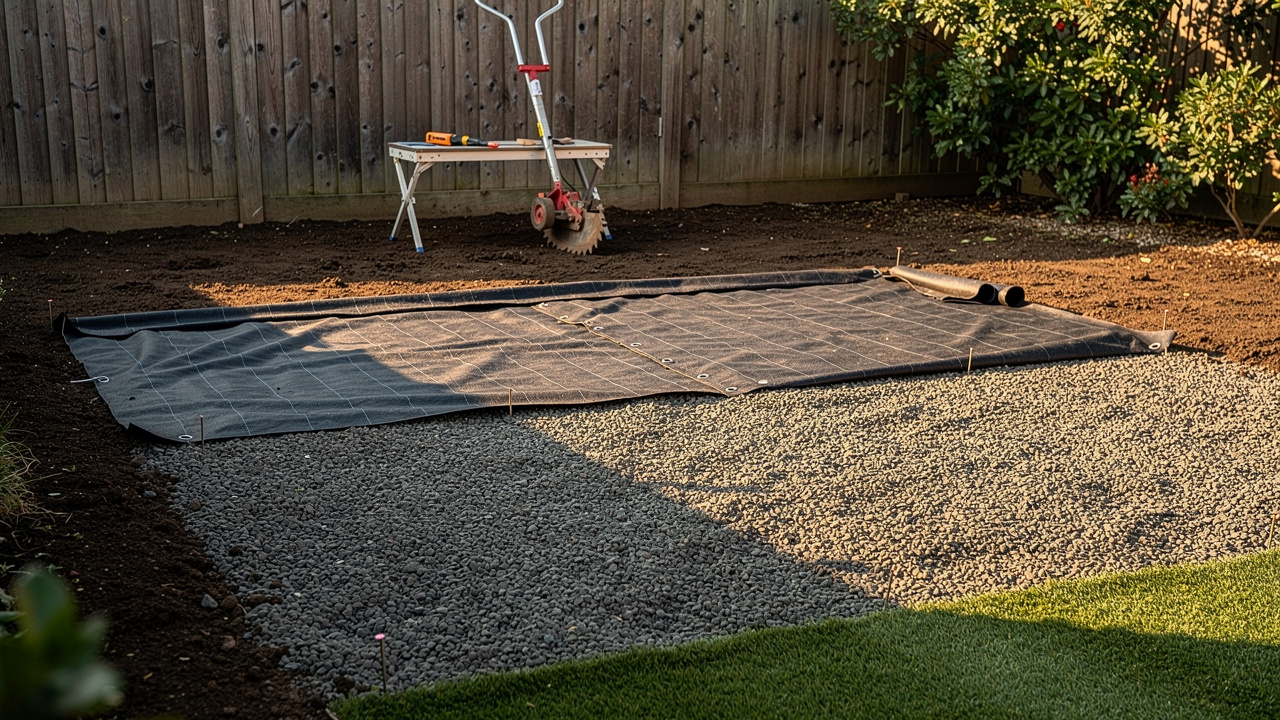
Effective site preparation is crucial for the longevity and performance of synthetic grass install. Begin by removing any existing vegetation, weeds, and debris from the installation site. Use a sod cutter or shovel to cut and remove the top layer of soil, approximately 2-4 inches deep, depending on your specific turf requirements.
Next, ensure that the area has proper drainage. If the ground is uneven, consider grading it to create a gentle slope of about 1/4 inch per foot (2-3% grade) away from structures to prevent water pooling.
To prevent weeds from growing through the synthetic turf, lay down a weed barrier fabric. This fabric typically costs around $68.00 per roll for about 1,500 square feet. Be sure to overlap the seams by at least 6 inches to ensure complete coverage.
After that, use a hand tamper or plate compactor to compact the soil. This step is essential to establish a stable foundation that will support the synthetic grass install and prevent settling over time.
If necessary, add a layer of crushed stone or gravel to improve drainage and provide a solid foundation. Spread it evenly and compact it again to ensure stability.
Finally, rake the surface to ensure it is smooth and level. This will assist in attaining a uniform placement during the synthetic grass install, which is essential for appearance and performance. Without proper preparation, the synthetic grass install may not last as long as expected, leading to costly replacements.
Investing in professional installation not only enhances the quality of your turf but also provides peace of mind for years to come. Scott Sachse praised Hall for their outstanding service, noting the team’s professionalism and meticulous attention to detail. Similarly, Les Boatright emphasized the importance of working with knowledgeable professionals who can deliver projects on time and within budget.
Install the Synthetic Grass: Step-by-Step Process
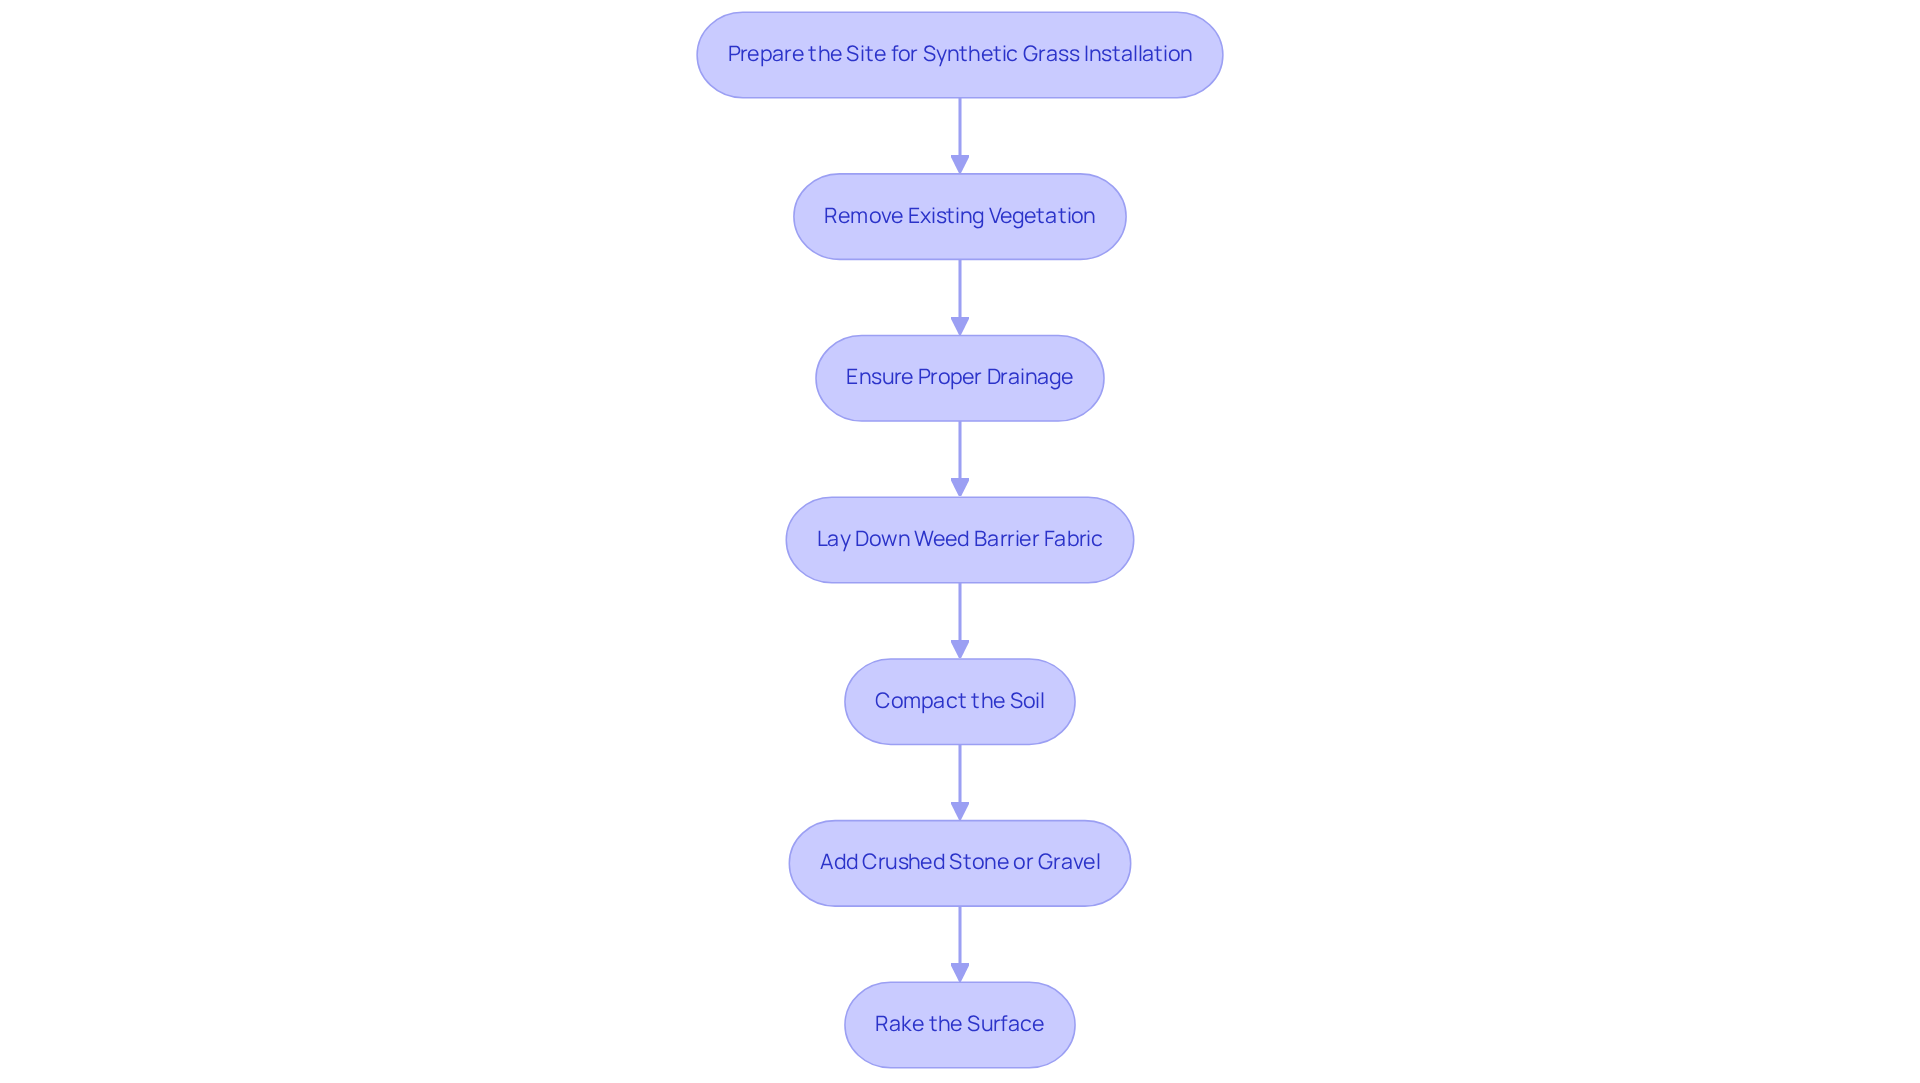
- Start the synthetic grass install by rolling out the synthetic lawn over the prepared area. Allow it to acclimate for a few hours to minimize creasing and ensure it lays flat, which is crucial for a seamless appearance.
- Cut to Fit: Use a utility knife to trim the edges of the grass for a precise fit. Leave a small allowance for tucking the edges under any borders or landscaping features to ensure a clean finish.
- Secure the Grass: Fasten the grass around the perimeter using landscape staples or galvanized nails, placing them every 6-12 inches. This step is crucial for keeping the area secure during the synthetic grass install, especially in high-traffic areas.
- Join the Grass: If your setup involves several sections of grass, use seam tape and adhesive to connect them. Follow the manufacturer’s instructions for applying the adhesive to ensure a strong bond that withstands wear.
- Tuck the Edges: Tuck the edges of the grass under any borders or landscaping elements. This not only improves the appearance but also prevents the edges from lifting over time, preserving the integrity of your setup.
- Add Infill: Evenly distribute infill material, such as silica sand or rubber granules, across the grass surface. This keeps the grass weighed down, supports the blades, and helps with drainage, which all contribute to a longer-lasting lawn.
- Brush the Grass: Finally, use a power broom or a stiff-bristled broom to brush the fibers upright. This enhances the appearance and ensures the infill is evenly distributed, providing a natural look and feel.
Gather Essential Tools and Materials for Installation
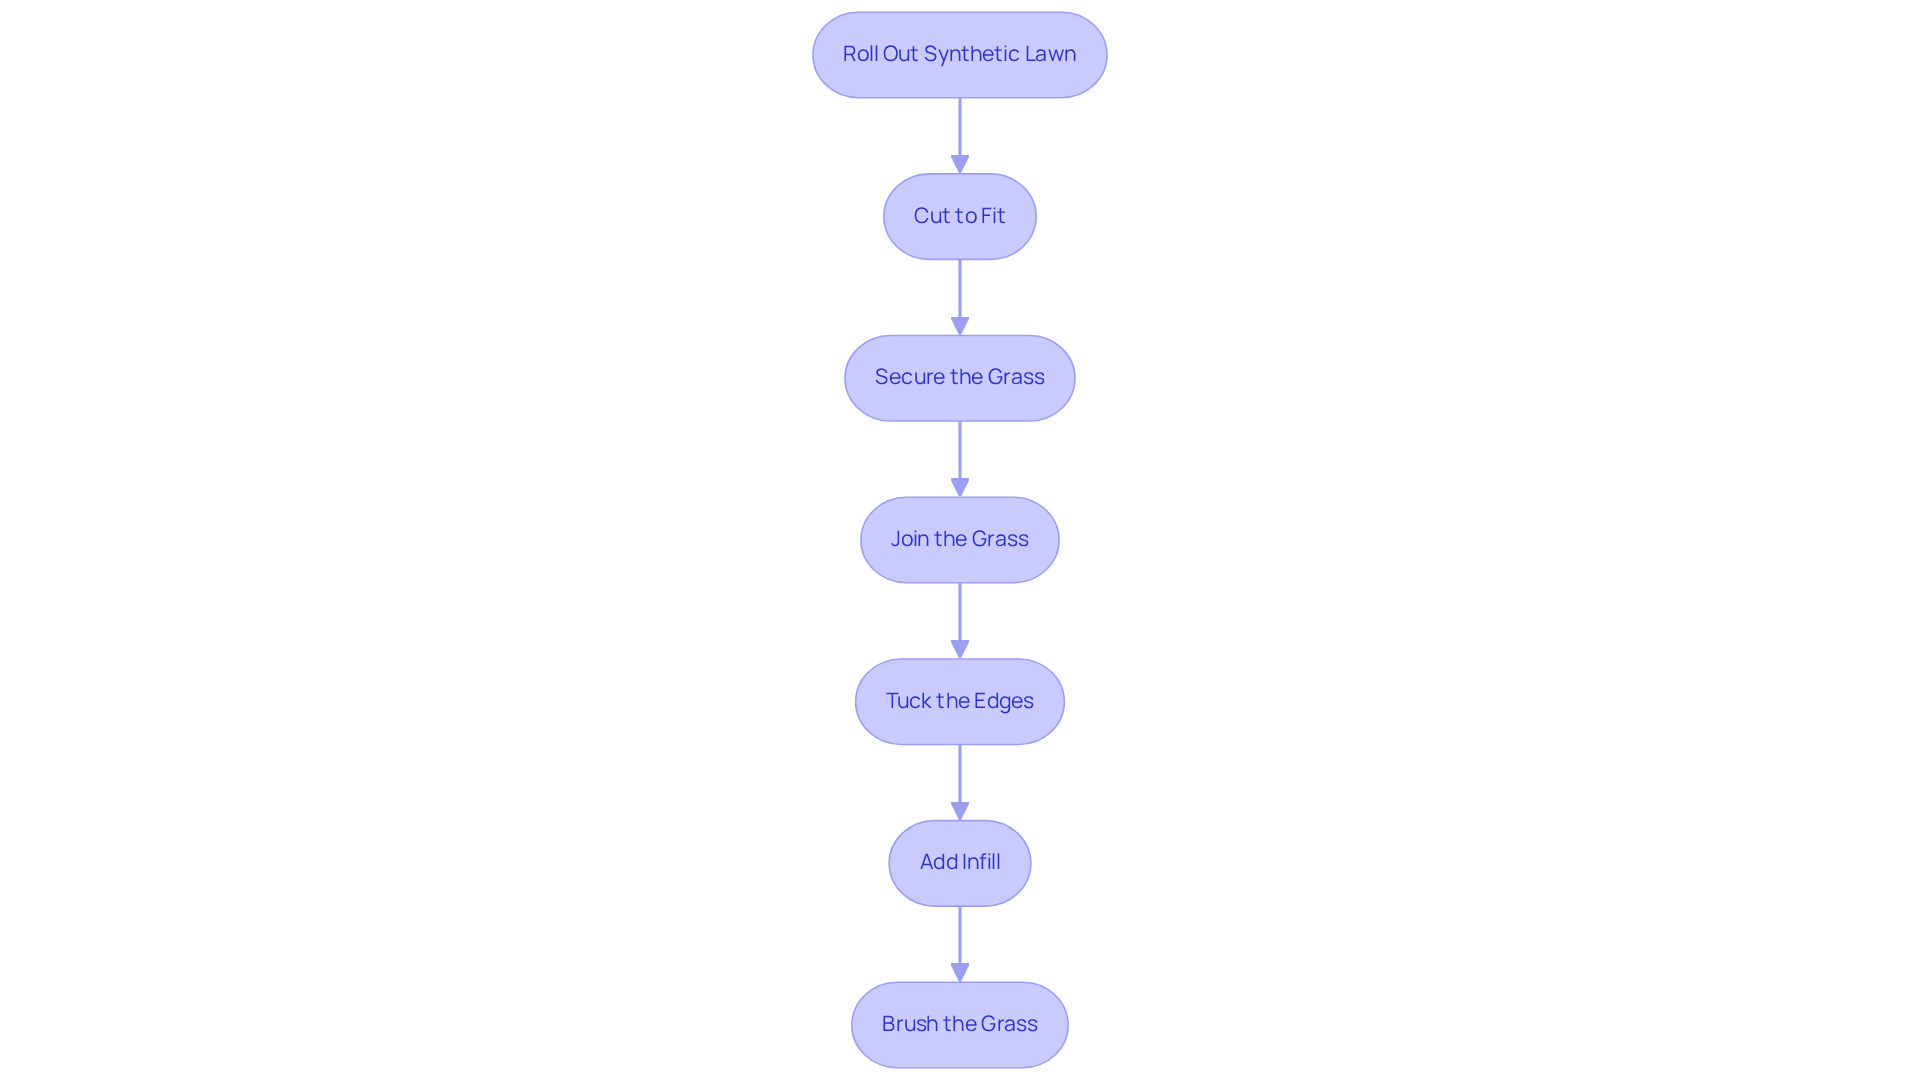
Gathering the right tools and materials is essential for a successful synthetic grass install.
-
Tools Needed:
- Sod Cutter or Shovel: Essential for removing existing grass and soil, creating a clean slate for your new turf.
- Utility Knife: Necessary for cutting the grass to fit your designated area precisely.
- Landscape Staples or Galvanized Nails: Used to secure the turf in place, preventing movement during use.
- Hand Tamper or Plate Compactor: Important for compacting the soil and base material, ensuring a stable foundation. Proper compaction helps avoid settling after setup, which can lead to uneven surfaces.
- Rake: Used for leveling the base material, which is essential for a smooth setup.
- Power Broom or Stiff-Bristled Broom: Perfect for sweeping the surface after setup to keep the blades standing upright.
- Tape Measure: Ensures accurate measurements of the setup area, preventing costly mistakes.
-
Materials Needed:
- Synthetic Grass: Select the appropriate type based on your specific needs, such as pet turf or playground turf, to ensure functionality and safety. Homeowners can significantly enhance their outdoor areas through synthetic grass install. As noted by satisfied client Dick Bryant, Hall Turf delivered the ideal solution for his grass problem, demonstrating that the correct selection of synthetic grass can yield outstanding outcomes.
- Weed Barrier Fabric: Crucial for stopping weed growth under the grass, improving durability and aesthetics.
- Base Material: Crushed stone or gravel is suggested for efficient drainage and stability, forming a solid foundation for the grass. Ensuring the installation location has a slight slope (1-2%) away from structures is crucial for proper drainage and preventing water pooling.
- Infill Material: Silica sand or rubber granules help weigh down the grass and support the blades, contributing to a natural look and feel.
- Seam Tape and Adhesive: Necessary for joining multiple pieces of turf if your project requires it, ensuring a seamless appearance.
- Outdoor Carpet Adhesive: Used for securing seams and edges, providing additional stability to the setup.
Investing in quality tools and materials not only simplifies the synthetic grass install process but also ensures long-lasting results that enhance outdoor spaces. Hall Grass, a licensed contractor with more than 15 years of experience, highlights the significance of quality materials and skilled setup. As emphasized by Scott Sachse, who praised Hall Turf for their outstanding setup of a putting green, attention to detail in the process can result in breathtaking outdoor changes that need little maintenance.
Troubleshoot Common Installation Issues
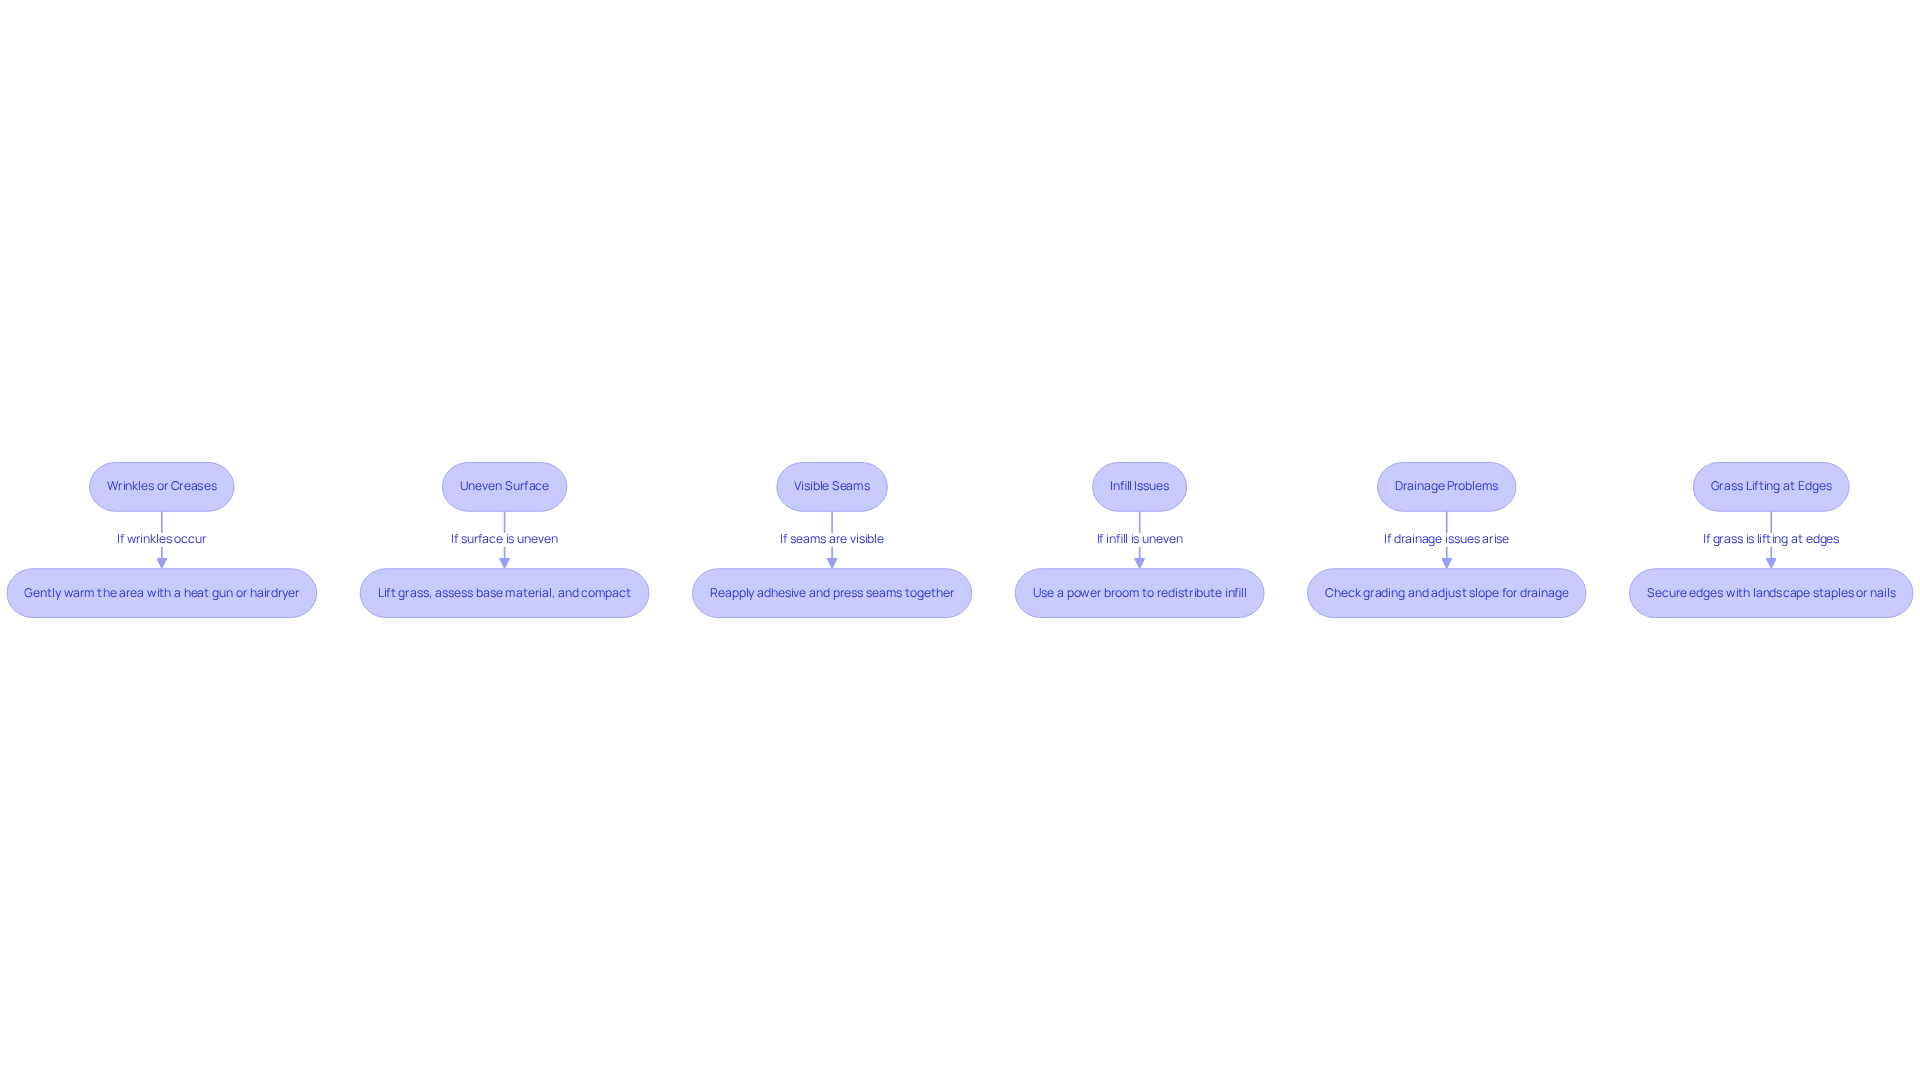
Addressing common installation issues is crucial for ensuring the integrity and appearance of a synthetic grass install.
- Wrinkles or Creases: If you notice wrinkles after installation, gently warm the affected area using a heat gun or hairdryer on a low setting. This technique relaxes the fibers, helping them lay flat and restoring the grass’s appearance.
- Uneven Surface: An irregular ground surface often indicates issues with base preparation. To correct this, lift the grass and assess the base material. Proper sub-base preparation is critical for a synthetic grass install; ensure that the base is uniformly level and well-compacted using a vibrating plate compactor. Modify by adding or removing material as necessary, then compact the area thoroughly before re-laying the grass to ensure a level finish.
- Visible Seams: If seams are noticeable, it may be due to insufficient adhesive or seam tape during installation. Reapply adhesive and press the seams together firmly to enhance the overall appearance and durability of the surface.
- Infill Issues: Uneven infill can impact the grass’s performance. Use a power broom to redistribute the infill evenly across the surface. Ensure that the type and amount of infill used align with the manufacturer’s recommendations for optimal results.
- Drainage Problems: Standing water can lead to significant problems if not addressed promptly. Check the grading of the base; you may need to adjust the slope to facilitate proper drainage away from structures. Adding more base material can also help achieve the necessary gradient. Implementing proper drainage solutions is essential to prevent water pooling and ensure the longevity of your grass.
- Grass Lifting at Edges: If the edges of the grass are lifting, ensure they are secured properly with landscape staples or nails. Re-secure any loose areas to prevent further lifting and maintain a neat appearance.
By ensuring these issues are resolved, you can protect your investment and enjoy a pristine outdoor space following a synthetic grass install for years to come. Hall Landscaping, a licensed contractor with over 15 years of experience, is dedicated to providing professional-grade results customized to your specific needs. As noted by satisfied customers like Scott Sachse, who praised Hall Turf’s exceptional installation of a putting green, and Dick Bryant, who appreciated the tailored solutions provided by Brock, you can trust Hall Turf to provide the expertise and quality you deserve.
Conclusion
Transforming your outdoor space with synthetic grass requires careful planning and execution. The process involves thorough site preparation, precise installation techniques, and the right tools and materials to ensure a durable and visually appealing result. Homeowners can achieve a professional-looking installation by carefully executing the steps discussed, enhancing their property while minimizing upkeep.
Key points discussed include the importance of thorough site preparation, which sets the foundation for a successful installation. Proper drainage, leveling, and the use of a weed barrier fabric are essential to prevent future issues. The step-by-step installation process emphasizes the need for precision in cutting, securing, and infilling the grass, ensuring a seamless and natural appearance. Troubleshooting common installation problems further highlights the significance of attention to detail, allowing for quick resolutions to maintain the integrity of the turf.
This investment not only enhances your yard’s appearance but also leads to significant savings in water and maintenance costs over time. If you’re looking for expert help, Hall Turf has over 15 years of experience and a strong commitment to quality. With a large satisfied client base and a reputation for excellence, Hall Turf is ready to assist you in creating the perfect outdoor space. For inquiries and quotes, reach out at (816) 555-7890 or email info@hallturf.com. Consider the long-term advantages of synthetic grass as you plan your outdoor transformation.
Frequently Asked Questions
Why is site preparation important for synthetic grass installation?
Effective site preparation is crucial for the longevity and performance of synthetic grass. Proper preparation ensures a stable foundation, prevents settling, and enhances drainage, which contributes to the overall durability of the installation.
What steps should be taken to prepare the site for synthetic grass?
Begin by removing existing vegetation, weeds, and debris. Cut and remove the top layer of soil (2-4 inches deep), ensure proper drainage by grading the area, lay down a weed barrier fabric, compact the soil, and if necessary, add a layer of crushed stone or gravel for improved drainage.
How deep should the top layer of soil be removed?
The top layer of soil should be removed to a depth of approximately 2-4 inches, depending on the specific requirements of the turf being installed.
What is the recommended slope for drainage during site preparation?
A gentle slope of about 1/4 inch per foot (2-3% grade) away from structures is recommended to prevent water pooling.
What is a weed barrier fabric, and why is it used?
A weed barrier fabric is a material laid down to prevent weeds from growing through the synthetic turf. It typically costs around $68.00 per roll for about 1,500 square feet and should be overlapped by at least 6 inches for complete coverage.
How can I ensure the soil is compacted properly?
Use a hand tamper or plate compactor to compact the soil, establishing a stable foundation that supports the synthetic grass and prevents settling over time.
What additional materials can be added to improve drainage?
A layer of crushed stone or gravel can be added to improve drainage and provide a solid foundation. It should be spread evenly and compacted again for stability.
What final step should be taken before installing synthetic grass?
Rake the surface to ensure it is smooth and level, which is essential for achieving a uniform placement during the installation.
What are the benefits of professional installation of synthetic grass?
Investing in professional installation enhances the quality of the turf and provides peace of mind, ensuring the project is completed correctly and efficiently. Testimonials from clients like Scott Sachse highlight the professionalism and attention to detail provided by Hall Turf.
List of Sources
- Prepare the Site for Synthetic Grass Installation
- Compare Hall Turf: Your Local Fake Grass Company Near Me – Hall Turf | Artificial Turf Installation Kansas City KS & MO (https://hallturf.com/compare-hall-turf-your-local-fake-grass-company-near-me)
- What is Drainage, and Why is It Important? | Synthetic Grass Warehouse (https://syntheticgrasswarehouse.com/resources/technology/drainage)
- Artificial Grass Drainage Solutions: Master Perfect 2025 (https://tmimn.com/artificial-grass-drainage-solutions-guide)
- How Much Does Artificial Turf Installation Cost in 2025? – Xtreme Green Synthetic Turf (https://xgreensynthetic.com/artificial-turf-installation-cost)
- 10 Essential Insights on Artificial Grass Drainage Systems for Homeowners – Hall Turf | Artificial Turf Installation Kansas City KS & MO (https://hallturf.com/10-essential-insights-on-artificial-grass-drainage-systems-for-homeowners)
- Install the Synthetic Grass: Step-by-Step Process
- Discover the Latest in Synthetic Turf Technology: Artificial Grass Innovations | Smart Turf® Artificial Grass (https://smartturf.com/artificial-grass-innovations)
- Artificial Grass Cost: How Much Does Turf Cost to Install? (https://turfnetwork.org/artificial-grass-cost)
- Free Artificial Turf Cost Calculator (2026) | QuoteIQ (https://myquoteiq.com/free-artificial-turf-cost-calculator)
- New Artificial Turf Designs Improve Safety (https://asme.org/topics-resources/content/new-artificial-turf-designs-improve-safety-(2))
- How Long Does it Take to Install Synthetic Grass? – SGS Turf (https://sgsturf.com/installing-synthetic-grass)
- Gather Essential Tools and Materials for Installation
- Plastic Turf Fields Are Taking Over America (https://nytimes.com/2025/07/26/business/artificial-turf-grass-sports.html)
- As the world heats up, so does the debate around artificial turf (https://thenewlede.org/2024/08/as-the-world-heats-up-so-does-the-debate-around-artificial-turf)
- 4 Steps to Install Artificial Grass Near You in Kansas City – Hall Turf | Artificial Turf Installation Kansas City KS & MO (https://hallturf.com/4-steps-to-install-artificial-grass-near-you-in-kansas-city)
- News (https://shawgrass.com/en-us/news)
- Synthetic Turf News | News & Blog | Synthetic Turf International (https://synthetic-turf.com/news-blog)
- Troubleshoot Common Installation Issues
- 5 common mistakes when installing artificial grass and how to avoid them – JardinVertical.es (https://jardinvertical.es/en/blog/5-common-mistakes-when-installing-artificial-grass-and-how-to-avoid-them)
- 7 Common Artificial Grass Problems and How to Fix Them (https://ccgrass.com/problems-with-artificial-grass)
- Critical Artificial Turf Problems, Root Causes & Preventive Tips – News – Xingu (https://xggrass.com/news/critical-artificial-turf-problems-root-causes-85592751.html)
- Overcoming Common Artificial Grass Installation Issues | Smart Turf® Artificial Grass (https://smartturf.com/overcoming-common-artificial-grass-installation-issues)