
Introduction
Installing artificial grass on a concrete surface is not merely about laying down the turf; it requires precision, the appropriate tools, and a comprehensive understanding of adhesive application. This guide outlines the critical steps and best practices for effectively using artificial grass glue, ensuring a durable and visually appealing outcome. However, if the preparation is inadequate or the adhesive fails to bond, the results can be disappointing. Understanding the intricacies of surface preparation and glue application is essential, as it can significantly impact the success of the installation and prevent costly rework.
Gather Necessary Tools and Materials
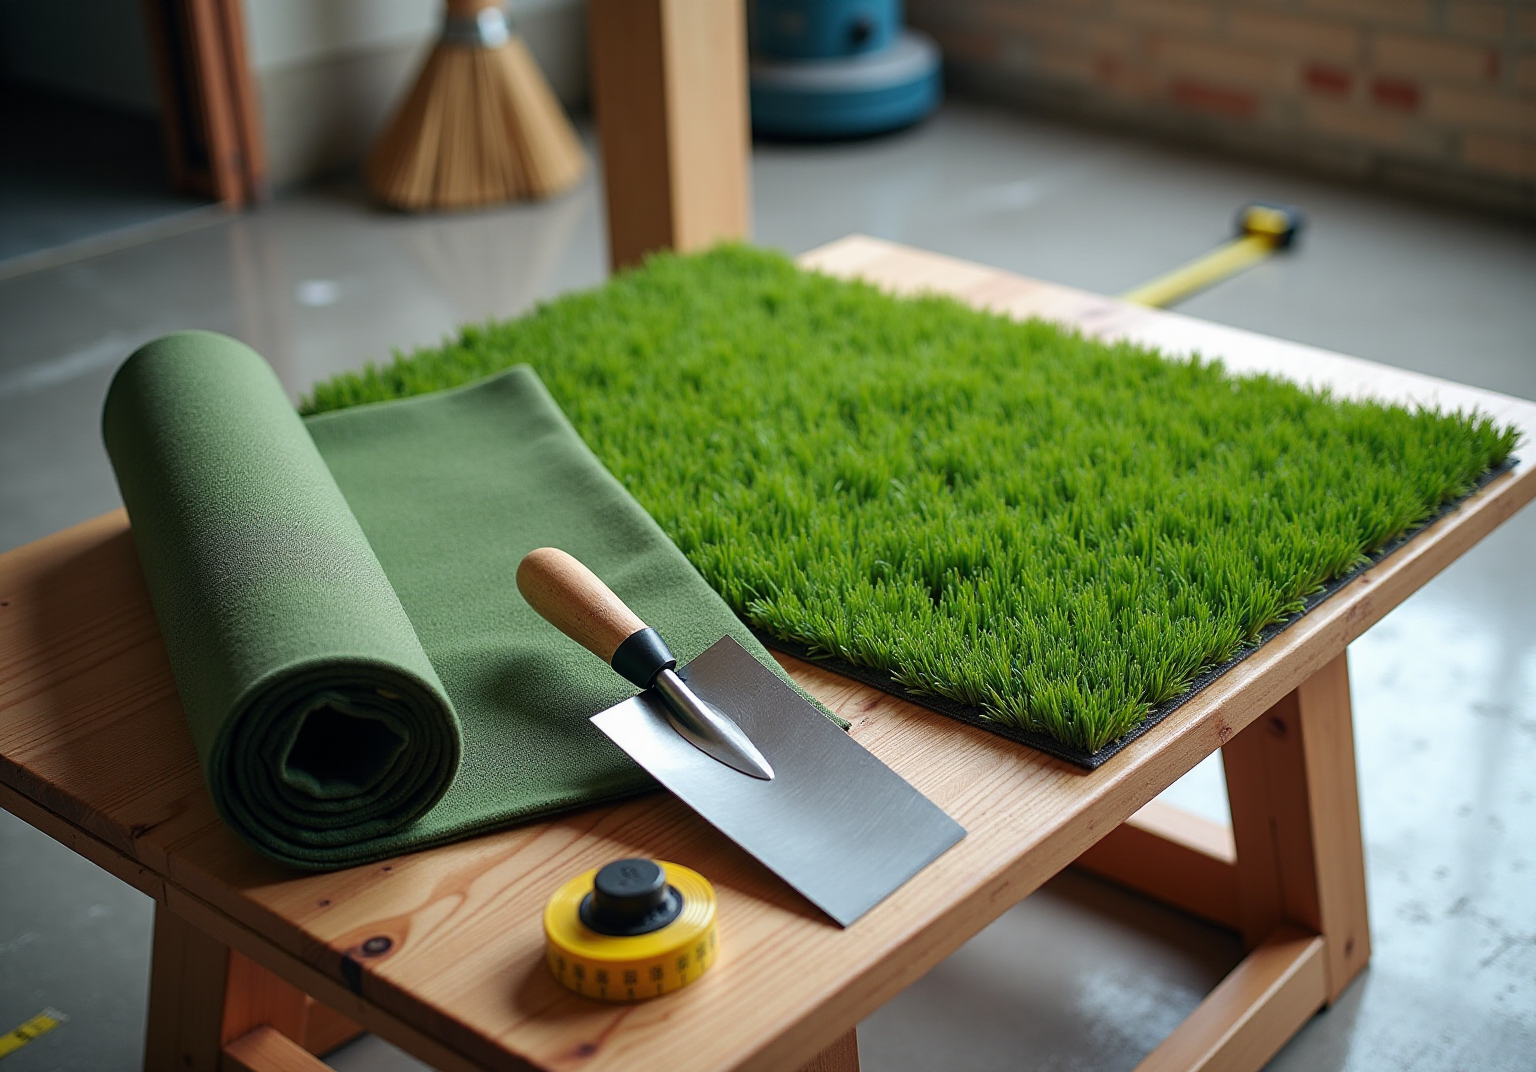
To ensure a successful installation of artificial grass on a solid surface, it is essential to gather the right tools and materials. Here’s what you will need:
- Artificial Grass Glue: Choose a high-quality adhesive specifically designed for artificial turf to create a strong bond with the concrete surface. Hall Turf recommends adhesives that have proven effective in various applications, ensuring durability and longevity.
- Notched Trowel: A 3-4mm notched trowel is crucial for evenly spreading the adhesive, which helps achieve a secure connection of the grass. This step is vital for a professional finish, similar to the meticulous work performed by Hall Turf’s assembly team.
- Utility Knife: This tool is necessary for accurately cutting the grass to fit the designated area, allowing for a clean and precise installation. A sharp Stanley knife is recommended for effective cutting, ensuring that your grass fits perfectly, as our clients have experienced in their projects.
- Measuring Tape: Accurate measurements are critical before cutting the turf, ensuring it fits perfectly in the intended space. It is advisable to have both short and long tape measures for precise measurements, reflecting the attention to detail that Hall Turf prides itself on.
- Broom or Vacuum: Thoroughly cleaning the surface before installation is essential to remove dust and debris, which enhances adhesion. Evaluating and addressing any concrete imperfections, such as cracks and bumps, is also necessary for a seamless setup, akin to the detailed assessments conducted by Hall Turf’s specialists.
- Roller: A heavy roller is recommended to firmly press the turf down onto the glue, ensuring proper adherence and a smooth finish. This step is often highlighted by our satisfied customers as a key part of achieving a flawless appearance.
- Optional Equipment: Consider using a carpet trolley for transporting heavy rolls and a drop spreader for uniform distribution of infill, which can streamline the setup process.
Gathering these tools and materials in advance will simplify the installation process, making it more efficient and effective. Additionally, ensure adequate drainage to prevent water accumulation on the surface, which is crucial for maintaining the integrity of the installation. With Hall Turf’s expert guidance, you can create a beautiful and functional artificial grass area that meets your needs.

Prepare the Concrete Surface for Adhesion
To ensure a successful installation of artificial grass on concrete, it is essential to prepare your surface by following these steps:
- Clean the Surface: Begin by thoroughly removing all dirt, dust, and debris using a broom or vacuum. A clean surface is crucial for achieving proper adhesion with artificial grass glue for concrete, as contaminants can significantly weaken the bond between the adhesive and the substrate.
- Inspect for Damage: Next, carefully examine the surface for any cracks or holes. Fill these imperfections with a patching material, allowing it to cure completely before proceeding. This step is vital to prevent future issues that could compromise the installation.
- Dry the Surface: Ensure that the material is entirely dry before applying any glue. Moisture can negatively impact the bonding, potentially leading to lifting or shifting of the turf over time.
- Optional – Apply a Primer: For improved bonding with artificial grass glue for concrete, consider using a primer specifically formulated for use with glues. This additional step can greatly enhance the bond strength between the adhesive and the concrete, ensuring a more durable application.
Successful projects have shown that meticulous surface preparation, particularly cleaning, directly impacts the effectiveness of adhesive bonds. Studies indicate that properly prepared surfaces lead to higher bond strength, thereby reducing the risk of premature failure in turf installations. By adhering to these steps, you can achieve a long-lasting and visually appealing artificial grass surface.

Apply Artificial Grass Glue to Concrete
To effectively apply artificial grass glue on concrete, follow these steps:
- Mix the Glue: Begin by carefully combining the components of two-part bonding agents according to the manufacturer’s guidelines. This ensures a proper blend for optimal adhesion.
- Spread the Glue: Use a notched trowel to evenly distribute the binding agent over the prepared concrete surface. Aim for a consistent layer of artificial grass glue for concrete that is approximately 1/8 inch thick to promote strong adhesion.
- Work in Sections: Focus on small portions at a time. This approach prevents the bonding agent from drying out before the turf is installed, ensuring a secure application.
- Avoid Air Bubbles: As you apply the glue, take care to eliminate any air bubbles that may become trapped underneath. These can weaken the bond. Additionally, remove any wrinkles while the bond sets to achieve a smooth finish.
- Compress the Glue: After spreading the glue, use a heavy roller to ensure good contact with the surface. This step is crucial for establishing a strong bond.
- Check Coverage: Verify that the entire area designated for grass installation is adequately covered with glue. This coverage is essential for promoting strong adhesion when using artificial grass glue for concrete.
- Temperature Considerations: For optimal results, install the adhesive during cooler times of the day. High temperatures can hinder adhesive penetration, affecting the overall effectiveness.

Secure Turf and Allow for Proper Curing
To secure the turf and ensure it cures properly, follow these steps:
- Lay the Turf: Position the artificial grass carefully onto the glued surface, ensuring correct alignment and a wrinkle-free finish. For added security, apply seam tape and artificial grass glue for concrete around the perimeter of each grass piece.
- Press Down Firmly: Use your hands or a weighted lawn roller to press down on the grass, ensuring it makes good contact with the glue. This step is crucial for achieving a strong bond and preventing lifting. Clients have noted that ‘Brock is highly professional, prompt, and attentive,’ highlighting the meticulous attention to detail that experts like Brock at Hall Turf provide.
- Secure the Edges: Use grass nails or staples along the edges to keep the surface in place while it cures. Proper anchoring is vital, with nails recommended to be spaced every 10-20 cm around the perimeter for optimal stability. A mallet is generally preferred over a hammer for installing nails or staples, as it distributes force more evenly. Customers have praised the crew’s professionalism, stating they were “beyond professional, polite, and courteous,” which contributes to a smooth installation process.
- Allow to Cure: Follow the manufacturer’s instructions for curing time, which typically ranges from 24 to 48 hours. Environmental conditions such as temperature and humidity can influence this time; warmer temperatures and low humidity generally accelerate drying. Avoid walking on the turf during this period to ensure a strong bond, as premature contact can compromise adhesion. Homeowners have expressed satisfaction with the end results, emphasizing the importance of allowing proper curing time for a durable finish.

Conclusion
Successfully installing artificial grass on concrete requires a meticulous approach centered on proper preparation, application, and securing techniques. This guide emphasizes the importance of utilizing high-quality tools and materials, such as specialized adhesives and notched trowels, to achieve a durable and visually appealing surface. By adhering to the outlined steps, homeowners can attain a professional finish that enhances their outdoor space.
Key arguments throughout this guide highlight the necessity of thorough surface cleaning, careful inspection for damages, and precise application techniques when using artificial grass glue. Each step, from preparing the concrete to allowing adequate curing time, is crucial for ensuring the longevity and stability of the installation. The insights provided serve as a comprehensive roadmap for anyone looking to undertake this project successfully.
Ultimately, the significance of this guide extends beyond the installation process itself. It underscores the value of investing time and effort into preparing and executing each step with care. Whether for personal enjoyment or enhancing property value, following these best practices will lead to a successful artificial grass installation that stands the test of time. Embrace this opportunity to transform your outdoor area into a vibrant, low-maintenance space that you can enjoy for years to come.
Frequently Asked Questions
What tools are necessary for installing artificial grass on a solid surface?
The necessary tools include artificial grass glue, a notched trowel, a utility knife, measuring tape, a broom or vacuum, and a heavy roller.
Why is artificial grass glue important for installation?
Artificial grass glue is essential for creating a strong bond between the grass and the concrete surface, ensuring durability and longevity of the installation.
What type of notched trowel should be used for spreading adhesive?
A 3-4mm notched trowel is recommended for evenly spreading the adhesive to achieve a secure connection of the grass.
How can I ensure accurate cutting of the artificial grass?
A utility knife, preferably a sharp Stanley knife, is necessary for accurately cutting the grass to fit the designated area, allowing for a clean and precise installation.
Why is measuring tape important in the installation process?
Accurate measurements are critical to ensure the turf fits perfectly in the intended space, and having both short and long tape measures can help achieve precise measurements.
What should be done to the surface before installing artificial grass?
The surface should be thoroughly cleaned with a broom or vacuum to remove dust and debris, and any concrete imperfections, such as cracks and bumps, should be addressed for a seamless setup.
What is the purpose of using a heavy roller during installation?
A heavy roller is used to firmly press the turf down onto the glue, ensuring proper adherence and a smooth finish.
Are there any optional tools that can assist in the installation process?
Optional tools include a carpet trolley for transporting heavy rolls and a drop spreader for uniform distribution of infill, which can streamline the setup process.
What should be considered regarding drainage during installation?
Adequate drainage should be ensured to prevent water accumulation on the surface, which is crucial for maintaining the integrity of the installation.
List of Sources
- Gather Necessary Tools and Materials
- Your Ultimate Guide to DIY Artificial Grass Installation | Smart Turf® Artificial Grass (https://smartturf.com/your-ultimate-guide-to-diy-artificial-grass-installation)
- Essential Tools for DIY Artificial Grass Installation (https://artificialturfexpress.com/blog/15-important-tools-youll-need-for-diy-artificial-grass-installation-in-san-jose)
- litagrass.com (https://litagrass.com/blogs/lita-artificial-grass-blog/how-to-install-artificial-turf-step-by-step-guide-with-tools-costs-and-pro-tips?srsltid=AfmBOorQpDMURWgVWsHOfuln5VCW1C8QIpEZgcD_ph46RgYvxBmFmkPX)
- How to Install Artificial Grass on Concrete (Step-by-Step) (https://ccgrass.com/installing-artificial-grass-on-concrete)
- Prepare the Concrete Surface for Adhesion
- sciencedirect.com (https://sciencedirect.com/science/article/abs/pii/S0950061824003933)
- Commercial Artificial Grass Installation Process on Concrete – US Turf (https://us-turf.com/installation/commercial-artificial-grass-installation-on-concrete)
- grasscompanyuk.com (https://grasscompanyuk.com/blogs/news/how-to-lay-artificial-turf-on-concrete-expert-tips?srsltid=AfmBOorAx6U7qujfQpf51cQz_tngavdK3zXiUxn7MGbn1VlxWTc3zIBN)
- pmc.ncbi.nlm.nih.gov (https://pmc.ncbi.nlm.nih.gov/articles/PMC6384808)
- Easy DIY Guide: Installing Artificial Turf on Concrete (https://artificialturfexpress.com/blog/the-diy-guide-to-installing-the-best-artificial-turf-on-concrete)
- Apply Artificial Grass Glue to Concrete
- How to Glue Down Artificial Grass on a Hard Surface: Complete Install (https://artificialturfsupply.com/how-to/how-to-install-artificial-grass-on-hardscape)
- Gluing Synthetic Grass On Concrete | SGW (https://syntheticgrasswarehouse.com/company/ask-an-expert/ask-jw/gluing-synthetic-turf-on-concrete)
- Synthetic Turf Installation: 10 Essential Adhesive Tips (https://artificialturfexpress.com/blog/sticking-it-10-adhesive-tips-for-synthetic-turf-installation)
- The Complete Guide To Artificial Turf Glue | Chemique US (https://chemiqueadhesives.com/us/the-complete-guide-to-turf-glue)
- Secure Turf and Allow for Proper Curing
- How to Secure Artificial Grass: Glue vs Nails vs Tape (https://ccgrass.com/how-to-secure-artificial-grass-properly)
- Ultimate Guide to Securing Artificial Turf (https://premiumgrassblades.com/the-ultimate-guide-to-securing-artificial-turf-spiral-nails-staples-and-proper-installation)
- Artificial Turf Glue Guide: Top 5 FAQs Answered (https://artificialturfexpress.com/blog/artificial-turf-glue)
- sgwnevada.com (https://sgwnevada.com/blog/everything-you-need-to-know-about-anchoring-artificial-grass-during-installation)
- haozechem.net (https://haozechem.net/news/how-long-does-turf-glue-take-to-dry.html)