
Decide what the putting green needs to support
A home putting green is a site-and-surface project, not simply a piece of turf placed in an open part of your yard. Start by deciding what you want the area to support: focused practice, casual play, family recreation, entertaining, or a combination of uses. That decision affects the amount of space you need, the number and placement of cups, the surface you discuss, and the surrounding landscape.
Those characteristics can make the surface suitable for a practice area or recreational space, but they do not determine whether your property can support the installation. Your intended use still needs to guide the layout and system choices.
Use this first decision to define the project in plain language:
- Practice first: You may want more than one putting line, varied distances, and enough room to work on direction and pace.
- Recreation first: You may give more weight to how the green fits with seating, entertaining, or other outdoor activities.
- Shared use: You will need to balance practice features with access, open space, and the way other people use the property.
- Landscape integration: You may want the green to follow an existing patio, pool, planting bed, or yard boundary rather than appear as an isolated rectangle.
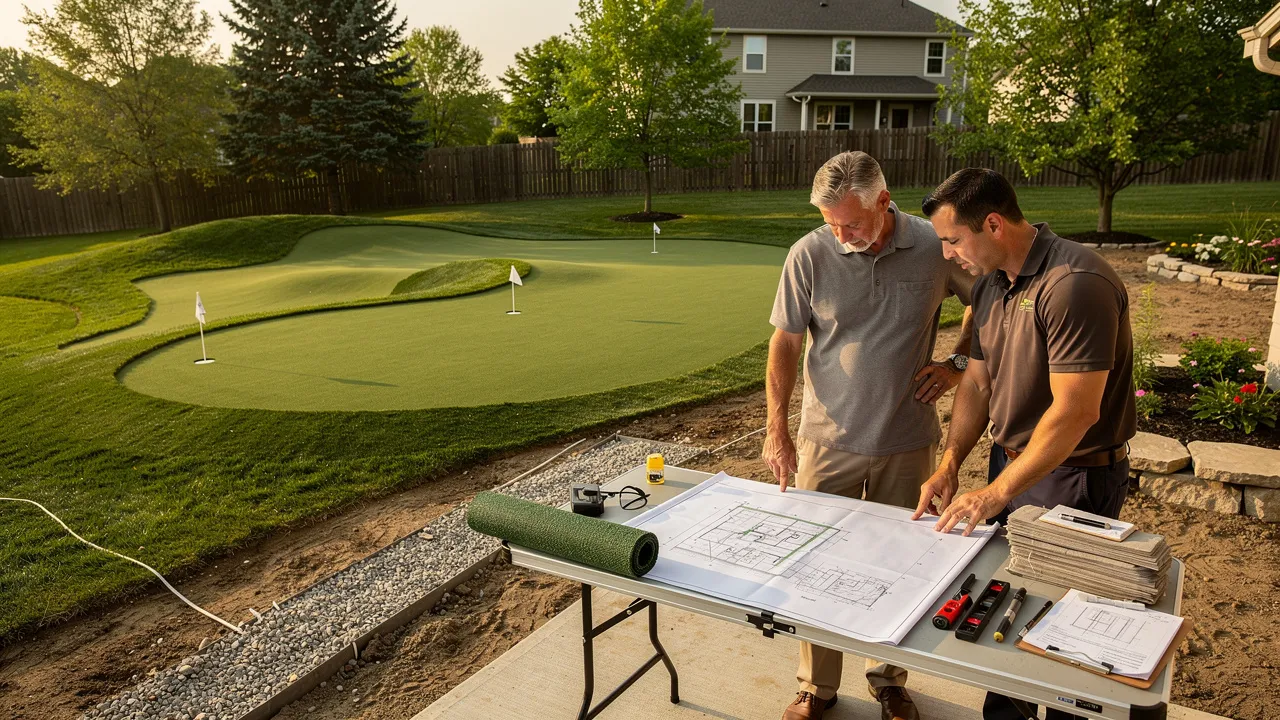
We offer installation of backyard putting greens for golf lovers, and we help homeowners customize putting greens to their specific space and skill level. That makes your first task a definition exercise: identify who will use the green, how often you expect to use it, and what other parts of the property must remain accessible. A clear use case gives every later conversation a practical starting point.
Use available area to define the practice layout
Available area should shape the practice layout before you choose turf or request installation. A selected technical source describes roughly 200–300 square feet as enough for basic practice and 400–600 square feet as a range associated with greater practice variety. Treat those figures as planning guidance, not as a promised design or a fixed requirement for your property.
Measure the usable area rather than the full yard. A fence line, retaining wall, tree, patio, pool, garden bed, utility feature, or narrow access path can change what is actually available. Mark the boundaries on a sketch and note where you need to walk, maintain the surface, move equipment, or reach adjacent landscaping. The green should fit the way you use the property, not only the dimensions shown on a site plan.
Before settling on a size, work through these questions:
- How much area can you dedicate without blocking an existing path or outdoor feature?
- Will the available shape allow the putting lines and cup locations you want?
- Does the layout leave room around the surface for access and care?
- Will a future landscape change, fence adjustment, or patio project affect the proposed boundary?
- Do you want one defined practice area or several zones with different uses?
A smaller area can still support a focused practice purpose, while a larger area may provide more room to vary distances and directions. The square-footage range does not tell you how the green will play or whether a particular layout fits. It helps you frame the conversation.
Your sketch should include approximate length and width, nearby structures, gates, steps, slopes you can see, and any area where materials would need to pass. Add photographs from several angles. We help homeowners customize putting greens to their specific space and skill level, so describe your intended use alongside the measurements instead of sending dimensions alone.
Inspect slopes, access, and the construction route
Slopes, grading needs, maintenance space, and construction access can change the complexity of a putting-green project. A sloped yard may require more design and preparation than a simple flat area, and retaining walls or other grading work can add to the project scope and price. Identify those conditions before comparing turf or discussing a layout.
Access deserves its own review. Equipment, soil or base material, and other supplies may need to reach the installation area. Some projects may require a crane to lift materials into a backyard, so a narrow gate or long route through the house is not a minor detail to leave until the end of planning. A Kansas City-area property with limited rear access should be described clearly in the first project conversation.
Walk the intended route and record what you find:
- Measure the narrowest gate, side yard, stairway, or passage.
- Note changes in elevation, steps, fences, overhead obstructions, and surfaces that could affect delivery.
- Mark the distance from the street or driveway to the proposed green.
- Photograph the route, not only the future green area.
- Identify where base material, equipment, and removed soil might need to move.
Your notes do not need to determine the construction method. They need to reveal conditions that could change it. A difficult route may affect staging, material handling, preparation, and the sequence of work. A slope may affect grading or the need for retaining structures. Space around the green also matters because the finished surface must remain accessible for care.
Do not treat a flat-looking patch as proof that the site is ready. Use your measurements and photographs to give an installer a complete starting picture, then ask which access, grading, and maintenance-space assumptions belong in the project scope.
Make drainage and the sub-base part of the design
The visible turf is only one part of the installation. A properly installed synthetic putting green requires precise grading, drainage, and appropriate turf selection to support reliable pace and durability. The selected technical guidance identifies three connected elements that influence how the finished surface plays: a stable, drainable sub-base; turf fiber selected for ball roll and durability; and calibrated silica sand infill.
That connection matters because a surface problem may begin below the turf. Ask how the proposed system will handle water, how the base will be prepared, and how the finished grade relates to the surrounding property. For an outdoor surface, product-selection guidance states that a backing drainage rate of at least 30 inches per hour helps prevent pooling that affects play and erodes the base; it also notes that regions with more rainfall may require a higher rate. Use that figure as a question for the proposed system, not as a guarantee that a product alone resolves site drainage.
Compaction is another specification to put in writing. The selected technical source states that sub-base compaction to 95% density, measured under ASTM D698 standards, is the threshold it identifies for long-term surface integrity. Ask how the installer will prepare and assess the base, what standard is being used, and how the completed work will be documented. The right answer depends on the design and property conditions, so avoid judging the entire installation by a single number.
Your drainage discussion should cover:
- The existing grade and where water currently moves.
- The proposed sub-base materials and preparation sequence.
- How the system will move water away from the playing surface.
- Whether the turf backing has documented drainage performance.
- How the surrounding landscape will meet the green edge.
- Which site conditions could require additional preparation.
This is the point where a product-only decision becomes incomplete. A turf sample can help you compare appearance and construction, but it cannot describe the whole base, drainage, and grading plan. Put those parts in the scope before you decide whether the proposed system fits your property.
Specify putting-green turf instead of landscape turf
Putting-green turf should be discussed as a specific surface category, not as a substitute for general landscape turf. Putting-green turf generally uses a short pile and dense fibers, while landscape turf is designed to look plush. The selected comparison source notes that landscape turf can cause a golf ball to wobble and slow down, which makes appearance alone a poor basis for choosing the surface.
Pile height is one specification to ask about. The selected product guidance places putting turf in a range of 0.5 to 0.75 inches and states that shorter pile generally rolls faster than longer pile. Exact speed depends on infill depth and fiber density, so do not treat pile height as a stand-alone prediction of performance. Ask how the proposed pile, fiber, and infill are intended to work together.
Fiber selection should follow your use:
- Dedicated practice: The selected technical source describes nylon as the reference option for dedicated putting greens because of its ball-roll consistency and resistance to ultraviolet exposure and abrasion.
- Dual-purpose use: The same source presents polyethylene as a balanced option when the surface has more than one intended use.
- Casual use: It presents polypropylene for casual use and notes that it degrades faster than the other options described.
Density also belongs in the conversation. Product-selection guidance recommends a face weight of 50 or more ounces per square yard for putting greens and states that higher face weight indicates more durable turf with better coverage. That recommendation does not establish a universal specification for every project. Ask what face weight, backing, fiber, and infill the proposed system uses and why those choices fit your intended use.
Use this product checklist when reviewing a proposal:
- Is the material identified as putting-green turf rather than landscape turf?
- What are the pile height, fiber type, face weight, backing, and infill requirements?
- How will infill depth be set and maintained?
- What ball-roll characteristics is the system designed to support?
- Which conditions could change the surface over time?
A sample can help you see color and texture. The written specifications explain whether the sample belongs to a system designed for the way you plan to use the green.
Read those specifications as a connected system. Pile height describes fiber length; face weight describes yarn density; backing provides structure and influences moisture handling; and infill helps stabilize fibers and tune ball speed. Because the selected guidance says exact speed depends on infill depth and fiber density, comparing a sample or one specification in isolation cannot establish how the installed surface will perform. Ask the installer to explain the trade-off as a complete surface choice.
Plan cups, flags, edges, and surrounding landscaping
A putting green is more than its main surface. Cup locations, flag alignment, edge treatment, access space, and the surrounding landscape all affect how the area functions and fits the property. Plan those details before the turf is cut so the layout reflects how you intend to practice and move through the yard.
Cup installation needs attention to the area around each hole. The selected cup-installation guidance identifies surface flatness around the three-foot radius line, ball stoppage or misdirection in that area, cup movement, tilted flags, and improper cup elevation as conditions to consider. Turn those points into questions for the scope: how will cup locations be selected, how will elevation relate to the finished surface, and how will the installer check the area around each cup?
For a regulation-style setup, ask how the proposed cup dimensions and depth will relate to the finished surface and intended layout. If you want a regulation-style setup, ask how the proposed cup components match that description and whether your intended layout calls for different features. Do not assume that a cup’s diameter alone describes the complete installation.
Map the design around the playing area:
- Mark the intended cup locations and the direction of the principal putting lines.
- Leave access for cleaning, inspection, and movement around the green.
- Show where flags may be visible from the house, patio, or seating area.
- Identify how the edge will meet adjacent paving, planting beds, turf, rock, or soil.
- Note any feature that must remain reachable after installation.
We help homeowners integrate a putting green into existing landscaping so it complements the overall aesthetic of the outdoor space. Bring photographs of the surrounding yard and identify the elements you want to retain. A coordinated boundary can make the project easier to evaluate, while an unclear edge can leave preparation and access questions unresolved.
Think of cup placement and edge treatment together: the usable practice area includes the space needed to approach, putt, retrieve a ball, and care for the surface. A layout that fills every available corner may offer more turf on paper but leave less practical room around the features. Show those movement paths on the sketch so the installer can assess them with the surrounding landscape.
Compare DIY with professional installation by site complexity
DIY can be a viable path for a simple, flat green under 400 square feet on a well-drained site. The selected technical source recommends stronger consideration of professional installation for larger greens or projects with complex drainage. The practical dividing line is not your interest in the project; it is the amount of site preparation, grading, drainage, material handling, and surface specification the project requires.
| Decision factor | DIY may fit when | Professional installation deserves stronger consideration when |
|---|---|---|
| Area and shape | The green is simple, compact, and under 400 square feet. | The area is larger, the shape is complex, or the layout requires more varied practice space. |
| Ground conditions | The site is flat and well drained. | Slopes, grading, retaining walls, or drainage questions affect the design. |
| Access | Materials and equipment can reach the work area without unusual handling. | A narrow route, elevation change, or difficult delivery path may require special handling. |
| Surface system | You can define the sub-base, turf, infill, cups, and edge as one coordinated installation. | You need a complete plan for grading, drainage, compaction, turf selection, and finished features. |
| Project responsibility | You can manage preparation, layout, installation, and follow-up care. | You want the site conditions and installation scope assessed as a complete project. |
Those conditions favor a written professional scope.
Choose DIY only when the property and project remain within the simple conditions described above. For a larger, sloped, access-limited, or drainage-sensitive project, request an installation assessment before you commit to materials.
Set the care commitment before approving the project
Artificial putting greens can reduce some lawn work, but your project still needs a care plan. Treat the care description as a planning consideration, not as a no-care promise.
Before approving a system, ask what routine care the selected turf, infill, cups, flags, and surrounding edge require. The answer should address the complete installed surface rather than the turf roll alone. Your care plan should also account for access: if the green is surrounded by planting beds, furniture, fences, or other obstacles, routine work may be harder to carry out.
Add these questions to your project notes:
- What regular care does the proposed surface require?
- How should the infill be checked, redistributed, or replenished?
- What should you do if the surface develops a visible low area, loose edge, or cup movement?
- How should the cups and flags be handled during routine care?
- Which cleaning products or methods are compatible with the selected system?
- Who should assess a change in drainage, surface condition, or ball movement?
You do not need to solve every care question before requesting a quote. You do need to make care part of the decision. Compare the expected routine with the location, access, and amount of use you described at the beginning. A surface that fits your practice goal but cannot be reached easily for care may require a different layout or installation scope.
The maintenance description also identifies durability, versatility, and resistance to pests and allergens as characteristics of artificial putting greens. Use those characteristics to frame the care conversation, not to skip it: ask which parts of the proposed system need attention, how access affects that work, and what change in surface condition should prompt professional review. This keeps the maintenance decision tied to the actual installation and your intended use.
Use a putting-performance checklist
A home putting green should be planned as a playing system, not just a turf surface. Ball-roll behavior is tied to the sub-base, turf fiber, and calibrated silica-sand infill, so the key planning question is how those parts work together for the practice you want in your Kansas City area property.
Use this putting-performance checklist:
- Practice use and area: Decide whether the surface is for basic practice or greater practice variety. Roughly 200–300 square feet is described as enough for basic practice, while 400–600 square feet is associated with greater practice variety. Mark the intended putting directions and the space needed around each cup.
- Roll variables: Put pile height, fiber density, infill depth, and face weight on the specification list. Putting turf commonly ranges from 0.5 to 0.75 inches; shorter pile generally rolls faster than longer pile, while exact speed depends on infill depth and fiber density. A 50+ oz/sq yd face-weight target is recommended for putting greens, and higher face weight indicates more durable turf with better coverage.
- Fiber choice: Match the fiber discussion to the use. Nylon is suited to dedicated putting greens, polyethylene offers a balanced option for dual-purpose greens, and polypropylene suits casual use but degrades faster.
- Base and drainage: A properly installed synthetic putting green requires precise grading, expert drainage, and appropriate turf selection. Ask how the sub-base will provide stability and drainage, how compaction will be addressed, and whether the proposed target is 95% density per ASTM D698. For an outdoor green, ask what backing drainage rate is documented; at least 30 inches per hour helps prevent pooling that can affect play and erode the base.
- Putting-specific turf: Putting-green turf generally has short pile and dense fibers. General landscape turf is designed to be plush and can cause a golf ball to wobble and slow down, so confirm that the proposed surface is intended for putting rather than only for a lawn-like appearance.
Review surface flatness around the three-foot radius line, possible ball stoppage or misdirection, cup movement, flag alignment, and cup elevation as part of the playing-surface discussion.
Larger greens or projects with complex drainage call for stronger consideration of professional installation. Drainage, structural, safety, and installation questions should receive site-specific professional review.
Record the answers as one surface specification covering intended practice, area, turf dimensions, fiber, infill, base, drainage, and cup details. Hall Turf installs backyard putting greens for golf lovers. We help homeowners customize putting greens to their specific space and skill level, and integrate a putting green into existing landscaping so it complements the outdoor space.
Ask the installer to explain the complete installation scope
A proposal should explain the complete installation scope, not only the visible turf. Proper installation requires precise grading, drainage, and appropriate turf selection to support reliable pace and durability. Use your quote brief to ask how each part of the proposed system connects to the site.
Ask the installer to address these points in plain language:
- Site preparation: What existing surface, soil, vegetation, or material must be removed or corrected? How will the finished grade be established?
- Base construction: What materials and depths are proposed beneath the turf? How will the base be stabilized and compacted? The selected technical source identifies 95% density under ASTM D698 standards as its threshold for long-term surface integrity, so ask how the proposed work relates to that specification.
- Drainage: Where will water move after installation? What site conditions could require additional drainage work? For the turf backing, product-selection guidance states that at least 30 inches per hour can help prevent pooling that affects play and erodes the base, while higher-rainfall regions may require more.
- Turf and infill: What fiber, pile height, face weight, backing, and infill will be used? How do those choices relate to your intended use and the surface characteristics discussed in the proposal?
- Cups and flags: How will the locations, elevation, surrounding flatness, flag alignment, and cup movement be addressed? The selected cup-installation guidance identifies each of those areas for consideration.
- Edges and access: How will the green meet adjacent landscape features, and will the finished design leave enough room for care and inspection?
- Care guidance: What routine care does the proposed system require, and what changes should prompt a follow-up assessment?
Use that distinction to evaluate the scope, not to assume that every professional proposal includes the same work.
A proposal becomes easier to compare when it identifies preparation, base, drainage, surface, features, access work, and care separately. If a material part of the system is described only as “included,” ask what the line covers before you compare alternatives.
Because the proposal concerns a technical system, ask Hall Turf to identify the relevant product certifications, CAD files, and testing documentation for the proposed materials and installation details. Hall Turf is described as a licensed contractor. The point is not to assume that every project uses the same documents, but to make the available technical support part of your comparison.
Validate the putting surface before choosing a system
Evaluate a home putting green as a complete playing surface rather than as a turf shape. The key planning question is how the base, drainage, turf, infill, and cup details will work together for the intended use.
Use this playing-surface checklist when discussing a Kansas City-area project:
- Base and drainage: Ask how grading, sub-base stability, compaction, and drainage will be addressed. A technical reference states that compaction to 95% density under ASTM D698 is the threshold for long-term surface integrity. For outdoor putting greens, another reference states that a backing drainage rate of at least 30 inches per hour helps prevent pooling that affects play and erodes the base; higher-rainfall regions may require more. Ask what drainage-rate test information applies to the proposed backing and what site conditions still need review.
- Turf, fiber, and infill: Compare putting-specific turf with general landscape turf. Putting turf generally uses a short pile and dense fibers, while plush landscape turf can make a golf ball wobble and slow down. Pile heights described for putting turf range from 0.5 to 0.75 inches; shorter pile generally rolls faster, but exact speed depends on infill depth and fiber density. Ask how fiber type, face weight, and silica-sand infill suit dedicated practice, casual use, or a green that serves more than one purpose. The technical guidance describes nylon for dedicated greens, polyethylene as a balanced option for dual-purpose greens, and polypropylene for casual use with faster degradation.
- Cups, flags, and edges: Ask how the installer will check surface flatness around each cup, ball stoppage or misdirection, cup movement, flag alignment, and cup elevation. Also clarify edging, maintenance access, and the transition into existing landscaping. We help homeowners integrate a putting green into existing landscaping so it complements the outdoor space.
- Scope and review: Have the proposal identify the base, drainage approach, turf, infill, cups, edging, access work, and care guidance. Site-specific grading, drainage, structural, safety, and installation questions require professional assessment rather than a generic product choice.
We offer installation of backyard putting greens for golf lovers, and we help homeowners customize putting greens to their specific space and skill level. Assess the intended use and ask the installer to explain the complete surface system before selecting materials.