
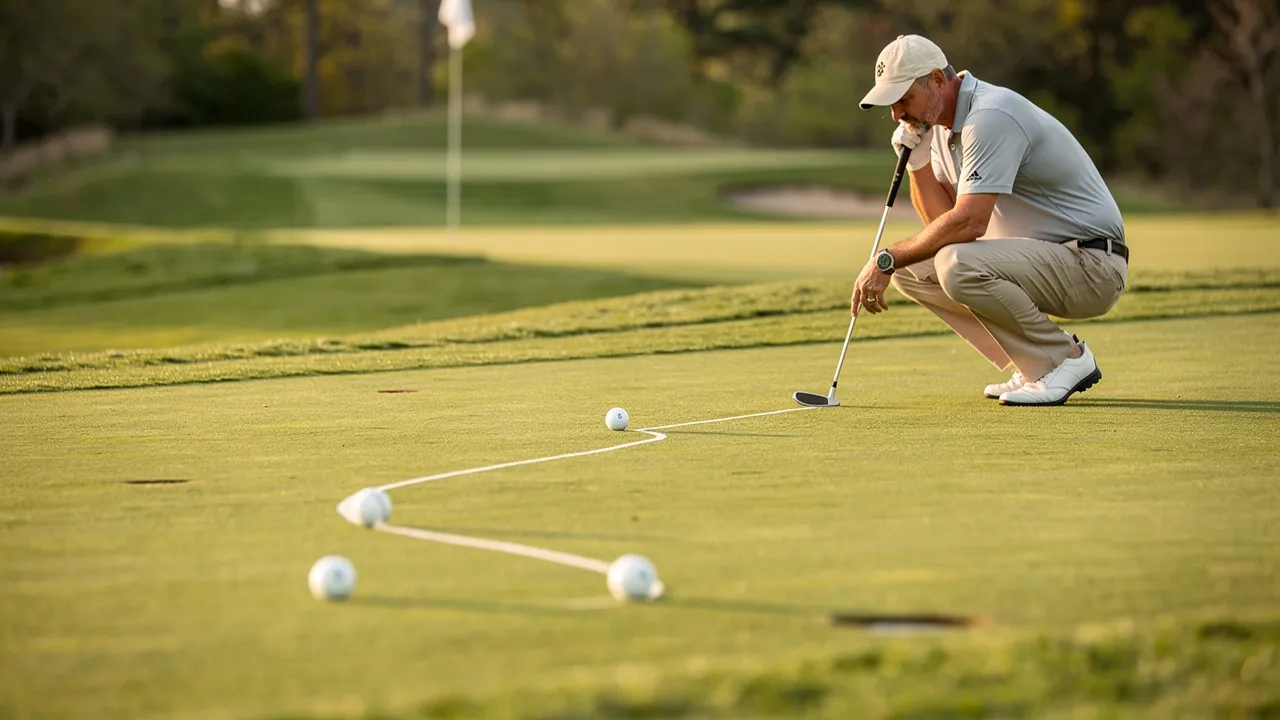

Use one repeatable read before every putt
A repeatable green-reading routine helps you turn a vague impression of the surface into a starting line and intended pace. The routine is simple: inspect the putt, identify how the surface falls, estimate how much the ball may curve, connect that estimate to pace, choose one line, and commit to it. You are not trying to discover a perfect answer by circling the ball indefinitely. You are building a reasonable read from the information available on that specific green.
Use this sequence before a putt:
- Observe the putt as you approach. Look from behind the ball and note the visible direction and slope.
- Inspect the surface from more than one angle. Walk around the ball, lower your viewpoint, and look for changes in contour, color, texture, or the fall line.
- Check the slope with your feet and the surrounding terrain. Notice uphill, downhill, high-side, and low-side features.
- Separate direction from amount. Decide which way the ball is likely to move, then estimate how much curve the distance and pace may allow.
- Choose a starting line and speed. Picture the ball’s path instead of treating direction and pace as separate guesses.
- Set up and commit. Align the putter face, settle your stance, take a breath, and avoid reopening the read.
This sequence gives you a practical order for making decisions. It also gives you a way to review a putt afterward: ask whether the observation, slope assessment, line, or pace needs more attention rather than abandoning the whole routine.
Your first reasonable read should become the foundation for the next decision. Choose one starting line, picture the ball’s path, and decide the intended speed. If you remain undecided, return to that first reasonable read instead of comparing lines indefinitely. The purpose of the routine is not to remove every uncertainty from a changing surface. The purpose is to move from observation to a clear, controlled stroke.
Begin the read as you approach the ball
The approach to the ball is the first part of the green read, not dead time before setup. Start looking from behind the ball as you walk toward it. Note the general direction of the putt, whether the visible surface appears to rise or fall, and whether one side of the route appears higher than the other.
The behind-the-ball view gives you a first picture of the route without requiring you to move around repeatedly. Keep the first observation specific. Instead of asking whether the putt feels difficult, ask: Which side looks high? Which side looks low? Does the route appear uphill, downhill, or relatively level? Where would the ball need to start if it is going to finish near the hole?
Your first look is a starting point, not a final verdict. Use it to direct the next inspection.
Repeated circling can make the read less decisive rather than more precise. A deliberate routine gives each viewpoint a job: the approach view establishes direction and visible slope, the side views help you sense contour, and the final behind-the-ball view lets you choose the starting direction and pace.
Use one deliberate look from behind before you begin walking around the putt. Keep your attention on the features that could affect the ball’s intended roll. If you notice a clear change after checking another angle, update the read once.
The practical boundary is clear: inspect enough to identify useful information, but do not make repeated circling part of the stroke routine.
As you approach the ball, look from behind it, note the direction and visible slope, and avoid circling repeatedly in search of a perfect answer. Carry that first reasonable picture into the next stage of the read.
Inspect the green from more than one angle
The putting surface can reveal different information from different viewpoints. Walk around the ball and inspect the route from more than one angle rather than relying only on the line that connects the ball and hole. Crouch for a lower view when the surface appears subtle.
Look for the following features:
- A visible rise or fall across the route.
- A side that appears higher and a side that appears lower.
- Changes in color or texture that follow the surface contour.
- Lines or transitions that suggest how the green falls.
- A broader fall line that may influence the direction of movement.
These observations do not need to become technical measurements. They are pieces of visual information that help you decide how the surface is shaped.
The fall line is useful because it gives you a reference for the direction in which the surface descends. A putt that crosses a noticeable fall line may need a different starting direction from a putt that travels mostly along it. Use the visible contour to ask whether your ball will spend more of its route moving across the slope or along the slope.
Surface appearance can be subtle, particularly when the green looks uniform from standing height. Compare the area near the ball with the area near the hole. Then look at the middle of the route rather than focusing only on the cup.
When color or texture changes are visible, treat them as clues to inspect alongside the slope. Do not let one visual feature replace the rest of the read.
A useful multi-angle inspection follows a short sequence: look from behind the ball, walk to the low side if you can identify it, crouch to compare the surface profile, and return to the ball-to-hole route. Each position should answer a question about slope or direction. Once the viewpoints agree well enough for you to choose a line, stop collecting views and move to pace.
Use your feet and surroundings to confirm the slope
Your feet can provide another indication of slope when your eyes cannot settle the question. Walk around the putting line and notice whether the ground feels level, slightly uphill, slightly downhill, or tilted from one side to the other. Pay attention to small differences rather than expecting a dramatic grade.
Underfoot feedback works best as a confirmation of what you have seen. If your eyes suggest that the left side is higher but your walk suggests the opposite, pause and inspect the route again. Compare the high and low sides from the middle of the ball-to-hole line rather than relying only on where you stand at the ball. A small difference in position can change your sense of the surface.
Use your feet as information, not as a substitute for choosing a line. The goal is to establish the likely direction of the slope before you estimate how much the ball may move across it.
The area around the green can also offer clues about how the surface falls. Hills, water features, and the general lay of the land may indicate the broader direction of the grade. Look beyond the immediate route for context, especially when the putting surface itself appears nearly flat.
Surrounding topography should remain one input among several. The local surface can contain contours that do not match the broad direction of the ground around it. Compare the wider lay of the land with what you see on the green and what you feel underfoot. If they point in the same direction, confidence in the probable break can increase. If they disagree, return your attention to the ball-to-hole route and inspect it from the low side.
Use your feet as another source of information: walk around the putting line and notice the contours, including slight uphill or downhill differences. Consider the surrounding topography as a further clue, then base the starting direction on the specific surface between your ball and the hole.
Separate break direction from break amount
Break direction and break amount are separate decisions. Break direction answers the first question: which way is the ball likely to move as it travels toward the hole? Break amount answers the second: how far should the starting line sit from the direct ball-to-hole line to allow for that movement?
Begin with the high side and low side. Then consider how much of the route crosses that slope, how far the ball must travel, and how much pace you intend to use. A short putt across a noticeable slope presents a different judgment from a longer putt that follows the same general contour.
Avoid turning this judgment into a fixed conversion. A visible slope does not automatically translate into one universal aim point because the route, surface, and pace all shape the expected movement.
Picture the ball’s full path rather than focusing only on the point where you want it to start. Imagine the ball leaving the putter, moving across the higher and lower portions of the slope, and approaching the hole along the final part of the route. This picture helps you see whether the chosen starting direction leaves room for the expected curve.
A practical sequence is:
- Identify the probable fall direction.
- Mark the direct line between ball and hole in your mind.
- Estimate where the ball should begin so its expected curve can bring it toward the hole.
- Decide the pace that fits that pictured route.
- Recheck the whole path once, then choose the line.
The purpose of the sequence is to keep direction and amount distinct until both have been considered. Once you have chosen the line, do not keep moving the target while standing over the ball.
If you can identify the direction of break but not its amount, use the practice green to calibrate your judgment on the surface in front of you. Notice how putts with similar slopes respond to different strokes, and carry that observation into the next read. The result will still be an estimate, but it will be tied to what the green is showing you rather than to a general rule applied without inspection.

Let pace shape the expected curve
Green speed describes how quickly the ball rolls on the putting surface. Grass type, mowing height, moisture, and the green’s overall condition can affect that speed. Pace therefore belongs inside the green read, not after the line has already been selected.
A faster surface generally calls for a more delicate touch and greater precision. A slower surface may call for a firmer stroke. Those descriptions do not give you a universal stroke length or a fixed amount of break. They tell you how to adjust the relationship between the line you picture and the pace you intend to use.
Use that idea as a way to picture the path, not as a promise that every putt will respond identically. Your chosen speed must still account for the particular surface, distance, and slope.
Picture the ball’s path and intended speed together. Imagine where the ball should start, how it should travel across the slope, and how it should approach the hole. If the pictured route requires the ball to slow near the cup, your starting line and pace need to agree with that expectation. If the imagined pace is firmer, reconsider how much curve you expect before settling on the line.
Treating pace as a separate afterthought creates two competing decisions: one for direction and another for force. Linking them gives you one planned roll. You can then make the stroke with a clearer target instead of trying to correct the line through the putter during the stroke.
Use the practice green to gauge the current speed before relying on your read. Roll a few putts with different strokes and notice how much distance each pace produces. The exercise is not meant to produce a permanent speed label for every green. It gives you a current reference for the surface you are about to play.
When you practice, pay attention to the relationship among pace, distance, and curve. A putt that finishes short may have been under-paced, misread, or both. A putt that runs well past the hole may reflect excessive pace, a different surface condition, or a line that did not match the intended roll. Keep those possibilities separate when you review the stroke.
Check the conditions that can change the read
Visible grass grain can affect both pace and break. Putts against the grain may be slower, while putts with the grain tend to be faster, and grain can affect how much break a putt takes. Look for a visible directional pattern in the grass and account for it alongside the slope rather than treating it as a separate correction added at the last moment.
Grain is not a reason to ignore the surface contour. First identify the likely direction of the slope, then decide whether the visible grain supports a faster or slower roll along your intended route. If the grain is difficult to see, do not invent a direction for it. Use the information you can observe and give more weight to the clear features of the putt.
Green speed can change with conditions during the day. Moisture and recent mowing can change measured speed; a damp morning may be slower than a dry, breezy afternoon, and greens tend to lose speed late in the day as the grass grows. The practical lesson is to read the surface you have now rather than relying on how the same green rolled at another time.
Before a round or practice session, use the practice green to establish a current pace reference. Notice how a short, medium, and longer roll respond to your touch. You do not need to assign a number to the green to benefit from this check. You need a useful sense of how much pace your intended stroke produces under the present conditions.
Check the conditions in a consistent order:
- Moisture: Consider whether the surface is damp or has dried since an earlier practice period.
- Mowing: Treat a recently mowed surface as a possible change from the pace you previously experienced.
- Grain: If the direction is visible, include its possible effect on speed and break.
- Overall condition: Use your practice rolls to learn how the surface is responding today.
- Time of day: Do not assume the green will roll the same way throughout the day.
These checks refine the read without replacing it. You still need to inspect the slope, choose a route, and decide how the ball should approach the hole.

Choose one starting line and intended speed
Your starting line is the direction in which you want the ball to leave the putter before the expected curve brings it toward the hole. Choose that direction only after you have considered slope, break, distance, pace, and visible conditions. Then picture the ball rolling along the selected route.
A clear target can be a point on the green rather than the hole itself. Pick a point that represents the start of the intended path and connect it to the pace you have in mind. This keeps the decision concrete. You are not trying to aim at an abstract amount of break; you are selecting a visible or imagined starting direction for one planned roll.
Choose the intended speed before you move into setup. Imagine how the ball should travel along the selected line and how it should approach the hole. If the line seems reasonable but the pace does not fit the route, adjust the plan before addressing the ball. Do not wait until the putter is behind the ball to solve the entire read.
If two lines seem possible, return to the first reasonable read and decide. Comparing options forever does not create a clearer target. Once you have selected a line and pace, let the next stage of the routine be preparation rather than another reading session.
The final decision should contain three linked pieces: a starting direction, an expected curve, and an intended speed. Say the plan to yourself in plain terms if that helps: start the ball toward this point, allow it to move toward the lower side, and roll it with this pace. Then stop revising the plan and prepare to make the stroke.
Use a timed decision and commit
A 20-second reading window gives the decision a practical boundary. Start the window as you approach the ball. Use it to observe the direction and visible slope, inspect the useful angles, choose the line, and decide the intended speed. When the window ends, begin your setup without reopening the read.
The time limit is a cue to act, not a reason to rush the stroke. Controlled movement still matters. The window simply prevents the inspection phase from blending into an endless search for certainty. If your first reasonable read remains the best available interpretation, use it.
After the line and speed are chosen, align the putter face with the selected line. Settle your stance, take a breath, and keep your movements controlled. These actions create a clean transition between reading and setup.
Your setup should serve the decision you have already made. Do not use the final seconds over the ball to compare a new line, reinterpret the slope, or change the intended speed without a clear reason. If you lose confidence after stepping into position, step back and make the decision again from the routine’s beginning rather than making a hurried change over the ball.
Use the timed routine as follows:
- Begin reading while approaching the ball.
- Look from behind and note direction and visible slope.
- Use the next part of the window to choose the starting line and intended speed.
- Picture the ball’s path once.
- When the window ends, align the putter face, settle your stance, and take a breath.
- Make the stroke without reopening the read.
The routine does not require you to feel certain. It requires you to make a considered decision and give that decision a controlled execution.

Practice the method on different slopes
A structured practice drill lets you rehearse the read instead of practicing only the stroke. Choose a putt roughly twenty feet away at a quiet practice hole. As you approach, notice the high and low sides. Read the putt from behind the ball, then inspect it from the low side near the middle of the ball-to-hole line.
The goal is to practice identifying the surface, choosing a starting direction, and selecting an intended speed before you commit. If the hole offers more than one useful angle, use the same inspection order for each attempt.
Run each practice putt through the same sequence:
- Approach the ball and identify the high and low sides.
- Look from behind the ball.
- Move to the low side near the middle of the route.
- Choose the starting direction and intended pace.
- Picture the ball rolling along the chosen route.
- Step into address and commit to the stroke.
- Review whether the observed slope, line, or pace needs attention before moving to the next putt.
A line on the ball is optional in this drill. It can help you represent the selected direction, but the central practice is the read-and-commit sequence.
Complete eighteen reads and putts to expose your routine to more than one position. Take nine putts from different positions around one hole, then take nine at another hole or across a different mix of slopes.
After each putt, describe the result in terms of the plan. Did the ball begin on the intended line? Did the pace match the picture? Did the observed slope appear to influence the path as expected? Keep those questions separate. A result that finishes away from the hole does not automatically identify which part of the read needs adjustment.
Use the drill on a practice green before relying on your read during play. The purpose is to make the sequence familiar: inspect from behind, confirm from the low side, choose direction and pace, then commit. Move to a fresh position when the routine becomes automatic so you continue learning how different slopes present themselves.
Troubleshoot the read rather than rewriting the whole method
A putt that misses gives you a reason to review the plan, not a reason to discard the entire routine. Separate the possible causes before changing anything. Ask whether you misidentified the slope, chose the wrong starting line, or used a pace that did not match the pictured route.
Review the putt in this order:
- Observation: Did you inspect the green from behind and from another useful angle?
- Slope: Did your visual and underfoot checks identify the probable high and low sides?
- Direction: Did the ball begin on the starting line you selected?
- Pace: Did the stroke produce the intended speed for the current surface?
- Commitment: Did you change the plan over the ball or make the stroke with controlled movements?
This review keeps a single result from becoming a broad judgment about your ability to read greens.
If the ball finishes below the expected route, first distinguish between under-reading the slope and underplaying the pace. A line aimed too close to the direct ball-to-hole path may indicate that you underestimated the amount of break. A ball that stops short may not have traveled far enough for the intended route to develop. Make only the adjustment your observation supports.
If the ball begins on the chosen line but does not reach the hole, check the intended speed and the current green conditions. Faster greens call for a more delicate touch and greater precision, while slower greens may call for a firmer stroke. Use the practice green to gauge the current speed before carrying the adjustment to another putt.
If the ball finishes above the expected route or moves more than you pictured, distinguish between over-reading the slope and using too much pace. A line that began too far toward the high side may indicate that the expected curve was exaggerated. A firm stroke may also carry the ball farther across the slope than the original picture suggested.
Conditions can complicate that review. Moisture, recent mowing, grain, and the overall condition of the green can affect speed. If the surface has changed since your practice roll, reassess the pace before making a large change to the line. Adjust the part of the plan that the observation actually challenges.
If you change your mind while standing over the ball, step back and repeat the decision rather than making a last-second correction. Return to the first reasonable read when repeated comparisons are creating uncertainty. Choose one starting line, picture the ball’s path, decide the intended speed, and begin setup again when the plan is clear.
Know the limits of green reading
Green reading does not produce one fixed answer that applies to every surface or every time of day. Moisture and recent mowing can change speed; a damp morning may be slower than a dry, breezy afternoon, while greens may lose speed late in the day as the grass grows. Your read therefore belongs to the conditions in front of you.
The method can organize your observations, but it cannot replace them. You still need to look at the surface, feel the slope, judge the route, and use practice rolls to understand the pace. A line that made sense under one set of conditions may need a different pace or starting direction under another.
A measured greens map can record break direction and break amount. A map can preserve information about a particular green, but it does not remove the need to account for the conditions of the current round or the pace you intend to use.
Use recorded information as a reference rather than treating it as an automatic aim point. Compare it with what you see and feel on the current putt. If the present surface differs from the conditions behind the record, give the current observation priority.
The practical value of a repeatable read is narrower and more useful: it gives you a consistent way to inspect the surface, connect slope with pace, choose a line, and review the decision after the ball rolls.
Apply the routine to a Kansas City-area putting green
A Kansas City-area putting green gives you a specific surface on which to apply the routine, so begin each practice session by checking its current pace rather than relying on a past impression. Study the green from behind and from another angle, use your feet to confirm the slope, identify the probable break direction, connect the expected curve to your intended speed, and choose one starting line. Then use the timed decision to move from reading into a controlled setup.
Keep the review specific after each putt. Note whether the slope, line, pace, or commitment needs attention, and use the next practice roll to examine that point. Repeating the same sequence across different positions and slopes gives you a practical way to learn how the particular surface responds.
If you are considering a putting-green installation in the Kansas City area, select “Get a free quote.”
What should I do when a putt breaks differently than expected?
What should I observe when approaching a putting green?
As you approach the putting green, look from behind the ball to note the general direction and visible slope. Identify which side appears higher or lower and whether the surface seems to rise or fall.
How can I confirm the slope of the green?
Walk around the putting line and feel the slope underfoot. Notice if the ground feels level, slightly uphill, or slightly downhill. This tactile feedback can help confirm what you see visually.
What factors influence the speed of a putting green?
Green speed is affected by grass type, mowing height, moisture levels, and overall condition.
How do I choose a starting line for my putt?
After assessing the slope and break, choose a starting line based on where you want the ball to begin its path. Picture the ball rolling along this line before committing to it.
What is the importance of pace when putting?
Pace affects how much the ball will break as it rolls. A softer pace allows the ball to be influenced by the slope for a longer distance, while a firmer pace may carry it farther before the curve becomes noticeable.
How can I practice reading greens effectively?
To practice, choose a putt about twenty feet away and follow a structured routine: observe the high and low sides, read from behind the ball, confirm from the low side, choose direction and pace, and commit to the stroke.
What should I do if my putt misses the target?
Review your read by checking if you misidentified the slope, chose the wrong starting line, or used an inappropriate pace. This helps isolate the cause of the miss without discarding your entire routine.