

Introduction
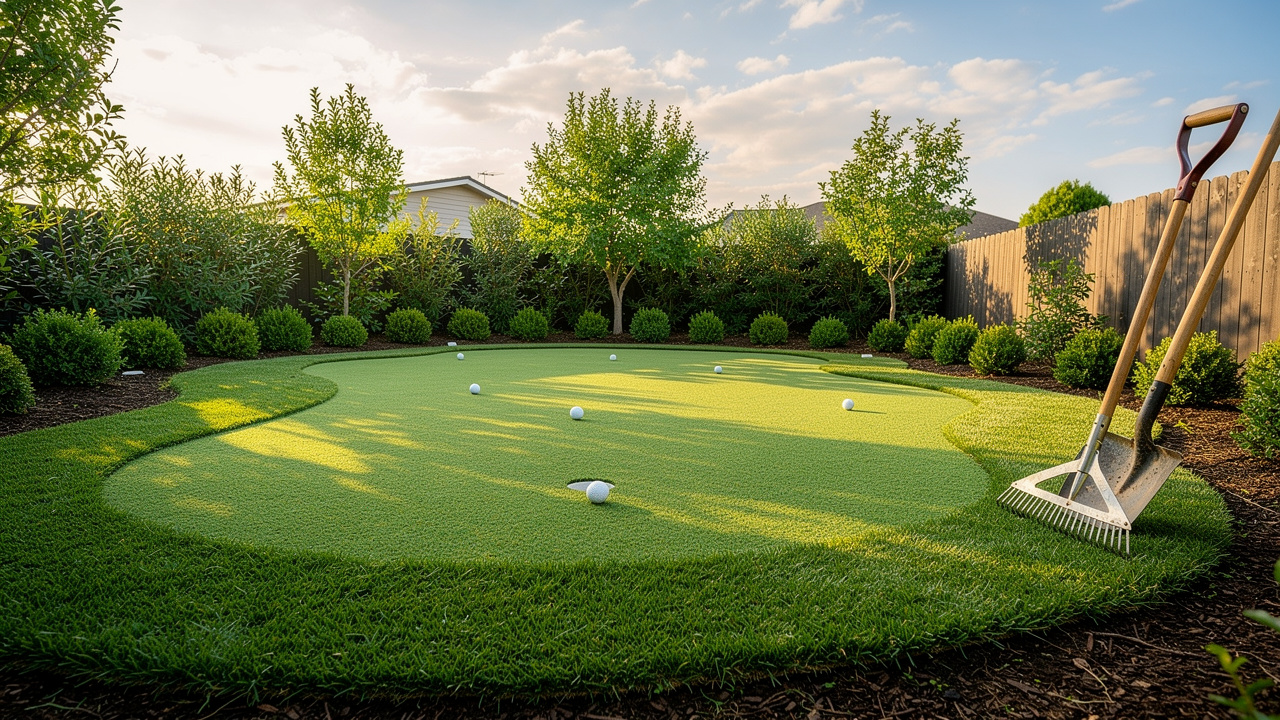
Installing a personal putting green at home presents both opportunities and challenges for homeowners seeking to enhance their outdoor space. This addition can elevate golfing skills while providing a unique recreational area. However, homeowners often face unexpected challenges during the installation of a putting green, from selecting appropriate materials to ensuring proper drainage.
Navigating these complexities is essential for achieving a successful and sustainable putting green. Successfully addressing these challenges can lead to a rewarding outdoor experience that enhances both leisure and skill development.
Assess Your Space and Requirements
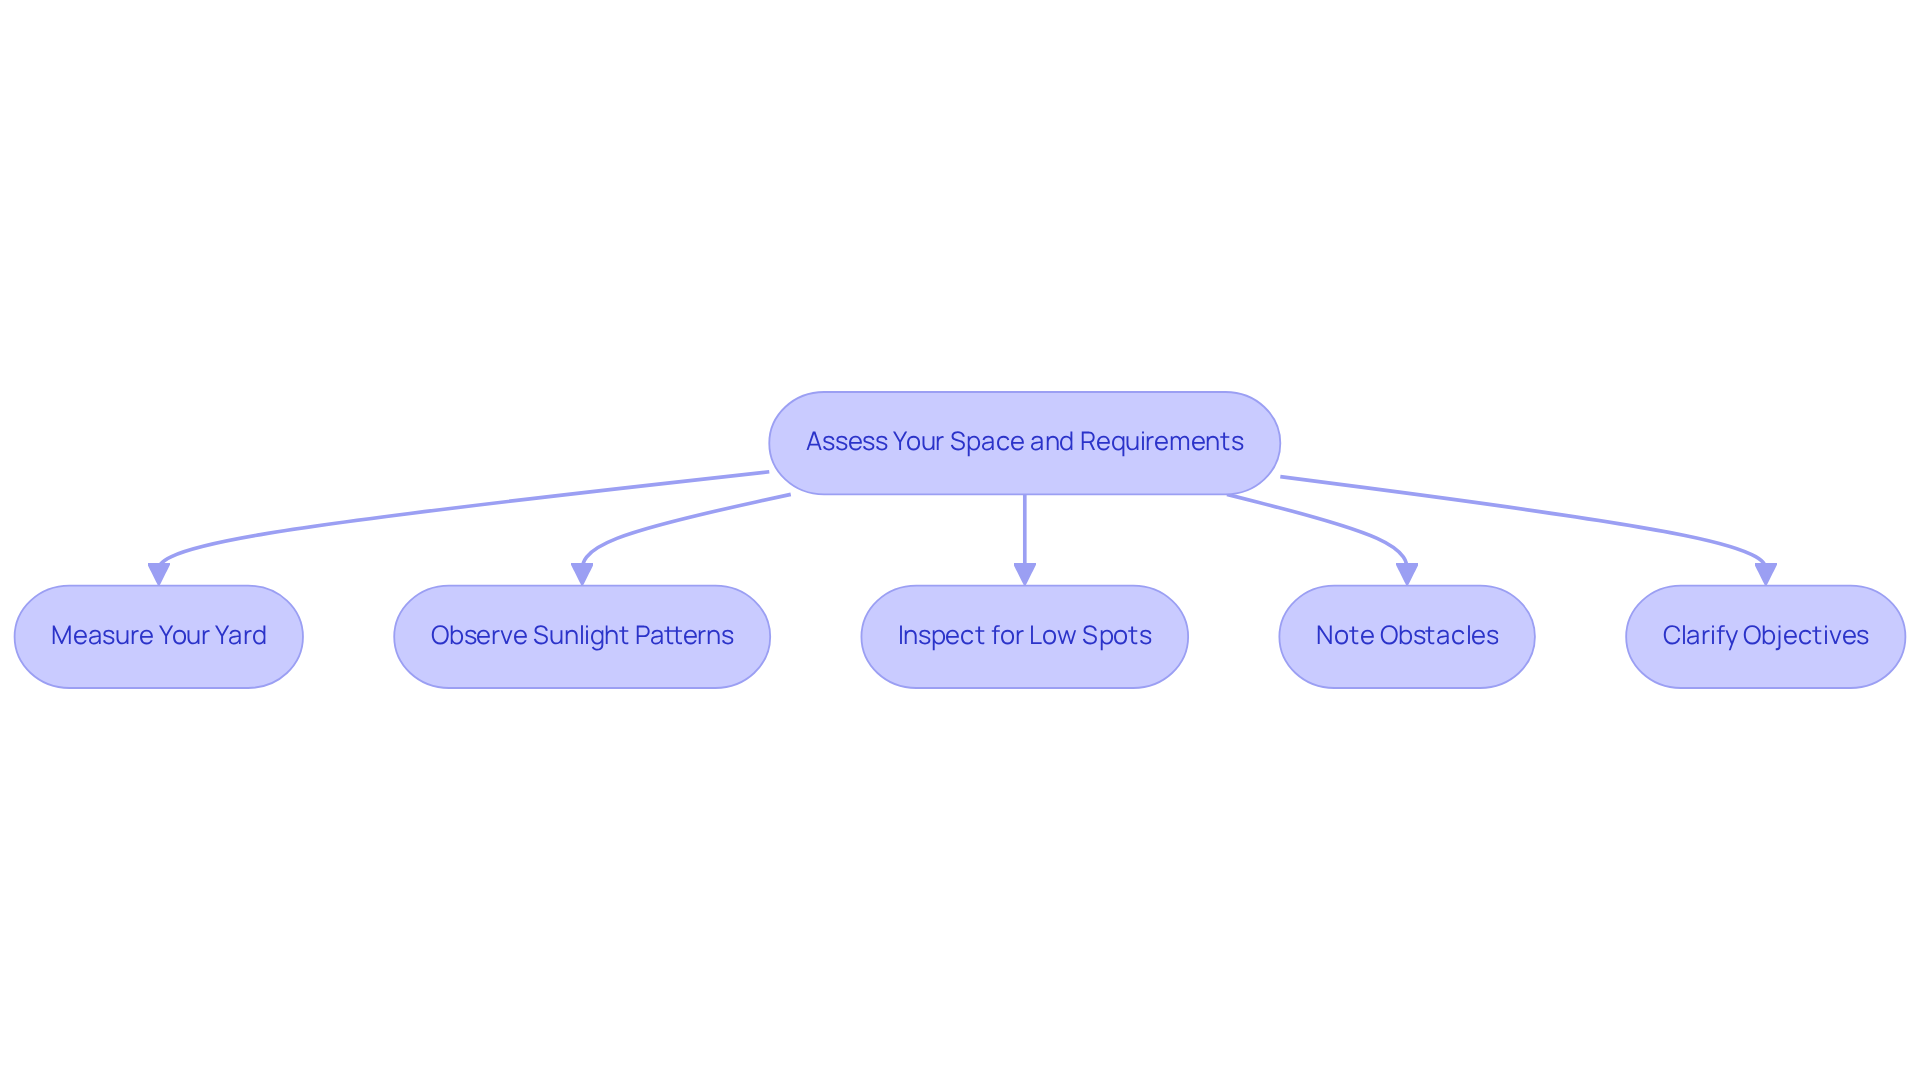
To create an effective golf practice area, start by measuring your yard to determine the available space. In the U.S., residential golf surfaces typically range from 150 to 500 square feet. Smaller areas are ideal for compact spaces, while larger areas can accommodate more complex designs and multiple holes. Dick Bryant found Hall Turf’s team effective in evaluating needs to ensure the right fit for his space.
Next, observe the sunlight patterns in your yard throughout the day. For optimal turf quality, the putting surface should ideally receive at least 6 hours of direct sunlight daily. This exposure is crucial for maintaining the integrity and appearance of the artificial grass. Scott Sachse commended Hall Turf for their professionalism and responsiveness in considering sunlight during installation.
Additionally, inspect your yard for low spots where water may collect. Efficient drainage is essential to avoid water accumulation on the surface, which can affect playability and result in maintenance problems. Les Boatright appreciated Brock’s detail-oriented approach, which includes thorough evaluations of drainage needs.
Take note of any trees, shrubs, or structures that could obstruct the installation or gameplay. Ensure there is adequate space around the area for easy access and upkeep, as well as to improve the overall playing experience. The Hall Turf team is known for their meticulous planning, ensuring that obstacles are addressed before installation.
Finally, clarify your objectives for the practice area. Whether it’s for practice, entertainment, or both, understanding your goals will guide your design choices and material selection. Clients trust Hall Turf to skillfully roll out putting green that enhances their home practice experience.
Choose the Right Turf and Materials
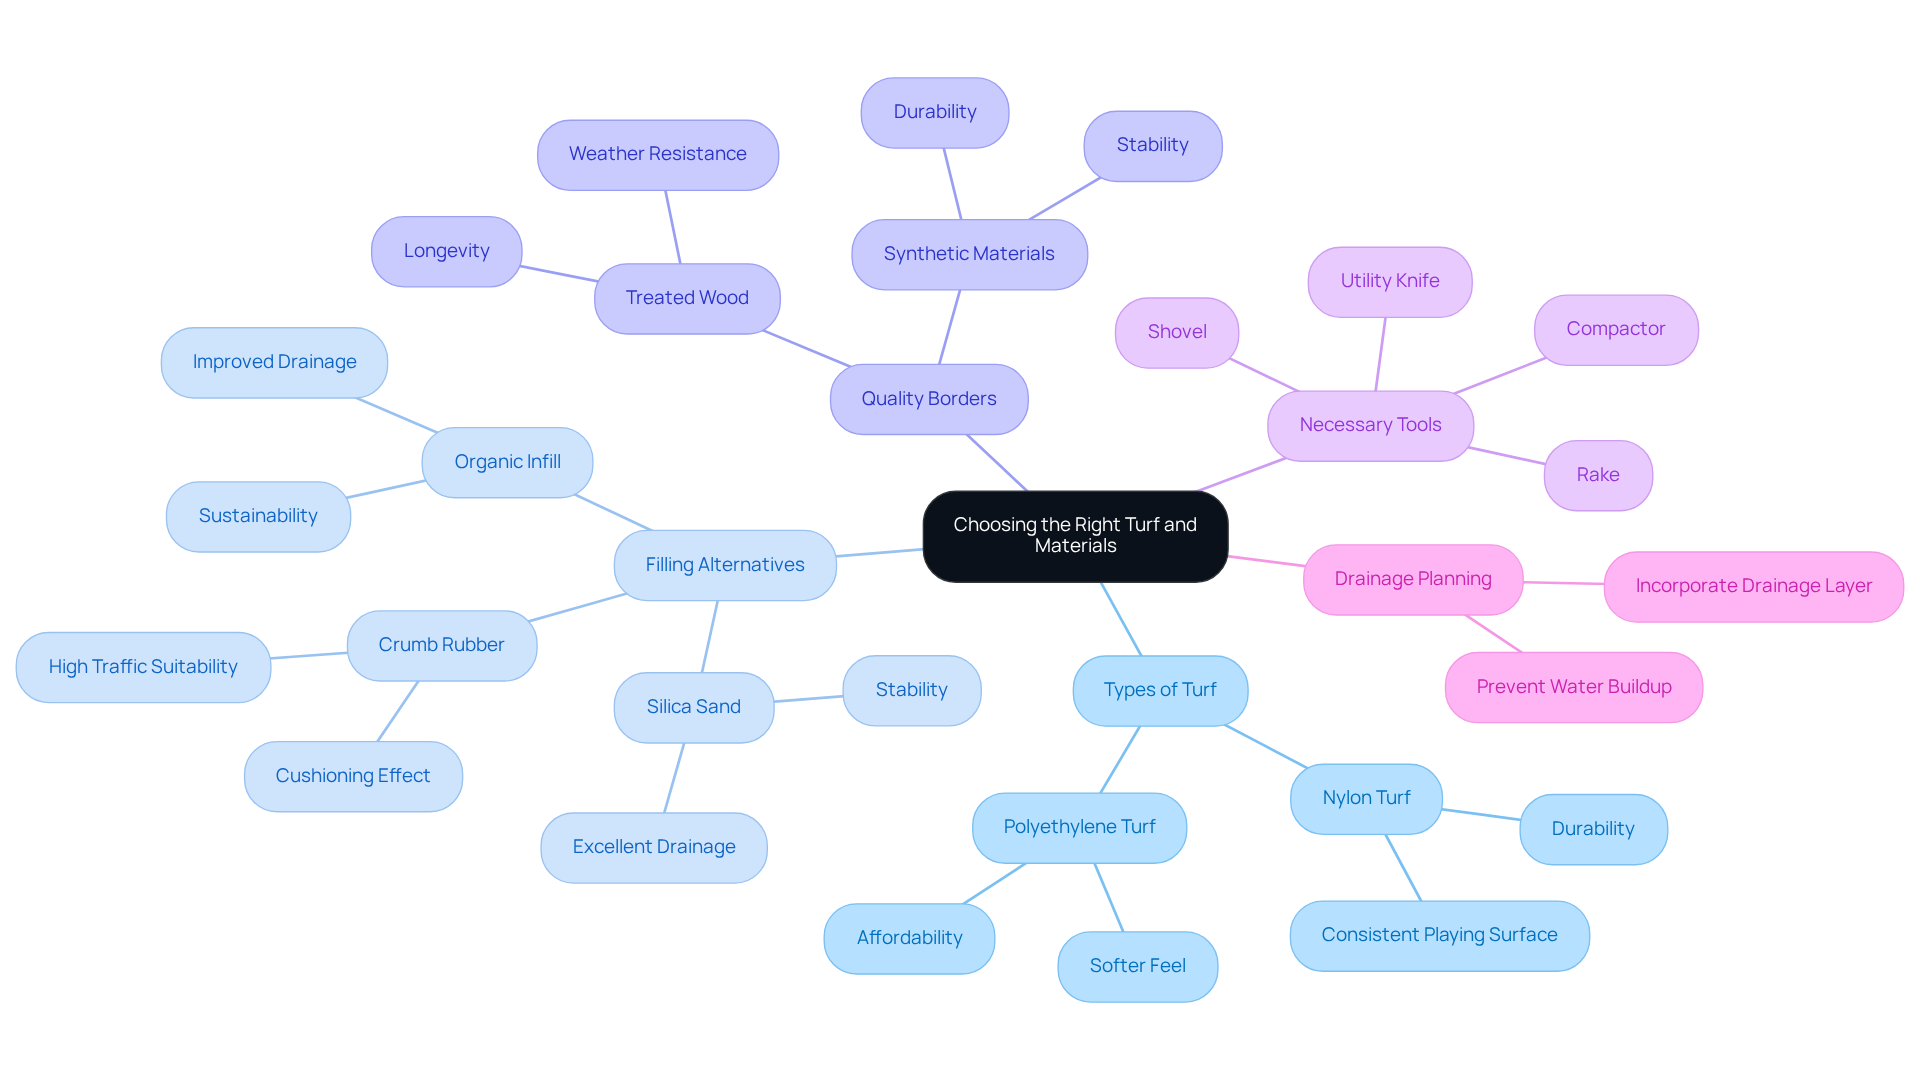
Selecting the right materials and tools is crucial to roll out putting green effectively. First, choose artificial grass specifically designed for golf holes. Focus on materials that ensure a smooth ball roll and lasting durability. Nylon turf is resilient and maintains a consistent playing surface. In contrast, polyethylene turf feels softer and is often more affordable, making it a popular choice for homeowners.
Next, explore filling alternatives, as the selection of filling is vital for enhancing your putting green’s effectiveness. Silica sand is a common option due to its excellent drainage properties and stability, which helps keep the grass blades upright. Alternatively, crumb rubber provides cushioning, making it ideal for high-traffic areas, but it may require more upkeep than other options. Organic infill options, such as cork or coconut fibers, are gaining traction among environmentally conscious consumers for their sustainability and improved drainage capabilities.
Additionally, purchasing quality borders is essential for maintaining the shape of your putting area and preventing grass encroachment. Consider using treated wood or durable synthetic materials that can withstand various weather conditions, ensuring longevity and stability.
Before starting your installation, gather all necessary tools. Make sure you have a shovel, rake, utility knife, and a compactor ready to level the base for a smooth finish.
Finally, plan for drainage. If your area experiences drainage issues, it’s advisable to incorporate a drainage layer beneath the grass. Neglecting drainage can lead to water buildup, affecting both playability and the longevity of the grass. Proper preparation and material selection can significantly enhance the performance and durability of a roll out putting green.
Install Your Putting Green: Step-by-Step Process
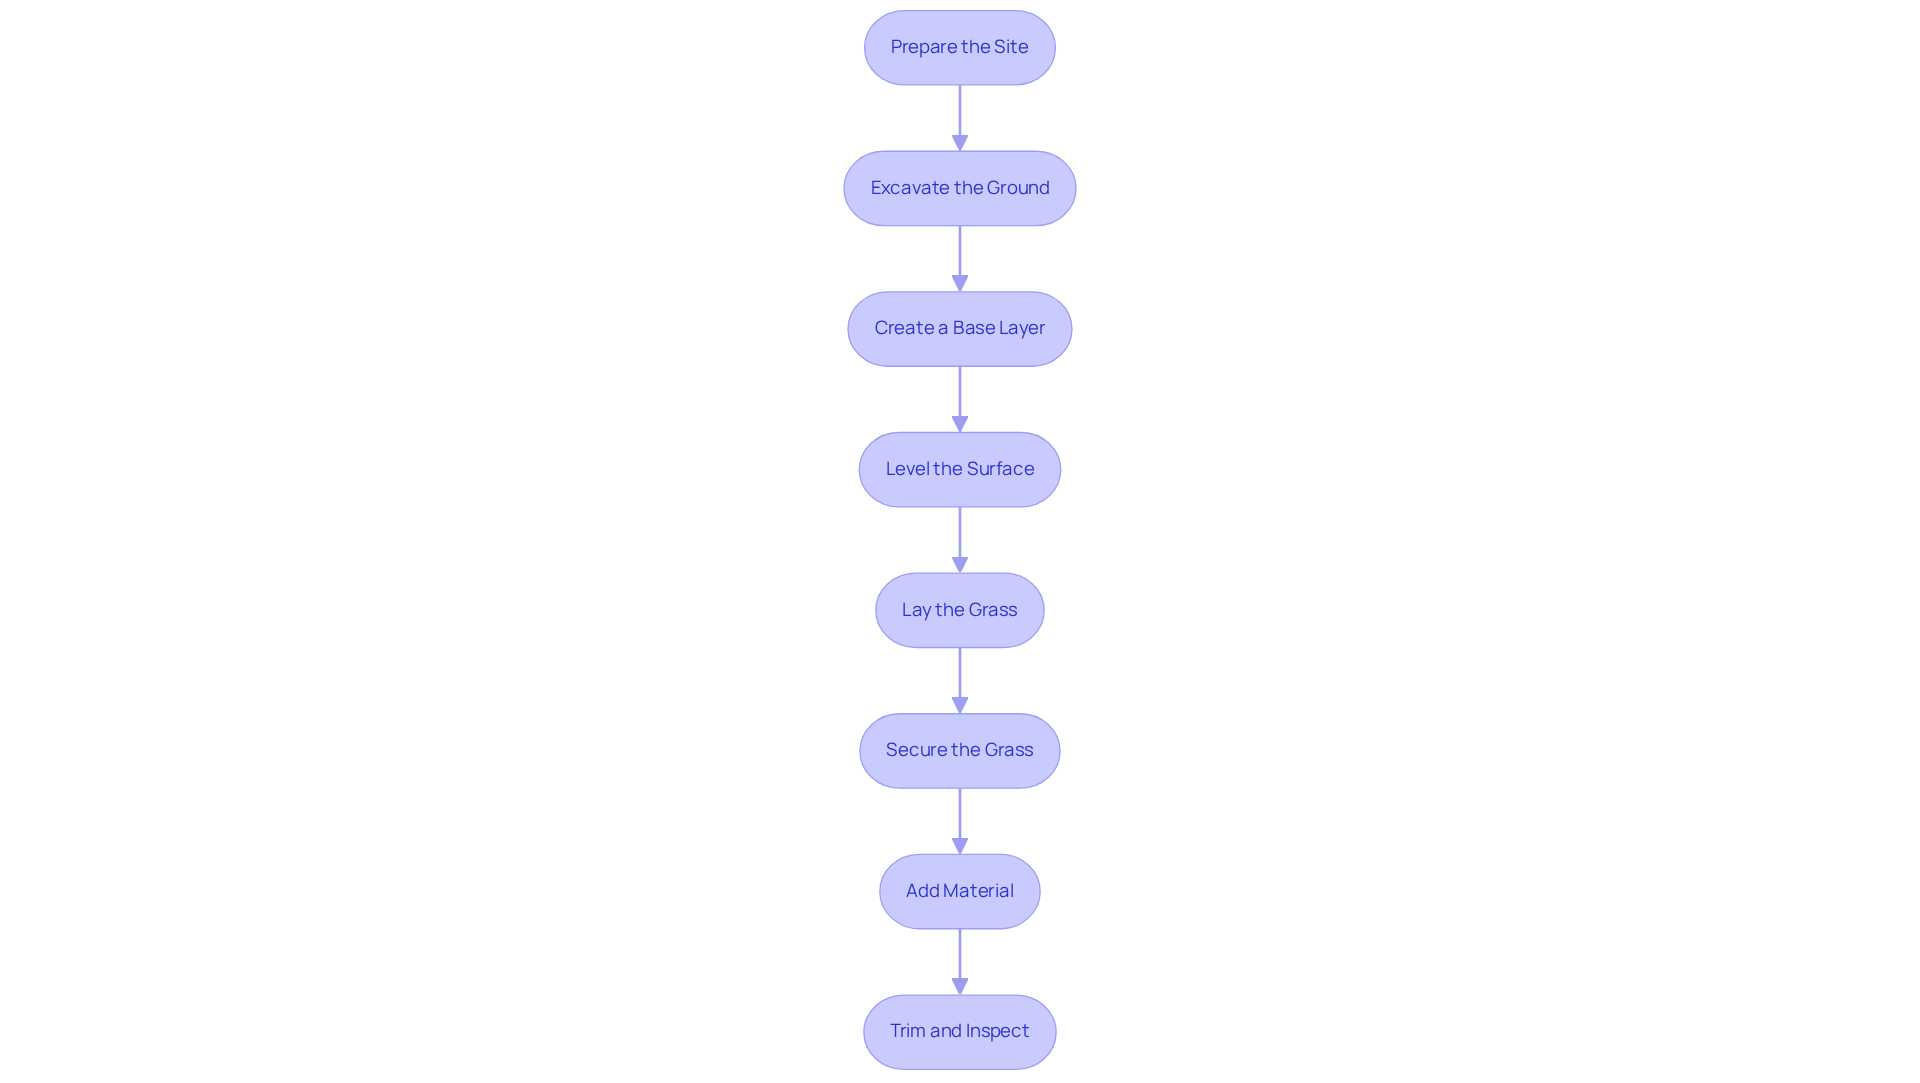
To ensure a successful installation of your roll out putting green, start by preparing the site meticulously. Begin by removing any existing grass, plants, or debris from the installation site. This step ensures a clean slate for rolling out the putting green.
Next, excavate the ground by digging down approximately 3-5 inches to create a level base. This depth will support the grass and infill materials, ensuring a stable foundation.
After that, create a base layer by filling the excavated area with crushed stone or gravel, about 2-4 inches deep. Compact this layer thoroughly to create a solid foundation that supports the grass.
Then, level the surface using a rake to smooth out the base, checking for any low spots that may require additional filling. For optimal playability, it is essential to roll out putting green on a level surface.
Now, lay the grass by rolling out the synthetic grass over the prepared base, ensuring it fits snugly and overlaps at the seams. Use a utility knife to cut the grass to the desired shape.
Secure the grass by attaching the edges to the ground using landscape staples or adhesive. This keeps the grass in place and preserves the quality of your roll out putting green.
Next, add material by evenly distributing your selected filler substance across the surface of the grass. Use a broom to work the material into the fibers, ensuring it is well-distributed for optimal performance.
Finally, trim any excess turf around the edges and ensure the surface is smooth. Inspect for areas that may need additional infill or adjustments to achieve a perfect finish. Achieving a flawless finish requires attention to detail at every step of the process.
Maintain Your Putting Green for Longevity
To ensure optimal performance, regular maintenance of your roll out putting green is essential.
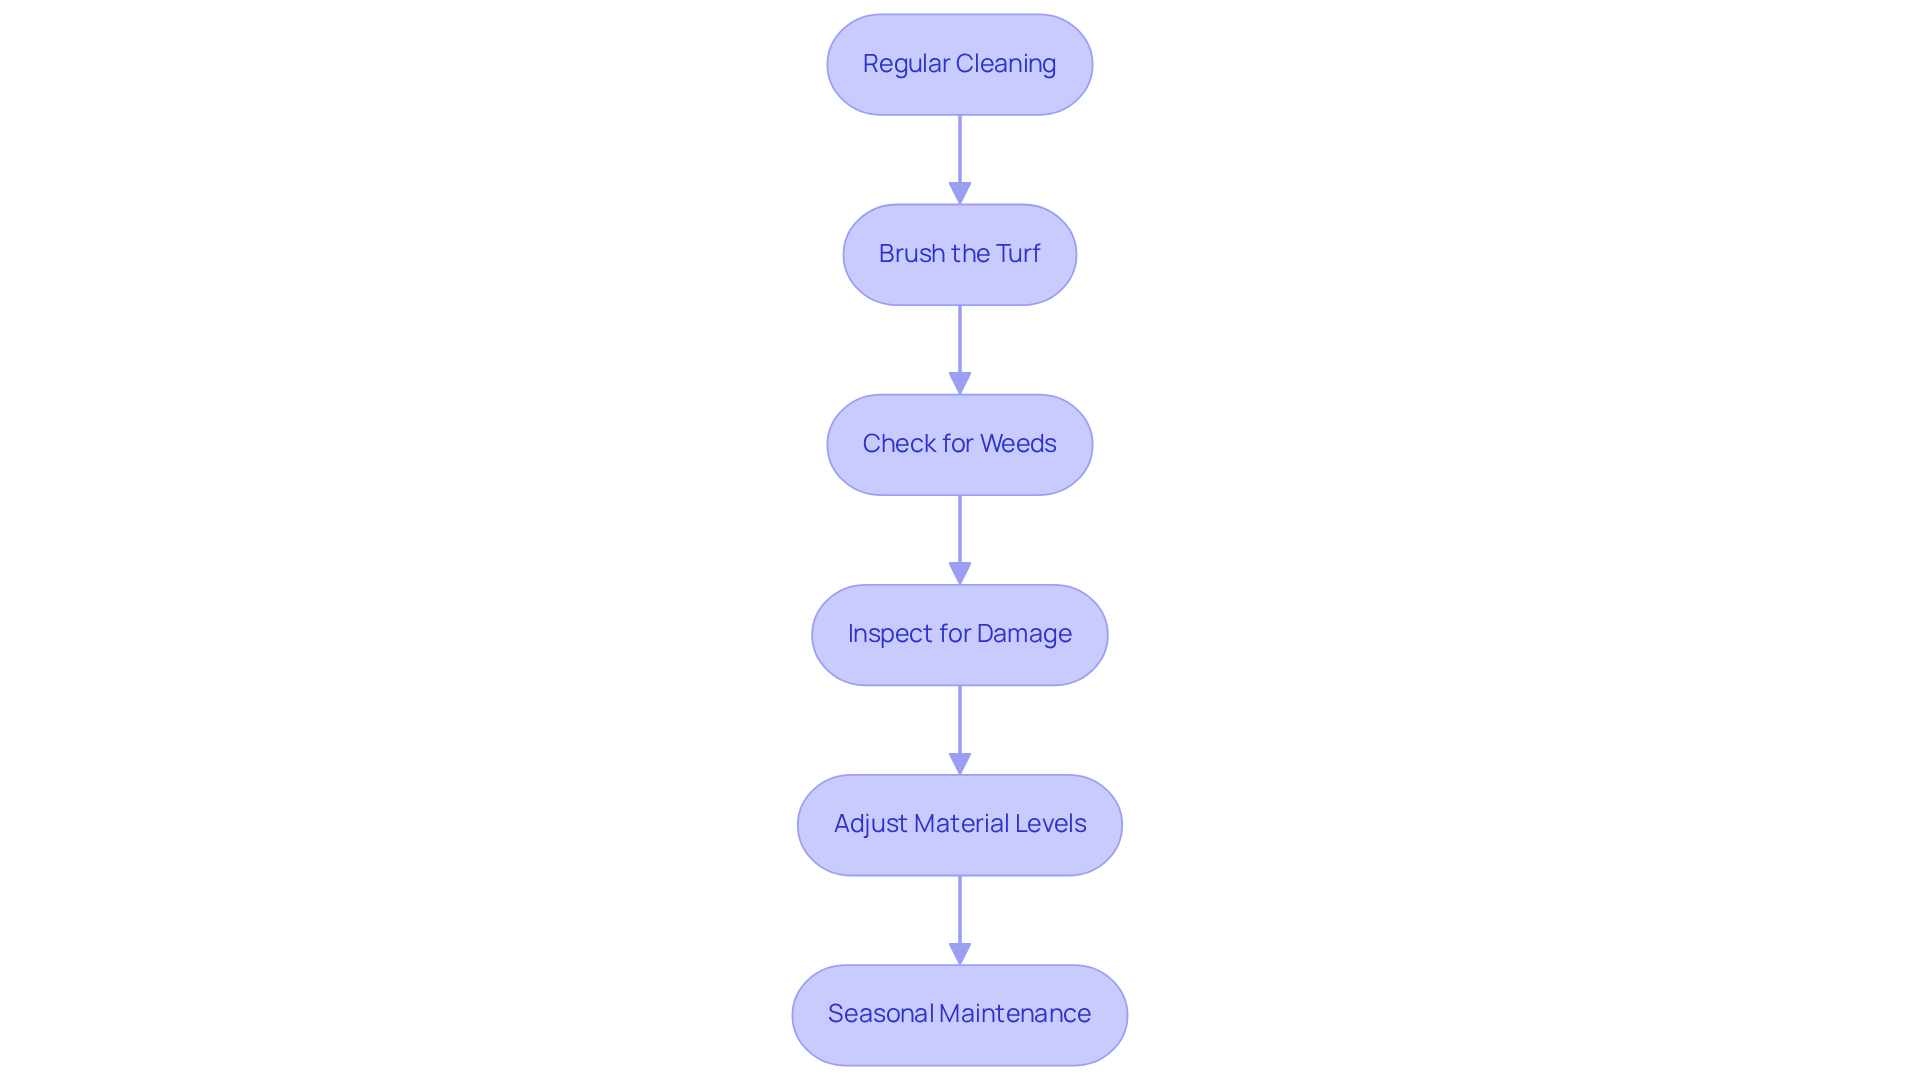
- Regular Cleaning: Maintain a clean surface by removing debris such as leaves, twigs, and dirt. Use a leaf blower or a stiff-bristled broom to ensure the green remains free from obstructions that could affect playability.
- Brush the Turf: Regularly brush the turf fibers to keep them upright. This practice is vital for sustaining a smooth surface and avoiding matting, which can impede performance.
- Check for Weeds: Inspect the edges of the putting green for any encroaching weeds or grass. If left unchecked, weeds can compromise the quality of your putting green. Timely elimination is crucial to maintaining the integrity of the grass.
- Inspect for Damage: Make it a habit to check for any signs of wear or damage on the turf. Neglecting these checks can lead to costly repairs and a shorter lifespan for your green.
- Adjust Material Levels: Over time, the filler may settle or wash away. Regularly check the levels and replenish infill as necessary to maintain the desired surface texture and performance.
- Seasonal Maintenance: Depending on your climate, implement seasonal maintenance tasks such as rinsing the grass to remove dust or pollen and inspecting drainage systems to ensure they function properly. This proactive approach helps sustain the course’s playability throughout the year. Additionally, be cautious of potential mildew if water cannot drain or evaporate, and avoid using strong chemicals that could damage the turf. Ultimately, consistent upkeep not only preserves the quality of your roll out putting green but also safeguards your investment.
Conclusion
Transforming your yard into a golfer’s paradise requires careful planning and execution, but the rewards are well worth the effort. Assessing your yard’s dimensions, sunlight exposure, and drainage needs is crucial for a successful installation of your putting green. Choosing the right turf and infill materials directly impacts the functionality and longevity of the green. Following a structured installation process ensures a solid foundation and a smooth surface, while regular maintenance practices help sustain its quality over time.
Investing time and effort into building and maintaining a putting green not only enhances your home but also cultivates a space for skill development and relaxation. Embrace the opportunity to improve your golfing skills right in your backyard, and enjoy the countless hours of practice and enjoyment that come with it.
Frequently Asked Questions
How do I start creating an effective golf practice area at home?
Begin by measuring your yard to determine the available space, which typically ranges from 150 to 500 square feet for residential golf surfaces.
What size area is ideal for a golf practice space?
Smaller areas are suitable for compact spaces, while larger areas can accommodate more complex designs and multiple holes.
Why is sunlight important for a golf practice area?
The putting surface should ideally receive at least 6 hours of direct sunlight daily to maintain the integrity and appearance of the artificial grass.
What should I consider regarding drainage in my yard?
Inspect your yard for low spots where water may collect, as efficient drainage is essential to avoid water accumulation that can affect playability and maintenance.
How can trees and structures impact the golf practice area?
Trees, shrubs, or structures may obstruct installation or gameplay, so it’s important to ensure adequate space around the area for easy access and upkeep.
Why is it important to clarify my objectives for the practice area?
Understanding your goals, whether for practice, entertainment, or both, will guide your design choices and material selection for the golf practice area.
List of Sources
- Assess Your Space and Requirements
- Backyard Putting Green Sizes: How Big Should Yours Be? (https://texasturfusa.com/austin-landscape-design/the-perfect-backyard-putting-green-size-a-golfers-guide)
- Avoid Costly Mistakes: Backyard Putting Green Installatio (https://heavenlygreens.com/blog/avoid-backyard-putting-green-mistakes)
- How to Decide on the Right Backyard Putting Green Size – Synthetic Grass DFW (https://syntheticgrassdfw.com/putting-greens/how-to-decide-on-the-right-backyard-putting-green-size)
- 5 Backyard Putting Green Installation Mistakes & How to Fix Them (https://aglgrass.com/blogs/backyard-putting-green-mistakes)
- What To Consider Before Installing Backyard Putting Green Turf (https://grizzlyoutdoor.com/blog/what-to-consider-before-installing-backyard-putting-green-turf)
- Choose the Right Turf and Materials
- standarddrivetrain.com (https://standarddrivetrain.com/best-turf-for-putting-green)
- Artificial Turf Infill Options (Pros, Cons & Best Uses) | US Turf (https://usturfsandiego.com/news/artificial-turf-infill-options)
- Why Is Infill Crucial for Synthetic Turf Putting Green Installations? – SGW Sacramento (https://sgwsacramento.com/blog/why-is-infill-crucial-for-synthetic-turf-putting-green-installations)
- 2026’s Biggest Artificial Turf Putting Green Design Trends – OC Turf & Putting Greens (https://octurfandputtinggreens.com/2026s-biggest-artificial-turf-putting-green-design-trends)
- 5 Popular Artificial Turf Putting Green Design Trends to Try in 2026 – SGW Sacramento (https://sgwsacramento.com/blog/5-popular-artificial-turf-putting-green-design-trends-to-try-in-2026)
- Install Your Putting Green: Step-by-Step Process
- kaizengolf.com.au (https://kaizengolf.com.au/blogs/news/how-i-built-my-own-diy-backyard-putting-green?srsltid=AfmBOoqVDjXso53OtfQPK9d-jfLoc4yBumJLIRXZ5FazGVsP6mBYOt5h)
- How To Make Your Backyard Putting Green Dream a Reality (https://usga.org/content/usga/home-page/course-care/green-section-record/62/issue-17/how-to-make-your-backyard-putting-green-dream-a-reality.html)
- How to Install a Putting Green: Step-by-Step Guide for Homeowners (https://californiaturfco.com/how-to-install-a-putting-green-step-by-step-guide-for-homeowners)
- turffactorydirect.com (https://turffactorydirect.com/blog/how-to-install-a-putting-green-in-your-backyard?srsltid=AfmBOopQ4j8deZ8Lq0K2BQVIww12gur5Le0EOUQf9vQ8VN67EXnJez8o)
- DIY Putting Green Installation: A Step-by-Step Guide (https://artificialturfexpress.com/blog/installing-the-best-putting-greens-in-your-yard-the-ultimate-diy-guide)
- Maintain Your Putting Green for Longevity
- Tour Greens | Putting Green Maintenance (https://tourgreens.com/putting-green-maintenance.html)
- Artificial Golf Greens Maintenance Tips (https://southwestgreens.com/blog/artificial-golf-greens-maintenance-tips)
- How to Clean and Maintain Putting Green Turf: A Seasonal Guide (https://backninegreens.com/blog/how-to-clean-and-maintain-putting-green-turf-seasonal-checklist)
- Artificial Putting Green Maintenance: Year-Round Care Guide (https://aglgrass.com/blogs/artificial-putting-green-maintenance)
- wintergreengrass.com (https://wintergreengrass.com/10-tips-for-maintaining-an-artificial-grass-putting-green)