
Introduction
Transforming a backyard into a golfer’s paradise with an outdoor synthetic putting green requires meticulous planning and execution. This article explores essential best practices that enhance both the functionality and enjoyment of synthetic putting greens, including:
- Selecting the ideal location and materials
- Establishing a robust maintenance routine
Homeowners often struggle with the complexities of planning and executing a synthetic putting green. Addressing these complexities is essential for maximizing the performance and longevity of your investment.
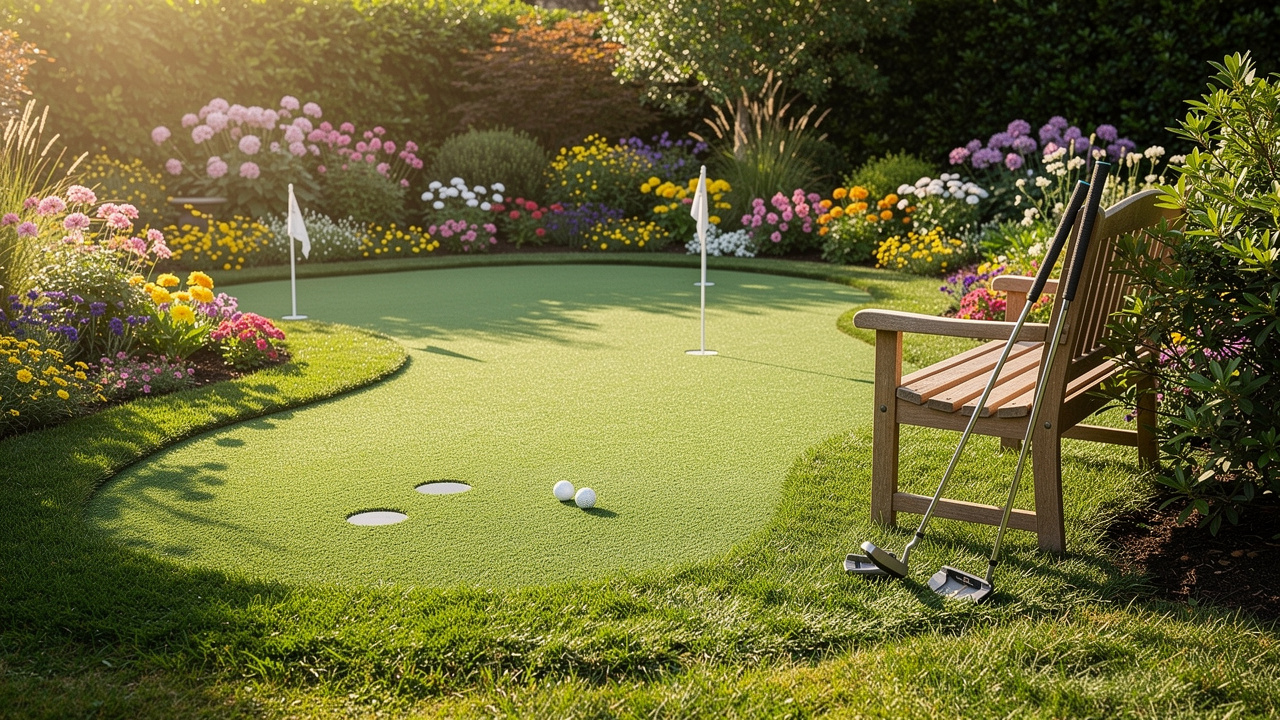
Determine Optimal Location and Size for Your Putting Green
Choosing the right location for your outdoor synthetic putting green is crucial to prevent maintenance issues and improve your golfing experience. Here are key considerations:
- Sunlight Exposure: Ensure the area receives adequate sunlight for at least 6-8 hours a day. This exposure is crucial for maintaining the grass’s integrity and preventing mold growth.
- Drainage: Choose a location with good drainage to avoid water pooling, which can damage the turf. A slight slope can facilitate drainage, so consider the natural topography of your yard when selecting the site.
- Size Considerations: The average dimensions for residential putting areas in Kansas and Missouri typically range from 200 to 500 square feet. Smaller areas (150-300 sq. ft.) are suitable for casual practice, while larger spaces (300-500 sq. ft.) can accommodate more complex designs and multiple holes, enhancing gameplay variety.
- Proximity to Other Features: Position the foliage away from trees and shrubs to minimize debris and shade. Additionally, consider its distance from your home and other outdoor features to create a cohesive landscape design.
Choosing the right site and dimensions for an outdoor synthetic putting green can enhance your outdoor space and create an enjoyable golfing experience. With over 15 years of experience and more than 80,000 satisfied customers, Hall Turf is dedicated to delivering quality installations. Scott Sachse, a satisfied customer, praised the team’s attention to detail and professionalism. Brock, an essential team member, is recognized for his creativity and commitment to achieving results punctually and within budget, ensuring that your lawn meets your expectations. Hall Turf also offers comprehensive technical specifications and project assistance from concept through installation, ensuring a seamless process.

Select High-Quality Materials and Turf for Longevity and Performance
Selecting the right materials for your outdoor synthetic putting green is crucial for achieving both realism and durability. Here are some best practices to consider:
- Surface Type: Choose nylon or polyethylene grass, as these materials provide a realistic feel and outstanding durability. Nylon is particularly renowned for its resilience, making it ideal for areas with heavy foot traffic.
- Infill Material: Utilize high-quality infill materials such as sand or rubber to enhance the grass’s performance. Infill stabilizes the grass fibers, providing a true roll for the golf ball and enhancing overall playability. For leisure putting greens, 2 to 4 pounds of Envirofill per square foot is recommended, while professional greens require 5 to 7 pounds per square foot.
- Backing Material: Ensure the grass includes a sturdy backing that can endure various weather conditions. A well-constructed backing prevents the grass from shifting or wrinkling over time, maintaining its integrity.
- UV Resistance: Opt for turf that is UV stabilized to prevent fading and degradation from sun exposure. This feature helps sustain the landscape’s appearance and functionality for years, ensuring it remains a vibrant part of your outdoor space.
Selecting the appropriate materials can be overwhelming given the numerous options on the market. However, using subpar materials may result in a less enjoyable playing experience and increased maintenance costs. When you invest in quality materials, you boost the performance of your outdoor synthetic putting green and extend its lifespan, making it a smart choice for any golf lover.

Implement Regular Maintenance Routines for Optimal Performance
To ensure your synthetic putting surface remains in optimal condition, a consistent maintenance routine is essential. Here are some best practices to follow:
- Debris Removal: Regularly clear the area of leaves, twigs, and other debris to prevent damage and maintain a clean appearance. Utilizing a leaf blower or a stiff broom is effective for this task, ensuring that the surface remains smooth and playable. Experts in landscape maintenance recommend making it a habit to clear away debris weekly, as this can significantly enhance the longevity of your green.
- Brushing: Groom the fibers with a stiff-bristled broom or a specialized grass brush. This practice keeps the grass blades upright and ensures a smooth putting surface. Aim to brush the grass at least once a month, or more often during peak usage times. Regular brushing can also help prevent matting of fibers, which is common in areas with heavy foot traffic.
- Rinsing: Rinsing the surface occasionally with water helps eliminate dust and dirt buildup. This is particularly important in dry climates where dust can accumulate quickly, affecting both the appearance and performance of the green. A light spray with a garden hose every few weeks can effectively wash away residues without displacing the infill. For stubborn stains, a diluted bleach cleaner (50% bleach and 50% water) can be used to maintain cleanliness.
- Infill Maintenance: Regularly check the infill levels, especially in high-use areas, and top up as needed to maintain the turf’s performance. Keeping the right amount of infill is key for a realistic ball roll and cushioning, which makes your playing experience much better. A well-maintained outdoor synthetic putting green not only improves playability but also enhances property value and enjoyment.
- Weed Control: Inspect the edges of the turf for any weed growth and remove them promptly to prevent them from spreading. Using turf-safe weed preventers can help manage weeds around the edges, ensuring a clean and well-maintained appearance.
By adhering to these maintenance practices, you not only protect your investment but also enhance your overall enjoyment of the game.

Evaluate Professional Installation vs. DIY for Your Project
When considering the installation of your synthetic putting surface, you must weigh the benefits of professional installation against the DIY approach. Evaluating which is best for you involves considering several factors:
-
Professional Installation: Hiring experts like Hall Turf ensures a high-quality installation with minimal hassle. Experts have the skills and equipment required to establish a smooth, accurately rolling surface. They also provide valuable insights on design and materials, ensuring optimal drainage and grading. Hall Turf is a licensed contractor with a wealth of knowledge, including over 300 playground installations, which enhances their credibility. Customers have praised Hall Turf’s team for their professionalism and attention to detail. For example, Scott Sachse remarked, “They recently set up a putting area at our new home, and they did an exceptional job. Brock is extremely professional, timely, and responsive.”
- Pros:
- High-quality results that meet performance standards expected by golfers.
- Time-saving, as professionals can complete the project in just a few days.
- Expert advice on design and materials tailored to your specific needs.
- Warranty on installation, providing peace of mind regarding durability and maintenance.
- Professional tune-ups for high-traffic areas should be scheduled every 2 to 5 years to maintain performance.
- Cons:
- Higher upfront costs compared to DIY.
- Less control over the process, as you rely on the installer’s expertise and schedule.
- Pros:
-
DIY Installation: For those who enjoy home improvement, taking on a DIY installation can be a fulfilling challenge. It allows for greater control over the design and materials used, but it comes with its own set of challenges.
- Pros:
- Lower costs, as you save on labor expenses.
- Flexibility in design, allowing you to customize the space to your preferences.
- Personal satisfaction from completing the project yourself.
- Cons:
- Requires significant time and effort, often taking several weekends to complete, including excavation that typically requires removing existing grass/soil to a depth of 4-6 inches.
- Mistakes in installation can lead to significant issues, impacting the overall playability of your putting surface.
- Lack of professional expertise may lead to issues that are difficult to fix later.
- Pros:
Choosing the right installation method can significantly impact the longevity and enjoyment of your putting green. A well-built practice area can endure 15 years or longer with appropriate materials and construction. If you choose to go the DIY route, thorough research and adherence to best practices are essential to achieve the best results. Regular maintenance, such as debris removal and seam inspections, is crucial for extending the life of your putting green, regardless of the installation method chosen. As Les Boatright expressed, “Overall, I am extremely happy with the end product and Brock’s ability to get the job done, on time and on budget.

Conclusion
Selecting appropriate practices for your outdoor synthetic putting green is crucial for maximizing its effectiveness and durability. By concentrating on optimal location, quality materials, and regular maintenance, along with the choice between professional installation and DIY, golfers can enhance their game and improve their outdoor space.
Key considerations include:
- Ensuring adequate sunlight and drainage
- Selecting durable turf materials
- Implementing a consistent maintenance routine
These factors work together to provide a realistic and enjoyable putting experience while safeguarding your investment. Whether you choose professional assistance or decide to handle the project yourself, making informed choices is essential for achieving the best results.
Ultimately, a thoughtfully designed outdoor synthetic putting green transforms your backyard into a personal golfing haven. By following these best practices and leveraging the expertise of a reputable provider like Hall Turf, golfers can ensure their putting green remains a source of enjoyment and pride for years to come.
Frequently Asked Questions
What factors should I consider when choosing a location for my synthetic putting green?
Key factors include ensuring adequate sunlight exposure for at least 6-8 hours a day, selecting a site with good drainage to avoid water pooling, and considering the proximity to other features such as trees and shrubs to minimize debris and shade.
How does sunlight exposure affect my putting green?
Adequate sunlight exposure is crucial for maintaining the integrity of the grass and preventing mold growth, which can impact the quality of your putting green.
What is the importance of drainage for a putting green?
Good drainage prevents water pooling, which can damage the turf. A slight slope in the terrain can help facilitate drainage, enhancing the longevity and usability of the putting green.
What are the recommended sizes for residential putting greens?
Sizes typically range from 200 to 500 square feet. Smaller areas (150-300 sq. ft.) are suitable for casual practice, while larger spaces (300-500 sq. ft.) can accommodate more complex designs and multiple holes for varied gameplay.
How can the proximity to other landscape features affect my putting green?
Positioning the putting green away from trees and shrubs reduces debris and shade, which can enhance the overall golfing experience and maintain the quality of the turf.
What experience does Hall Turf have in installing putting greens?
Hall Turf has over 15 years of experience and has served more than 80,000 satisfied customers, ensuring quality installations and customer satisfaction.
Can Hall Turf assist with project support during the installation of a putting green?
Yes, Hall Turf provides comprehensive technical specifications and project assistance from concept through installation, ensuring a seamless process for customers.
How can I contact Hall Turf for inquiries or quotes?
You can contact Hall Turf at (816) 555-7890 or via email at info@hallturf.com for inquiries and quotes regarding synthetic putting greens and other services.
List of Sources
- Determine Optimal Location and Size for Your Putting Green
- Ensure a Perfect Outdoor Putting Green Installation With These 5 Tips – SGW Texas (https://sgwtexas.com/blog/2023/09/28/ensure-a-perfect-outdoor-putting-green-installation-with-these-5-tips)
- How to Build a Putting Green in Your Backyard: 5 Tips – Motz (https://themotzgroup.com/infill_blog/tips-for-installing-a-putting-green-in-a-backyard)
- 5 Backyard Putting Green Installation Mistakes & How to Fix Them (https://aglgrass.com/blogs/backyard-putting-green-mistakes)
- Create Your Perfect Synthetic Grass Putting Green: 5 Tips for Customizing Your Course – SGW Florida (https://sgwflorida.com/blog/create-your-perfect-synthetic-grass-putting-green-5-tips-for-customizing-your-course)
- Choose Your Dream Backyard Putting Green Size: Expert Guide (https://syntheticgrassdfw.com/putting-greens/how-to-decide-on-the-right-backyard-putting-green-size)
- Select High-Quality Materials and Turf for Longevity and Performance
- Artificial Grass Putting Greens | Synthetic Grass Warehouse (https://syntheticgrasswarehouse.com/products/putting-greens)
- The Best Artificial Grass for Putting Green (https://themotzgroup.com/infill_blog/the-best-artificial-grass-for-putting-greens)
- The Best Putting Green Turf: Buyer’s Guide (https://synlawn.com/articles/best-putting-green-turf-buyers-guide)
- synthetic-turf.com (https://synthetic-turf.com/stiofnorthtexas/sti-offers-the-best-synthetic-putting-greens-on-the-market-today)
- Artificial Turf Putting Greens | SGW Florida | Superior Turf Products (https://sgwflorida.com/products/putting-greens)
- Implement Regular Maintenance Routines for Optimal Performance
- Artificial Putting Green Maintenance: Year-Round Care Guide (https://aglgrass.com/blogs/artificial-putting-green-maintenance)
- Tour Greens | Putting Green Maintenance (https://tourgreens.com/putting-green-maintenance.html)
- Artificial Golf Greens Maintenance Tips (https://southwestgreens.com/blog/artificial-golf-greens-maintenance-tips)
- Evaluate Professional Installation vs. DIY for Your Project
- Backyard Putting Green: DIY or Professional Installation? (https://heavenlygreens.com/blog/backyard-putting-green-diy-vs-professional)
- DIY Backyard Putting Green vs Pro Install: Which is Best? (https://aglgrass.com/blogs/diy-backyard-putting-green)
- visionturfandlighting.com (https://visionturfandlighting.com/diy-vs-professional-installation-which-is-right-for-your-putting-green)