

Introduction
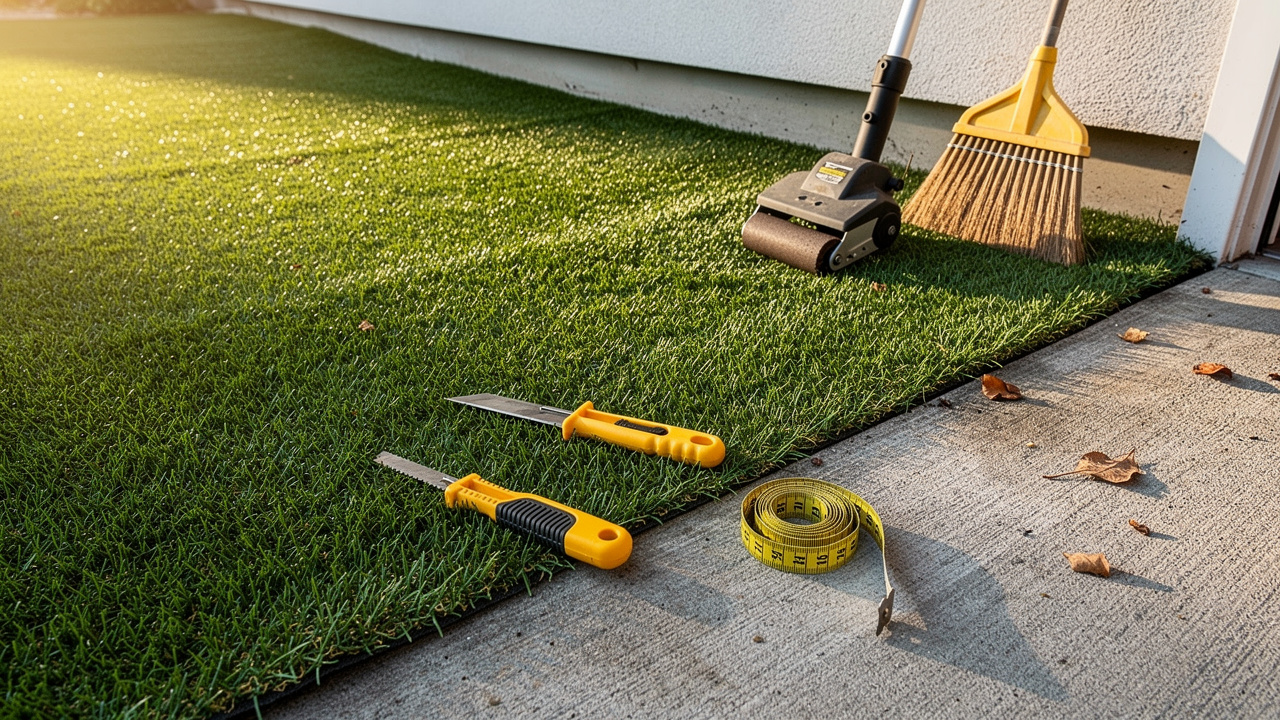
Installing turf on concrete involves navigating specific challenges that can impact the overall success of the project. This guide provides a detailed, step-by-step method for effectively laying artificial grass over concrete, focusing on durability and visual appeal. These challenges can compromise the installation’s effectiveness and longevity. Addressing these issues is crucial for ensuring a successful and lasting turf installation. Exploring these common pitfalls and their solutions equips homeowners and contractors with the knowledge to achieve success.
Understand the Unique Challenges of Installing Turf on Concrete
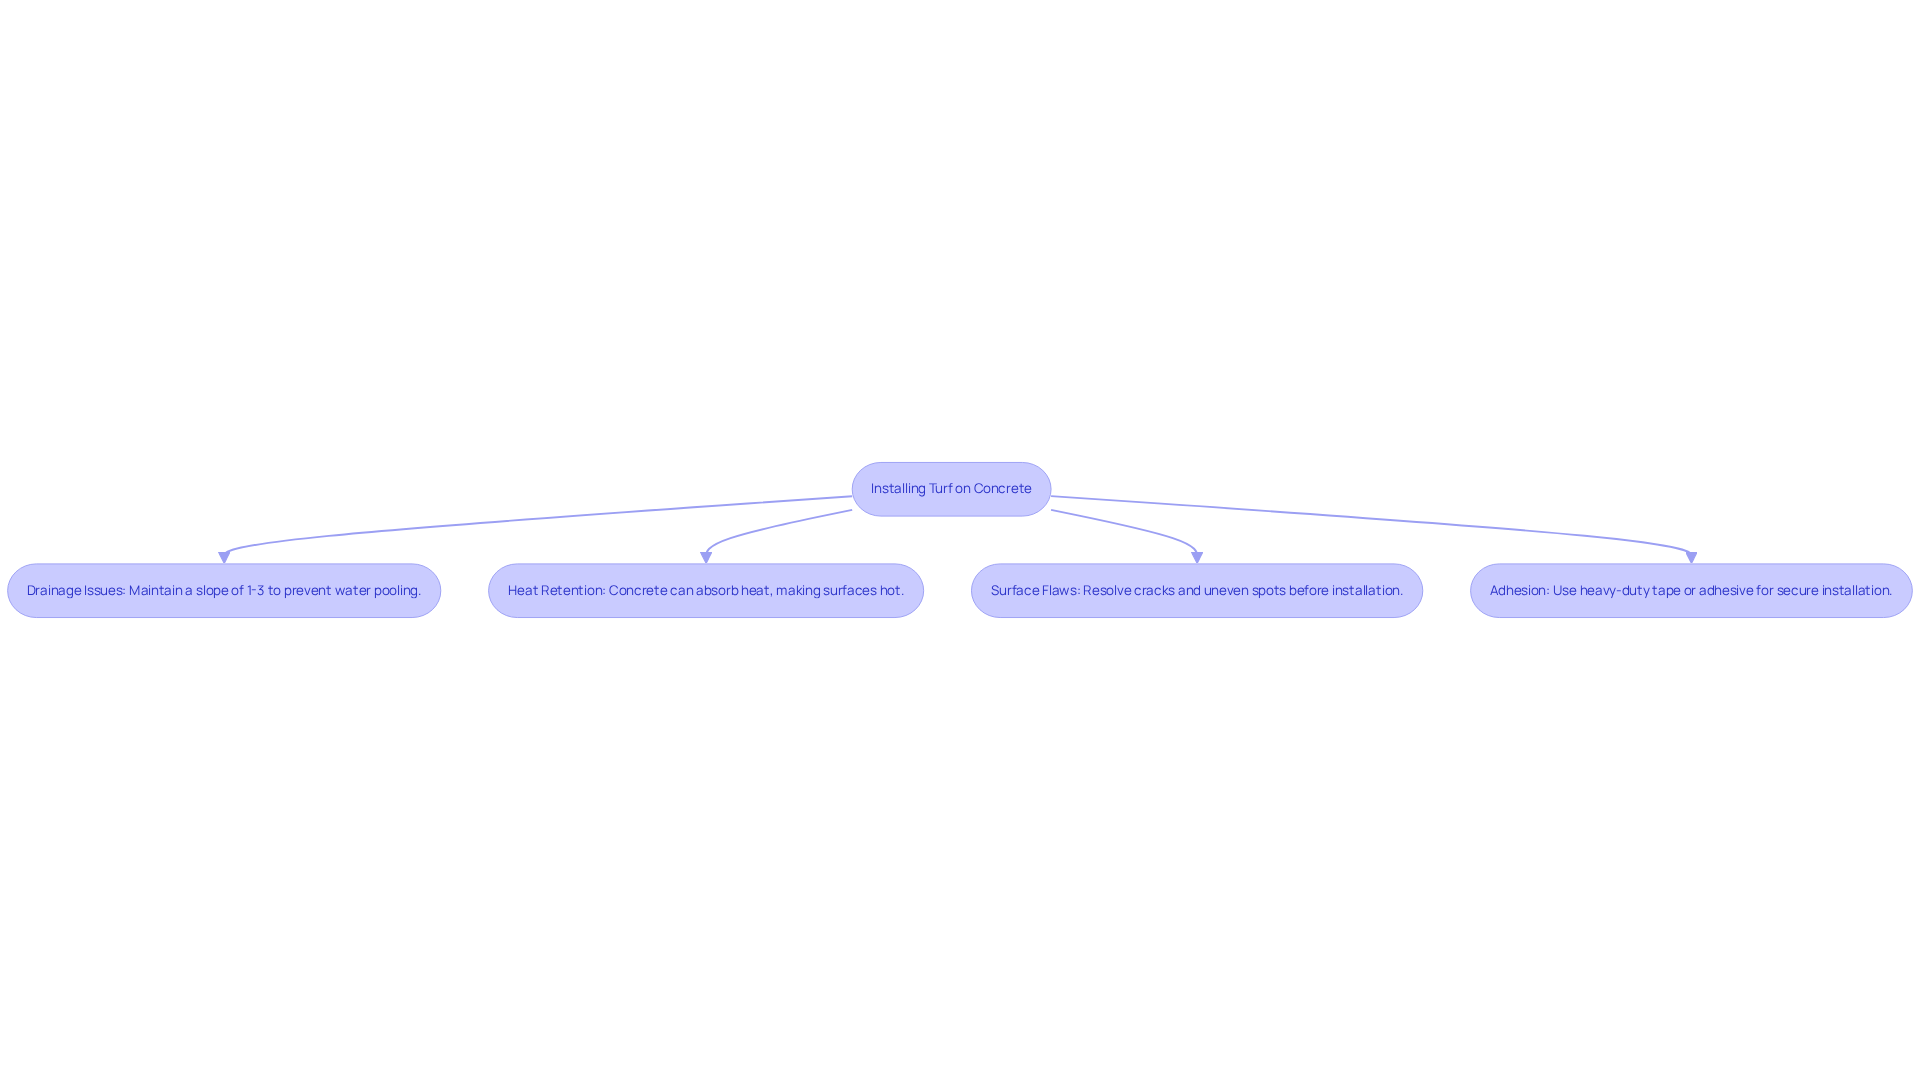
Installing turf on top of concrete involves navigating several significant challenges that require careful consideration. Key considerations include:
- Drainage Issues: Concrete surfaces hinder natural drainage, leading to water pooling beneath the turf. This buildup can cause mold and mildew, which can damage the grass. Maintaining a slight slope of 1-3% is crucial to facilitate drainage and prevent issues that can arise with turf on top of concrete.
- Heat Retention: Turf on top of concrete can lead to the concrete absorbing and retaining heat, making the surface uncomfortably hot, particularly in direct sunlight. This is especially important in areas where pets or children will play, as synthetic grass can heat up significantly more than natural grass, raising safety concerns.
- Surface Flaws: Prior to setup, it is crucial to resolve any cracks, uneven spots, or other defects in the concrete. These issues can impact both the appearance and performance of the grass when using turf on top of concrete, resulting in an uneven surface that may present safety hazards.
- Adhesion: Proper adhesion is vital for a successful installation. The glue applied must adhere effectively to the cement to prevent the grass from moving or rising over time. Utilizing heavy-duty outdoor double-sided tape or adhesive can fasten the synthetic grass to the cement effectively.
Addressing these challenges effectively can lead to a successful and durable installation that enhances outdoor spaces.
Gather Necessary Tools and Materials for Installation
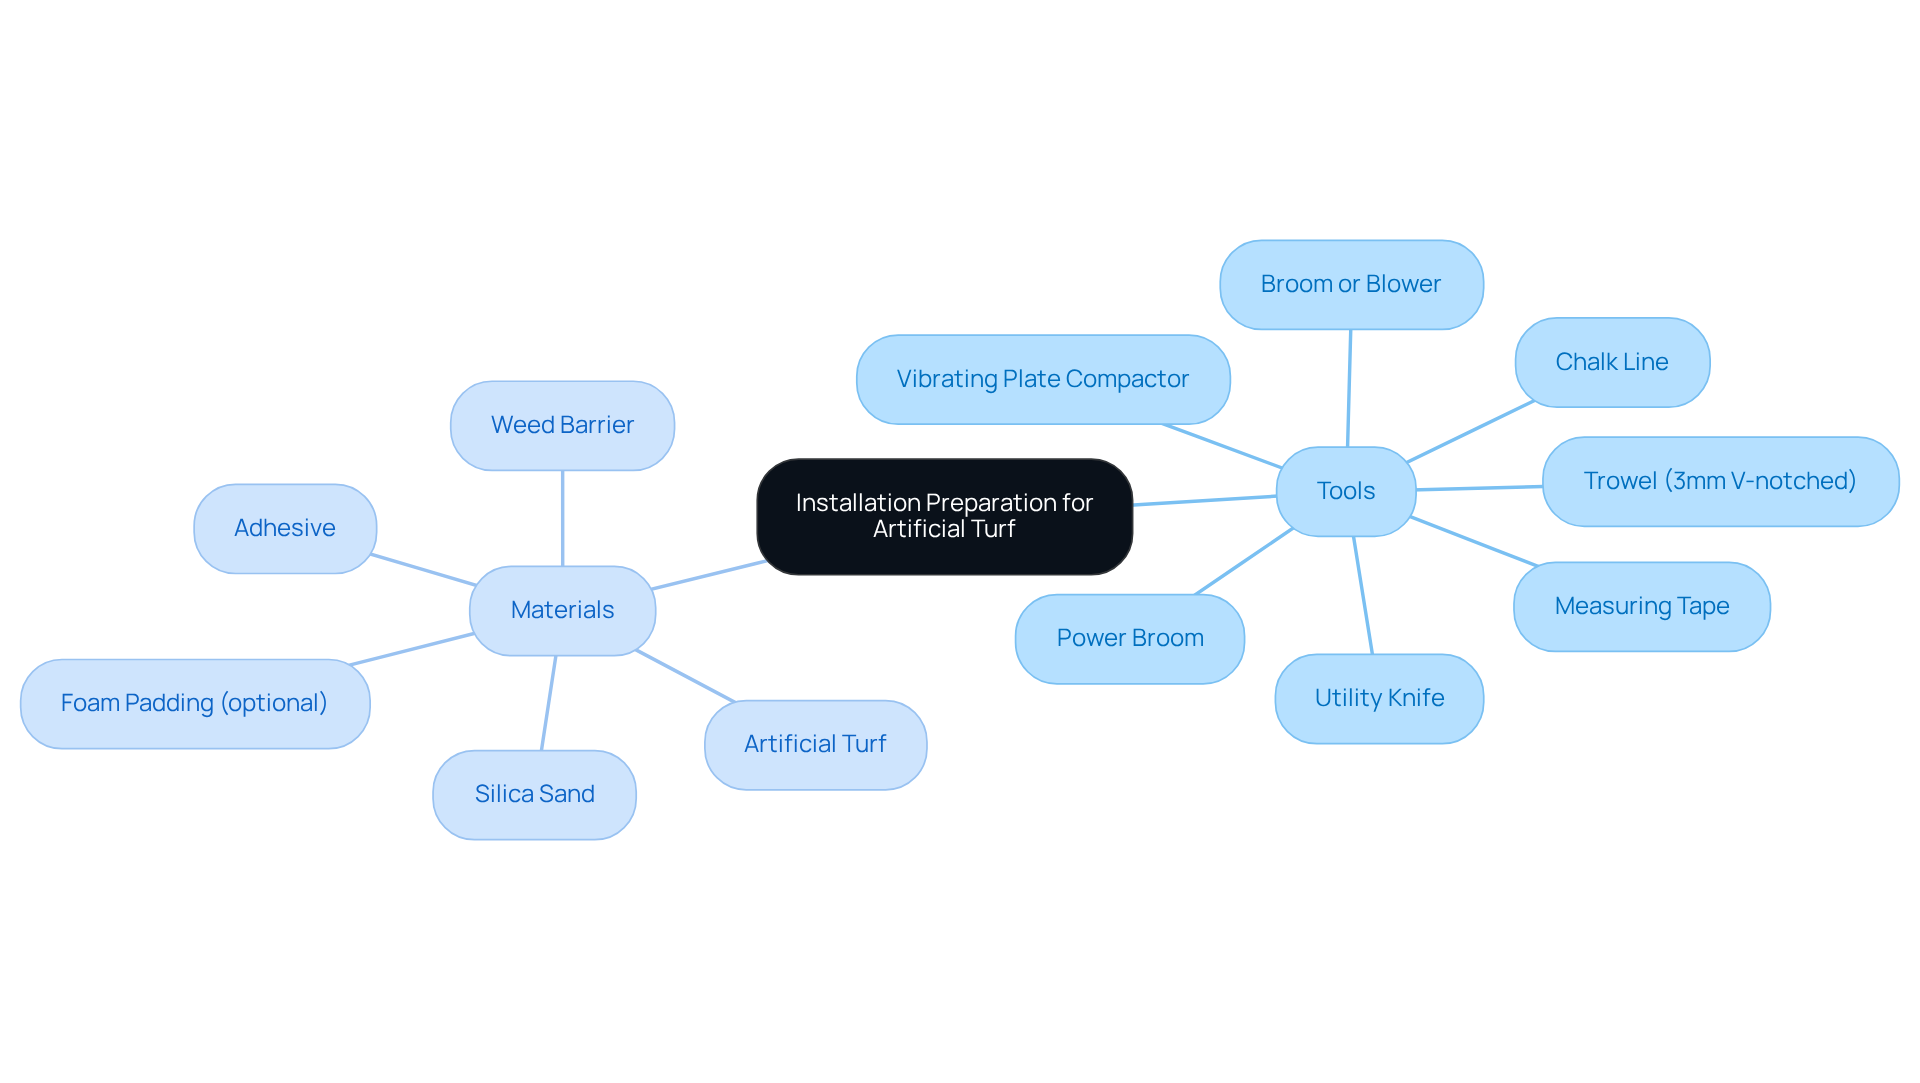
Achieving a professional installation of artificial turf requires careful preparation and the right tools. Before you begin the installation, ensure you have the following tools and materials:
Tools:
- Utility Knife: Essential for cutting the turf to the desired size, ensuring a precise fit.
- Measuring Tape: Important for accurately measuring the setup area to avoid errors.
- Broom or Blower: Used to thoroughly clean the concrete surface before installation, ensuring proper adhesion.
- Trowel (3mm V-notched): Ideal for applying adhesive evenly across the surface.
- Power Broom: Assists in securing the surface and infill, ensuring a professional finish.
- Chalk Line: Useful for marking straight lines on the concrete, aiding in accurate placement.
- Vibrating Plate Compactor: Crucial for proper compaction of the sub-base, ensuring a solid foundation.
Materials:
- Artificial Turf: Select high-quality turf that meets your specific needs, ensuring durability and aesthetics.
- Adhesive: A strong adhesive specifically designed for synthetic grass is crucial for a secure installation.
- Silica Sand: This infill material helps keep the grass blades upright and provides cushioning for comfort.
- Foam Padding (optional): Adding foam padding beneath the surface can enhance comfort and safety, especially in play areas.
- Weed Barrier: Installing a weed barrier is advised to prevent weeds from growing beneath the artificial grass.
Prior to setup, ensure to clear away existing grass, roots, mulch, and other barriers from the surface, and dig out the soil up to 2-4 inches deep to prepare the foundation for synthetic grass. When you have these tools and materials ready, the setup process becomes much simpler, helping you achieve that professional look. Ultimately, thorough preparation is the key to a successful and long-lasting artificial turf installation.
Prepare the Concrete and Lay the Turf: Step-by-Step Instructions
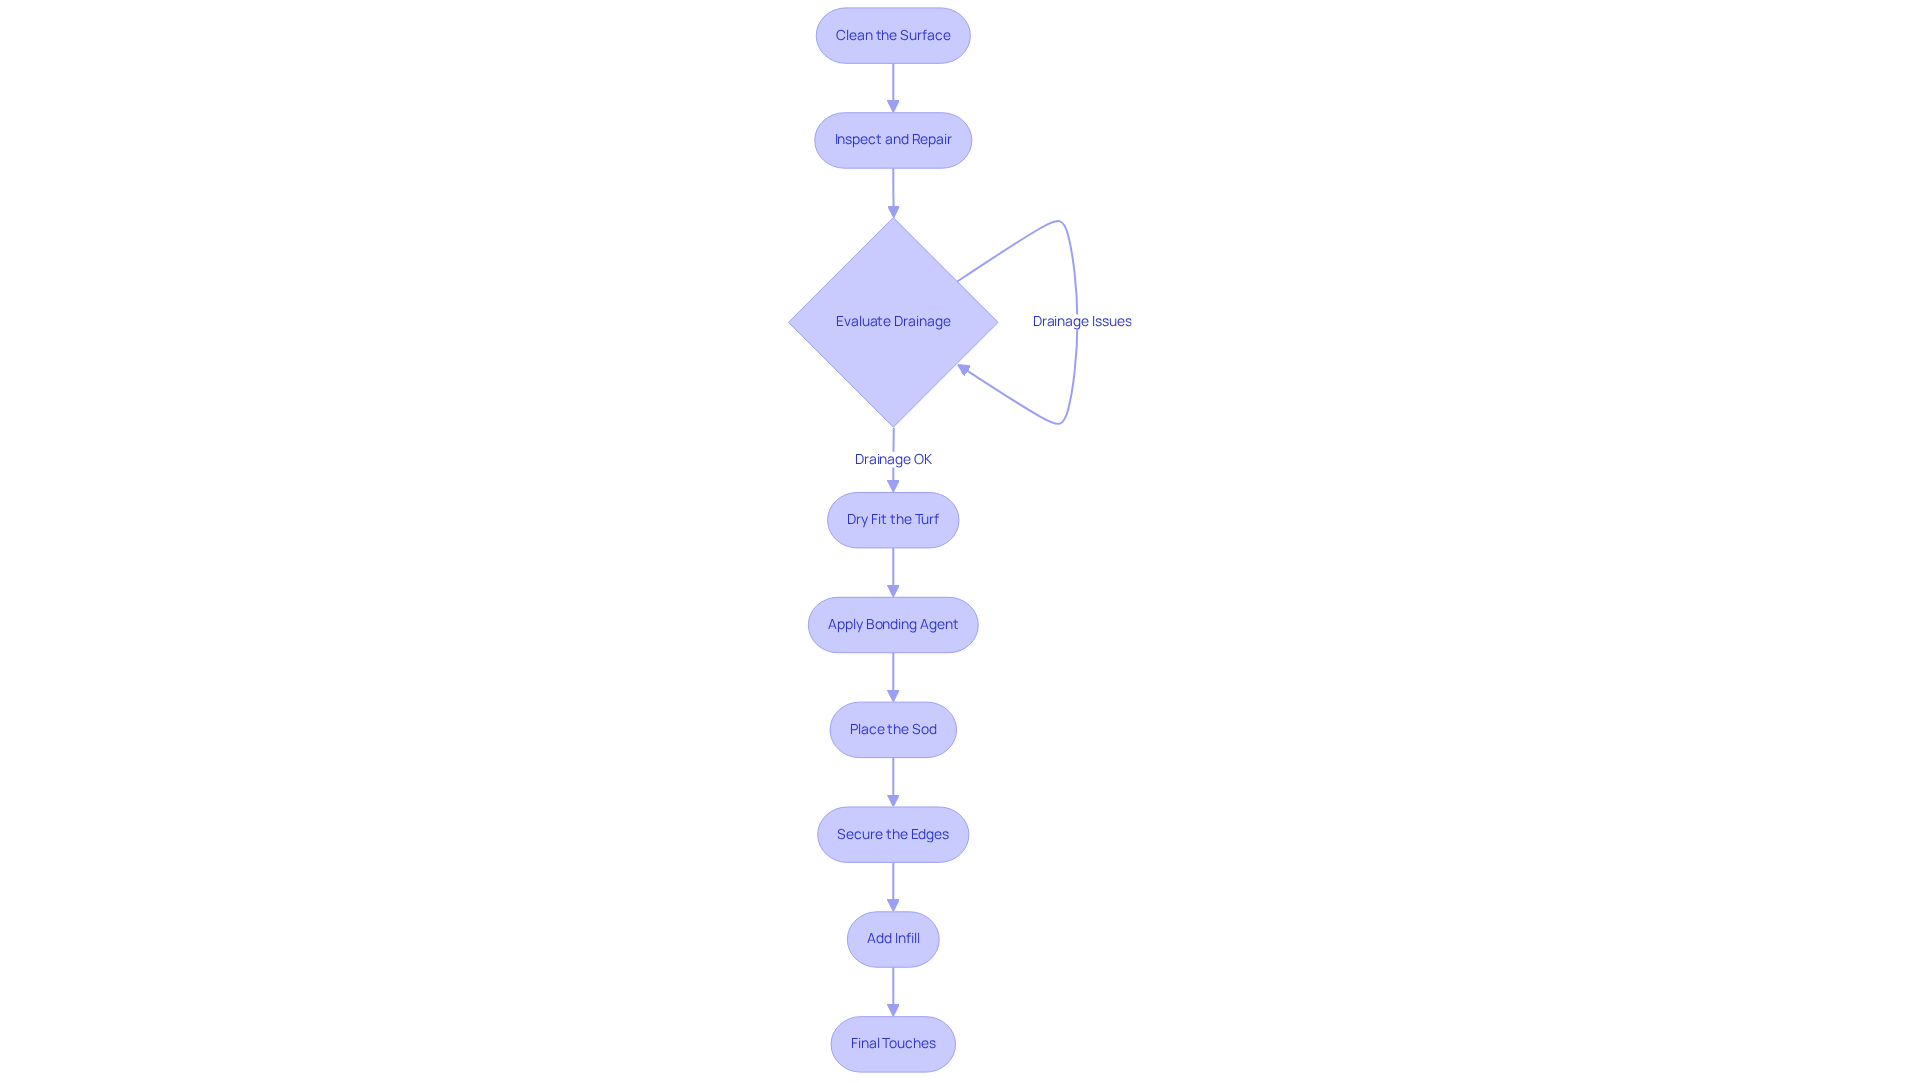
To achieve a durable and visually appealing turf installation, follow these essential steps carefully:
- Clean the Surface: Begin by using a broom or blower to thoroughly remove all debris, dirt, and dust from the slab. A clean surface is essential for ensuring proper adhesion of the grass when laying turf on top of concrete.
- Inspect and Repair: Carefully check for any cracks or uneven areas in the surface. Utilize a solid filler to fix flaws, ensuring a smooth surface for the installation of turf on top of concrete.
- Evaluate Drainage: Before moving forward, evaluate the drainage of the cement. If water collects on the surface, drill drainage holes with a 16mm bit and fill them with 10mm shingle to avoid moisture issues.
- Dry Fit the Turf: Place the turf on the slab without using glue to verify the fit. Make any necessary adjustments by trimming the edges with a utility knife to ensure a perfect fit for the turf on top of concrete.
- Apply Bonding Agent: Using a 3mm V-notched trowel, apply a high-quality bonding agent, such as XGS Turf Glue or Mapei PU-1K, to the concrete in manageable sections. Follow the manufacturer’s instructions for the glue to ensure proper application and bonding.
- Place the Sod: Carefully roll the grass onto the glue, starting from one end and working your way to the other. Press down firmly to ensure good contact with the adhesive, which is essential for a secure setup of turf on top of concrete.
- Secure the Edges: Use a power broom to secure the edges of the grass, ensuring it adheres well to the concrete. Not securing the edges can lead to lifting or shifting of the turf on top of concrete, which compromises its integrity.
- Add Infill: If using infill, spread a light layer of silica sand evenly across the grass. This helps keep the blades upright, provides cushioning, and improves UV protection.
- Final Touches: Trim any excess turf around the edges and ensure everything is securely in place. Allow the adhesive to cure according to the manufacturer’s instructions before using the area.
A meticulous installation process not only enhances the aesthetic appeal but also ensures long-lasting performance of your turf. Hall Turf, a licensed contractor with more than 15 years of experience, is recognized for its professionalism and attention to detail, ensuring that your grass setup meets the highest standards.
Troubleshoot Common Installation Issues
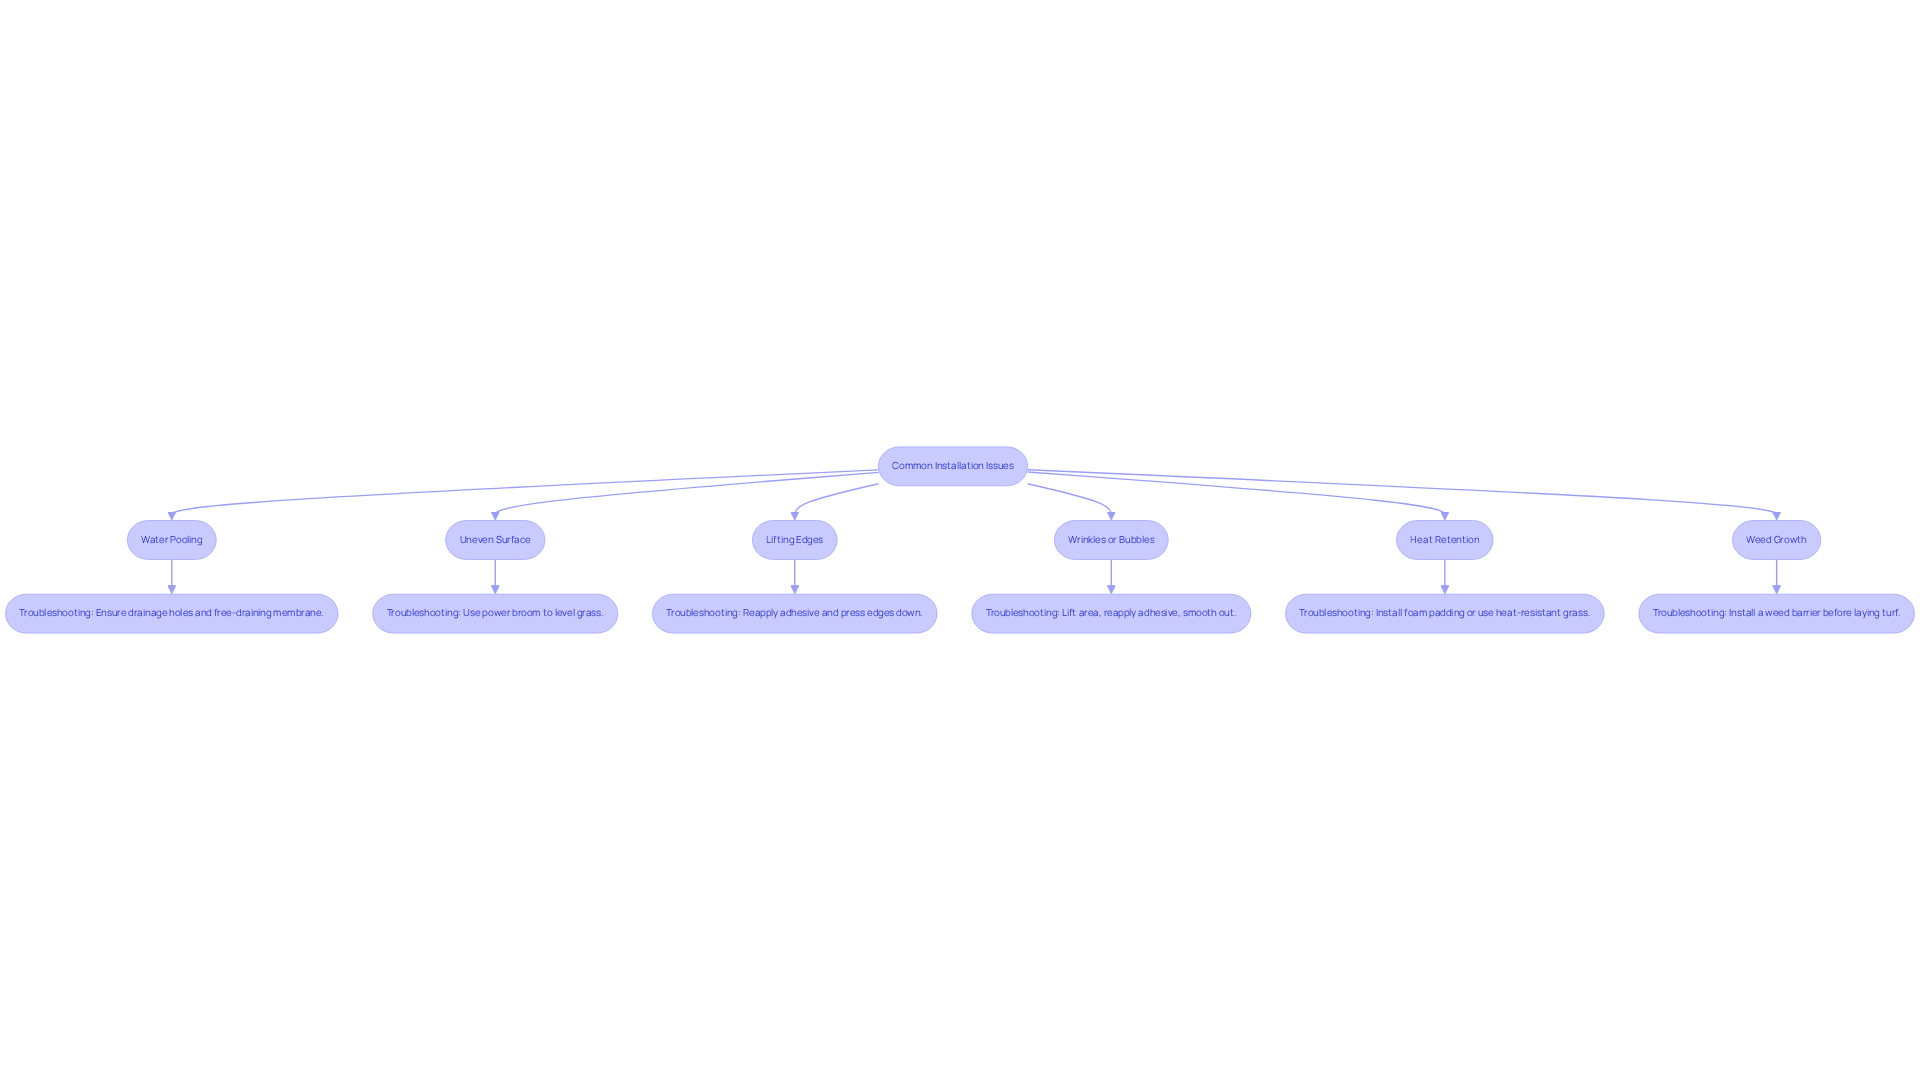
Laying turf on top of concrete can lead to several challenges, even with careful preparation. Here are some common problems and effective troubleshooting methods:
- Water Pooling: Water pooling on the turf signals a drainage problem that needs addressing. Ensure the grass is not laid too tightly and that drainage holes are present. Proper installation with a free-draining membrane is crucial to prevent unpleasant odors and drainage problems. If pooling continues, consider incorporating a drainage layer under the grass to enhance water movement.
- Uneven Surface: An uneven appearance may result from improper glue application or surface imperfections. Utilize a power broom to level the grass and ensure it adheres correctly.
- Lifting Edges: When the edges of the grass lift, inspect the bonding agent immediately. Reapply adhesive as necessary and press down firmly to secure the edges in place. Regular inspections of the surface condition are important to identify any lifting seams.
- Wrinkles or Bubbles: These can occur if the grass was not laid out correctly. Carefully lift the affected area, reapply adhesive, and smooth it out to eliminate any wrinkles.
- Heat Retention: If the surface becomes excessively hot, consider installing a layer of foam padding beneath it to provide insulation and reduce heat absorption. Additionally, using heat-resistant grass varieties or shading solutions can help reduce heat retention.
- Weed Growth: Weeds can still grow around the edges and seams of synthetic grass. Installing a high-quality weed barrier before laying the grass can help prevent this issue.
By proactively addressing these issues, you can extend the lifespan of your synthetic grass, particularly when it is installed as turf on top of concrete, and maintain its appearance.
Conclusion
Installing turf on concrete is often more complicated than it appears, requiring meticulous planning and execution. Understanding the challenges of drainage, heat retention, surface flaws, and adhesion is key to a successful installation. This guide details the crucial steps for transforming concrete into a functional outdoor space.
Key points discussed include:
- The importance of preparing the concrete surface
- Gathering the right tools and materials
- Following a detailed step-by-step installation process
Troubleshooting common issues such as water pooling, uneven surfaces, and heat retention ensures that the turf remains durable and visually appealing over time. Hall Turf’s extensive experience and commitment to quality further reinforce the reliability of these techniques.
Putting in the effort for a proper installation can really pay off in both looks and durability. If you’re ready to enhance your concrete space with artificial turf, give Hall Turf a call at (816) 555-7890 or email info@hallturf.com for expert help. Embrace the opportunity to create a beautiful, functional environment that meets the needs of your family, pets, or business.
Frequently Asked Questions
What are the main challenges of installing turf on concrete?
The main challenges include drainage issues, heat retention, surface flaws, and the need for proper adhesion.
Why is drainage a concern when installing turf on concrete?
Concrete surfaces hinder natural drainage, which can lead to water pooling beneath the turf. This buildup can cause mold and mildew, damaging the grass. Maintaining a slight slope of 1-3% is crucial to facilitate drainage.
How does heat retention affect turf installed on concrete?
Concrete can absorb and retain heat, making the surface uncomfortably hot, especially in direct sunlight. This is particularly important for areas where pets or children will play, as synthetic grass can heat up significantly more than natural grass.
What should be done to address surface flaws before installing turf on concrete?
It is essential to resolve any cracks, uneven spots, or other defects in the concrete prior to installation. These issues can affect the appearance and performance of the grass, leading to an uneven surface that may pose safety hazards.
How important is adhesion in the installation of turf on concrete?
Proper adhesion is vital for a successful installation. The glue used must effectively adhere to the cement to prevent the grass from moving or rising over time. Heavy-duty outdoor double-sided tape or adhesive is recommended for fastening the synthetic grass to the cement.
What can be achieved by effectively addressing the challenges of installing turf on concrete?
Effectively addressing these challenges can lead to a successful and durable installation that enhances outdoor spaces.
List of Sources
- Understand the Unique Challenges of Installing Turf on Concrete
- Installing Artificial Grass on Concrete | US Turf (https://usturfsandiego.com/news/installing-artificial-grass-on-concrete)
- Installing Artificial Grass on Concrete: Professional Guide (https://biltright.com/installing-artificial-grass-on-concrete-professional-guide)
- As the world heats up, so does the debate around artificial turf (https://thenewlede.org/2024/08/as-the-world-heats-up-so-does-the-debate-around-artificial-turf)
- Fixing 5 Challenges in Commercial Artificial Turf Installations (https://velcro.com/news-and-blog/2024/07/fixing-5-challenges-in-artificial-turf-installation)
- Can You Put Artificial Turf on Concrete? Key Benefits and Tips | Hall Turf (https://hallturf.com/can-you-put-artificial-turf-on-concrete-key-benefits-and-tips)
- Gather Necessary Tools and Materials for Installation
- Artificial Grass Install Accessories | Synthetic Grass Warehouse (https://syntheticgrasswarehouse.com/products/install-accessories)
- A Step-by-Step Guide to Installing Artificial Turf Grass (https://lowes.com/n/how-to/install-artificial-grass)
- DIY Guide: Essential Tools for Installing (https://blog.artificialgrassrecyclers.com/diy-guide-tools-you-need-to-install-your-own-artificial-turf?hs_amp=true)
- 15 Crucial Tools for DIY Artificial Grass Installation in San Jose (https://artificialturfexpress.com/blog/15-important-tools-youll-need-for-diy-artificial-grass-installation-in-san-jose)
- Prepare the Concrete and Lay the Turf: Step-by-Step Instructions
- Artificial Grass, Market Trends, Business Insights, and Analysis (https://installartificial.com/how/artificial-grass-business-insights-market-trends)
- Installing Artificial Grass on Concrete: Professional Guide (https://biltright.com/installing-artificial-grass-on-concrete-professional-guide)
- How to Install Artificial Grass on Concrete – A Step-by-Step Guide (https://neograss.co.uk/how-to-install-artificial-grass-on-concrete-guide)
- Easy DIY Guide: Installing Artificial Turf on Concrete (https://artificialturfexpress.com/blog/the-diy-guide-to-installing-the-best-artificial-turf-on-concrete)
- How to Install Artificial Grass on Concrete (Step-by-Step) (https://ccgrass.com/installing-artificial-grass-on-concrete)
- Troubleshoot Common Installation Issues
- Common Artificial Turf Issues & How To Solve Them | George Davies Turf (https://georgedaviesturf.co.uk/blog/common-artificial-turf-issues-how-to-solve-them?srsltid=AfmBOoozTJqr6j0jvO7Kd3RVS09chGgkaCM-3jkltZ8I4cRsMGoZwTGN)
- Common Issues With DIY Installs | Synthetic Grass Warehouse (https://syntheticgrasswarehouse.com/resources/installing-artificial-grass/common-issues-with-diy-installs)
- Problems With Artificial Grass (and Fixes) | US Turf (https://usturfsandiego.com/news/problems-with-artificial-grass)
- 7 Common Artificial Grass Problems and How to Fix Them (https://ccgrass.com/problems-with-artificial-grass)