
Introduction
The increasing adoption of artificial grass in Kansas and Missouri signifies a growing demand for sustainable landscaping solutions that meet both aesthetic and practical requirements. This guide provides homeowners with a detailed roadmap for installing artificial grass, covering essential preparation steps, required tools, and common pitfalls to avoid.
Without a clear roadmap, homeowners risk facing challenges that could compromise the longevity of their investment. A well-executed installation not only enhances the beauty of your landscape but also ensures durability and long-term satisfaction.
Prepare the Installation Area
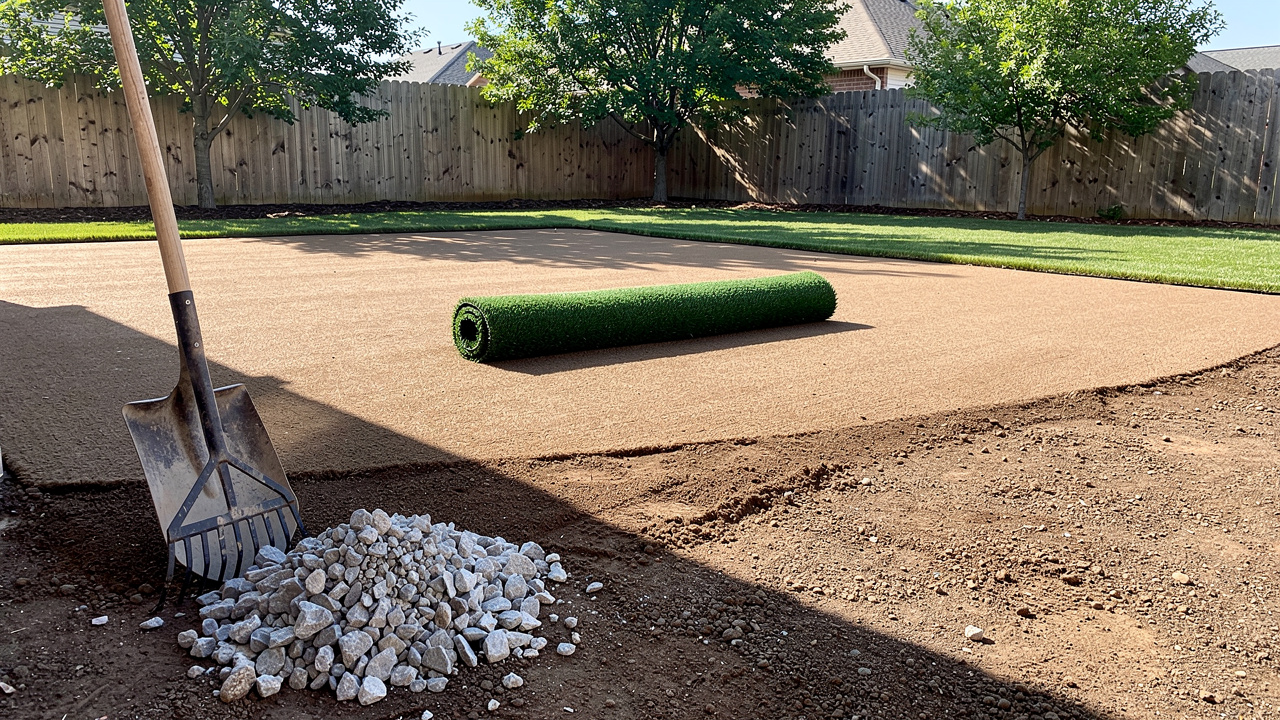
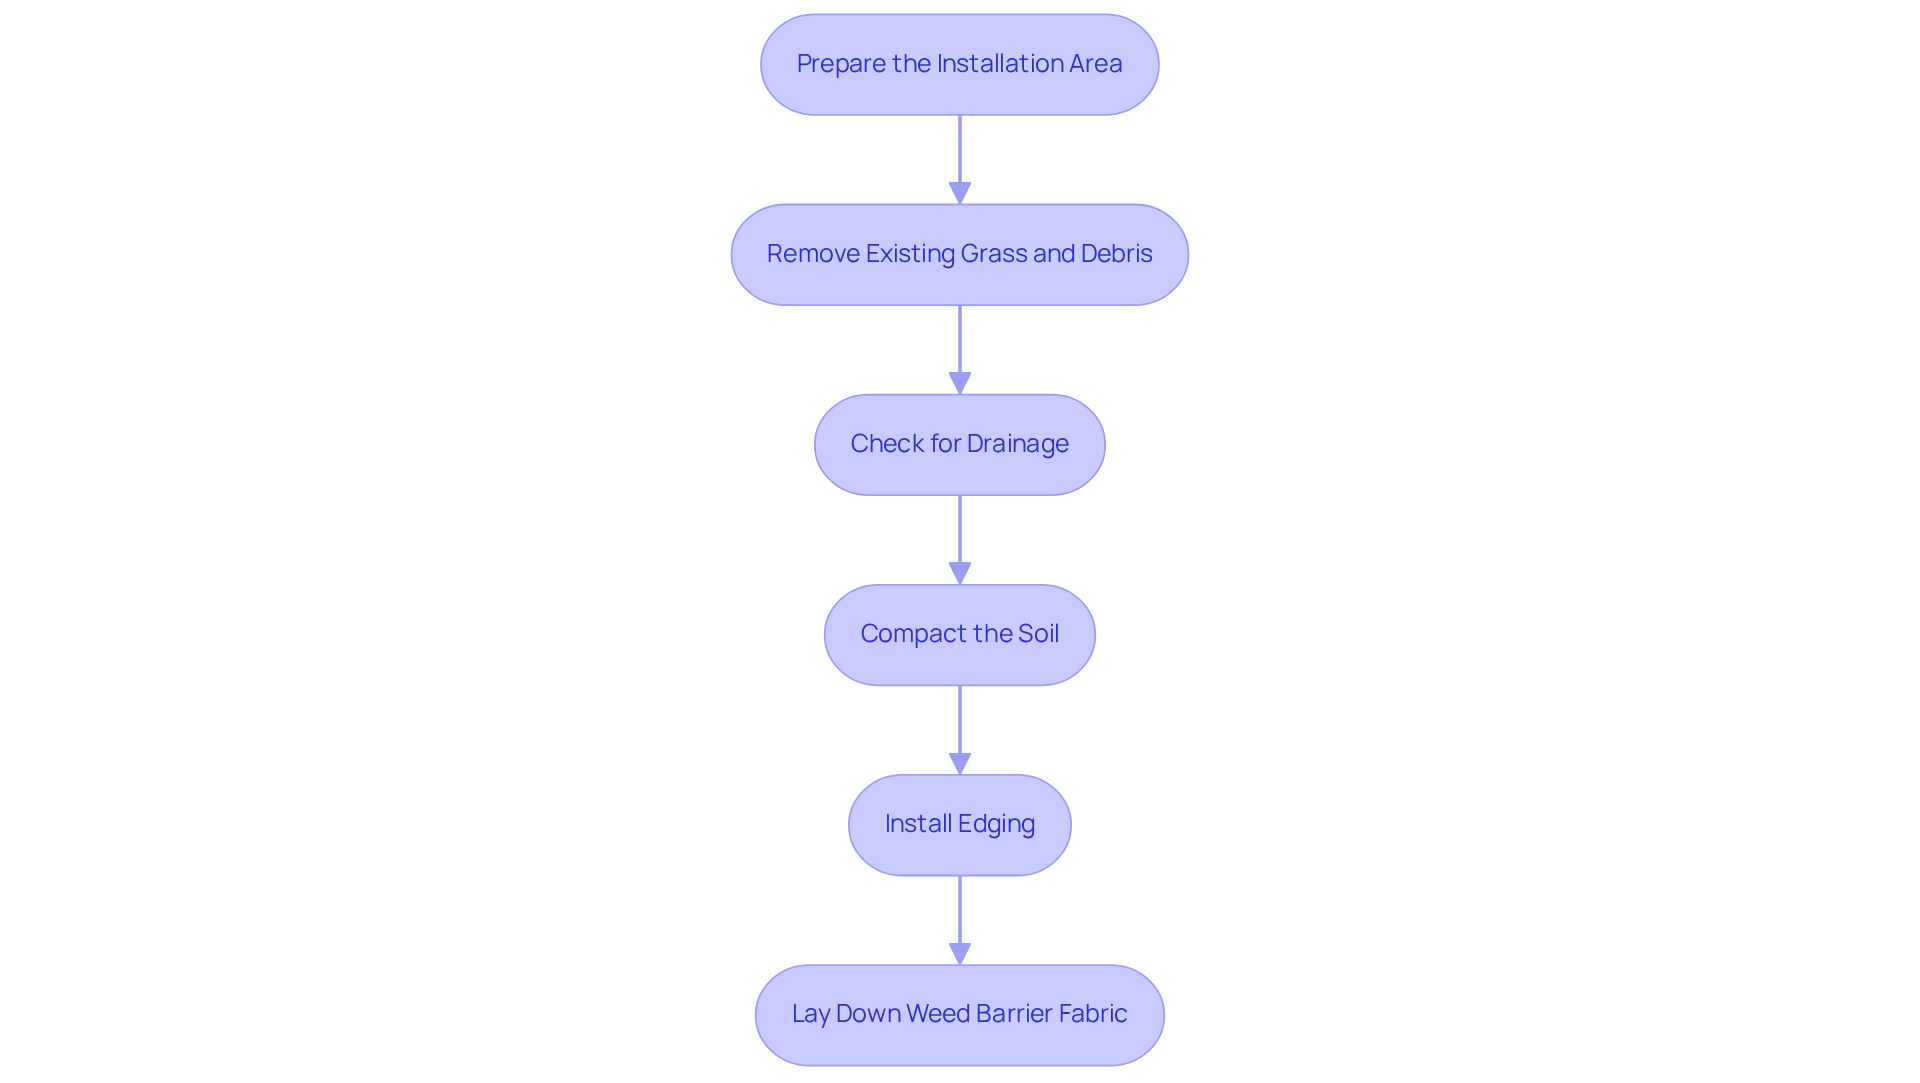
Preparing the site correctly is crucial for the successful installation of artificial grass. Start by removing any existing grass, weeds, rocks, and debris from the setup site. Dig down about 3-4 inches to create a clean surface. This step prevents uneven surfaces and creates a solid base for the grass.
Next, check for drainage. Proper drainage is essential to avoid water pooling on the surface. Without proper drainage, homeowners may face unsightly water pooling, leading to maintenance challenges. If the ground is too flat, consider grading it to facilitate water flow away from the grass. This adjustment can significantly enhance the longevity and performance of the artificial grass.
After that, compact the soil using a plate compactor. This creates a solid base and is essential to avoid settling after the grass is installed, ensuring a smooth and durable surface that can endure regular use.
Then, install edging around the perimeter of the area. This step helps keep the grass in place and prevents shifting over time. It also helps keep everything stable and looking good.
Finally, lay down a weed barrier fabric to prevent weeds from growing through the grass. This will help preserve the appearance and integrity of the setup over time, reducing the need for upkeep and ensuring a tidy look.
In Kansas and Missouri, the demand for artificial turf is growing, driven by the need for low-maintenance landscaping solutions. Homeowners can save up to 55 gallons of water per square foot of synthetic grass installed, making it an environmentally friendly choice. Additionally, the total cost of maintaining synthetic grass over 12 years is significantly lower than that of natural grass, which can reach over $34,000. By investing time in these preparation steps, homeowners can enjoy a beautiful, low-maintenance lawn for years to come.
Gather Necessary Tools and Materials
Selecting the right tools and materials is essential for a successful artificial grass installation.
-
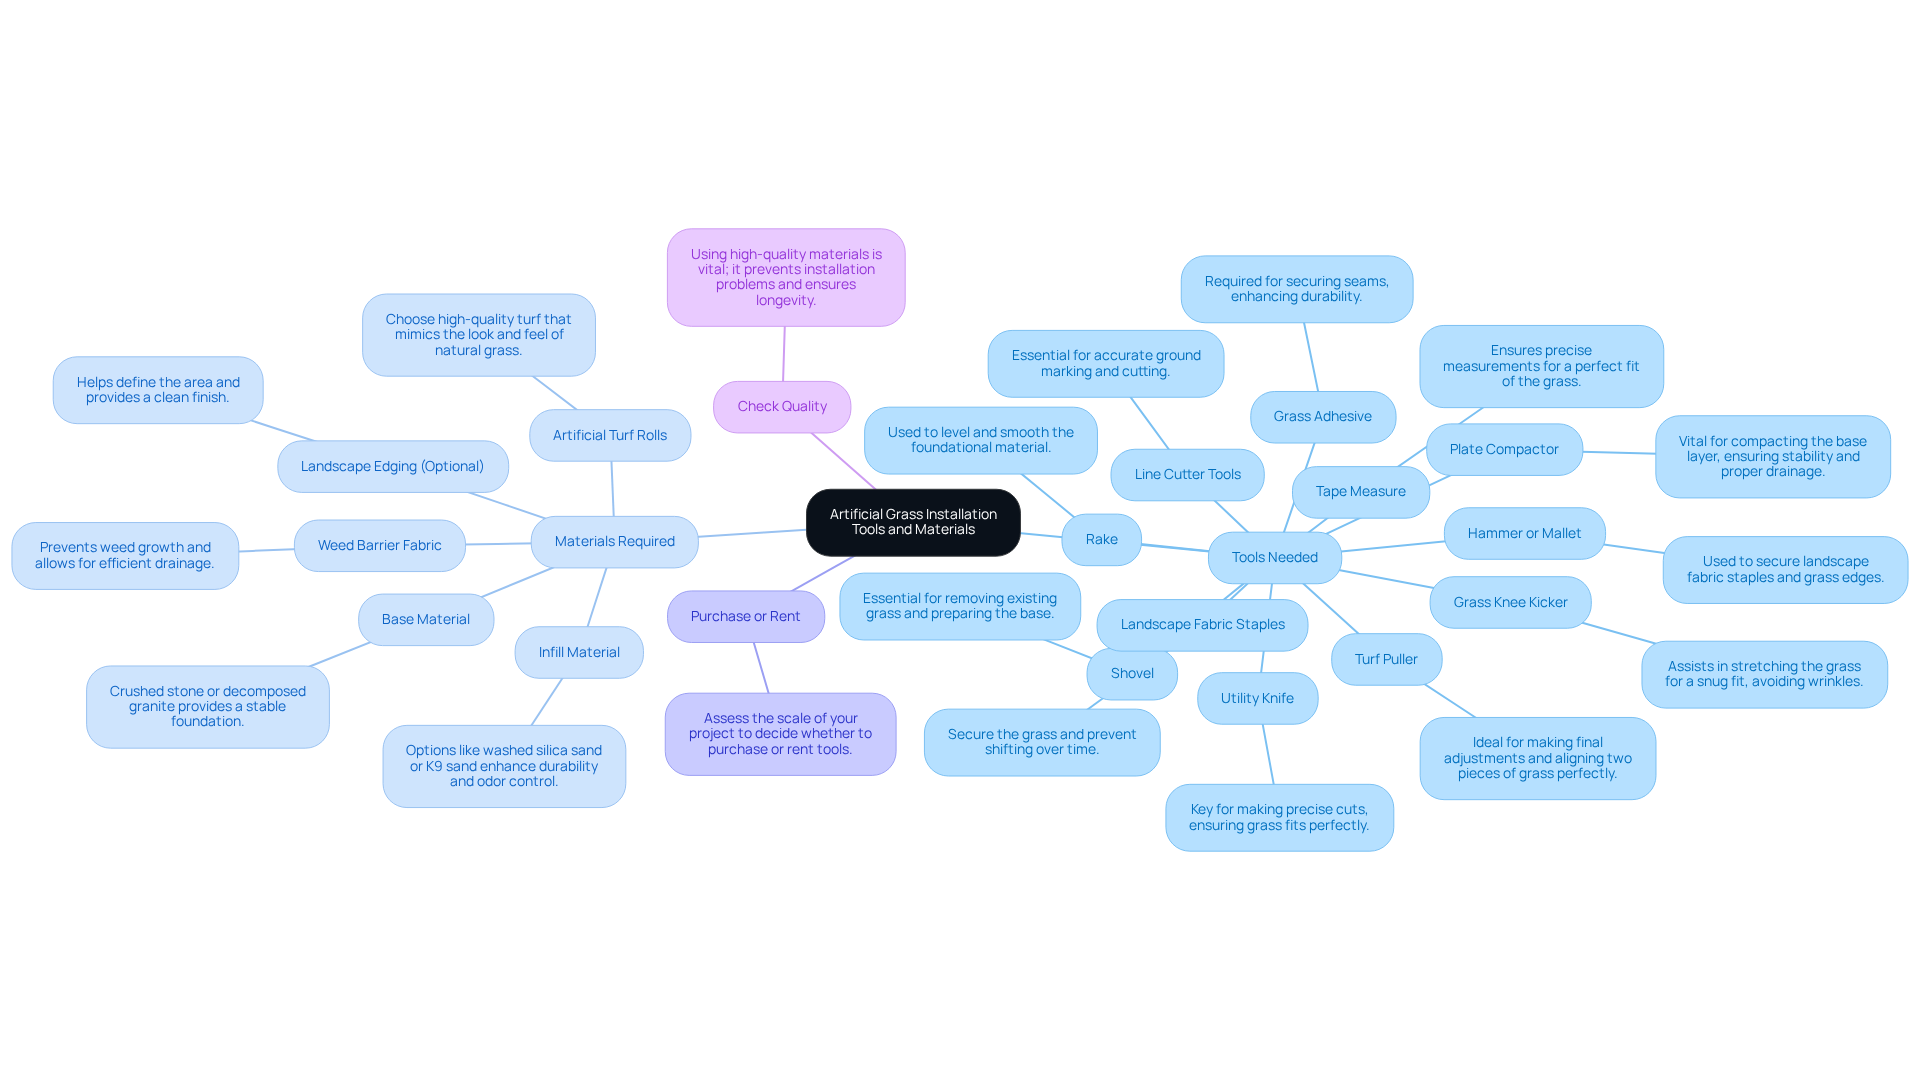
Tools Needed:
- Shovel: Essential for removing existing grass and preparing the base.
- Rake: Used to level and smooth the foundational material.
- Plate compactor: Vital for compacting the base layer, ensuring stability and proper drainage.
- Utility knife: A utility knife is key for making precise cuts, ensuring your grass fits perfectly.
- Hammer or mallet: Used to secure landscape fabric staples and grass edges.
- Tape measure: Ensures precise measurements for a perfect fit of the grass.
- Landscape fabric staples: Secure the grass and prevent shifting over time.
- Grass adhesive: Required for securing seams, enhancing durability.
- Grass knee kicker: Assists in stretching the grass for a snug fit, avoiding wrinkles.
- Turf puller: Ideal for making final adjustments and aligning two pieces of grass perfectly.
- Line cutter tools: Essential for accurate ground marking and cutting.
-
Materials Required:
- Artificial turf rolls: Choose high-quality turf that mimics the look and feel of natural grass.
- Weed barrier fabric: Prevents weed growth and allows for efficient drainage.
- Base material: Crushed stone or decomposed granite provides a stable foundation.
- Infill material: Options like washed silica sand or K9 sand enhance durability and odor control.
- Landscape edging (optional): Helps define the area and provides a clean finish.
-
Purchase or Rent: Assess the scale of your project to decide whether to purchase or rent tools. Local hardware stores typically offer rental options for larger equipment like plate compactors, making it accessible for DIY enthusiasts.
-
Check Quality: Using high-quality materials is vital; it prevents installation problems and ensures your turf lasts longer. For example, utilizing a high-quality adhesive can greatly improve the longevity of seams, as highlighted by pleased customers who stress the significance of excellence in their setups. Additionally, dry-fitting the grass before applying adhesive ensures proper alignment and fit, which is critical for a successful installation.
Investing in quality tools and materials not only ensures a smoother installation but also enhances the longevity of your artificial grass setup.
Install the Artificial Turf
Achieving a successful installation of synthetic grass requires careful preparation and attention to detail.
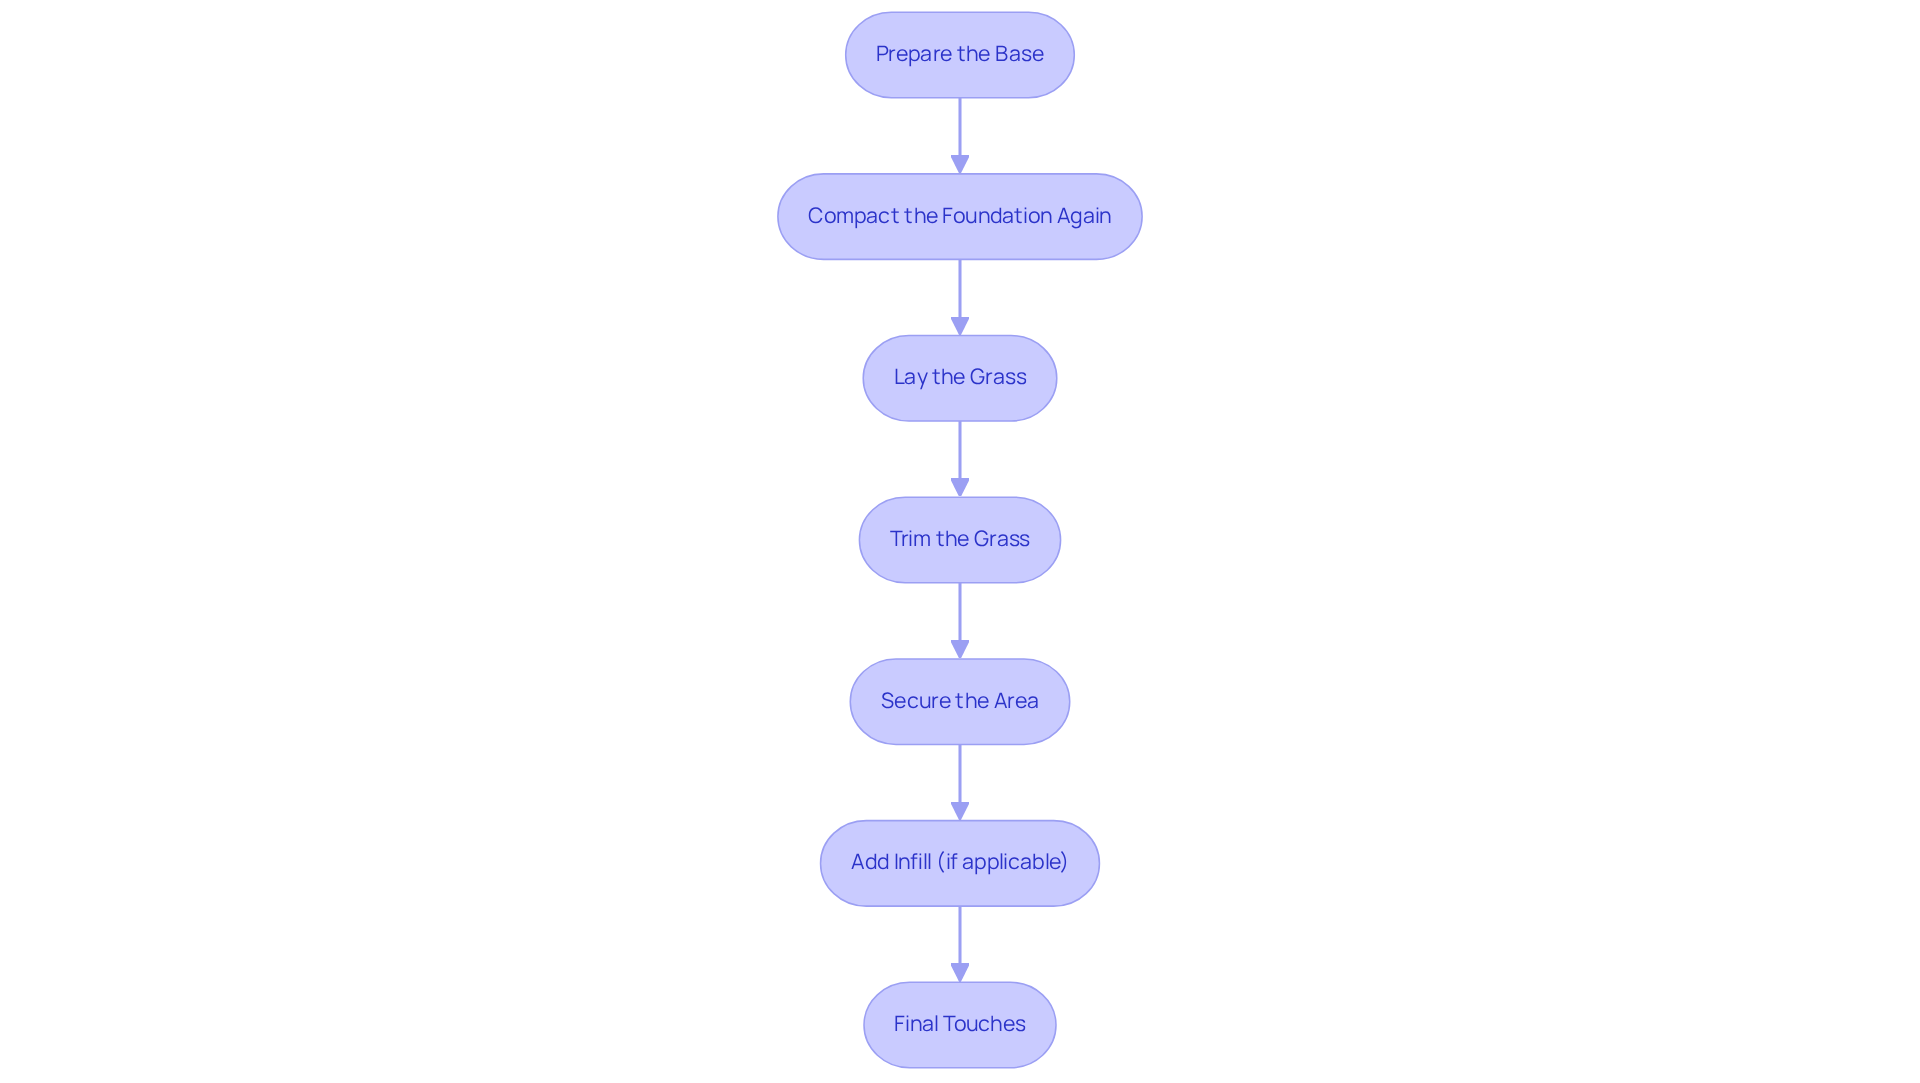
- Prepare the Base: Begin by clearing the area of any existing vegetation and debris. Once cleared, compact the soil to create a stable foundation. Spread a layer of foundational material, approximately 2-3 inches thick, evenly across the site. Ensure proper drainage by maintaining a minimum slope of 1% away from structures to prevent water pooling. Use a rake to level it out, ensuring a smooth surface for the grass. Without proper compaction, the foundation may settle unevenly over time, leading to costly repairs.
- Compact the Foundation Again: After leveling, use a plate compactor to firmly compress the foundation material. This step is key to making sure your foundation is solid and level, preventing any settling problems down the line.
- Lay the Grass: Unroll the synthetic grass over the prepared base. Allow the grass to acclimate in the sun for a few hours; this makes it more pliable and easier to work with during installation.
- Trim the Grass: Using a utility knife, cut the grass to fit the designated area. Ensure that seams are staggered to create a more natural appearance and avoid visible lines.
- Secure the Area: To secure the area, use landscape staples or nails around the perimeter and along seams. Place these fasteners every 6-8 inches to ensure stability and prevent movement over time.
- Add Infill (if applicable): If your selected grass requires infill, evenly distribute it across the surface using a power broom. This helps the infill blend into the fibers, enhancing the durability and look of the surface.
- Final Touches: Brush the grass with a broom to lift the fibers and give it a natural look. Examine the setup for any loose sections and fasten them as needed to guarantee a perfect finish.
Cost Consideration: For a 1,000 square foot project, homeowners can expect to invest around $8,500 to $9,000 in grass, a cost that is often offset by the reduced maintenance and water savings over time. Remember to check local building codes regarding drainage systems to ensure compliance and optimal results. Hall Grass is a licensed contractor with product certifications, guaranteeing that all setups meet the highest standards of quality and safety.
In the words of satisfied customers, “Brock came out, evaluated my needs and came up with the best solution. I went with his advice and the recommendation was perfect!” – Dick Bryant. Another client shared, “Brock is extremely professional, timely, and responsive. The crew was beyond professional, polite, and courteous. Excellent experience!” – Scott Sachse. These testimonials demonstrate Hall Turf’s dedication to quality and customer satisfaction, established through over 15 years of experience and a substantial satisfied clientele, making them a reliable option for artificial grass solutions in Kansas City. By adhering to these guidelines, homeowners can ensure a durable and visually appealing lawn that enhances their property value.
Troubleshoot Common Installation Issues
Maintaining the integrity of your turf requires attention to detail and adherence to proper installation techniques.
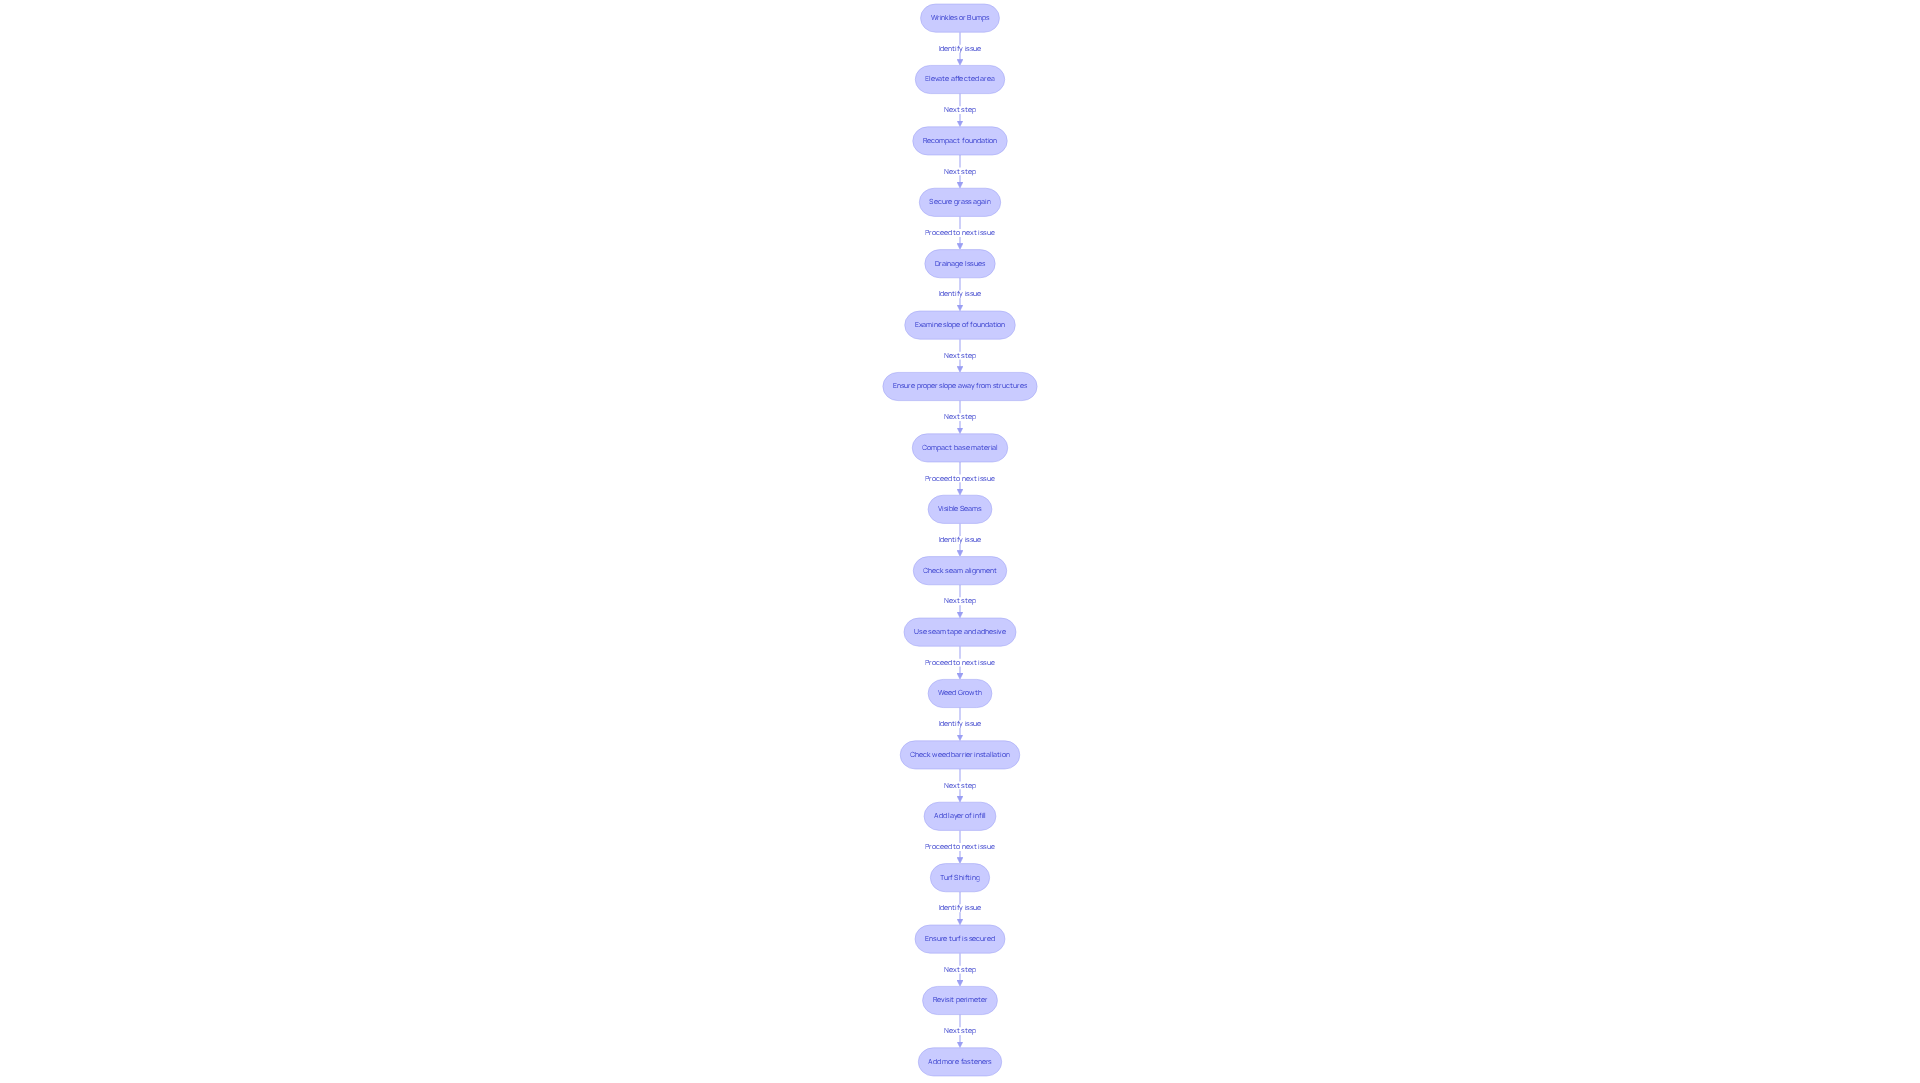
- Wrinkles or Bumps: If you notice wrinkles or bumps in the grass, it may stem from improper setup or insufficient compaction. To fix this, first elevate the affected area. Then, recompact the foundation and secure the grass again. Steve Young emphasizes that using proper installation techniques is key to keeping your turf intact.
- Drainage Issues: If water collects on the surface, examine the slope of the foundation. Ensure that the area slopes away from structures and that the base material is compacted properly. Poor drainage can lead to significant issues, as highlighted by the KC Current vs. Elite Turf USA lawsuit, which revealed how inadequate setup caused serious drainage problems.
- Visible Seams: If seams are visible, ensure that they are properly aligned and secured. Use seam tape and adhesive to reinforce the seams if necessary. Proper seam alignment is essential for both aesthetics and functionality, as emphasized by industry experts.
- Weed Growth: If you see weeds growing through the grass, check that the weed barrier was installed correctly. Consider adding a layer of infill to help suppress weed growth. Understanding grass warranties is also significant, as they often address issues related to improper installation, including weed growth.
- Turf Shifting: If the turf shifts or moves, ensure that it is adequately secured with staples or nails. Revisit the perimeter and add more fasteners as needed. Using the right securing techniques is essential to prevent turf shifting, which can cause additional problems later.
Conclusion
Achieving a professional installation of artificial turf is a multifaceted process that demands attention to detail and proper planning. Homeowners can achieve a professional-looking installation by carefully following the outlined steps, which include site preparation and troubleshooting common issues. Proper site preparation is crucial; it involves:
- Clearing the area
- Ensuring adequate drainage
- Compacting the soil for a stable foundation
Additionally, selecting high-quality tools and materials directly impacts the longevity and performance of the turf. The installation process itself requires meticulous attention, from laying the grass to securing it properly, ensuring a seamless and attractive finish.
Ultimately, homeowners in Kansas and Missouri can enjoy a durable and visually appealing solution by choosing artificial turf, which also conserves water and reduces maintenance costs. For those considering this upgrade, reaching out to Hall Turf, a licensed contractor with over 15 years of experience and a commitment to quality, can provide the expertise needed for a successful installation. By choosing Hall Turf, homeowners can ensure their investment in artificial grass yields lasting beauty and functionality.
Frequently Asked Questions
Why is preparing the installation area important for artificial grass?
Preparing the installation area is crucial to ensure a successful installation of artificial grass. It helps create a clean, solid base, prevents uneven surfaces, and enhances the longevity and performance of the grass.
What steps should be taken to prepare the installation site?
The steps include removing existing grass, weeds, rocks, and debris, digging down about 3-4 inches, checking for proper drainage, compacting the soil, installing edging around the perimeter, and laying down a weed barrier fabric.
How can I ensure proper drainage for artificial grass?
To ensure proper drainage, check the ground for flatness and consider grading it to facilitate water flow away from the grass. This prevents water pooling, which can lead to maintenance challenges.
What is the purpose of compacting the soil before installing artificial grass?
Compacting the soil creates a solid base that prevents settling after the grass is installed, ensuring a smooth and durable surface that can withstand regular use.
Why should I install edging around the perimeter of the area?
Installing edging helps keep the grass in place, prevents shifting over time, and maintains stability and appearance.
What is the benefit of laying down a weed barrier fabric?
A weed barrier fabric prevents weeds from growing through the grass, helping to preserve the appearance and integrity of the installation while reducing maintenance needs.
What are the environmental benefits of installing artificial grass in Kansas and Missouri?
Homeowners can save up to 55 gallons of water per square foot of synthetic grass installed, making it an environmentally friendly choice.
How does the cost of maintaining synthetic grass compare to natural grass?
The total cost of maintaining synthetic grass over 12 years is significantly lower than that of natural grass, which can exceed $34,000.
List of Sources
- Prepare the Installation Area
- Cost of Artificial Grass | Synthetic Grass Warehouse (https://syntheticgrasswarehouse.com/resources/maintenance-care/artificial-grass-cost)
- Artificial Turf Market Size & Industry Growth 2030 (https://futuredatastats.com/artificial-turf-market?srsltid=AfmBOoqTJQpiSG4ItXkCB_DS7ub12FL0-C3CHYACRftlRIr7h0WJjvgC)
- How Much Does Artificial Turf Installation Cost in 2025? – Xtreme Green Synthetic Turf (https://xgreensynthetic.com/artificial-turf-installation-cost)
- Gather Necessary Tools and Materials
- Artificial Grass Install Accessories | Synthetic Grass Warehouse (https://syntheticgrasswarehouse.com/products/install-accessories)
- Tools for DIY Artificial Turf Installation | FusionTurf (https://find.fusionturf.com/answers/tools-needed-for-diy-artificial-turf-installation)
- Artificial Turf Material Supply List For Any Installation (https://turfkingz.com/resources/artificial-turf-material-supply-list)
- 4 Essential Synthetic Grass Tools for Your Home Installation | Hall Turf (https://hallturf.com/4-essential-synthetic-grass-tools-for-your-home-installation)
- 15 Crucial Tools for DIY Artificial Grass Installation in San Jose (https://artificialturfexpress.com/blog/15-important-tools-youll-need-for-diy-artificial-grass-installation-in-san-jose)
- Install the Artificial Turf
- Artificial Turf Cost: A Comprehensive Guide (https://southernturfco.com/blog/comprehensive-guide-to-artificial-turf-cost)
- Turf Installation Timeline from Start to Finish (https://integriturf.com/glossary/turf-installation-timeline-from-start-to-finish)
- How Much Does Artificial Turf Installation Cost in 2025? – Xtreme Green Synthetic Turf (https://xgreensynthetic.com/artificial-turf-installation-cost)
- How Long Does It Take to Install Artificial Grass (https://syntheticturftc.com/how-long-does-it-take-to-install-artificial-grass)
- How Long Does Synthetic Grass Installation Take? – ForeverLawn Northern Ohio (https://foreverlawnnohio.com/blog/how-long-does-synthetic-grass-installation-take)
- Troubleshoot Common Installation Issues
- KC Current seek nearly $2 million in lawsuit over practice facility turf installation (https://kctv5.com/2024/07/09/kc-current-seek-nearly-2-million-lawsuit-over-practice-facility-turf-installation?outputType=amp)
- Glossary (https://integriturf.com/glossary/artificial-turf-installation-common-problems-a-comprehensive-guide)
- Overcoming Common Artificial Grass Installation Issues | Smart Turf® Artificial Grass (https://smartturf.com/overcoming-common-artificial-grass-installation-issues)