
Introduction
Many homeowners dream of enhancing their outdoor space with a personal putting green, yet the installation process can be complex and challenging. Many homeowners feel overwhelmed by the choices involved in creating their ideal putting green. Without a clear plan, homeowners risk ending up with a putting green that does not fulfill their vision.
With the right guidance, how can homeowners navigate the installation process to create a putting green that meets their expectations? Understanding the essential steps can transform this dream into a reality, ensuring a putting green that provides lasting enjoyment.
Prepare Your Backyard for Installation
- Select the Location: Selecting the right location is crucial for maximizing the usability and enjoyment of your putting green. Identify a flat area in your yard that receives plenty of sunlight and is free from overhanging branches. Ensure the area is sufficiently large to accommodate the desired size of your golfing green.
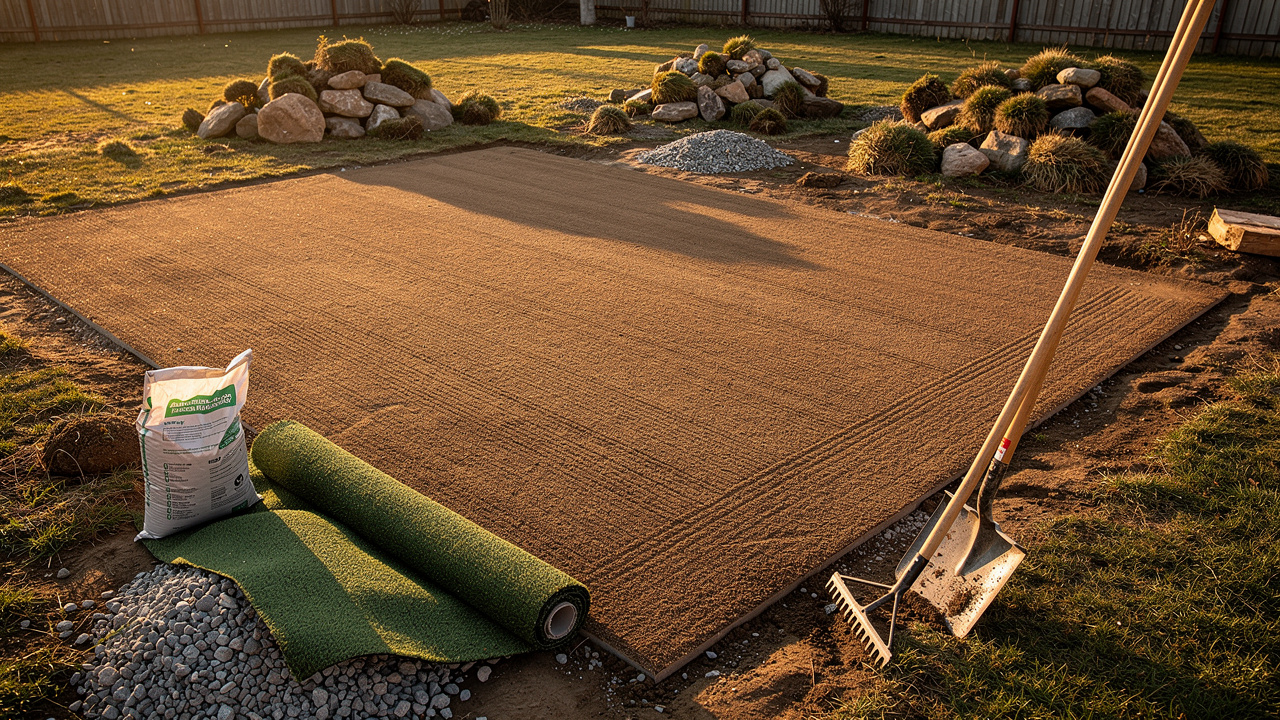
- Clear the Area: Remove any existing grass, plants, or debris. Use a shovel or sod cutter to dig out the top layer of soil, approximately 3 to 5 inches deep, depending on the thickness of your selected grass. Proper preparation is key to ensuring a successful installation.
- Level the Ground: After clearing, use a rake to level the ground. This step is crucial for creating a smooth surface for the grass, enhancing both drainage and visual appeal. Effective drainage is essential for synthetic grass golf areas; insufficient drainage can lead to water accumulation and unplayable situations.
- Check for Drainage: Verify that the area has adequate drainage to prevent water pooling. To avoid potential water pooling, consider creating a slight slope away from any structures for better runoff. Research shows that effective drainage systems can significantly extend the life and usability of your golfing green.
- Compact the Soil: Use a hand tamper or plate compactor to compact the soil. This step is essential to avoid settling after the grass installation, which can result in uneven surfaces over time. Using high-quality tools can lead to a smoother installation and better long-term results.
Cost Consideration: Homeowners in Kansas and Missouri can anticipate the average expense of installing synthetic grass to range from $5 to $20 per square foot, depending on the quality of the material and the complexity of the installation. This investment can lead to significant savings in maintenance and water costs over time.
Customer Experience: When considering your installation, it’s worth noting the positive experiences of others. For example, Dick Bryant discussed how Brock assessed his lawn requirements and offered the ideal solution, while Scott Sachse commended the outstanding work accomplished on his new surface, emphasizing Brock’s professionalism and the polite demeanor of the team. Les Boatright also highlighted Brock’s attention to detail and commitment to delivering on time and within budget, showcasing Hall Turf‘s dedication to customer satisfaction.

Gather Necessary Materials and Tools
Choosing the right materials and tools is critical for achieving a successful golf putting area installation. Here’s what you’ll need:
-
Materials Needed:
- Artificial Turf: Select high-quality putting green turf that meets your requirements, prioritizing options with a realistic appearance and suitable pile height for optimal playability. Hall Turf provides high-quality artificial grass solutions tailored to your needs. As Dick Bryant pointed out, ‘When I needed a solution to my grass problem, Brock came out, assessed my requirements and proposed the best answer. I went with his advice and the recommendation was perfect!’
- Base Material: Use crushed stone or gravel, ideally 2-4 inches deep, to ensure proper drainage and stability for the green.
- Infill Material: Incorporate sand or rubber infill to weigh down the grass and enhance the realistic feel underfoot, which is crucial for a true-rolling surface.
- Weed Barrier Fabric: While optional, it is advisable to use this fabric to prevent weed growth beneath the turf, ensuring longevity and maintenance ease.
- Putting Cups: Acquire cups and flags specifically designed for putting greens to complete your setup.
-
Tools Required:
- Shovel: Essential for digging and leveling the ground to create a smooth surface.
- Rake: Necessary for smoothing out the soil and preparing the base.
- Hand Tamper or Plate Compactor: Important for compacting the soil, which helps prevent air pockets and ensures a stable foundation.
- Utility Knife: Used for cutting the grass to the desired size, allowing for precise fitting.
- Tape Measure: Critical for accurately measuring the installation area to ensure proper dimensions.
- Staple Gun: Necessary for securing the edges of the grass, preventing fraying and ensuring a neat finish.
- Broom: Useful for brushing the turf after installation to maintain an even surface and enhance appearance.
Choosing the right materials can be overwhelming, but it is crucial for a successful installation. With the right materials and tools, you can create a golfing green that enhances your golfing experience and stands the test of time. As Scott Sachse expressed, ‘A huge thank you to Brock! They recently installed a putting green at our new home, and they did an exceptional job. Brock is extremely professional, timely, and responsive.

Follow the Step-by-Step Installation Process
To ensure a successful installation of synthetic grass, it is crucial to follow a systematic approach that guarantees a stable and aesthetically pleasing surface. Begin by excavating the designated area to a depth of 3 to 5 inches, based on the thickness of the grass you have chosen. Make sure to remove all rocks, roots, and debris to establish a clean foundation.
Next, evenly distribute a layer of crushed stone or gravel across the excavated area, targeting a thickness of 2 to 4 inches. Use a rake to level the material, ensuring a smooth surface for the grass. After that, thoroughly compact the base material using a plate compactor. Without proper compaction, the grass may settle unevenly over time, leading to an unsatisfactory appearance.
Once the base is compacted, roll out the synthetic grass over the surface, allowing it to acclimate for a few hours to minimize wrinkles. Use a utility knife to trim the grass to fit the designated area precisely. Following this, utilize a staple gun to fasten the edges of the surface to the ground, placing staples every few inches along the perimeter to prevent movement. If the edges are not secured, the grass may shift, resulting in an uneven surface that detracts from the overall look.
Next, cut openings for the putting cups at your preferred spots, ensuring they are level with the ground surface for a seamless appearance. Evenly distribute infill material across the surface to weigh it down and improve the authentic feel. Use a broom to sweep the infill into the grass fibers, ensuring even distribution.
Finally, brush the surface against the grain to lift the fibers and achieve an even appearance. Inspect for any loose edges and secure them as necessary to complete the installation. Neglecting these steps can lead to an installation that fails to meet expectations, ultimately diminishing the enjoyment of your new synthetic grass surface.

Troubleshoot Common Installation Issues
Addressing common issues with grass installation is essential for maintaining its appearance and functionality.
- Uneven Surface: If the grass looks uneven after installation, inspect the base for compactness. Areas that feel loose should be re-compacted, and additional base material may be necessary to ensure a stable foundation. By checking regularly, you can spot and fix these issues early, which helps avoid long-term wear and tear.
- Water Pooling: Water pooling on the surface indicates inadequate drainage. Ensure the base has a proper slope to facilitate drainage; adjusting the base material to create a slight incline can significantly improve water flow. If pooling persists, consulting a specialist may be necessary to evaluate the drainage system. Without proper drainage, the longevity of your grass installation may be compromised.
- Wrinkles in the Grass: Wrinkles can diminish the look and usability of your grass. To remove minor wrinkles, gently stretch the grass as you secure it. For persistent issues, it may be necessary to remove the affected section and re-lay it to achieve a smooth finish.
- Infill Issues: Uneven infill can impact the performance of your grass. Utilize a broom to spread the infill uniformly over the area, ensuring that the kind and quantity of infill are suitable for your particular grass. Regular brushing helps maintain an even surface and prevents compaction.
- Cup Placement Problems: If the putting cups are not flush with the turf, adjust their height by adding or removing base material beneath them. Secure placement is crucial to prevent movement during use, ensuring a consistent playing experience. Regular maintenance checks can help keep the cups properly aligned. Neglecting these maintenance aspects can lead to costly repairs and diminished enjoyment of your lawn.

Conclusion
A personal golfing green in the backyard offers both aesthetic enhancement and a unique recreational opportunity for golf enthusiasts. The process involves careful planning, from selecting the ideal location to ensuring proper drainage and leveling, all of which contribute to a successful installation. By following the outlined steps, homeowners can achieve a durable and enjoyable putting green that meets their golfing needs.
The article delves into the essential preparations, materials, and tools required for installing synthetic grass. Key points include:
- The importance of clearing and leveling the ground
- Choosing high-quality turf
- Securing the edges to prevent shifting
Additionally, homeowners often face challenges in maintaining the green, particularly with issues like uneven surfaces and water pooling. Customer feedback underscores the importance of professional guidance and high-quality materials for a successful installation.
Investing in a backyard putting green not only elevates property value but also fosters memorable outdoor experiences with family and friends. For those considering this project, taking the time to research and follow a step-by-step guide will ensure a rewarding experience that brings joy for years to come. By investing in this project, homeowners can create a lasting legacy of enjoyment and togetherness in their outdoor spaces.
Frequently Asked Questions
How do I select the right location for my putting green?
Choose a flat area in your yard that receives plenty of sunlight and is free from overhanging branches. Ensure the area is large enough to accommodate the desired size of your golfing green.
What steps should I take to clear the area for installation?
Remove any existing grass, plants, or debris. Use a shovel or sod cutter to dig out the top layer of soil, approximately 3 to 5 inches deep, depending on the thickness of your selected grass.
Why is leveling the ground important before installation?
Leveling the ground creates a smooth surface for the grass, enhancing both drainage and visual appeal. Proper leveling is crucial for preventing water accumulation and ensuring the green is playable.
How can I check for adequate drainage in the area?
Verify that the area has sufficient drainage to prevent water pooling. Consider creating a slight slope away from any structures for better runoff, as effective drainage systems can extend the life and usability of your golfing green.
What is the purpose of compacting the soil before installation?
Compacting the soil prevents settling after the grass installation, which can lead to uneven surfaces over time. Using a hand tamper or plate compactor ensures a smoother installation and better long-term results.
What are the cost considerations for installing synthetic grass in Kansas and Missouri?
Homeowners can expect the average cost of installing synthetic grass to range from $5 to $20 per square foot, depending on the quality of the material and the complexity of the installation.
What do customers say about their experience with the installation service?
Customers have shared positive experiences, highlighting the professionalism and attention to detail of the installation team. For instance, Dick Bryant praised the assessment of his lawn requirements, while Scott Sachse commended the outstanding work and polite demeanor of the team. Les Boatright noted the commitment to delivering on time and within budget.
List of Sources
- Prepare Your Backyard for Installation
- Artificial Turf Market Size And Share | Industry Report, 2033 (https://grandviewresearch.com/industry-analysis/artificial-turf-market)
- The Dos and Don’ts of Installing an Artificial Turf Putting Green – OC Turf & Putting Greens (https://octurfandputtinggreens.com/the-dos-and-donts-of-installing-an-artificial-turf-putting-green)
- Avoid Costly Backyard Putting Green Mistakes! #Golf #Turf (https://heavenlygreens.com/blog/avoid-backyard-putting-green-mistakes)
- Gather Necessary Materials and Tools
- 2026’s Biggest Artificial Turf Putting Green Design Trends – OC Turf & Putting Greens (https://octurfandputtinggreens.com/2026s-biggest-artificial-turf-putting-green-design-trends)
- How to Install the Best Putting Greens | Start to Finish DIY! (https://artificialturfexpress.com/blog/installing-the-best-putting-greens-in-your-yard-the-ultimate-diy-guide)
- How to Install an Artificial Grass Putting Green Easily (https://cclawnpros.com/how-to-install-artificial-grass-putting-green)
- Follow the Step-by-Step Installation Process
- Step-by-Step Guide to Installing Artificial Grass in California’s Diverse Climate (https://agsturf.com/artificial-turf-news/Step-by-Step-Guide-to-Installing-Artificial-Grass-in-California-s-Diverse-Climate-0108.html)
- The Dos and Don’ts of Installing an Artificial Turf Putting Green – OC Turf & Putting Greens (https://octurfandputtinggreens.com/the-dos-and-donts-of-installing-an-artificial-turf-putting-green)
- How to Install Artificial Turf on Dirt | US Turf (https://usturfsandiego.com/news/how-to-install-artificial-turf-on-dirt)
- How To Install the Ultimate Artificial Turf Putting Green | Synthetic Grass Warehouse (https://syntheticgrasswarehouse.com/blog/how-to-install-the-ultimate-artificial-turf-putting-green)
- A Guide To Installing An Artificial Putting Green (https://turftekusa.com/blog/a-guide-to-installing-an-artificial-putting-green)
- Troubleshoot Common Installation Issues
- Why Is My Artificial Grass Uneven or Bumpy? | Smart Turf® Artificial Grass (https://smartturf.com/why-is-my-artificial-grass-uneven-or-bumpy)
- The Best Way to Install Artificial Turf on an Unlevel Surface | Synthetic Grass Warehouse (https://syntheticgrasswarehouse.com/blog/the-best-way-to-install-artificial-turf-on-unlevel-surface)
- How to Fix Artificial Grass Uneven Spots After Heavy Rain (https://mantecaartificialgrass.com/fix-artificial-grass-uneven-spots)
- Common Artificial Turf Issues & How To Solve Them | George Davies Turf (https://georgedaviesturf.co.uk/blog/common-artificial-turf-issues-how-to-solve-them?srsltid=AfmBOor73mQ_JM_zvtW82mIRDgucvItLFEIYv943tojIOA7A0c0cXTTn)
- 4 Solutions for Common Artificial Turf Drainage Problems (https://californiaturfco.com/4-solutions-for-common-artificial-turf-drainage-problems)