
Introduction
Transforming your backyard into a golfer’s paradise begins with creating a personal putting green, which offers both practice and leisure opportunities. This guide details the essential tools and materials for installation while highlighting the importance of site assessment and maintenance for lasting performance.
Homeowners often struggle with the complexities of installation, including drainage and accessibility issues. Without a structured approach, the dream of a perfect putting green may remain just that – a dream. Navigating these complexities with a clear plan can turn your vision of a flawless putting green into reality.
Assess Your Space and Requirements
Selecting the right location for your putting green is crucial for optimal performance and longevity. Identify a flat, level area in your yard that receives ample sunlight. Avoid areas with significant shade from trees or buildings, as this can impede the grass’s performance and longevity.
Next, measure the area using a tape measure to ascertain the dimensions of the selected space. Typical putting surfaces in Kansas and Missouri vary from 10×10 feet for smaller practice areas to larger dimensions of around 1,000 square feet or more for extensive setups, allowing for diverse practice opportunities.
It’s also important to consider drainage. Without proper drainage, water can accumulate, leading to unhealthy turf conditions. If the ground is too flat, you may need to create a slight slope to facilitate proper drainage. To maintain healthy turf, consider using crushed stone or decomposed granite to improve drainage and prevent water pooling.
Additionally, evaluate accessibility. Make sure there’s enough room around the green so players can move around easily, which really boosts the experience.
Before you start digging, check for underground utilities. Neglecting to check for underground utilities can lead to costly repairs and safety hazards. Contact local utility companies to assist in marking these lines, facilitating a safe installation process. As a landscape architect emphasizes, assessing the site properly is essential for a safe and functional installation.
Brock, a representative from Hall Turf, has received commendation from clients such as Dick Bryant, who remarked, “When I needed a solution to my grass problem, Brock came out, assessed my needs and devised the best answer. I went with his advice and the recommendation was perfect!” This level of customer service exemplifies Hall Turf’s commitment to quality and satisfaction. Additionally, Hall Turf is a licensed contractor with product certifications, guaranteeing compliance and technical rigor in every installation. Ensuring these factors are addressed will lead to a successful and enjoyable putting green experience.

Gather Necessary Tools and Materials
Proper installation of synthetic grass requires specific tools and materials to ensure a successful outcome.
-
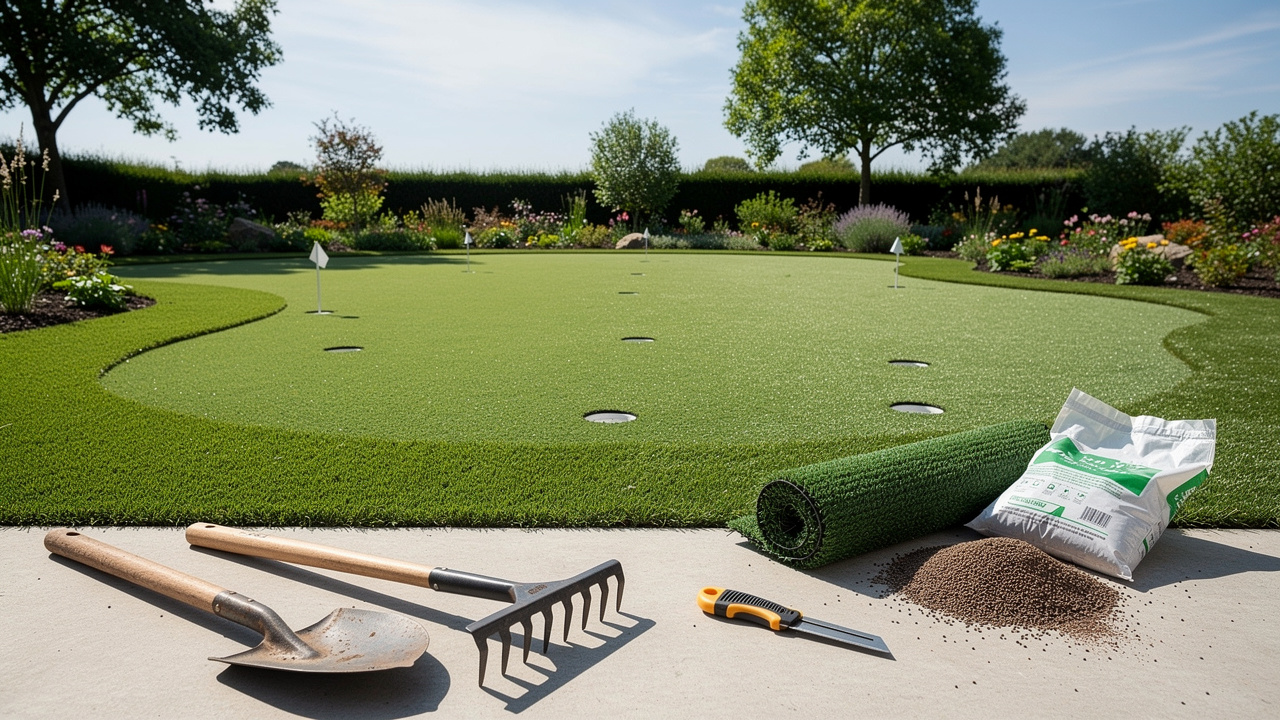
Tools Needed:
- Shovel: Essential for digging and leveling the ground, ensuring a solid foundation for the turf.
- Rake: Used to smooth out the soil and aggregate, creating an even surface for installation.
- Tamper: Important for compacting the base material, which helps prevent settling over time.
- Vibrating Plate Compactor: Essential for effectively compacting the sub-base layers, ensuring a sturdy foundation for synthetic grass installation.
- Utility Knife: Necessary for cutting the grass to size, allowing for precise fitting around edges and obstacles.
- Tape Measure: Ensures precise measurements, essential for a proper fit of the grass.
- Level: Used to check the evenness of the surface, ensuring a flat playing area.
- Hammer or Mallet: For fastening the grass to the foundation, ensuring stability.
- Staple Gun: Useful for securing the grass firmly to the base, preventing movement.
- Drop Spreader: Suggested for uniformly spreading infill material over the grass, improving the overall appearance.
- Safety Equipment: Don’t forget safety equipment like gloves and knee pads to keep installers protected during the installation process.
-
Materials Needed:
- Artificial Turf: Select high-quality putting green turf that closely mimics the look and feel of natural grass, enhancing the playing experience.
- Weed Barrier Fabric: Essential for preventing weeds from growing through the grass, maintaining a clean appearance.
- Base Material: Crushed stone or decomposed granite is recommended for effective drainage and stability, ensuring the longevity of the installation.
- Infill Material: Sand or rubber infill supports the fibers and provides a realistic feel underfoot, contributing to the overall playability. It is recommended to use 1 to 2 pounds of infill per square foot for optimal performance.
- Putting Cups: Essential for creating holes in the turf, allowing for a complete golfing experience.
- Gopher Wire: Consider laying gopher wire beneath the grass to prevent gophers from digging up the new lawn, providing an additional layer of protection.
-
Purchase Locations:
Local home improvement stores and online retailers are ideal for sourcing these tools and materials. Ensure all items are gathered before starting the installation to avoid interruptions and ensure a smooth process. Choosing the right tools and materials not only enhances the installation process but also ensures the longevity and performance of your synthetic grass.

Follow the Step-by-Step Installation Process
Creating a flawless backyard putting green requires careful preparation and attention to detail. Begin by clearing the area of any existing grass, plants, or debris. Utilize a shovel to dig approximately 2-4 inches to establish a flat surface, ensuring a sturdy foundation for your putting area. Neglecting to clear all organic material can result in an uneven putting surface.
Next, lay down a high-quality weed barrier fabric over the excavated area. This step is vital as it stops weeds from growing through the turf, ensuring your putting green remains intact.
Spread a layer of crushed stone or decomposed granite over the weed barrier, approximately 2-4 inches thick. Use a rake to level it out evenly, which is essential for proper drainage and stability. Ensure the foundation is well-compacted to avoid future settling.
Thoroughly compact the base material using a tamper. This step is essential to prevent settling and ensure a stable surface for the grass installation. Without proper compaction, you risk an unstable and unsightly putting green.
Roll out the artificial putting turf over the compacted base. Allow it to acclimate to the temperature for a few hours before making any cuts, which helps avoid wrinkles. This process typically takes one to two days, depending on the size of your project.
Use a utility knife to trim the grass to fit the desired shape of your putting green. Leave a little excess around the edges for securing the grass properly. Ensure you have the right tools, such as a sharp utility knife, to make clean cuts.
Secure the turf using a staple gun or landscape staples. Place staples every few inches around the perimeter and in the center to ensure it stays in place. This step is crucial for preventing movement and ensuring a professional finish.
Cut holes for the putting green cups according to the manufacturer’s instructions. Ensure that the cups are level with the ground surface for optimal playability. Misalignment of the cups can affect gameplay.
Evenly distribute infill material over the grass to support the fibers and provide a realistic feel. Utilize a broom to work the infill into the grass fibers, enhancing the overall performance of the putting surface. Proper infill distribution is key to achieving a natural look and feel.
Finally, brush the surface to stand the fibers upright and ensure everything is secure. Check for any loose areas and re-secure as needed, ensuring a professional finish to your backyard putting green.
Scott Sachse, a satisfied customer, highlighted the exceptional job done by Hall Turf’s team, emphasizing that attention to detail and professionalism are key in every installation. With more than 15 years of experience and a client base of over 80,000 satisfied customers, Hall Turf is dedicated to providing high-quality solutions for artificial putting turf customized to your requirements, including licensed contractor status and product certifications. Ultimately, the quality of your installation will determine the enjoyment and longevity of your putting green.

Troubleshoot Common Issues and Maintenance Tips
Maintaining an artificial lawn requires attention to common issues and proactive maintenance strategies to ensure its longevity and appearance.
Weed growth can quickly detract from the lawn’s aesthetic appeal if not managed effectively. To minimize this issue, ensure that a durable weed barrier is installed correctly before laying the turf. Regularly check for any signs of growth and remove them promptly to maintain the lawn’s appearance.
Uneven surfaces can disrupt the overall look of your lawn. If the ground feels irregular, check the foundation for settling. Adding more base material and re-compacting it may be necessary to restore a level surface. Neglecting to level the surface can lead to further settling and more extensive repairs in the future.
Grass lifting can compromise the neatness of your lawn. If the edges of the grass are lifting, secure them with additional staples or adhesive to prevent further lifting and maintain a neat appearance.
Regular cleaning is essential for maintaining your lawn’s appearance. Remove debris such as leaves and twigs frequently to prevent buildup. A leaf blower or broom can make this task quick and easy.
Brushing is crucial for maintaining the appearance of your lawn. Periodically sweep the grass with a stiff-bristled broom to keep the fibers upright and looking fresh, which is essential for maintaining a smooth roll on putting greens.
Infill maintenance is vital for the performance of your artificial grass. Regularly check the infill levels and add more as needed to ensure optimal performance and appearance.
Stain removal is an important aspect of lawn maintenance. For stains, use a mixture of mild soap and water. Avoid harsh chemicals that could damage the grass fibers and affect their longevity.
Seasonal checks are crucial for maintaining your lawn’s health. At the beginning of each season, inspect the grass for any signs of wear or damage. Addressing issues promptly can prevent more significant problems down the line.
Annual maintenance is recommended for optimal performance. Consider scheduling annual or biannual maintenance to ensure the longevity and performance of your artificial putting turf.
Drainage inspection is essential for maintaining your lawn’s condition. Regularly check for water pooling, which can indicate poor drainage and lead to mold and unpleasant odors. Proper drainage is essential for maintaining the turf’s condition.
UV protection is important for preserving your lawn’s appearance. Look for UV-resistant coatings that can help minimize fading of the artificial grass, ensuring it remains vibrant and functional for years.

Conclusion
Transforming your outdoor space into a golfer’s paradise begins with creating an artificial putting green at home. By following the detailed steps outlined in this guide, homeowners can ensure a successful installation that meets their specific needs and enhances their property.
Key considerations include:
- Assessing the space for optimal sunlight and drainage
- Gathering the necessary tools and materials
- Adhering to a systematic installation process
Each step, from clearing the area to securing the turf and maintaining it, plays a crucial role in achieving a high-quality putting green. The importance of proper drainage and high-quality materials reflects Hall Turf’s commitment to excellence in every project.
Ultimately, investing time and effort into the installation and maintenance of an artificial putting green not only elevates the aesthetic appeal of your yard but also provides a valuable recreational space for family and friends. If you’re ready to start this journey, Hall Turf is here to provide expert guidance and quality products, making the process smooth from start to finish. Reach out to Hall Turf at (816) 555-7890 or via email at info@hallturf.com for inquiries and quotes, and take the first step toward enhancing your outdoor living space.
Frequently Asked Questions
Why is selecting the right location for a putting green important?
Selecting the right location is crucial for optimal performance and longevity of the putting green. A flat, level area that receives ample sunlight is ideal, while areas with significant shade should be avoided as they can impede grass performance.
What dimensions are typical for putting greens in Kansas and Missouri?
Typical putting surfaces in Kansas and Missouri range from 10×10 feet for smaller practice areas to larger dimensions of around 1,000 square feet or more for extensive setups, allowing for diverse practice opportunities.
How can I ensure proper drainage for my putting green?
Proper drainage is essential to prevent water accumulation, which can lead to unhealthy turf conditions. If the ground is too flat, creating a slight slope can facilitate drainage. Using crushed stone or decomposed granite can also improve drainage and prevent water pooling.
What should I consider regarding accessibility around the putting green?
It’s important to ensure there is enough room around the green for players to move around easily, which enhances the overall experience.
Why is it necessary to check for underground utilities before installation?
Checking for underground utilities is crucial to avoid costly repairs and safety hazards. Contacting local utility companies can help mark these lines, ensuring a safe installation process.
How does Hall Turf support customers in the installation process?
Hall Turf collaborates with architects and designers, providing detailed technical specifications and project support from concept through installation, ensuring a successful putting green experience.
Can you provide an example of customer satisfaction with Hall Turf?
Dick Bryant, a client of Hall Turf, praised their service, stating that Brock assessed his needs and provided the perfect solution for his grass problem, exemplifying Hall Turf’s commitment to quality and satisfaction.
What qualifications does Hall Turf have as a contractor?
Hall Turf is a licensed contractor with product certifications, ensuring compliance and technical rigor in every installation.
How can I contact Hall Turf for inquiries or quotes?
You can contact Hall Turf at (816) 555-7890 or via email at info@hallturf.com for inquiries and quotes regarding putting greens and other services.
What experience does Hall Turf have in the industry?
Hall Turf has over 15 years of experience and has completed more than 300 playground installations, serving a client base of over 80,000 satisfied customers worldwide.
List of Sources
- Assess Your Space and Requirements
- Tour Greens | Backyard Putting Green Cost in 2025 (https://tourgreens.com/backyard-putting-green-cost.html)
- Ensure a Perfect Outdoor Putting Green Installation With These 5 Tips – SGW Texas (https://sgwtexas.com/blog/2023/09/28/ensure-a-perfect-outdoor-putting-green-installation-with-these-5-tips)
- Your Guide to the Best Backyard Putting Green Turf (https://realturf.com/us/the-secret-to-a-perfect-backyard-putting-green)
- 5 Steps to Install Artificial Turf for Your Kansas Home – Hall Turf | Artificial Turf Installation Kansas City KS & MO (https://hallturf.com/5-steps-to-install-artificial-turf-for-your-kansas-home)
- How to Build a Putting Green in Your Backyard: 5 Tips – Motz (https://themotzgroup.com/infill_blog/tips-for-installing-a-putting-green-in-a-backyard)
- Gather Necessary Tools and Materials
- Essential Tools for DIY Artificial Grass Installation (https://artificialturfexpress.com/blog/15-important-tools-youll-need-for-diy-artificial-grass-installation-in-san-jose)
- DIY Guide: Essential Tools for Installing (https://blog.artificialgrassrecyclers.com/diy-guide-tools-you-need-to-install-your-own-artificial-turf)
- 10 Essential Artificial Grass Equipment for Flawless Installations – Hall Turf | Artificial Turf Installation Kansas City KS & MO (https://hallturf.com/10-essential-artificial-grass-equipment-for-flawless-installations)
- What Tools Do I Need to Install Artificial Turf? (https://integriturf.com/glossary/what-tools-do-i-need-to-install-artificial-turf)
- DIY vs. Professional: Installing Artificial Grass Simplified (https://usturf.com/blogs/news/diy-vs-professional-installing-artificial-grass?srsltid=AfmBOopqPlR6KUUYd9zL5Vp9N8bCl_UiX0Y3aVBA0HExH7NYN7f_mdIo)
- Follow the Step-by-Step Installation Process
- Artificial Grass, Market Trends, Business Insights, and Analysis (https://installartificial.com/how/artificial-grass-business-insights-market-trends)
- How To Build a Backyard Putting Green (https://xgrass.com/how-to-build-putting-green.html)
- DIY Putting Green Installation: A Step-by-Step Guide (https://artificialturfexpress.com/blog/installing-the-best-putting-greens-in-your-yard-the-ultimate-diy-guide)
- DIY Artificial Grass Putting Green Installation: Step-by-Step Guide – SGW Arizona (https://sgwarizona.com/blog/diy-artificial-grass-putting-green-installation-step-by-step-guide)
- Troubleshoot Common Issues and Maintenance Tips
- Common Artificial Turf Issues & How To Solve Them | George Davies Turf (https://georgedaviesturf.co.uk/blog/common-artificial-turf-issues-how-to-solve-them?srsltid=AfmBOoo-07xSePqOX_25CYvTLsVWV55j2El6WUztBxGWctfA2KjCf4M0)
- How to Maintain Your Artificial Grass All Year Round (https://synlawn.com/articles/how-to-maintain-artificial-grass)
- Artificial Putting Green Maintenance: Year-Round Care Guide (https://aglgrass.com/blogs/artificial-putting-green-maintenance)
- 7 Common Artificial Grass Problems and How to Fix Them (https://ccgrass.com/problems-with-artificial-grass)