

Introduction
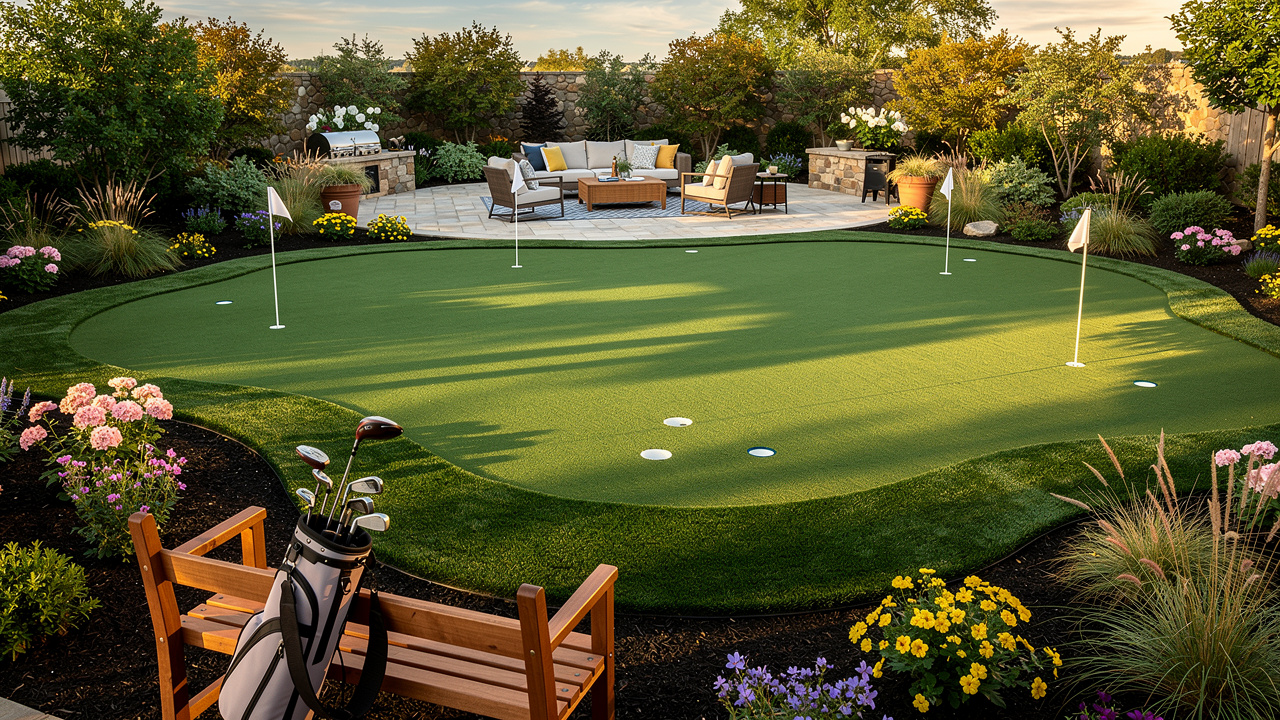
Transforming your backyard into a personal golf practice green can create an ideal space for skill development and relaxation. This guide provides a comprehensive, step-by-step approach to installing a golf practice green, ensuring that enthusiasts can achieve their desired setup with confidence. Many enthusiasts find the process overwhelming due to the numerous considerations involved. Without a clear plan, the dream of a personal golf green may remain just that – a dream.
Define Your Goals and Space Requirements
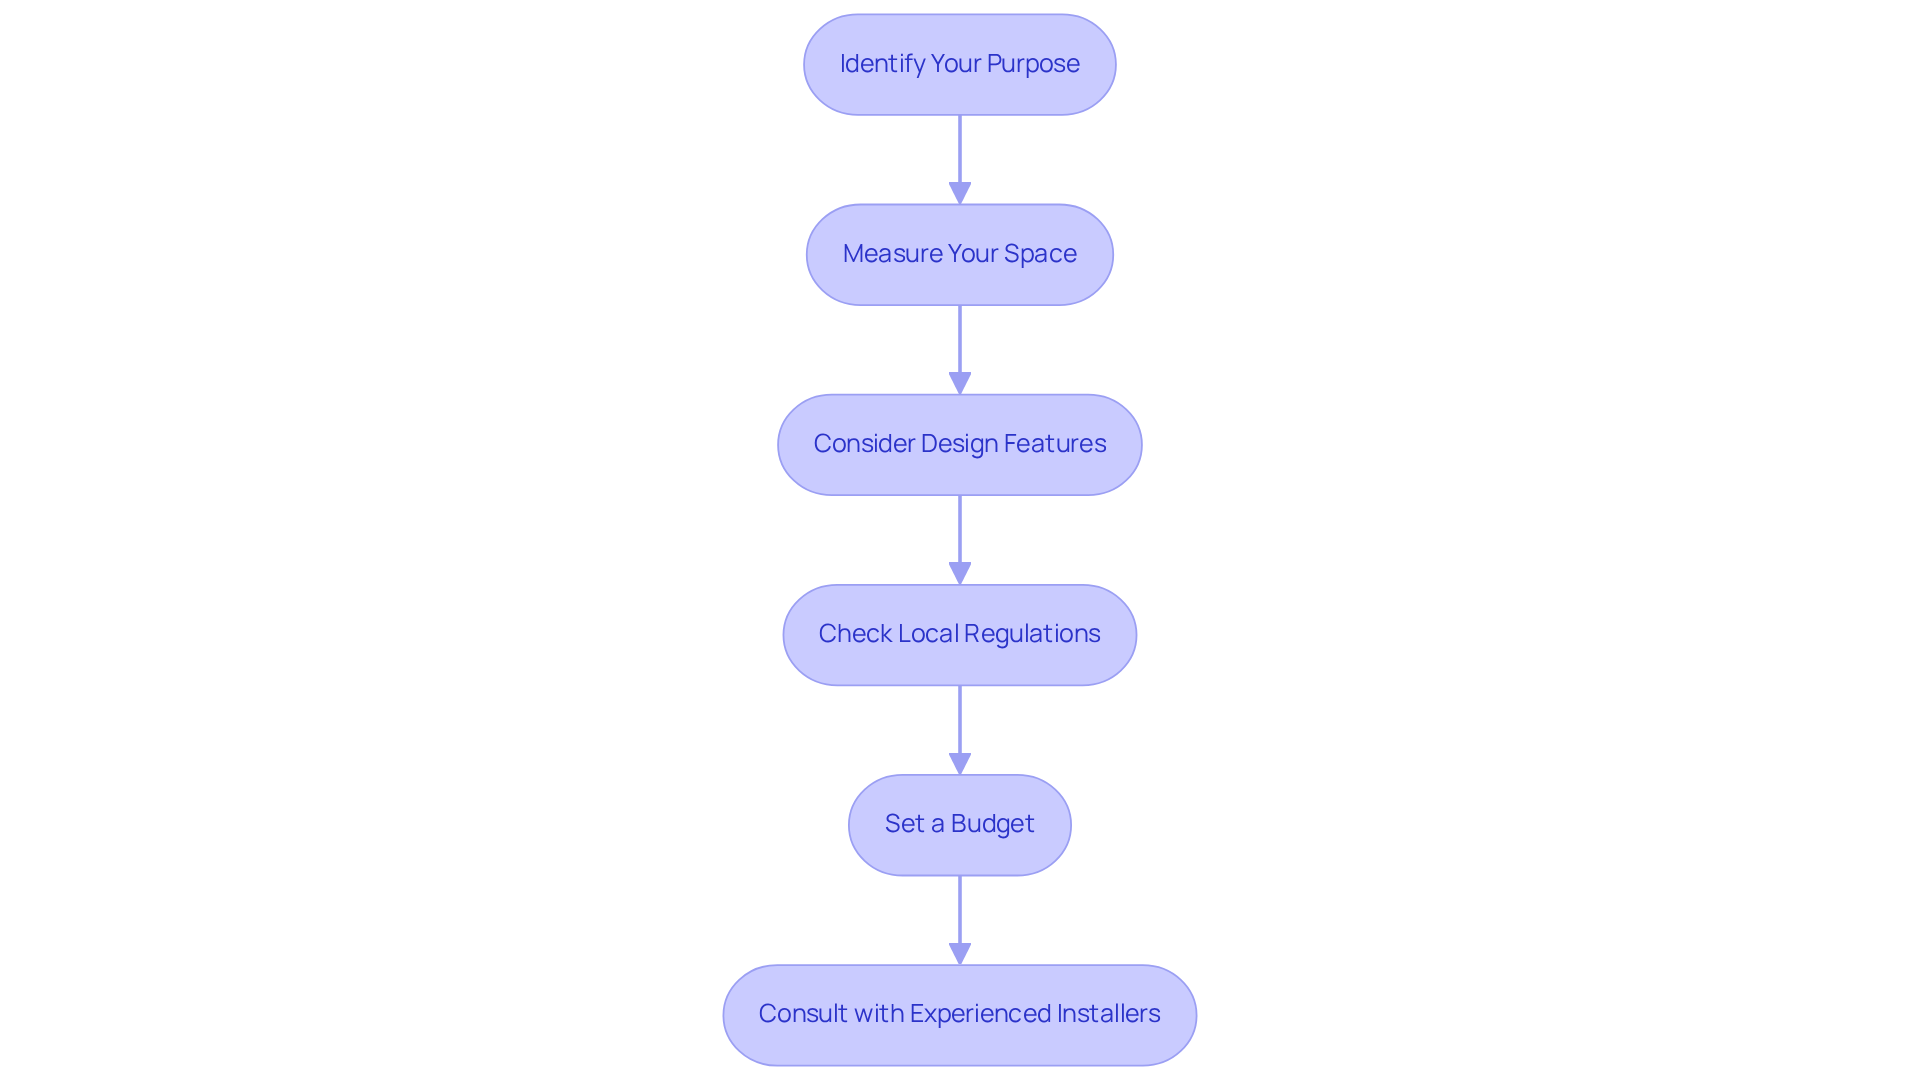
Before starting your golf practice area installation, it’s crucial to clarify your objectives and evaluate your available space. Here’s how to approach this process:
- Identify Your Purpose: Determine if the area will be used solely for personal practice, for entertaining guests, or a combination of both. This decision will significantly influence the size and complexity of your design.
- Measure Your Space: Accurately measure the dimensions of the area designated for the green. Consider elements like sunlight exposure, drainage patterns, and closeness to other structures, as these will influence the setup and upkeep.
- Consider Design Features: Think about any additional features you may want, such as multiple holes, slopes, or chipping areas. Creating a rough sketch can help visualize how these elements will fit together within your space.
- Check Local Regulations: Ignoring local regulations can lead to costly compliance issues. Verify that your planned setup adheres to local zoning laws and homeowners’ association guidelines to avoid any compliance issues.
- Set a Budget: Establish a comprehensive budget for your project, factoring in materials, tools, and any professional assistance you may require. This will direct your choices throughout the setup process.
- Consult with Experienced Installers: Working with experts like Hall Turf, who have over 15 years of experience in artificial grass installation, can offer you practical advice for your project. Hall Turf provides a variety of services, including pet grass setup and playground surface solutions, ensuring that all elements of your outdoor area are addressed. As noted by satisfied customers, Hall Turf’s team is known for their professionalism, attention to detail, and ability to deliver projects on time and within budget. They can assist in evaluating your yard’s drainage patterns and suggest suitable infill choices to guarantee a successful setup.
By clearly defining your goals and assessing your space, you can create a golf practice green that meets your needs and transforms your outdoor space into a personal retreat for relaxation and enjoyment.
Gather Essential Materials and Tools
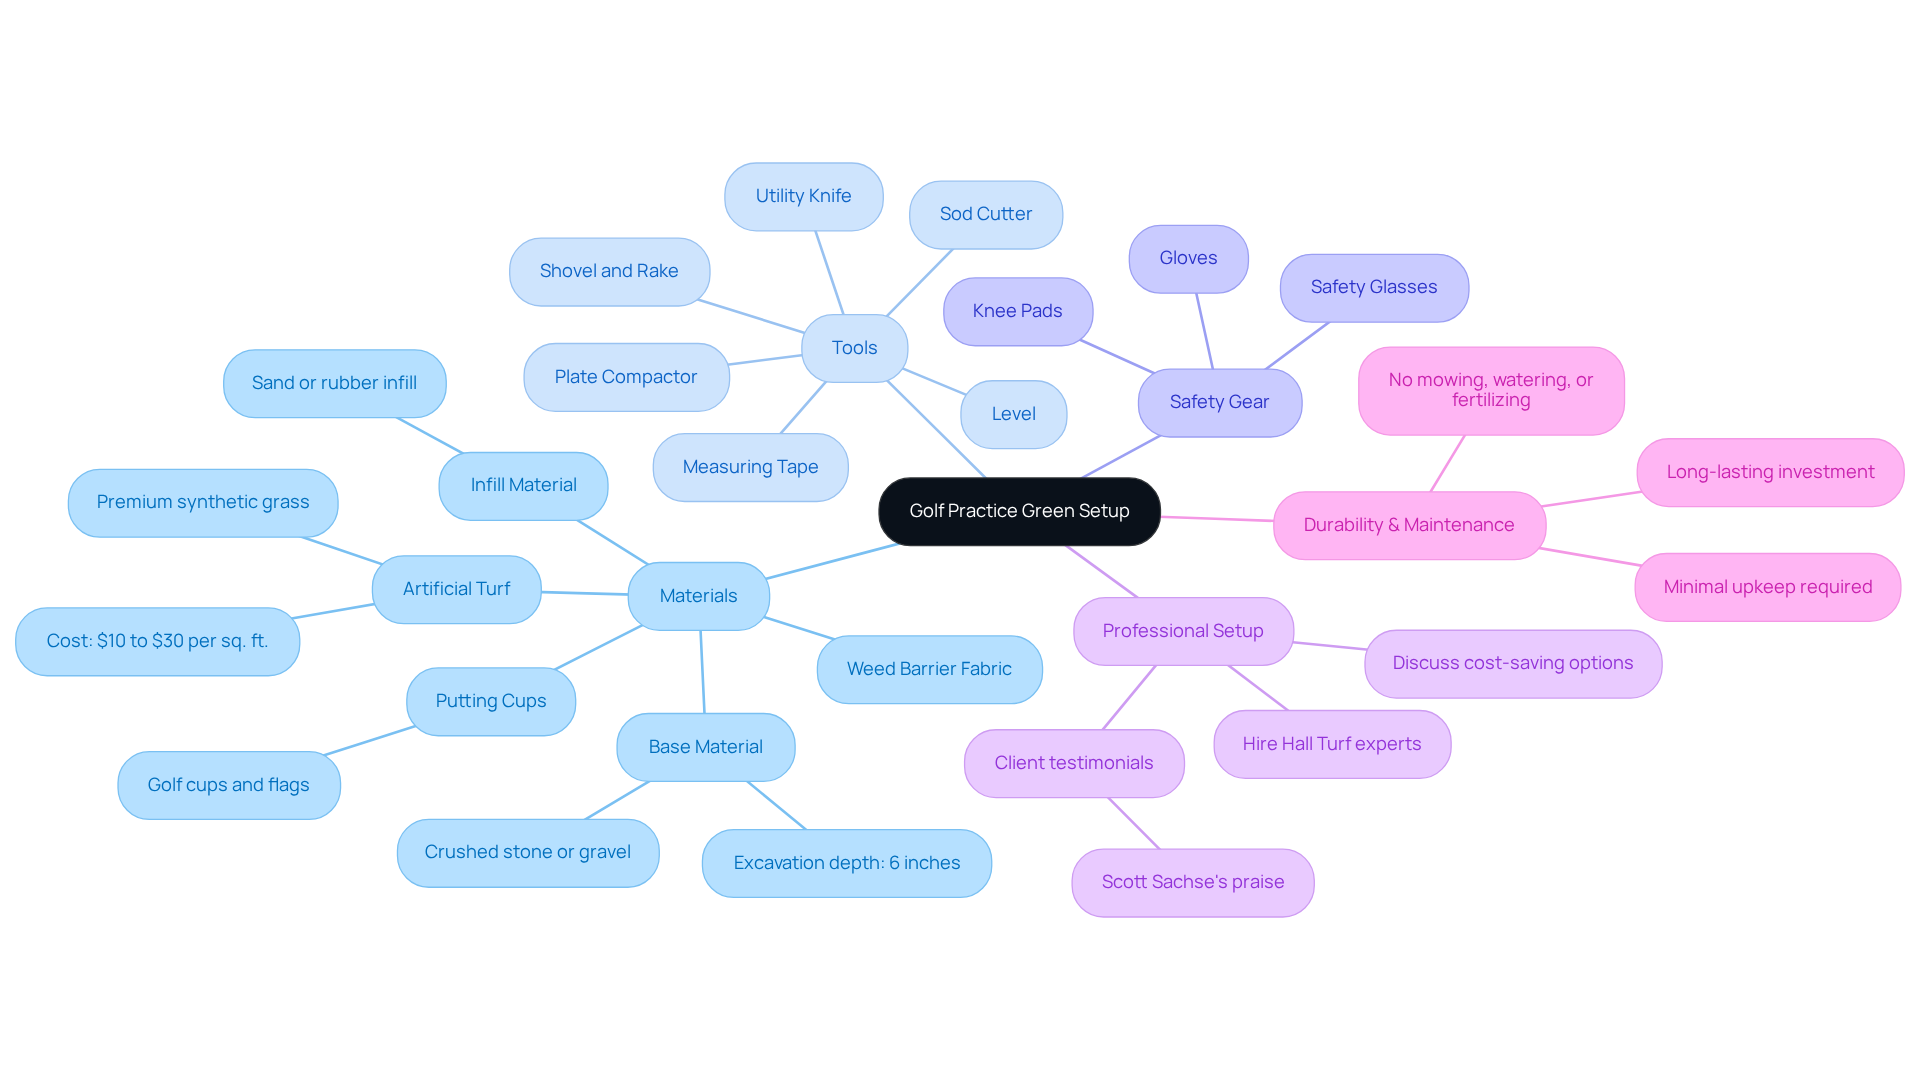
To create an effective golf practice green setup, gathering the right materials and equipment is essential. Here’s a checklist to help you:
-
Materials:
- Artificial Turf: Invest $10 to $30 per square foot in premium synthetic grass designed for putting greens. This choice is essential for long-term satisfaction. Hall Turf offers tailored artificial grass solutions, ensuring a top-notch installation that meets your specific needs.
- Base Material: Use crushed stone or gravel for adequate drainage and stability. Proper base preparation is crucial; remove all organic materials, including natural grass and soil, to a depth of about 6 inches during excavation.
- Infill Material: Incorporate sand or rubber infill to enhance the grass’s performance and feel underfoot.
- Putting Cups: Acquire golf cups and flags to create an authentic golfing experience.
- Weed Barrier Fabric: Place this under the grass to prevent weed growth and maintain the quality of your lawn.
-
Tools:
- Sod Cutter: Essential for removing existing grass and preparing the site.
- Shovel and Rake: Necessary for leveling the ground and shaping the area for the lawn.
- Plate Compactor: Important for compacting the base material to ensure a solid foundation.
- Utility Knife: Useful for cutting the turf to the desired size and shape.
- Measuring Tape: To ensure accurate measurements for your green layout.
- Level: To check the evenness of the surface, ensuring a professional finish.
-
Safety Gear: Don’t forget to wear gloves, safety glasses, and knee pads to protect yourself during the setup process.
-
Professional Setup: Consider hiring Hall Turf experts for the setup. Their expertise can ensure that the project is completed correctly, enhancing the durability and performance of your putting green. Discuss potential cost-saving options with your turf setup specialist to manage your overall expenses effectively. Clients such as Scott Sachse have praised Hall for their professionalism and attention to detail, ensuring a seamless installation experience.
-
Durability and Maintenance: Remember that synthetic turf requires minimal upkeep compared to natural grass, eliminating the need for mowing, watering, or fertilizing. This makes it a practical choice for homeowners seeking a low-maintenance solution. Hall Turf’s golf practice green is designed to provide an authentic golfing experience, allowing you to hone your short game right in your backyard. Ultimately, investing in quality materials and professional setup can significantly enhance your golfing experience at home.
Install Your Golf Practice Green: Step-by-Step Instructions
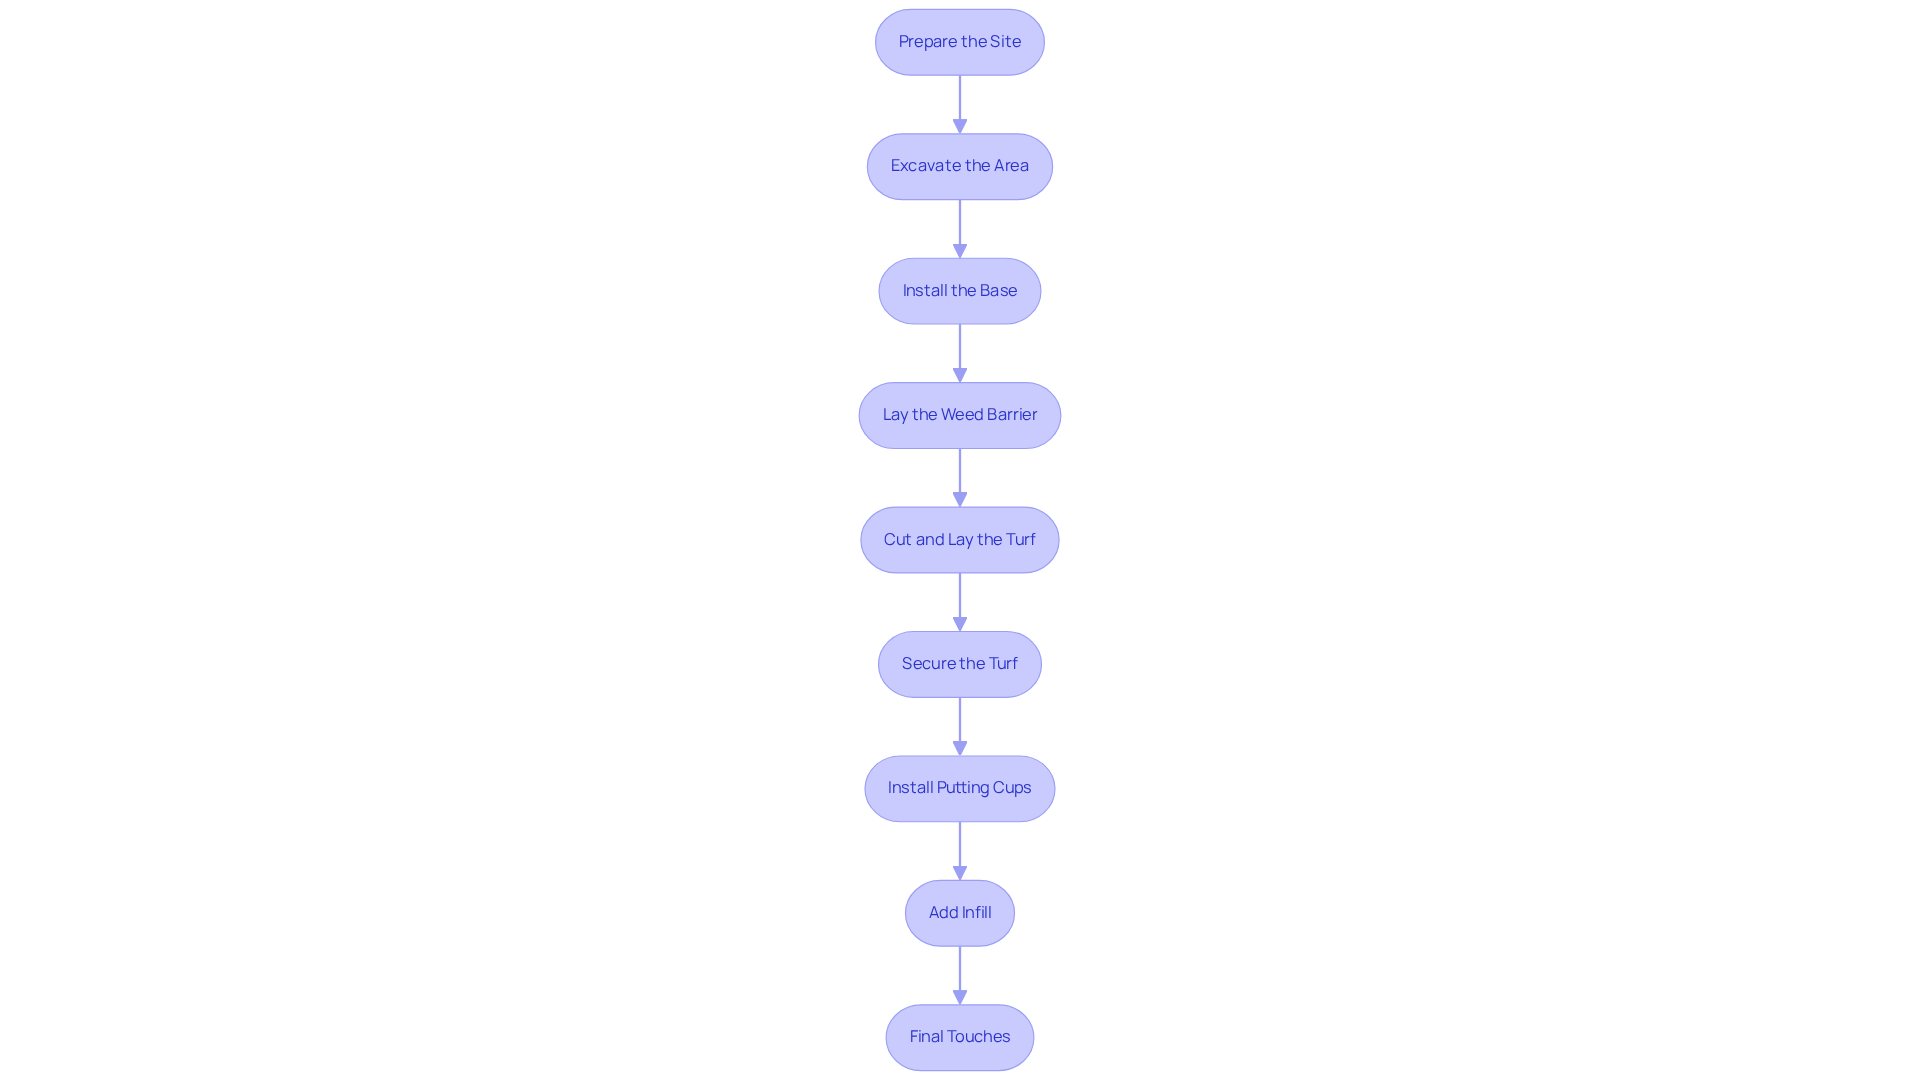
Now that you have your materials and tools ready, follow these step-by-step instructions to install your golf practice green:
-
Prepare the Site:
- Clear the area of any debris, rocks, or vegetation. If there is existing grass, use a sod cutter to remove it, ensuring a clean slate for your practice green installation.
-
Excavate the Area:
- Dig out the area to a depth of about 4-6 inches to accommodate the base material. Ensure the area is level and slopes slightly for drainage.
-
- Spread a layer of crushed stone or gravel evenly across the excavated area, typically 2 to 4 inches deep. Use a plate compactor to compact the base material thoroughly, achieving at least 95% compaction density for stability. Without a solid base, the turf on your practice green may shift over time, compromising its quality.
-
Lay the Weed Barrier:
- Place weed barrier fabric over the compacted base to prevent weed growth and muffles sound.
-
Cut and Lay the Turf:
- Roll out the artificial turf over the prepared area, allowing it to acclimate for a few hours. Cut the sod to fit the shape of your green, ensuring edges are neat and aligned, trimming any excess with a utility knife.
-
Secure the Turf:
- Use landscape staples or adhesive to secure the turf to the ground, especially around the edges, to prevent shifting.
-
Install Putting Cups:
- Cut holes for the putting cups according to the manufacturer’s instructions, ensuring they are level with the turf surface. Place the cups and secure them in position, ensuring the top lip is level with the ground height.
-
Add Infill:
- Spread infill material evenly across the turf to help it stand upright and provide a realistic feel, typically using 2 to 2.5 lbs of silica sand per square foot. Brush the surface to distribute the infill evenly, ensuring a smooth and consistent ball roll. Using the right amount of infill helps prevent turf shrinkage and ensures the ball rolls consistently.
-
Final Touches:
- Take a moment to check for any uneven areas and make adjustments as needed to keep the surface smooth and flush around the cups. Inspect the putting surface after the initial application to ensure even distribution of infill, which is essential for achieving a smooth playing area. Tidy up the setup area, eliminating any surplus materials to prepare your new practice space for use.
Cost Considerations:
Homeowners can save between $2,400 to $11,600 on a 400-square-foot eco-friendly area by choosing a DIY approach instead of employing a contractor. However, for more complex projects, consulting with experienced builders or golf course architects is advisable to ensure optimal design and functionality.
As noted by pleased clients like Scott Sachse, who commended Hall for their outstanding installation of a putting green, the professionalism and attention to detail offered by Hall guarantee a high-quality outcome. Dick Bryant also emphasized how Hall’s expert assessment resulted in the ideal solution for his grass requirements, demonstrating the company’s dedication to customer satisfaction.
For inquiries and quotes, please reach out to Hall Grass at (816) 555-7890 or email info@hallgrass.com. Hall Turf is a licensed contractor with extensive experience and product certifications, ensuring compliance and technical rigor in all installations.
Ultimately, investing in a well-installed golf practice green can enhance your golfing experience and improve your skills over time.
Finalize and Maintain Your Practice Green
To maintain the quality of your golf practice green, establishing a thorough maintenance routine is crucial. Here’s how to ensure your green remains in top condition:
-
- Walk around the green to check for any uneven areas or loose edges. Make necessary adjustments to ensure a smooth surface.
-
- Remove debris, leaves, and dirt regularly to keep the surface clean. A leaf blower or broom is effective for this task, helping to prevent moisture accumulation and weed growth.
-
- Use a stiff-bristled broom to brush the turf fibers every couple of weeks. This practice maintains the upright position of the grass, ensuring a smooth and true roll for your putting experience.
-
- Periodically check the infill levels, especially in high-use areas, and add more if necessary to maintain the turf’s performance. Typically, a top-up is required every 2 to 3 years in residential settings to ensure optimal performance.
-
Weed Control:
- Weed growth can quickly compromise the appearance and health of your green if not addressed. Monitor for any weed growth around the edges and remove them promptly to prevent them from spreading.
-
- Adjust your maintenance routine seasonally. In winter, for example, ensure snow and ice are removed gently to prevent damage to the turf fibers. Avoid using sharp tools that could tear the surface.
-
- Make sure to enjoy your practice green; it’s a great opportunity to improve your skills and share enjoyable moments with friends. A well-maintained golf practice green not only enhances your golfing experience but also safeguards your investment in your property.
As noted by satisfied customers like Scott Sachse and Dick Bryant, Hall Turf’s commitment to quality and professionalism ensures that your installation will be a source of pride and enjoyment for years to come.

Conclusion
Investing in a golf practice green can significantly enhance your outdoor experience and skill development. By following the outlined steps – from defining your goals and gathering essential materials to executing the installation and maintenance – homeowners can achieve a professional-quality putting green that enhances both enjoyment and performance.
Key insights include the importance of careful planning, such as measuring your space and considering local regulations, as well as the necessity of using high-quality materials and tools. Collaborating with experts such as Hall Turf ensures a successful installation, backed by their proven track record. To keep your green in top shape, regular maintenance like cleaning and managing infill is essential for preserving its quality and longevity.
Ultimately, investing in a golf practice green not only elevates your golfing experience but also increases your property’s market value. By choosing Hall Turf, you ensure that your project is executed with expertise, ultimately leading to a rewarding addition to your home and lifestyle. For those ready to take the next step, Hall Turf is available for inquiries and quotes at (816) 555-7890 or via email at info@hallturf.com, ensuring that your project is handled with the utmost professionalism and care.
Frequently Asked Questions
What should I consider when defining my goals for a golf practice area installation?
You should identify the purpose of the area, whether it will be used solely for personal practice, for entertaining guests, or a combination of both. This decision will influence the size and complexity of your design.
How do I measure the space for my golf practice area?
Accurately measure the dimensions of the designated area, considering factors like sunlight exposure, drainage patterns, and proximity to other structures, as these will affect the setup and maintenance.
What design features can I include in my golf practice area?
Consider adding features such as multiple holes, slopes, or chipping areas. Creating a rough sketch can help visualize how these elements will fit together within your space.
Why is it important to check local regulations before installation?
Checking local regulations is crucial to avoid costly compliance issues. Ensure that your planned setup adheres to local zoning laws and homeowners’ association guidelines.
How can I set a budget for my golf practice area project?
Establish a comprehensive budget that includes materials, tools, and any professional assistance you may need. This budget will guide your choices throughout the setup process.
Why should I consult with experienced installers like Hall Turf?
Consulting with experts like Hall Turf, who have over 15 years of experience in artificial grass installation, can provide practical advice for your project. They offer a variety of services and are known for their professionalism and attention to detail.
What services does Hall Turf provide for golf practice area installations?
Hall Turf provides services including pet grass setup and playground surface solutions, ensuring that all elements of your outdoor area are addressed effectively.
How can Hall Turf assist with drainage patterns and infill choices?
Hall Turf’s team can evaluate your yard’s drainage patterns and suggest suitable infill choices to guarantee a successful setup for your golf practice area.
List of Sources
- Define Your Goals and Space Requirements
- What To Consider Before Installing Backyard Putting Green Turf (https://grizzlyoutdoor.com/blog/what-to-consider-before-installing-backyard-putting-green-turf)
- How To Make Your Backyard Putting Green Dream a Reality (https://usga.org/content/usga/home-page/course-care/green-section-record/62/issue-17/how-to-make-your-backyard-putting-green-dream-a-reality.html)
- How to Build a Putting Green in Your Backyard: 5 Tips – Motz (https://themotzgroup.com/infill_blog/tips-for-installing-a-putting-green-in-a-backyard)
- Want to build a backyard putting green? Here are 4 key considerations (https://golf.com/lifestyle/backyard-putting-green-guidelines-questions?srsltid=AfmBOopUdL9uPPm_5kzMrXR8ATT1dDDPjKYs0Bg0P8Hfk1XFaH8RFSQf)
- Designing Your Dream Golf Space: What To Consider for the Ultimate Synthetic Grass Putting Green – EnvyLawn (https://envylawn.com/designing-your-dream-golf-space-what-to-consider-for-the-ultimate-synthetic-grass-putting-green)
- Gather Essential Materials and Tools
- 10 Things to Consider During Putting Green Installation (https://helmslandscapedesignllc.com/putting-green-installation)
- Backyard Putting Green Cost: What Homeowners Should Expect (https://celebritygreens.com/backyard-putting-green-cost)
- How Much Does a Backyard Putting Green Cost? | Southwest Greens (https://southwestgreens.com/artificial-putting-greens/backyard-putting-greens/cost-of-a-backyard-putting-green)
- Kansas City MO Putting Greens: Are They Worth It? (https://waterlooturf.com/kansascity/backyard-putting-greens)
- How To Make Your Backyard Putting Green Dream a Reality (https://usga.org/content/usga/home-page/course-care/green-section-record/62/issue-17/how-to-make-your-backyard-putting-green-dream-a-reality.html)
- Install Your Golf Practice Green: Step-by-Step Instructions
- Premium Grass Blades Putting Green Installation Expert Tips (https://premiumgrassblades.com/installation-guide-putting-green)
- How To Make Your Backyard Putting Green Dream a Reality (https://usga.org/content/usga/home-page/course-care/green-section-record/62/issue-17/how-to-make-your-backyard-putting-green-dream-a-reality.html)
- 5 Backyard Putting Green Installation Mistakes & How to Fix Them (https://aglgrass.com/blogs/backyard-putting-green-mistakes)
- How to Install a Putting Green in Your Backyard: A Step-by-Step Guide (https://turffactorydirect.com/blog/how-to-install-a-putting-green-in-your-backyard?srsltid=AfmBOoowFSajnREkIl_lWigh0WksC5QFjs0N6zjh0ywFdKCBSOLbHo5v)
- Finalize and Maintain Your Practice Green
- Artificial Putting Green Maintenance: Year-Round Care Guide (https://aglgrass.com/blogs/artificial-putting-green-maintenance)
- Artificial Golf Greens Maintenance Tips (https://southwestgreens.com/blog/artificial-golf-greens-maintenance-tips)
- Compare Turf for Golf: Performance, Costs, and Best Choices – Hall Turf | Artificial Turf Installation Kansas City KS & MO (https://hallturf.com/compare-turf-for-golf-performance-costs-and-best-choices)
- How to Clean and Maintain Putting Green Turf: A Seasonal Guide (https://backninegreens.com/blog/how-to-clean-and-maintain-putting-green-turf-seasonal-checklist)
- Protecting the Practice Areas: 5 Ways Golfers Can Help (https://usga.org/content/usga/home-page/course-care/green-section-record/60/golf-journal/protecting-the-practice-areas—5-ways-golfers-can-help.html)