
Start with the installation sequence, not the turf surface
Artificial grass can be a practical, low-maintenance option for everyday play and outdoor use; the visible grass is only the final layer of the project. Artificial grass can help reduce muddy paws, tolerate frequent activity, and make pet waste easier to manage. It still needs occasional rinsing, debris removal, and care, while upfront cost, surface heat, drainage, and odor control remain practical considerations.
The installation sequence matters because the base carries the drainage path and supports the turf above it. Base preparation is the installation step most likely to make or break the result. Serious artificial-grass problems are uncommon when turf is installed correctly, while most complaints involve installation or drainage rather than the turf material itself.
The installation sequence described in this guide is:
- Record the area, intended use, access, drainage conditions, and underground utilities.
- Remove vegetation and unstable material instead of covering it.
- Build, grade, compact, and inspect the aggregate base.
- Place the turf, align the pile, join the rolls, secure the perimeter, and add infill when required.
- Match the system to pet use, then plan cleaning and inspection.
- Compare the completed site scope with the likely cost before arranging professional work.
A general installation guide places most artificial grass jobs around $5,000 to start, with product and labor affecting the overall cost. Treat that figure as a broad starting point, not a property-specific price. Your site record will determine whether a local estimate is meaningful.
Record the site before excavation
The site record should describe the proposed lawn, dog run, or pet area before any excavation begins. Measure the area, note the intended turf direction, review drainage requirements, and locate underground utilities. If a utility conflict is identified, contact a qualified professional or the responsible authority promptly for project-specific direction. Record access points as well: a narrow gate, steps, or a long route from the street can affect how materials and equipment reach the work area.
A thorough site evaluation covers five practical subjects:
- Dimensions: Measure the length and width of each section, including irregular corners and separate pet zones.
- Existing conditions: Note grass, roots, rocks, compacted soil, soft spots, slopes, and areas that stay wet.
- Water movement: Mark places where water collects after rain and identify where runoff currently travels.
- Use: Describe the number and activity level of dogs, whether the area is a passage or a dedicated run, and whether people will use it too.
- Access and preferences: Record gates, walkways, preferred turf direction, edge treatments, color preferences, and budget considerations.
Kansas City has four distinct but unpredictable seasons, and heavy spring rains and ice storms often leave yards uneven. A Kansas City estimate says those conditions can require thorough excavation before turf work. That regional point makes the existing grade and drainage history useful information for a Kearney or Kansas City project, but it does not determine the required work at your property.
Synthetic grass material affects both durability and price per square foot. One Kansas City estimate describes the following material figures, measured per square foot of synthetic grass:
| Material | Description in the estimate | Listed material price |
|---|---|---|
| Nylon | Described as the most durable option | $5 to $8 per square foot |
| Local polypropylene | Described as having medium durability | $5 to $10 per square foot |
Those descriptions and prices are material comparisons, not installed project prices. Record the use of the space first so the material discussion relates to actual traffic, digging, drainage, and heat exposure.
Remove the unstable surface and make room for the base
The ground beneath the turf must become a stable base rather than remain loose soil or living grass. Do not lay artificial grass directly on loose soil or existing grass for a durable installation. The ground may settle or shift, vegetation can decay below the surface, and weeds may grow through the finished area.
Ground preparation generally follows this sequence:
- Clear organic material and debris, including existing sod, weeds, roots, rocks, and gravel where those materials are present.
- Excavate the area to make room for the base and finished turf surface.
- Remove high spots and address low or soft areas rather than burying them under aggregate.
- Inspect the exposed ground before placing the base materials.
Many residential installations excavate roughly 3 to 4 inches, with the depth adjusted for soil conditions and use. Soft or clay soils, high-traffic areas, and sites that stay wet often call for a thicker base. Hall Turf’s installation guidance recommends clearing grass, rocks, and debris and excavating to a depth of 3 to 4 inches. Some installation guidance describes a level base, while other guidance recommends a slight grade for runoff; the site’s drainage plan, surrounding surfaces, and conditions should determine the finished contour.
Do not treat those dimensions as an automatic excavation prescription for every Kearney or Kansas City property. Soil, access, existing drainage, and the intended use affect the finished assembly. One reported do-it-yourself installation required excavating to a depth of 12 inches, adding and tamping gravel and sand, and modifying in-ground sprinklers; that account illustrates how a particular property can differ from a simple surface replacement.
Edge preparation belongs in the same planning record. Secure turf edges with suitable fixings, typically spaced 8 to 12 inches, or 200 to 300 millimeters, apart, while following the manufacturer’s guidance. If drainage failure, unstable ground, or another unsafe condition cannot be resolved safely, stop; if in doubt, contact a qualified professional or the responsible authority promptly.

Build and inspect the drainage base
The drainage base gives water a route below the turf while creating the smooth, compact foundation that supports the finished surface. Artificial turf drainage depends on water moving through the grass fibers, infill, backing, and underlying base. A problem in any layer can affect the path through the system.
A practical base sequence includes the following steps:
- Place drainage-grade crushed rock. One installation guide specifies a first layer 2 to 2.5 inches thick. That layer can stabilize the surface and allow water to move through the profile, helping prevent puddling or erosion beneath the turf.
- Add and shape the remaining aggregate. A Southwest ground-preparation guide describes crushed fines spread evenly to create a base from 3 inches to near finish grade. Treat that dimension as the cited guide’s preparation detail, not as a universal finished contour for every property.
- Grade for water movement. Grade the aggregate for the required drainage contours, including crowns or slopes where the site plan calls for them. A slight slope can help avoid water buildup or improper drainage.
- Compact the base. The cited Southwest guide sets a goal of 90% to 95% compaction of the prepared base, typically using 2 to 3 passes, then recommends letting it dry and checking for inconsistencies.
- Inspect the finished surface. After the base layers are complete, hose and compact the surface again so it is dense and smooth, without bumps, dips, or ridges that could show through the turf.
The finished contour should support the drainage plan rather than simply look level from one viewpoint. Check transitions to sidewalks, patios, beds, gates, and other surfaces. If the site has a known pooling area, do not assume the turf will correct it by itself; resolve the base and drainage approach before the visible surface is installed.

Place, join, secure, and finish the turf
The turf placement stage turns the prepared base into a continuous surface, but each connection and perimeter still needs attention. The work includes placing and acclimating the turf, cutting it to the site, joining rolls, securing the edges, adding infill when the product requires it, and grooming the finished surface.
Use this sequence as a practical review of the work:
- Set the layout: Place the rolls so the grass pile leans in the same direction. Plan cuts around beds, paths, posts, and the shape of the dog area before trimming.
- Cut carefully: Keep cuts controlled at boundaries and leave the finished perimeter compatible with the selected edging or anchoring method.
- Join the rolls: Use adhesive-bond seaming and reinforce with specialty turf adhesive where necessary. Finished seams should be flat and tight, without separation or fraying.
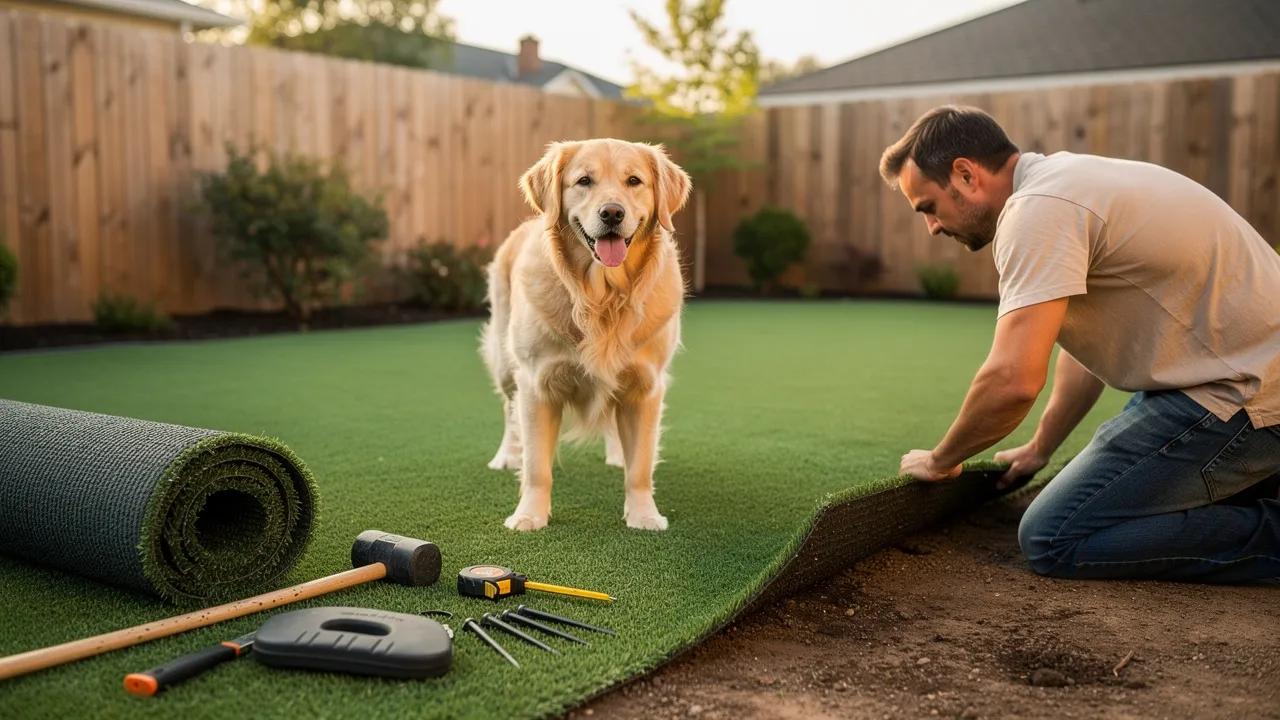
- Anchor the perimeter: After layout and seaming, secure the turf to a firmly anchored nailer board or another suitable perimeter structure with stainless steel staples, screws, or nails.
- Protect pet-area edges: Landscape edging or stakes are particularly useful around a dog run because they help prevent a dog from lifting the turf edge.
- Apply required infill and groom: Add infill when the product calls for it, then brush and groom the surface so the fibers present consistently.
Do not judge the finished work only by its appearance from above. Walk the transitions, inspect the seams, and look closely at edges near fences, sidewalks, planting beds, and gates. A pet area puts repeated use at the perimeter, so the anchoring plan matters as much as the visible turf.

Specify the system for dogs
A pet turf system must address liquid waste, repeated movement, edge security, and heat exposure rather than treat every artificial grass product as interchangeable. Not all artificial turf is ideal for pets. Turf designed for pets usually features enhanced drainage, more durable fibers, and sometimes antimicrobial properties or compatible infills to manage odors and wear.
Use these questions when you define the system:
- Where will urine go? Effective drainage is especially important in pet areas because urine must pass through the turf quickly to help prevent odors and bacterial growth. Ask how the turf backing, infill, and base work together as a drainage path.
- What use must the surface handle? Synthetic turf is designed to withstand wear from running, playing, and occasional digging. Match the proposed material and base to the activity you recorded rather than assuming a residential lawn specification fits a busy dog run.
- How will the edges stay in place? Use perimeter edging or stakes in pet areas to help prevent a dog from lifting the turf edges.
- How will heat be managed? Synthetic turf can become warm under strong sunlight and may be uncomfortable for bare paws on very hot days. Lighter-colored turf or shaded areas can help manage this. Plan shaded relief where the layout permits it.
- What does the infill do? Consider whether the selected infill is compatible with the turf and the pet-use objectives, including odor management and wear.
Environmental trade-offs also belong in a complete decision. In a study conducted in Spain, artificial turf fibers comprised up to 15% of plastic debris in aquatic environments. That figure describes aquatic debris in Spain, not the percentage of material leaving a Kearney or Kansas City yard. It does show why drainage design, surface care, and the handling of turf-system materials deserve attention alongside comfort and durability.
Plan the cleaning and inspection routine
Pet turf care is a recurring routine, not a one-time finishing task. Artificial turf is often low-maintenance but is not maintenance-free, and maintenance is one of the strongest predictors of system lifespan.
Build the routine around four actions:
- Remove waste and debris: Pick up solid waste promptly, clear leaves and other debris regularly, and keep organic material from collecting in the pet area.
- Rinse for liquid waste: Rinse the turf regularly with water. Regular rinsing supports the drainage and odor-control plan, especially where dogs use the same zone repeatedly.
- Use suitable cleaners: Use enzyme-based or specialized turf cleaners designed to neutralize pet odors when cleaning requires more than water. Follow the product directions and use cleaners suitable for artificial grass.
- Brush and inspect: Brush according to the turf type and traffic level. Check the infill, seams, edges, and any area that feels different underfoot.
After installation, brush periodically and watch for settling, lifted edges, or seam issues. Continue checking how the area drains after rain. Pooling that remains, a new ripple, or a separating seam deserves attention before repeated dog traffic makes the condition harder to address.
The care plan should match the property record. A shaded dog run, a sunny open lawn, and a narrow relief area will not receive the same traffic or weather exposure. Write down who will remove waste, when the area will be rinsed, and which cleaner is compatible with the selected turf system so routine care does not depend on memory.
Separate installation time from long-term performance
Installation time and long-term performance are different planning questions. A professional crew may install artificial grass in 1 to 3 days for most yards between 500 and 1,000 square feet. That range measures the work period for yards in that size range; it is not a promise for an irregular, wet, restricted-access, or heavily prepared site.
The work period can expand when the site needs more excavation, debris removal, base construction, drainage work, detailed cuts, or difficult material access. Your site record should make those possible additions visible before the project is scheduled.
Long-term performance depends especially on drainage efficiency, sub-base stability, and consistent maintenance in high-moisture, high-UV environments. Those conditions make the base and care plan relevant after the crew leaves. A surface that looks finished on installation day still needs waste removal, rinsing, brushing, edge checks, and attention after rain.
Use the one-to-three-day figure to plan access, pets, and household routines for a typical 500-to-1,000-square-foot yard. Use the drainage, base, use, weather exposure, and maintenance plan to think about ongoing performance. Do not treat the installation duration as a lifespan estimate. For an expected service-life estimate, ask the installer or product manufacturer about the selected turf, use, drainage, climate, and maintenance.
Use site scope to interpret the cost
Artificial turf cost is the cost of a site-specific system, not only the price of the visible grass. Installation cost varies with area size, excavation and base-material needs, drainage work, equipment access, shape complexity, edging choices, infill requirements, labor, and turf material.
Our Hall Turf pricing guide places professionally installed artificial turf in the Kansas City area at $8 to $15 per square foot. That range includes old-lawn removal, grading, a compacted aggregate base, premium turf, infill, and edging. The same guide places a typical 500-square-foot backyard at $4,000 to $7,500 installed. Those figures describe the guide’s stated Kansas City-area scope; your property may require a different scope.
A separate Kansas City estimate reports an overall average project cost of $5,785 and smaller yard upgrades starting around $3,243. For a 500-square-foot lawn, that estimate reports material costs of $925 to $3,700 and labor costs of $1,850 to $4,170. These figures come from a separate estimate, so keep them separate from the Hall Turf range instead of blending them into one average.
Ground preparation can also appear as its own cost. In Kansas City, one estimate puts preparation for 3 cubic yards of space at $140 to $555 and disposal of old grass and dirt at $25 to $70. The quantities measure preparation and disposal for that stated standard-project example, not the full turf system.
Before you compare a price, write down whether it includes:
- Existing grass, roots, rocks, and debris removal
- Excavation depth and disposal
- Aggregate type, base thickness, grading, and compaction
- Drainage work and access requirements
- Turf material, infill, seams, and perimeter edging
- Labor, cuts around obstacles, and final grooming
- The cleaning and inspection expectations for pet use
Material affects both durability and price per square foot, while Kansas City’s seasonal weather makes the site conditions part of the scope. A low number may represent less preparation or fewer included components rather than a like-for-like comparison.
Pause for qualified site evaluation when warning signs appear
Installation warning signs indicate that the base, drainage path, seams, or perimeter needs attention before more work continues. Common problems include poor drainage, uneven surfaces, visible seams, loose edges, and turf that shifts; these conditions are often associated with base problems, rushed preparation, or improper securing.
Look for these visible signals:
- Water pooling after rain
- Ripples or waves across the surface
- Edges lifting near a sidewalk, bed, fence, or gate
- Seams that are visible or beginning to separate
- Turf that feels hard or uneven underfoot
If you see one of these conditions before completion, pause the next installation stage and arrange a qualified site evaluation. If the condition appears after completion, document the location, weather, affected edge or seam, and any change in drainage before requesting professional repair or assessment. A proper base supports good drainage and durability, so covering a warning sign with more turf or infill does not resolve the underlying condition.
The same boundary applies when the proposed site cannot be described clearly: unresolved drainage, unstable ground, or an installation plan that does not account for access should be evaluated before the visible surface is finalized. Keep the site record, photographs, measurements, and intended-use notes together so the condition can be discussed precisely.
Turn the completed site record into a Hall Turf quote
Your completed site record should identify the areas to cover, intended use, measurements, design preferences, access details, budget considerations, existing ground conditions, and drainage or accessibility concerns. Add photographs of uneven areas, pooling water, gates, transitions, and the route used to bring materials to the property.
For a Kearney or Kansas City project, include the questions that affect the complete pet-turf scope: how the base will be prepared, how water will move through the system, which edges will be secured, what infill is required, and what cleaning routine the finished area needs. Include any applicable product certifications, CAD files, and testing documentation in the project discussion, along with the project’s contractor-status information.
At Hall Turf, we design and install artificial grass in Kansas and Missouri, offer free estimates, and identify pet turf among our services. We are a licensed contractor. Bring the site record to the project conversation so the proposed work can be matched to the property rather than treated as a generic lawn replacement.