

Introduction
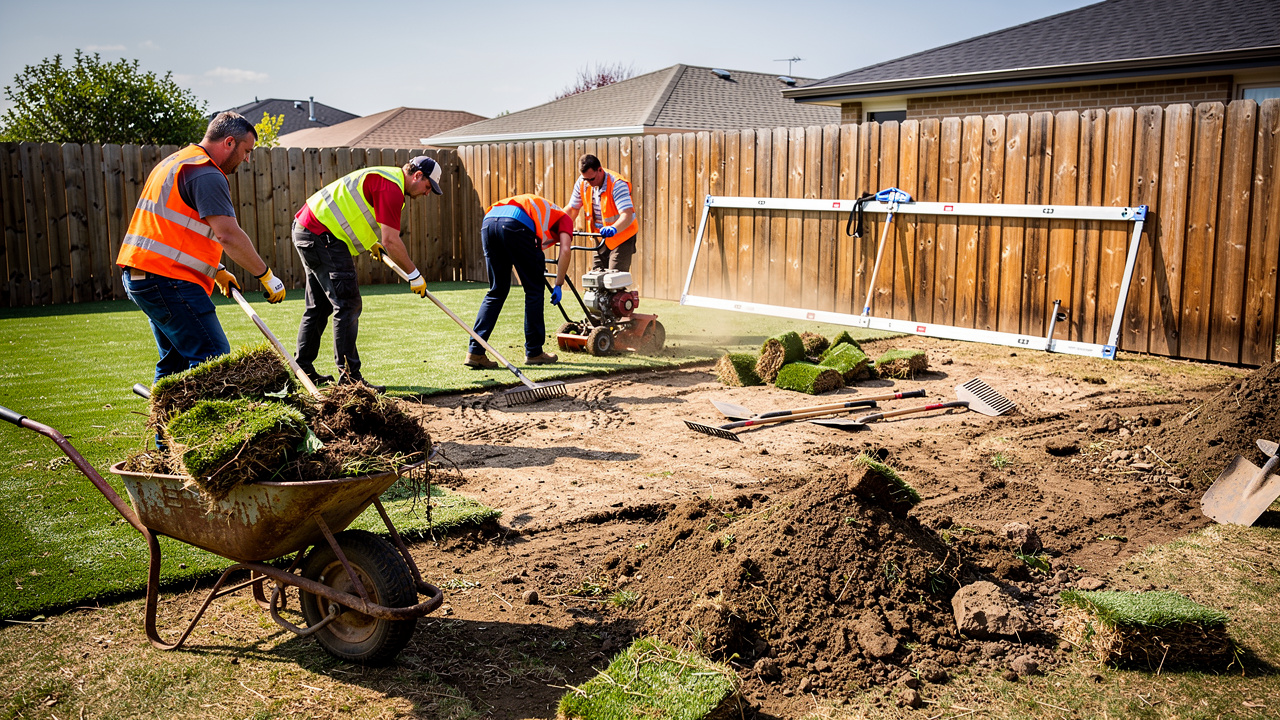
Meticulous ground preparation is crucial for a successful artificial turf installation, yet it is often underestimated by homeowners. This guide presents five essential steps that ensure a smooth, durable surface while enhancing the aesthetic appeal of outdoor spaces. Inadequate preparation can result in significant financial burdens and dissatisfaction for homeowners. Understanding the critical factors in site assessment, debris removal, and soil compaction can make all the difference in achieving a flawless installation that stands the test of time.
Assess the Site for Ground Preparation
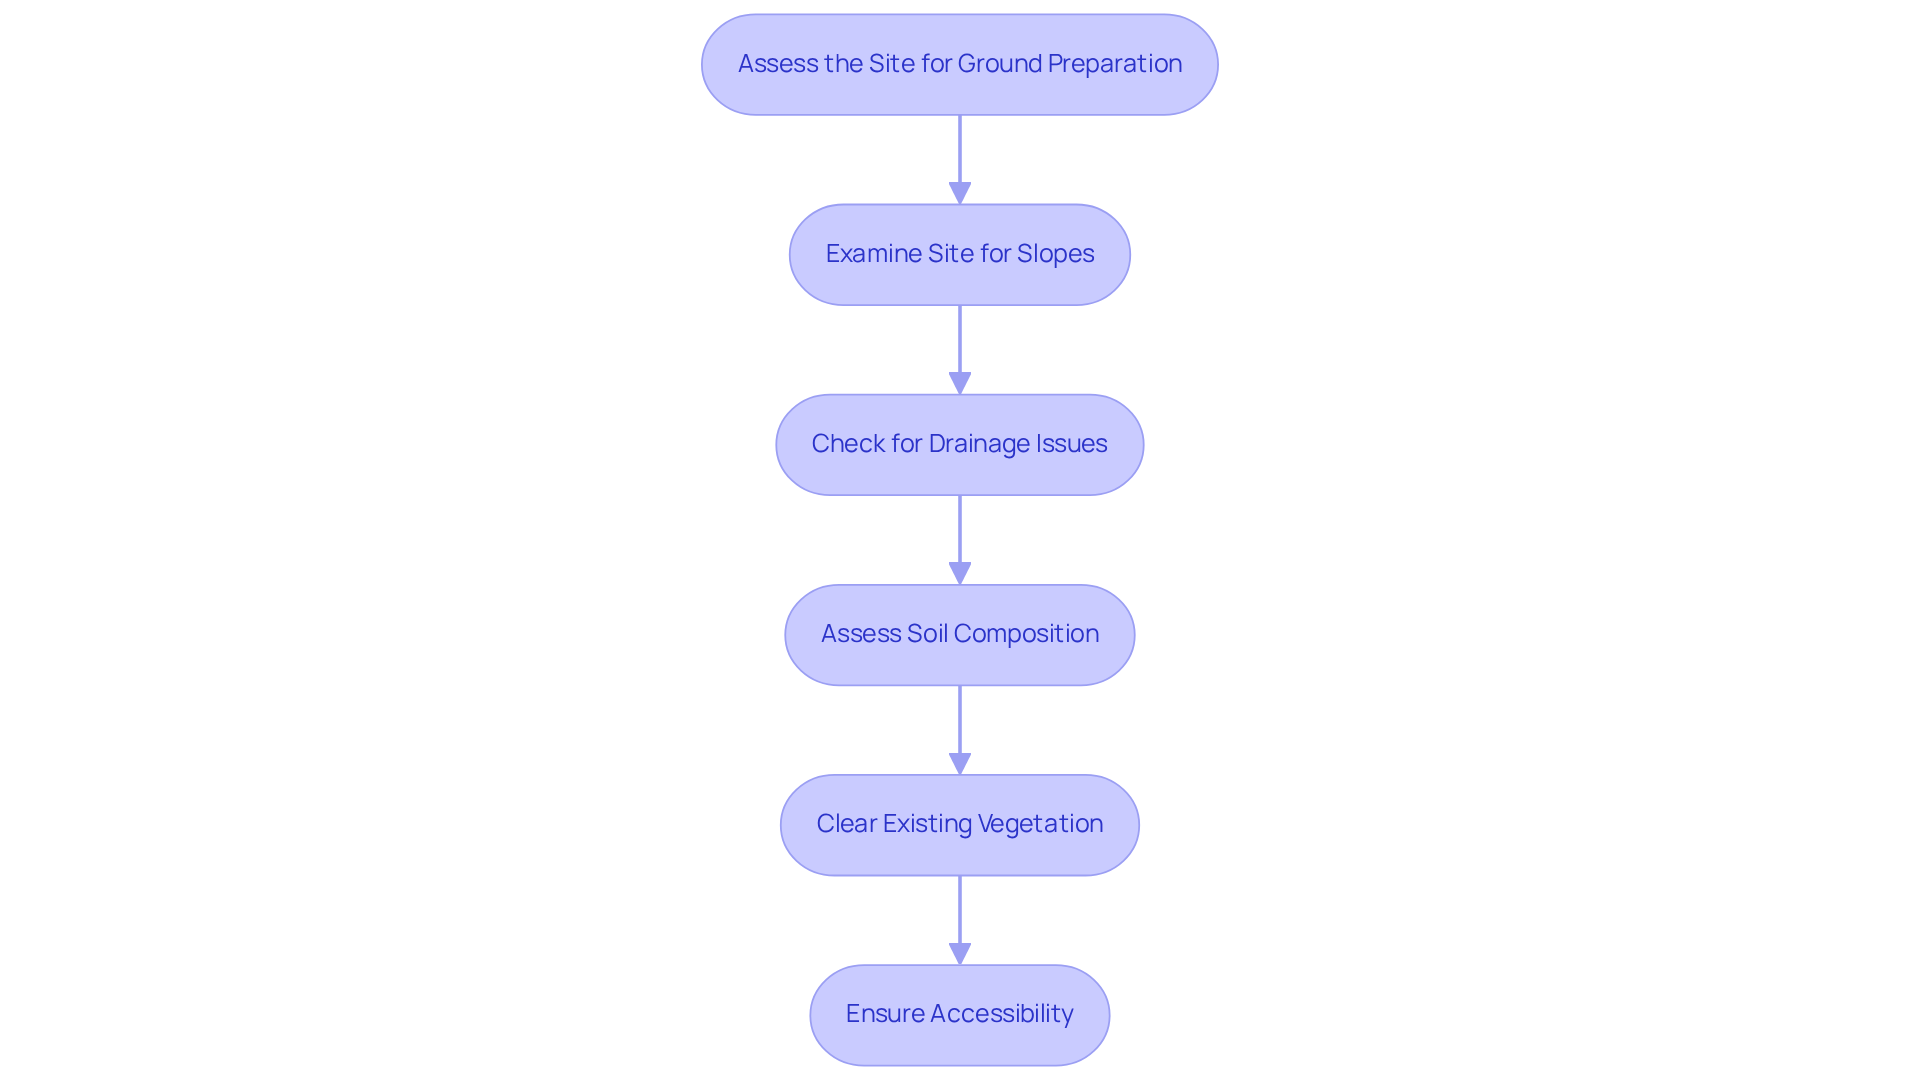
A thorough assessment of the installation site is critical for the ground prep for artificial turf to ensure successful placement. Start by carefully examining the region set aside for synthetic grass placement. Look for slopes, dips, or uneven surfaces that may necessitate additional grading to create a level foundation. Proper grading is a crucial aspect of ground prep for artificial turf, ensuring a smooth, stable lawn and preventing installation issues that could shorten its lifespan. Dick Bryant found that Brock from Hall Turf effectively assessed his grass problem and provided an ideal solution, resulting in a successful outcome.
Next, identify any spots where water tends to accumulate. Effective drainage is vital to prevent water from pooling beneath the turf, which can lead to mold growth and deterioration of the grass. Creating a slight incline away from buildings can facilitate proper drainage, ensuring that water flows away from the installation area. Scott Sachse expressed his gratitude for Hall Turf’s exceptional job in installing a putting green, highlighting their professionalism and timely execution.
Assess the soil composition-whether it is clay, sandy, or loamy-as this will significantly influence your ground prep for artificial turf strategy. For instance, clay soils may require more extensive excavation and specialized drainage solutions to ensure optimal performance of the turf. Excavating usually means removing about 3 to 4 inches of soil, which can take a few hours. Les Boatright appreciated Brock’s detail-oriented approach and broad knowledge base, which contributed to a successful project.
Take stock of any existing grass, weeds, or plants that need to be cleared from the site. This step is crucial for efficient site preparation, as ground prep for artificial turf requires eliminating undesirable plants to create a clean slate for the setup. Homeowners should plan for this clearing process, which can take additional time.
Ensure that the setup location is accessible for the necessary equipment and materials. Check for any obstacles that could hinder the setup process, as ease of access is critical for a smooth and efficient project execution. Labor costs in urban areas like Kansas City typically range from $5 to $10 per square foot, so ensuring accessibility can help manage overall expenses.
In summary, investing time in thorough site assessment and ground prep for artificial turf can significantly influence the success of your setup, ultimately leading to a durable and aesthetically pleasing outdoor space. Choosing a qualified contractor like Hall Turf can make all the difference in achieving a high-quality installation that meets your needs.
Clear the Area of Existing Grass and Debris
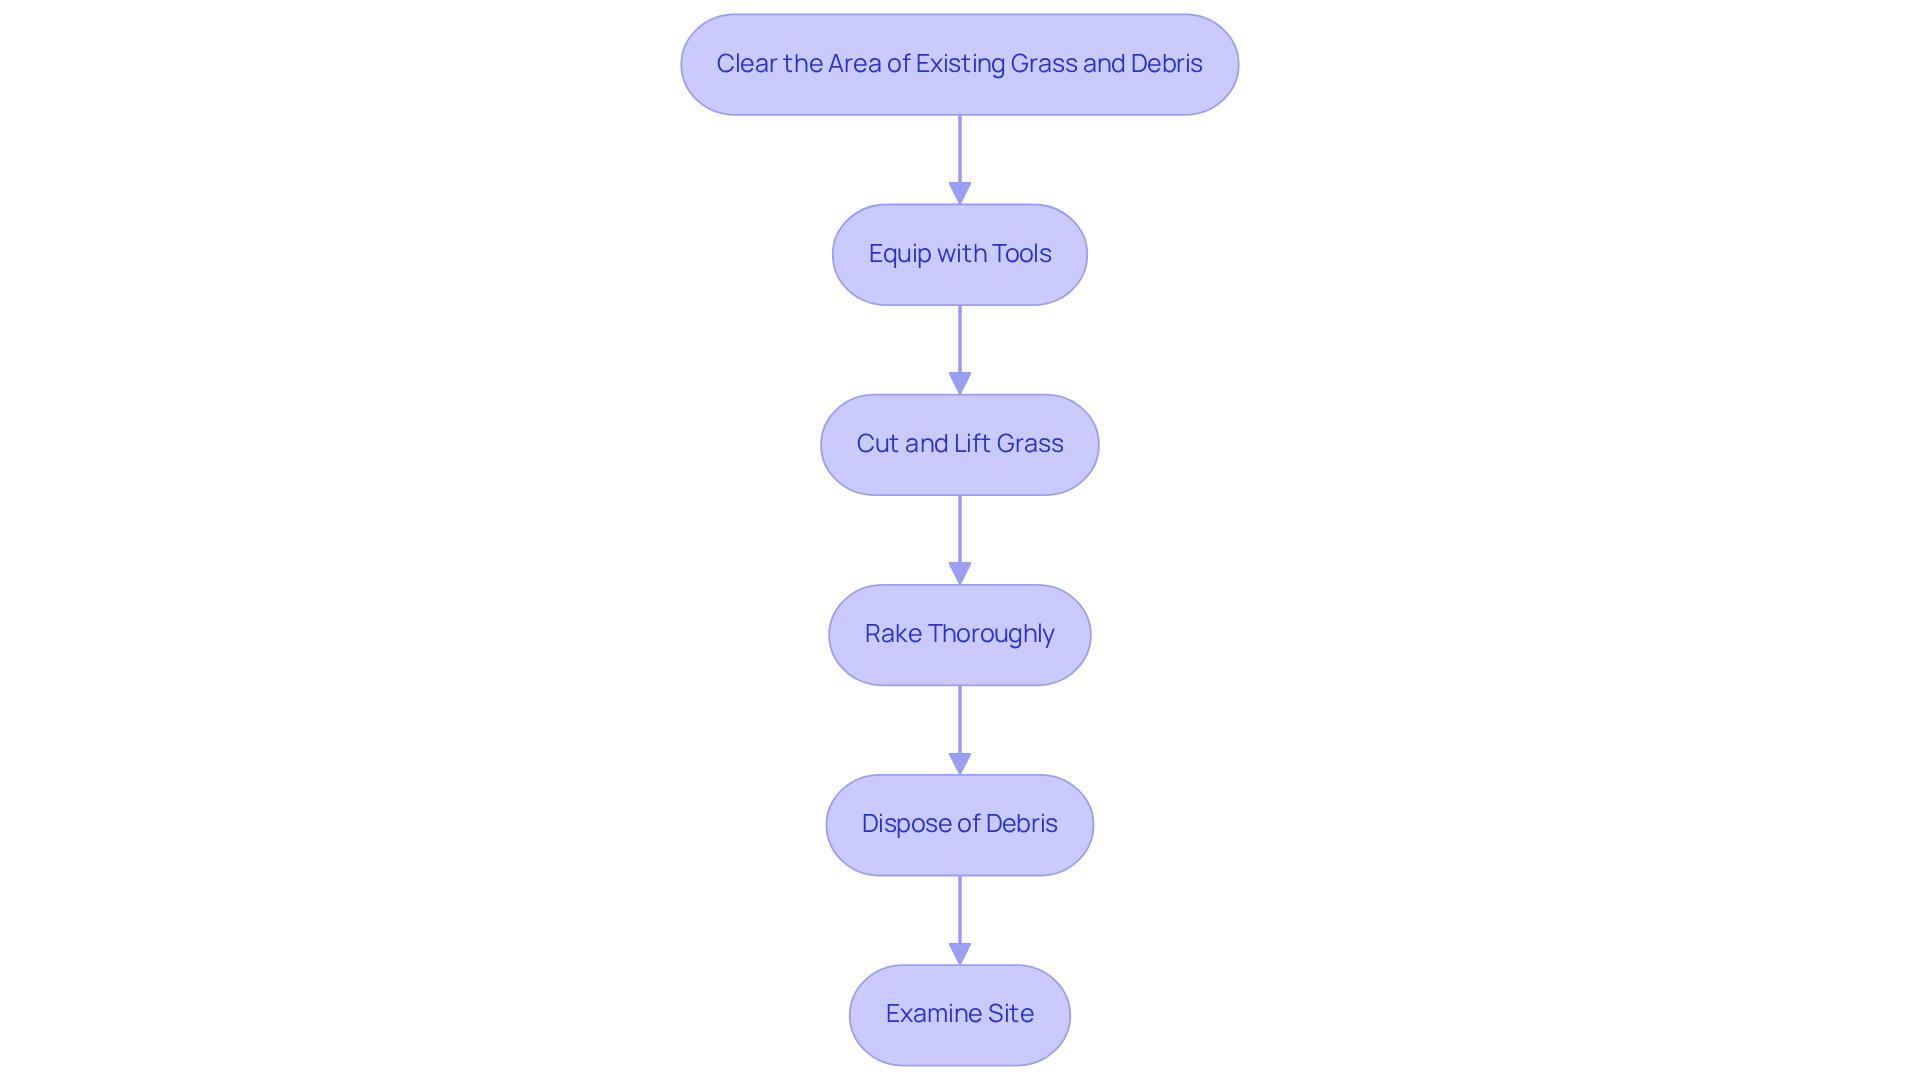
Meticulous preparation, specifically ground prep for artificial turf, is crucial to ensure a successful sod installation. Equip yourself with essential tools such as:
- A shovel
- A rake
- A motorized sod cutter for more extensive spaces
Using a wheelbarrow can help transport debris more effectively.
Utilize the sod cutter or shovel to cut and lift the existing grass and roots. It is essential to take away at least 2 inches of topsoil along with the grass to prevent regrowth and guarantee a clean surface for the new sod.
Rake the space thoroughly to eliminate any rocks, sticks, or other refuse that could interfere with the turf setup. Effective ground prep for artificial turf requires a clean ground surface for a successful setup.
Properly dispose of the removed grass and debris. Consider composting organic materials when possible, or check local regulations for appropriate disposal methods to ensure compliance with community guidelines.
After clearing, conduct a thorough examination of the site for any remaining roots or debris that may have been overlooked. Overlooking debris can lead to complications in the installation process, so ensuring a completely clean area is essential for the subsequent steps in the setup process.
Clients like Scott Sachse have praised Hall for their meticulous setup of a putting green, highlighting the team’s focus on detail and professionalism. Dick Bryant also emphasized how Hall’s expert assessment resulted in the ideal solution for his grass requirements, demonstrating the company’s dedication to quality and customer satisfaction. Hall Turf is a licensed contractor with extensive experience, having completed over 300 playground installations and serving more than 80,000 satisfied customers worldwide. Ultimately, ground prep for artificial turf lays the foundation for a thriving lawn that meets your expectations.
Grade the Ground for Optimal Turf Installation
Proper grading is essential in the ground prep for artificial turf to ensure effective drainage and prevent water accumulation, which can damage your turf installation.
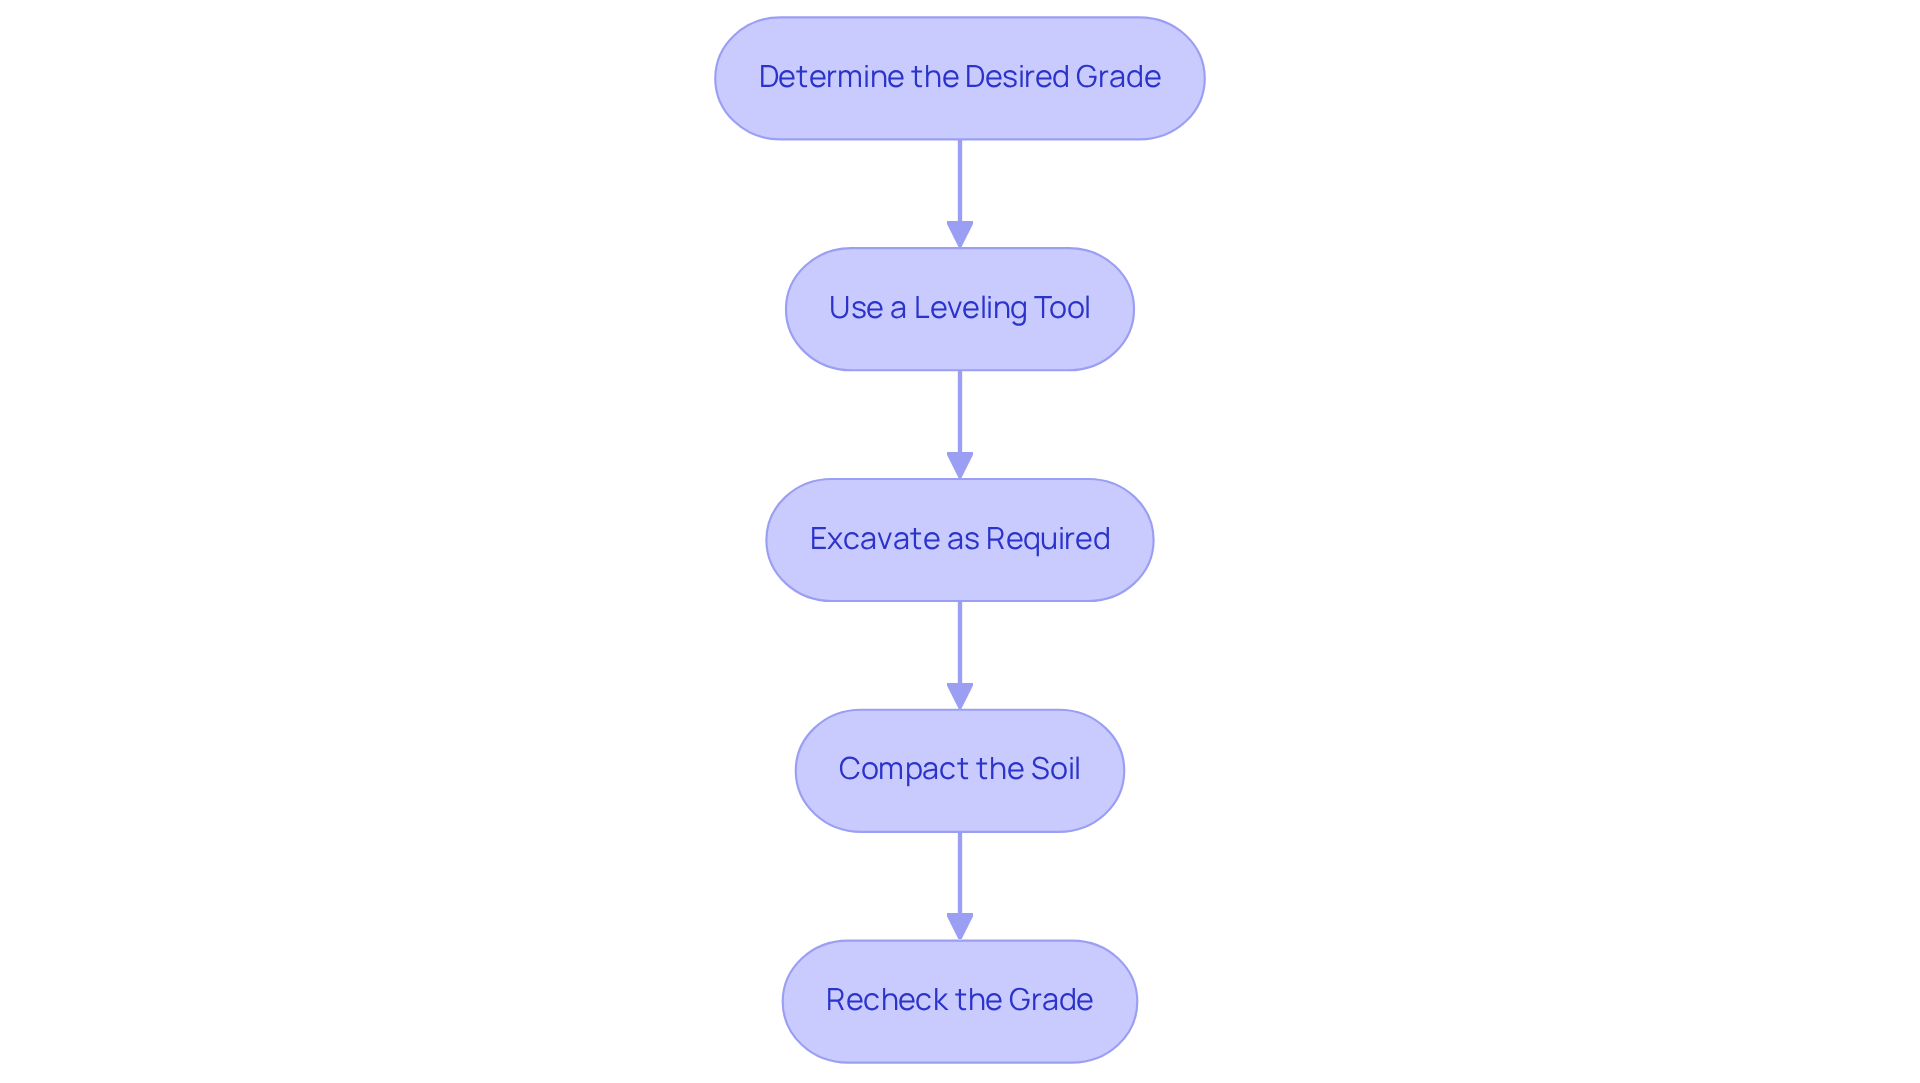
- Determine the Desired Grade: Establish a slight slope (1-2%) away from any structures to facilitate drainage. This is crucial for preventing water accumulation.
- Use a Leveling Tool: To ensure an even surface, employ a long board or leveling tool to check the ground’s evenness. Adjust the soil as necessary to achieve a flat surface.
- Excavate as Required: If the ground is uneven, it is necessary to excavate sections that are too high and fill in low spots with soil to create a smooth surface.
- Compact the Soil: After grading, compacting the soil is vital to prevent settling after the turf is installed. Use a plate compactor or hand tamper for this step.
- Recheck the Grade: Once compacted, it is crucial to recheck the grade to ensure it meets the desired slope for drainage. Make any final adjustments before proceeding. Neglecting the ground prep for artificial turf can lead to costly repairs and maintenance down the line.
Compact Soil and Sub-Base Materials
Achieving a solid foundation for synthetic grass necessitates careful ground prep for artificial turf and attention to several key steps.
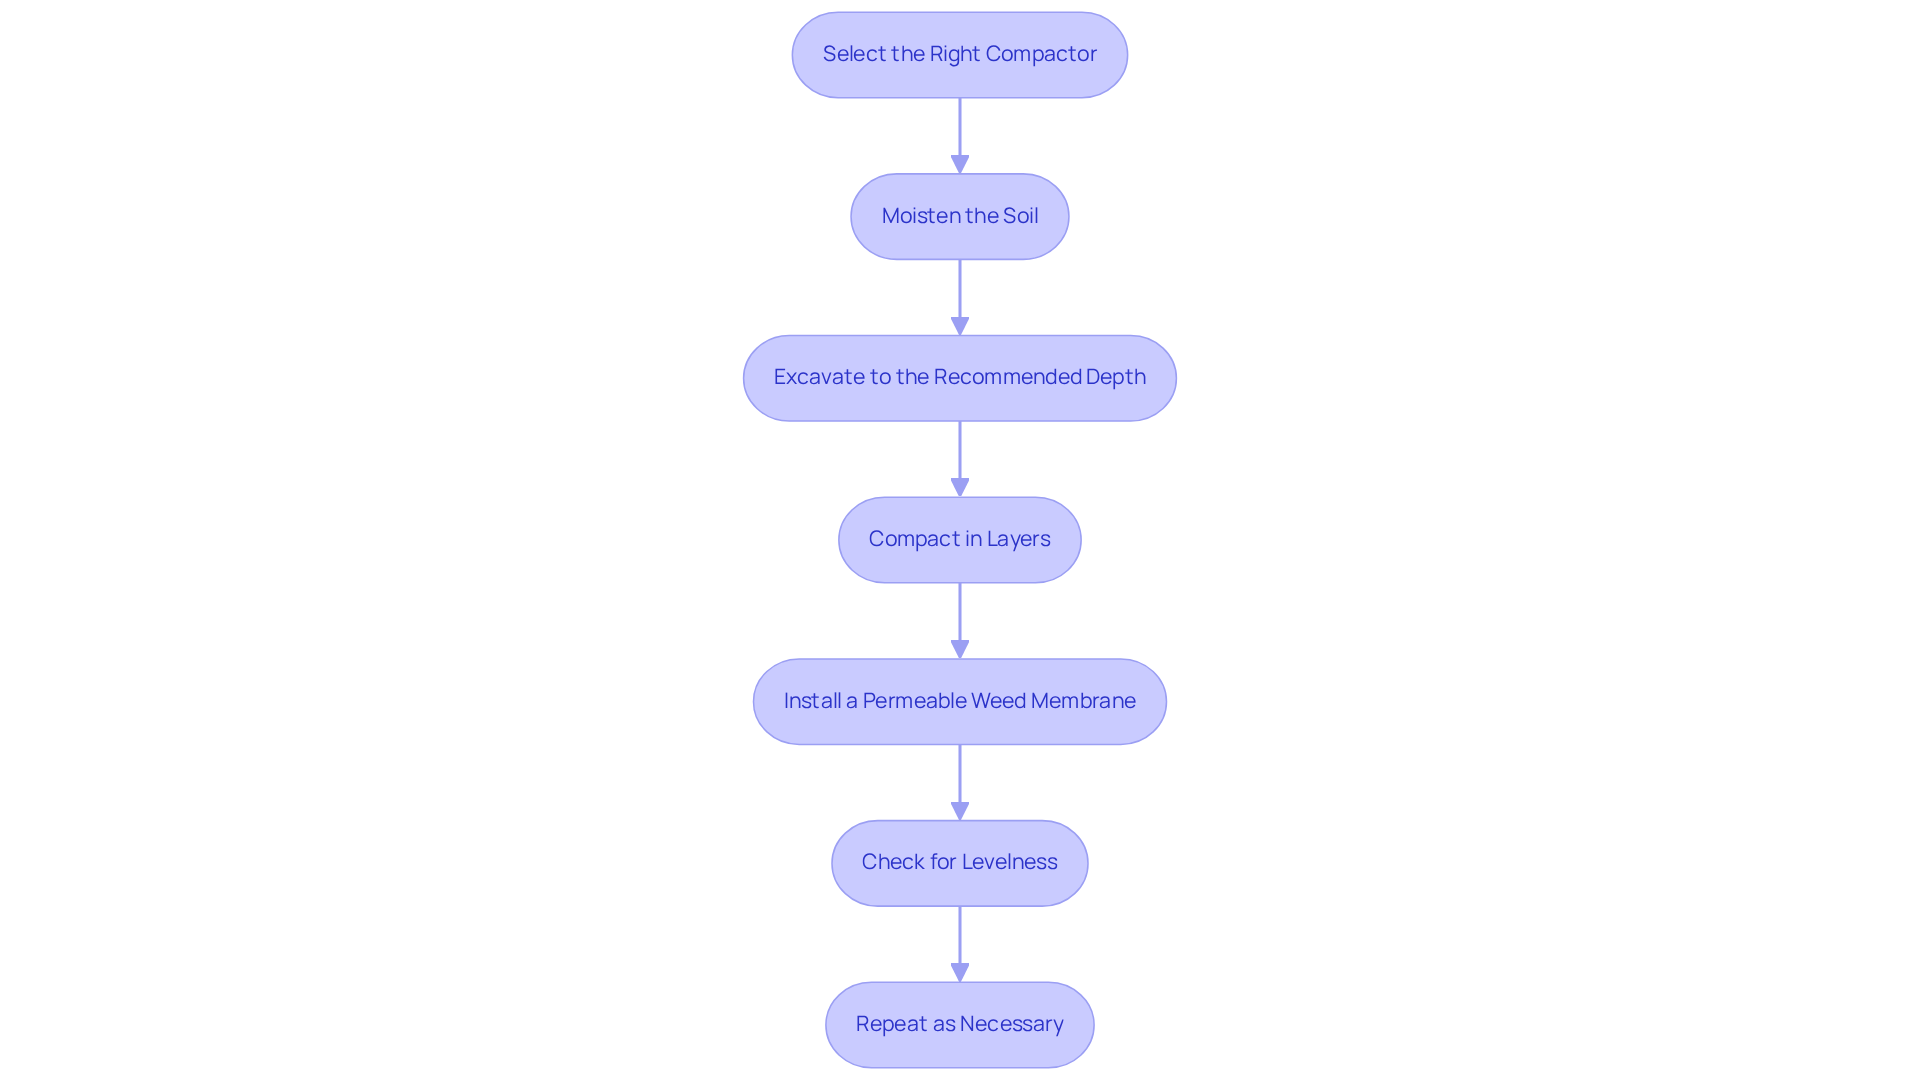
- Select the Right Compactor: Choose a plate compactor for larger areas to ensure effective compaction. For smaller spaces, a hand tamper may suffice, but mechanical compactors are generally more efficient for achieving the desired density.
- Moisten the Soil: Lightly dampening the soil before compaction enhances the process by improving cohesion and reducing dust. Proper moisture levels are crucial for achieving optimal compaction results.
- Excavate to the Recommended Depth: For residential lawns, excavate approximately 3-4 inches, while commercial or high-traffic areas should be excavated to 5-6 inches. Excavating to this depth ensures proper drainage and stability.
- Compact in Layers: When using sub-base materials, compact them in layers of 2-4 inches. This approach guarantees complete compaction and stability, which is crucial for the durability of the synthetic grass setup. Consider using materials like Crushed Miscellaneous Base (CMB) or Decomposed Granite (DG) for optimal results.
- Install a Permeable Weed Membrane: After excavation, lay down a permeable weed membrane to prevent weed growth and maintain the integrity of the installation.
- Check for Levelness: After compacting, use a level to assess the surface. Failing to check for levelness can lead to serious surface issues down the line. Make necessary adjustments to maintain a smooth and even foundation, which is essential for preventing future problems with the surface.
- Repeat as Necessary: Depending on the soil type and conditions, multiple rounds of compaction may be required to achieve the desired density and stability. If compaction is insufficient, the foundation risks failure, resulting in uneven surfaces and potential repairs. Aim for at least 80% compaction in the ground prep for artificial turf to ensure a solid foundation for the artificial grass.
Ultimately, thorough preparation and attention to detail will prevent future complications and ensure a lasting installation.
Lay Out and Secure the Artificial Turf
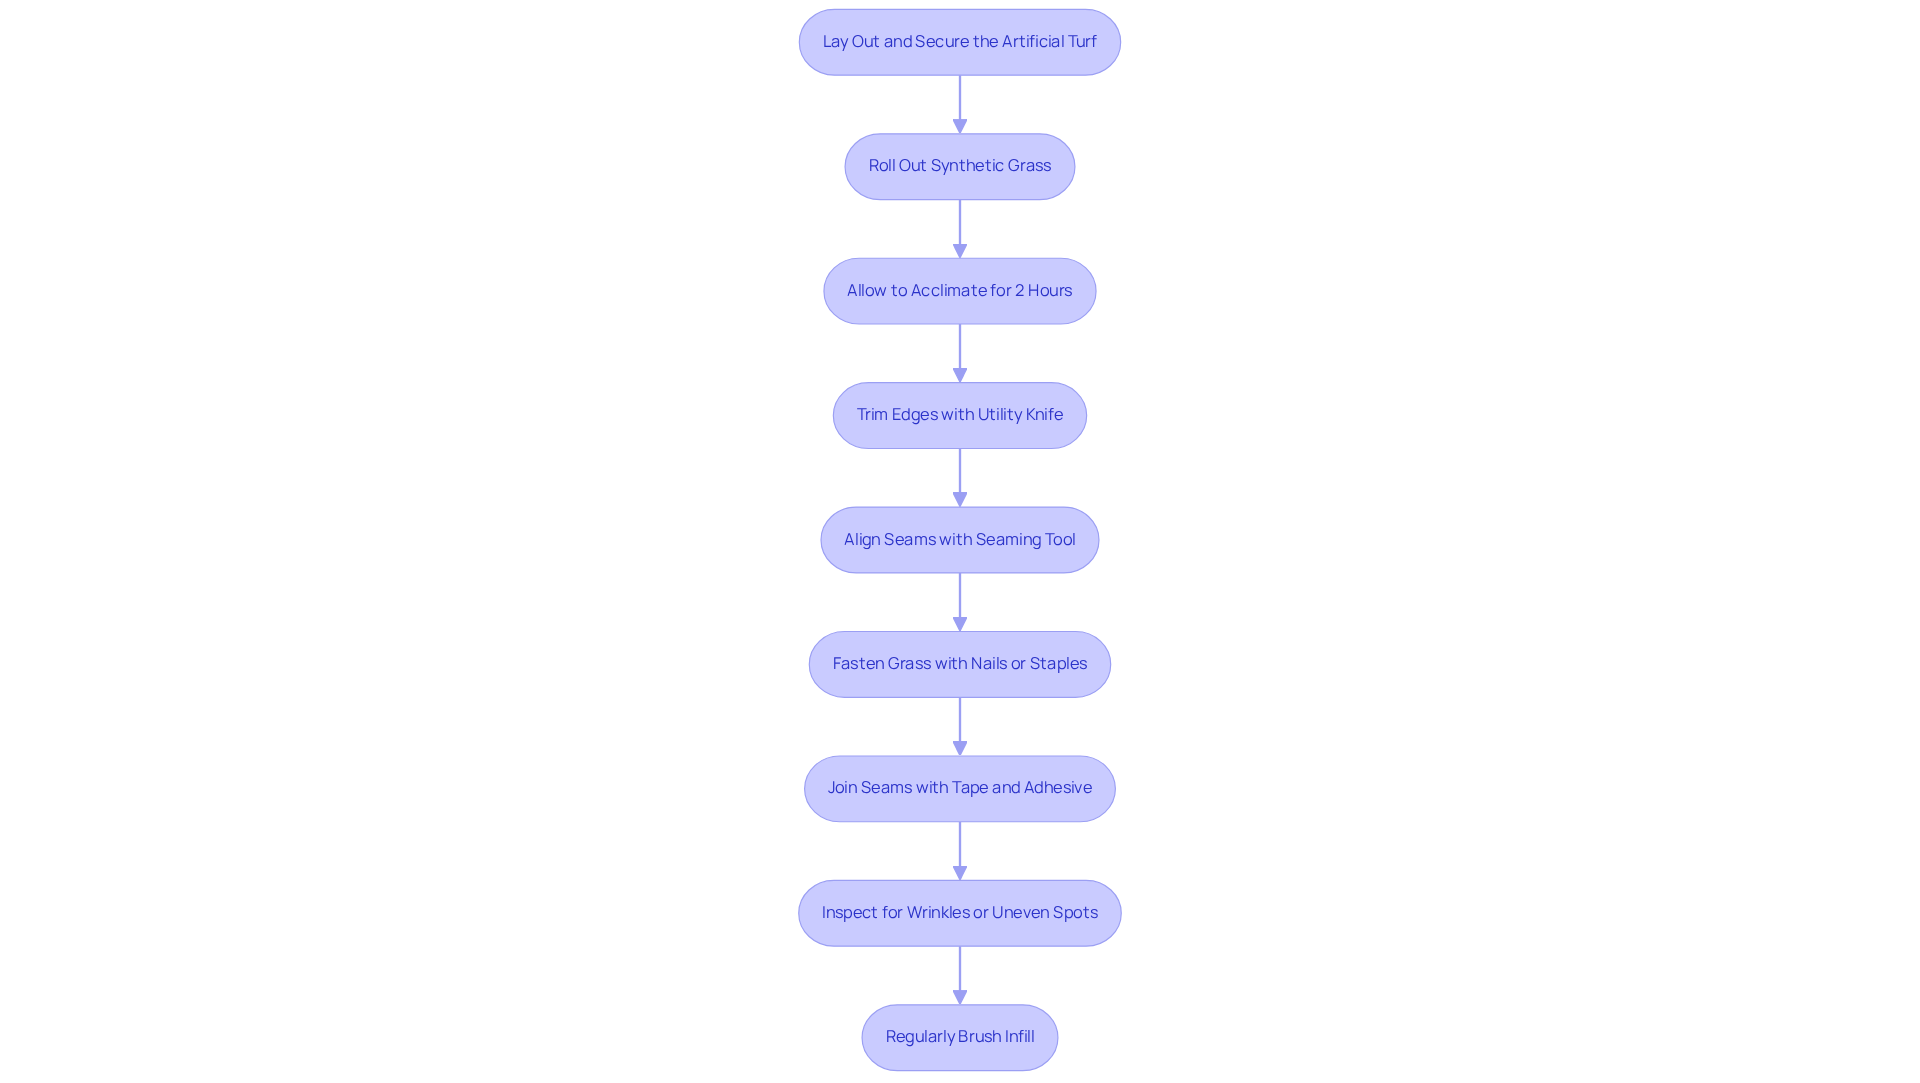
To achieve a flawless synthetic grass installation, ground prep for artificial turf and careful execution are essential. Begin by rolling out the synthetic grass in the desired area. Allow it to acclimate for at least two hours to reduce curling, making it easier to work with.
Next, use a sharp utility knife to trim the edges of the grass for a precise fit. When working with multiple pieces, ensure that seams align correctly to maintain a seamless appearance. Using a seaming tool to align grass pieces prevents discoloration at seams.
Fasten the grass around the perimeter using galvanized steel nails or U-shaped staples, spacing them approximately every 6 to 12 inches along the edge and driving them down ¾ of the way. Without proper anchoring, the grass may shift and develop unsightly wrinkles, making appropriate fastening techniques essential.
If your installation involves multiple pieces, use seam tape and adhesive to join the seams effectively. Follow the manufacturer’s guidelines for optimal results, ensuring a smooth transition between grass sections.
After securing the grass, conduct a thorough inspection of the area for any wrinkles or uneven spots. Make necessary adjustments to achieve a smooth, professional finish. Regular brushing of the infill every 2 to 4 weeks will help maintain the grass’s appearance and prevent matting. It is advisable to apply around 1 to 2 pounds of infill per square foot and replenish it every 18 months for optimal performance.
Clients such as Scott Sachse have praised Hall’s crew for their meticulous attention to detail and professionalism. Dick Bryant also highlighted how Hall Turf’s expert evaluation led to the perfect solution for his turf needs, showcasing the company’s commitment to customer satisfaction. A high-quality installation not only enhances the lawn’s appearance but also ensures long-term satisfaction for homeowners.
Conclusion
Proper ground preparation is crucial for ensuring the durability and aesthetic appeal of artificial turf installations. Homeowners can achieve a successful installation by carefully assessing the site, clearing vegetation, grading the ground, compacting the soil, and laying out the turf securely. With over 15 years of experience and a strong commitment to customer satisfaction, Hall Turf is well-equipped to guide homeowners through every step of their artificial turf project.
Key steps such as:
- Evaluating soil composition
- Ensuring effective drainage
- Utilizing the right compaction techniques
are essential for a solid foundation. Clients like Scott Sachse and Dick Bryant have praised Hall Turf for their professionalism and meticulous attention to detail, emphasizing why it’s vital to choose a qualified contractor. With over 300 playground installations and a client base of more than 80,000 satisfied customers worldwide, Hall Turf stands out as a leader in the industry.
Ultimately, thorough ground prep not only enhances the longevity of the artificial turf but also contributes to a beautiful and functional outdoor environment. By prioritizing these essential steps, homeowners can create a vibrant outdoor space that meets their needs and expectations.
Frequently Asked Questions
Why is site assessment important for artificial turf installation?
A thorough site assessment is critical for ground preparation as it ensures a level foundation, identifies drainage issues, and assesses soil composition, all of which influence the successful placement and longevity of the artificial turf.
What should be checked during the site assessment?
During the site assessment, check for slopes, dips, uneven surfaces, water accumulation spots, soil composition (clay, sandy, or loamy), and existing grass or debris that needs to be cleared.
How does soil composition affect ground preparation?
Soil composition significantly influences ground preparation strategies. For example, clay soils may require more excavation and specialized drainage solutions to ensure optimal turf performance.
What tools are necessary for clearing the area of existing grass and debris?
Essential tools include a shovel, a rake, and a motorized sod cutter for larger areas. A wheelbarrow can also be helpful for transporting debris.
How much topsoil should be removed when clearing the area?
At least 2 inches of topsoil should be removed along with the existing grass to prevent regrowth and ensure a clean surface for the new sod.
What steps should be taken after clearing the area?
After clearing, conduct a thorough examination of the site for any remaining roots or debris, as overlooking these can complicate the installation process.
How can proper drainage be ensured during installation?
Creating a slight incline away from buildings can facilitate proper drainage, ensuring that water flows away from the installation area and prevents pooling beneath the turf.
What are the labor costs associated with artificial turf installation in urban areas?
Labor costs in urban areas like Kansas City typically range from $5 to $10 per square foot, so ensuring accessibility for equipment can help manage overall expenses.
Why is it beneficial to choose a qualified contractor like Hall Turf?
Choosing a qualified contractor like Hall Turf ensures a high-quality installation, as they have extensive experience, are licensed, and have completed over 300 playground installations, serving more than 80,000 satisfied customers worldwide.
How can I contact Hall Turf for inquiries or quotes?
You can contact Hall Turf at (816) 555-7890 or via email at info@hallturf.com for inquiries and quotes.
List of Sources
- Assess the Site for Ground Preparation
- Is FIFA changing turf at Arrowhead Stadium for 2026 World Cup? (https://knoxnews.com/story/sports/2026/06/13/arrowhead-stadium-kansas-city-missouri-host-2026-fifa-world-cup-north-america-replacing-field-turf/90454917007)
- 4 Key Factors Influencing Artificial Grass Installation Costs – Hall Turf | Artificial Turf Installation Kansas City KS & MO (https://hallturf.com/4-key-factors-influencing-artificial-grass-installation-costs)
- How Much Does Artificial Turf Installation Cost in 2025? – Xtreme Green Synthetic Turf (https://xgreensynthetic.com/artificial-turf-installation-cost)
- Cost to Install Turf in Kansas City KS in 2026 | Contractor+ (https://contractorplus.app/resources/construction-costs/install-turf/kansas-city-ks)
- Master Artificial Turf Installation: Steps for Your Kansas Home – Hall Turf | Artificial Turf Installation Kansas City KS & MO (https://hallturf.com/master-artificial-turf-installation-steps-for-your-kansas-home)
- Clear the Area of Existing Grass and Debris
- 4 Ways To Properly Remove Natural Grass Before Your Synthetic Turf Installation – SGW Texas (https://sgwtexas.com/blog/2023/07/31/4-ways-to-properly-remove-natural-grass-before-your-synthetic-turf-installation)
- How to Remove Grass Before Laying Sod (2026 Guide) (https://westernturffarms.com/news/how-to-remove-old-grass-and-lay-new-sod-a-step-by-step-guide?srsltid=AfmBOoq-8BzqgDvT-W0_acvGVmpElSA6YXYPgj1XR83gL8vhX5yNU5t8)
- 3 Top Lawn Removal Methods for a Beautiful Waterwise Yard – Resource Central (https://resourcecentral.org/lawn-removal-methods?srsltid=AfmBOooakAosd9qvzqQEv5XFy7OLu1r8pVpvUVygNhik0Fop1oFCj0PK)
- Grade the Ground for Optimal Turf Installation
- Synthetic Grass Warehouse near Kansas City, Missouri (https://globalsynturf.com/kansas-city-missouri)
- Does Artificial Turf Drain Well? (https://synlawn.com/articles/does-artificial-turf-drain-well)
- Is Spring 2026 the Best Time to Install Artificial Turf? A Homeowner’s Guide to Cost, Drainage, and Timing – Realturf USA (https://realturf.com/us/is-spring-2026-the-best-time-to-install-artificial-turf-a-homeowners-guide-to-cost-drainage-and-timing)
- 5 Steps to Install Artificial Grass for Your Kansas Home – Hall Turf | Artificial Turf Installation Kansas City KS & MO (https://hallturf.com/5-steps-to-install-artificial-grass-for-your-kansas-home)
- DIY Artificial Grass Drainage Guide: Prevent Water Pooling (https://artificialturfexpress.com/blog/artificial-grass-drainage-101-ensuring-proper-water-runoff-for-your-diy-project)
- Compact Soil and Sub-Base Materials
- Choosing & Installing the Best Sub-Base for Artificial Grass (https://ccgrass.com/best-sub-base-for-artificial-grass)
- The Importance of Compaction | Ask JW | Synthetic Grass Warehouse (https://syntheticgrasswarehouse.com/company/ask-an-expert/ask-jw/the-importance-of-compaction)
- 4 Steps to Prepare the Base for Artificial Grass Installation – Hall Turf | Artificial Turf Installation Kansas City KS & MO (https://hallturf.com/4-steps-to-prepare-the-base-for-artificial-grass-installation)
- Understanding the Importance of Compaction | Synthetic Grass Warehouse (https://syntheticgrasswarehouse.com/blog/understanding-the-importance-of-compaction)
- Lay Out and Secure the Artificial Turf
- 5 Steps to Install Artificial Turf for Your Kansas Home – Hall Turf | Artificial Turf Installation Kansas City KS & MO (https://hallturf.com/5-steps-to-install-artificial-turf-for-your-kansas-home)
- How To Secure Artificial Grass: 7 Proven Anchoring Strategies (https://turftekusa.com/resources/blog/how-to-secure-artificial-grass-7-proven-anchoring-strategies)
- How to Install Artificial Turf – RCP Block & Brick (https://rcpblock.com/installation-artificial-turf.html)
- How To Install Artificial Grass | SGW (https://syntheticgrasswarehouse.com/resources/installing-artificial-grass/step-by-step-guide-to-installing-artificial-grass)
- 4 Ways to Anchor Artificial Grass to the Ground (https://blog.artificialgrassrecyclers.com/how-to-anchor-artificial-grass)