
Introduction
Installing artificial turf can significantly enhance a Kansas home’s outdoor space, providing a vibrant, green landscape throughout the year without the burdens of maintenance. This guide outlines the essential steps for successfully installing artificial turf, enabling homeowners to enjoy a beautiful lawn that endures the local climate. However, challenges may arise during the installation process. Careful planning and execution can lead to a flawless finish.
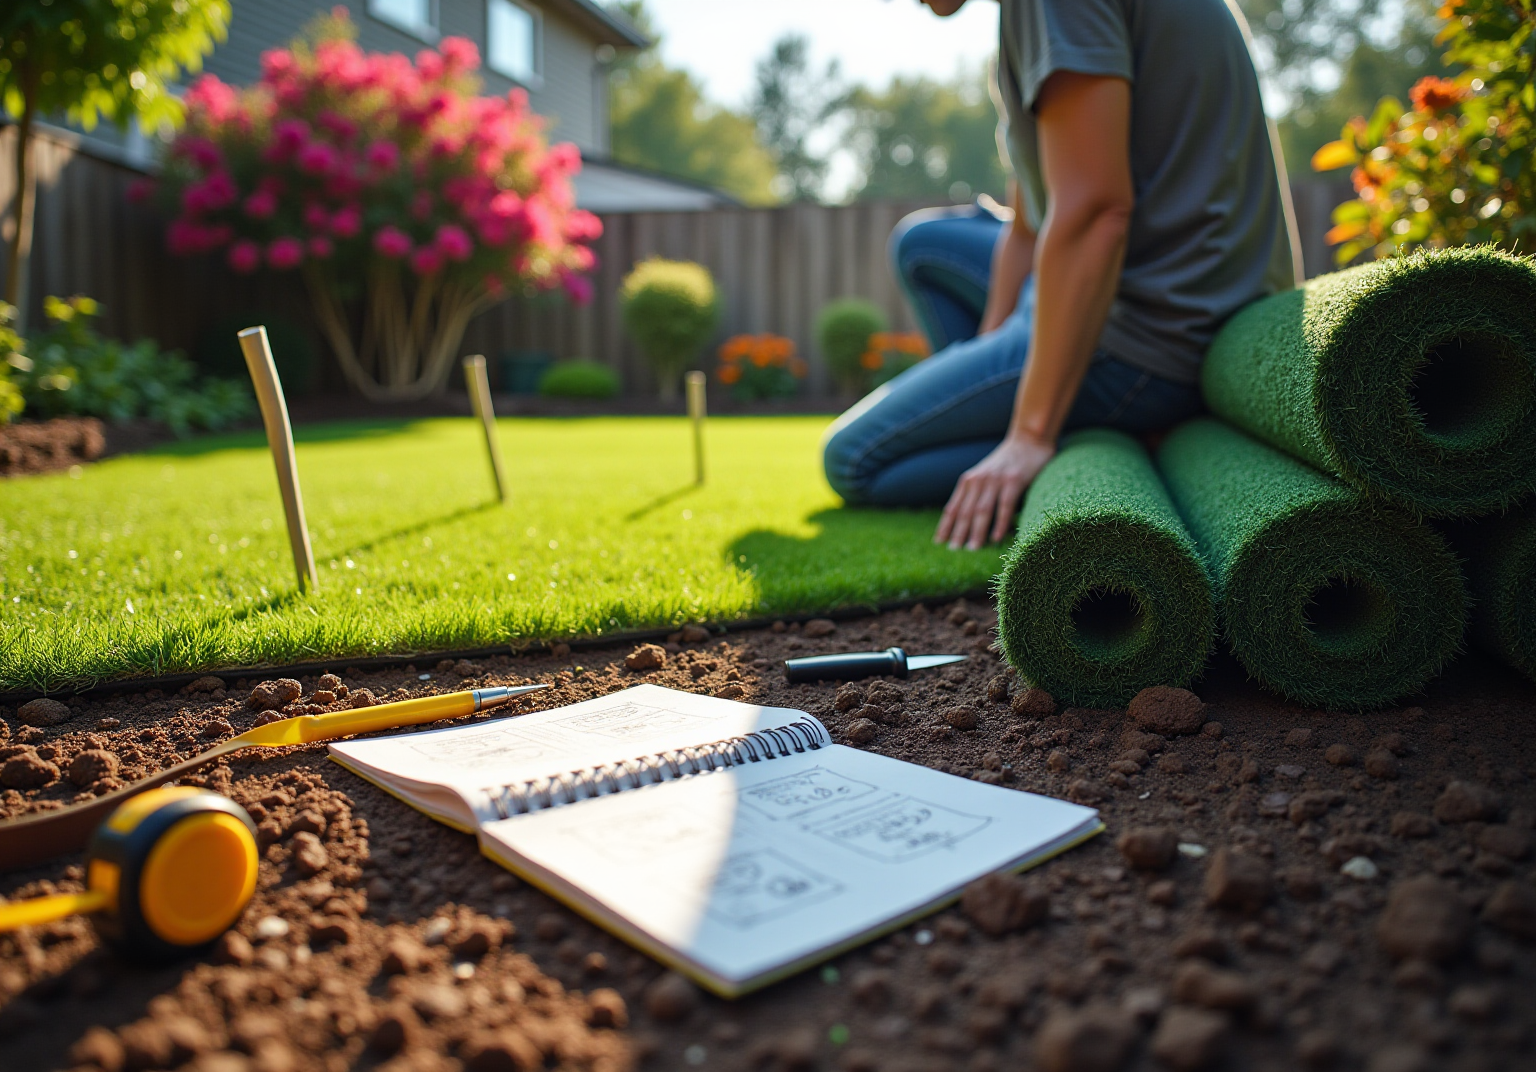
Measure and Plan Your Installation Area
- Gather Your Tools: Equip yourself with a measuring tape, notepad, and calculator. If desired, use stakes and string to outline the setup space for better precision. Having the appropriate equipment is essential, as emphasized by satisfied clients of Hall Grass, who highlight the importance of expert advice in achieving a successful setup.
- Measure the Area: Start by measuring the length and width of the designated space. For irregular shapes, divide the area into smaller rectangles, measuring each section individually. Double-check your measurements to avoid costly mistakes. As Brock from Hall Lawn advises, precise measurements are vital for a seamless installation.
- Calculate Total Square Footage: For rectangular areas, multiply the length by the width. For irregular shapes, sum the square footage of each section to obtain the total. In Kansas and Missouri, the average residential yard size can vary, making it crucial to understand your space for effective planning. Customers have found that Hall’s expertise aids them in navigating these calculations efficiently.
- Add Extra for Cuts: To accommodate cuts and potential waste, add approximately 10% to your total square footage. This precaution ensures you have sufficient material for a seamless installation. Many homeowners appreciate how Hall Turf‘s recommendations help prevent material shortages during their projects.
- Sketch the Layout: Create a simple sketch of your area, noting any obstacles such as trees or flower beds. This visual representation will assist you in planning how the turf will fit into your landscape. As Emily Greenfield wisely noted, “Careful measurements and a little planning save days of headaches.” Customers like Scott Sachse have experienced firsthand how thorough planning leads to exceptional results with Hall Turf.

Prepare the Site by Removing Existing Grass and Debris
- Clear the Area: Start by using a shovel or sod cutter to remove the existing grass, roots, and any debris from the setup site. Aim to excavate approximately 3 to 4 inches deep to create a solid base for the grass. Shayla, who undertook a DIY project, noted that she excavated about 2 inches below the cement line to accommodate the height of the grass. This can serve as a helpful guideline for homeowners.
- Dispose of Waste: Proper disposal of the removed grass and debris is essential to prevent contamination of the installation site. This step is crucial for maintaining the integrity of the new surface.
- Check for Drainage: Assess the area for adequate drainage. If necessary, establish a gentle incline away from any buildings to promote water drainage. This is vital for avoiding accumulation and ensuring the durability of the grass. Specialists emphasize that adequate drainage is essential to prevent issues with water buildup that can harm the grass over time.
- Level the Ground: Use a rake to smooth the soil, removing any large stones or roots that could disrupt the grass installation. A smooth, even surface is vital for achieving a professional finish.
- Compact the Soil: Finally, utilize a plate compactor or hand tamper to compact the soil, creating a stable base for the grass. This step helps prevent settling and ensures that the grass remains in position over time. Shayla highlighted the importance of teamwork during her installation, which made the process faster and more enjoyable-an insightful takeaway for homeowners considering a DIY approach.

Install a Stable Base Layer for Turf
- Choose Your Base Material: Begin by selecting a base material that suits local conditions and the specific application of the grass. Common options include crushed stone, gravel, or decomposed granite, each offering different drainage and stability characteristics.
- Spread the Base Material: Distribute the chosen base material evenly across the prepared area, aiming for a depth of 3 to 4 inches for standard residential lawns. Depending on the intended use, a depth of 3 to 6 inches may be necessary to ensure adequate support and drainage, thus preventing future issues.
- Level the Base: Use a rake to create an even surface, removing any high or low spots. Achieving a flat base is crucial for both the aesthetic appeal and functional performance of the surface.
- Compact the Base: Utilize a plate compactor to compress the base material to 90-95% compaction for each layer before adding the next. This step is essential for establishing a stable foundation that minimizes settling and shifting over time. As industry specialists emphasize, “The foundation for synthetic grass is nearly as crucial as the material you select for your project.”
- Check for Drainage: Ensure the base is graded with a slight slope of 1-2% away from structures to facilitate proper drainage. This prevents water accumulation, which can lead to unpleasant odors and damage to the grass setup. Additionally, consider incorporating a weed barrier to inhibit unwanted growth and enhance the durability of the grass installation. Be cautious, as many ground coverings fail due to poor base material selection, insufficient thickness, or inadequate compaction.

Roll Out and Cut the Turf to Fit
- Unroll the Grass: Spread the grass out in the sun for a few hours before setup. This acclimation process makes the grass more pliable, facilitating easier handling. A utility knife and a tape measure will be essential for the subsequent steps.
- Position the Grass: Arrange the grass in the desired location, ensuring it aligns properly with the borders of the installation area. All pieces should face the same direction to achieve a natural look. Homeowners have found that proper positioning is crucial for a seamless appearance, as highlighted in testimonials praising Hall’s expert guidance.
- Trim the Grass: Utilize a sharp utility knife to cut the grass to fit the space. Make cuts from the backing side to prevent damage to the grass fibers. For accuracy, mark cutting lines with chalk and adhere closely to these lines. Clients have noted that the meticulous approach employed by Hall professionals ensures a perfect fit, enhancing the overall aesthetic.
- Trim Around Obstacles: Carefully cut around any obstacles, such as trees or flower beds, to ensure a snug fit. Take your time during this process to avoid jagged edges and achieve a professional finish. Brock from Hall is recognized for his meticulous work in this area, ensuring that installations appear refined and customized.
- Check Alignment: After cutting, verify that the grass is aligned correctly. Make any necessary adjustments before securing it in place with landscape nails or adhesive, spaced every 4 to 6 inches along the perimeter to prevent shifting. Homeowners have expressed satisfaction with the alignment assessments conducted by Hall Grass, which enhance the durability and appearance of their grass installations.

Secure Edges and Seams for a Professional Finish
- Secure the Edges: Start by fastening the borders of the grass using U-shaped nails or landscape staples. Place them about 6 inches apart along the perimeter to ensure stability and prevent shifting over time.
- Seam the Grass: When installing multiple pieces of grass, use seam tape and adhesive to join them effectively. Apply the adhesive evenly to the seam tape, then press the edges of the grass together firmly. Proper seaming is essential, as it creates a smooth, continuous surface and prevents visible gaps that can detract from the overall appearance.
- Tuck the Edges: For a clean finish, tuck the edges of the grass under any borders or hardscapes. A carpet tucking tool can be particularly useful for achieving a tidy tuck, enhancing the professional appearance of your setup.
- Check for Gaps: After tucking, inspect the seams and edges for any gaps or areas where the turf may be lifting. Address these issues promptly by securing them with additional adhesive or seam tape to maintain a seamless appearance.
- Final Inspection: Conduct a thorough walk-around of the setup to ensure everything is secure and visually appealing. A well-executed installation, especially when you understand how to install artificial turf, not only enhances the aesthetic of your yard but also ensures durability and longevity, reducing the likelihood of seam failures that can occur if the installation process is rushed or improperly executed.

Add Infill for Stability and Aesthetic Appeal
- Choose Your Infill Material: Select an appropriate infill material based on your grass’s intended use and local climate. Common options include silica sand, crumb rubber, and organic infill such as cork or coconut fibers. Silica sand is cost-effective and provides excellent drainage, while crumb rubber offers superior cushioning, making it ideal for high-traffic areas. Organic infill options contribute to sustainability and help regulate temperature.
- Spread the Infill: Use a drop spreader to evenly distribute the infill across the grass surface. Aim for a depth of approximately 1 to 2 inches, which is crucial for maintaining stability and performance. When learning how to install artificial turf, it is typically necessary to use around 1 to 2 pounds of infill per square foot to ensure that the grass blades remain upright and functional.
- Brush the Infill: Employ a stiff-bristle broom or a power broom to work the infill into the grass fibers. This step is essential for ensuring even penetration of the infill, which enhances both the stability and aesthetic appeal of the lawn. Regular brushing, ideally every 2-4 weeks, helps maintain the grass’s appearance and prevents matting.
- Check the Depth: After brushing, verify the depth of the infill to ensure consistency across the entire area. Signs of inadequate infill include a hard or slippery surface, indicating that additional material may be required to restore functionality.
- Final Grooming: Perform a final brushing of the turf to fluff the fibers and achieve a natural look. This step not only enhances visual appeal but also contributes to the overall performance of the artificial grass, ensuring it remains inviting and functional for pets and children alike. It is recommended to replenish the infill every 18 months for optimal performance.

Conclusion
In conclusion, successfully installing artificial turf in a Kansas home requires a meticulous approach that ensures a beautiful and durable outcome. By adhering to the structured steps outlined, homeowners can transform their yards into lush, green spaces, free from the challenges of traditional lawn care. Careful planning, precise measurements, proper site preparation, and effective installation techniques are all critical phases that contribute to achieving a professional finish.
Key aspects emphasized throughout this process include:
- The necessity of thorough planning, which involves accurately measuring the area and preparing the site by removing existing grass and debris.
- Selecting a stable base layer and correctly installing the turf are essential, as is applying infill to enhance both stability and aesthetics.
- Each step, from securing edges to ensuring proper drainage, plays a vital role in the longevity and visual appeal of the artificial grass.
The importance of these steps cannot be overstated. A well-executed installation not only enhances the beauty of the home landscape but also offers a low-maintenance, environmentally friendly solution for outdoor spaces. For those contemplating this upgrade, following these guidelines will lead to a successful project that improves both the functionality and enjoyment of outdoor living areas. Taking action now to learn and implement these techniques can result in a vibrant, hassle-free lawn that endures for years to come.
Frequently Asked Questions
What tools do I need to measure and plan my installation area?
You will need a measuring tape, notepad, calculator, and optionally, stakes and string to outline the setup space for better precision.
How do I measure the area for installation?
Measure the length and width of the designated space. For irregular shapes, divide the area into smaller rectangles and measure each section individually. Always double-check your measurements to avoid mistakes.
How do I calculate the total square footage of my installation area?
For rectangular areas, multiply the length by the width. For irregular shapes, sum the square footage of each section to obtain the total.
Should I account for extra material when calculating square footage?
Yes, add approximately 10% to your total square footage to accommodate cuts and potential waste, ensuring you have enough material for installation.
Why is it important to sketch the layout of my area?
Creating a sketch helps you visualize how the turf will fit into your landscape and allows you to note any obstacles, such as trees or flower beds, which can aid in planning.
What is the first step in preparing the site for installation?
Start by clearing the area using a shovel or sod cutter to remove existing grass, roots, and debris, excavating approximately 3 to 4 inches deep for a solid base.
How should I dispose of the removed grass and debris?
Proper disposal is essential to prevent contamination of the installation site and maintain the integrity of the new surface.
What should I check for regarding drainage before installation?
Assess the area for adequate drainage and, if necessary, establish a gentle incline away from buildings to promote water drainage and prevent accumulation.
How do I ensure the ground is level before installing grass?
Use a rake to smooth the soil, removing any large stones or roots that could disrupt the installation, ensuring a smooth, even surface.
What is the final step in preparing the soil for grass installation?
Utilize a plate compactor or hand tamper to compact the soil, creating a stable base that helps prevent settling and ensures the grass remains in position over time.
List of Sources
- Measure and Plan Your Installation Area
- How to Measure the Right Amount of Artificial Turf for Your Project – SGW Sacramento (https://sgwsacramento.com/blog/how-to-measure-the-right-amount-of-artificial-turf-for-your-project)
- californiaturfco.com (https://californiaturfco.com/master-artificial-grass-sizes-a-step-by-step-homeowner-s-guide)
- lowes.com (https://lowes.com/n/how-to/install-artificial-grass)
- Prepare the Site by Removing Existing Grass and Debris
- shopping.yahoo.com (https://shopping.yahoo.com/home-garden/gardening/articles/report-shows-homeowners-coming-regret-113000200.html)
- Artificial Grass Installation DIY: My Experience, Tips, and Insights! | Purchase Green Artificial Grass (https://purchasegreen.com/diy-tips/artificial-grass-installation-diy-my-experience-tips-and-insights)
- reviewjournal.com (https://reviewjournal.com/news/environment/lawsuit-claims-ban-on-useless-grass-has-killed-100k-trees-in-southern-nevada-3607607)
- nytimes.com (https://nytimes.com/2025/07/26/business/artificial-turf-grass-sports.html)
- Install a Stable Base Layer for Turf
- hallturf.com (https://hallturf.com/essential-base-material-for-artificial-turf-best-practices-for-homeowners)
- jcturf.com (https://jcturf.com/artificial-grass/installation/ground-prep/base)
- Best Base for Artificial Turf: What Matters | US Turf (https://usturfsandiego.com/news/ideal-base-for-artificial-turf)
- What’s the Best Base for Artificial Grass Installation? – US Turf (https://us-turf.com/uncategorized/best-base-artificial-grass-installation)
- Roll Out and Cut the Turf to Fit
- nexgenlawns.com (https://nexgenlawns.com/how-to-lay-and-cut-fake-grass?srsltid=AfmBOoqFNere4EWCpIkNErOrbFecpN8qk_cz98L0bESAHaKOfkxkbxGf)
- lowes.com (https://lowes.com/n/how-to/install-artificial-grass)
- litagrass.com (https://litagrass.com/blogs/lita-artificial-grass-blog/how-to-install-artificial-turf-step-by-step-guide-with-tools-costs-and-pro-tips?srsltid=AfmBOop4KJwwwTdyBJWJuhABcGHa8hsetJdi3t8XjuMfLThcAv9OsOU4)
- petgrows.com (https://petgrows.com/blogs/news/mastering-the-art-of-artificial-turf-installation-a-step-by-step-guide)
- Everything You Need To Know About Cutting Artificial Grass Before Installation – SGW Las Vegas (https://sgwnevada.com/las-vegas/blog/2024/02/22/everything-you-need-to-know-about-cutting-artificial-grass-before-installation)
- Secure Edges and Seams for a Professional Finish
- syntheticgrasswarehouse.com (https://syntheticgrasswarehouse.com/blog/the-seaming-techniques-you-need-to-know-to-install-artificial-grass-like-a-pro)
- returf.com (https://returf.com/artificial-turf-seaming?srsltid=AfmBOooRsy28TtYbJXTH7qBQgMiH_S3WL0mlOwKQN8dlmDk-VrTjsrTR)
- petgrows.com (https://petgrows.com/blogs/news/mastering-the-art-of-artificial-turf-installation-a-step-by-step-guide)
- artificialturfsupply.com (https://artificialturfsupply.com/how-to/how-to-secure-artificial-turf-perimeter-edges-galvanized-nails-or-sod-staples)
- artificialturfsupply.com (https://artificialturfsupply.com/how-to/how-to-seam-your-artificial-turf-project)
- Add Infill for Stability and Aesthetic Appeal
- jcturf.com (https://jcturf.com/artificial-grass/material/infill/best)
- agsturf.com (https://agsturf.com/artificial-turf-news/Choosing-the-Right-Infill-Material-for-Your-Artificial-Turf-1223.html)
- usturfsandiego.com (https://usturfsandiego.com/news/artificial-turf-infill-options)
- turfdistributors.com (https://turfdistributors.com/blog/infill-for-artificial-grass)
- artificialturfexpress.com (https://artificialturfexpress.com/blog/an-in-depth-diy-guide-to-infill-for-the-best-artificial-turf)