
Introduction
Effective artificial grass installation can significantly enhance outdoor spaces while minimizing maintenance requirements. With the right techniques, homeowners in the Kansas City metropolitan area can achieve professional results without the need for costly contractors. Homeowners often face challenges during installation, such as uneven surfaces and drainage issues. This guide outlines four straightforward steps for installation, addressing common pitfalls to enhance the durability of synthetic lawns.
- Prepare the area
- Install a base layer
- Lay the artificial grass
- Secure and finish the edges
Prepare the Installation Area
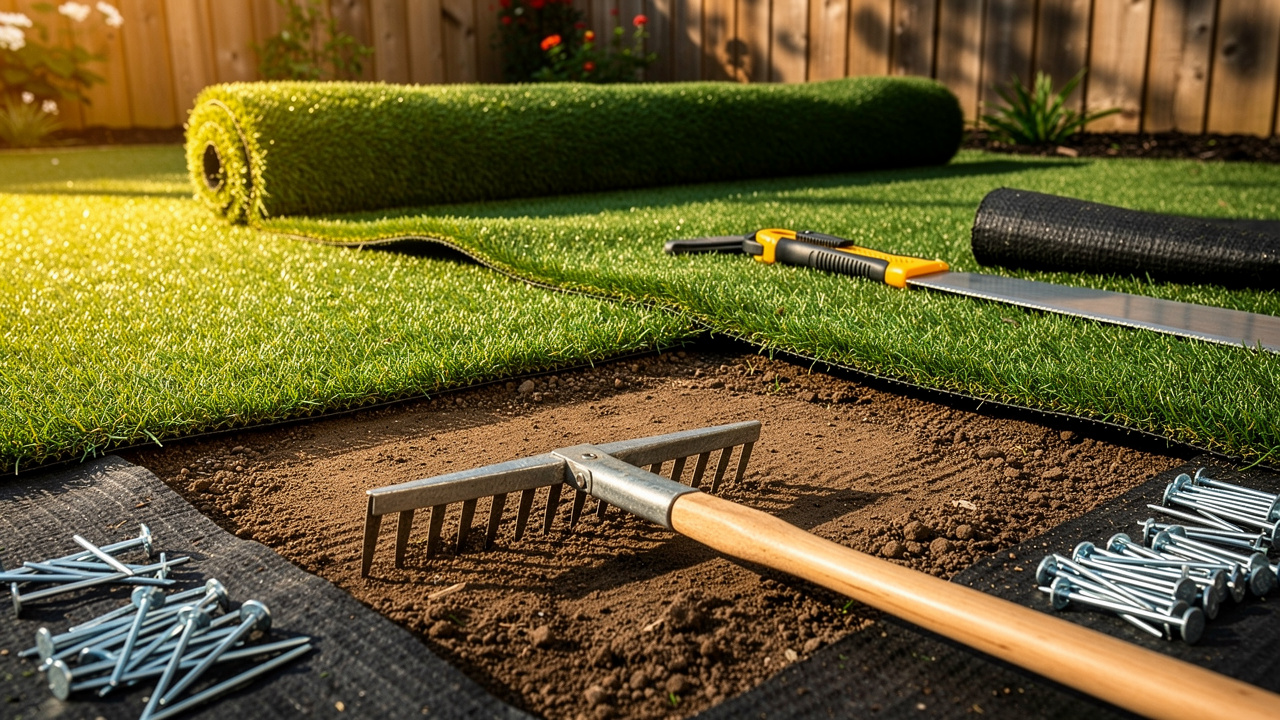
To ensure a successful artificial grass installation, start with a well-prepared site. Begin by removing any existing grass, weeds, and debris from the installation area. Use a shovel or spade to excavate the top layer of soil, about 2-4 inches deep, based on your lawn’s specifications. This step sets the stage for a solid foundation.
Next, achieve a flat area by using a rake to smooth out any bumps or dips. Proper leveling is essential for effective drainage and prevents uneven surfaces once the grass is installed. Failing to level the ground can lead to water pooling and uneven grass growth.
After leveling, place a weed barrier fabric over the prepared area to inhibit weed growth through the artificial grass. Secure the fabric with landscaping staples to ensure it stays in position, providing long-term protection against unwanted vegetation.
Then, you can use a plate compactor or a hand tamper to make sure the soil is compacted well. This step establishes a sturdy foundation that supports the grass and reduces settling over time, ensuring durability and stability.
Finally, if needed, introduce a layer of crushed stone or gravel to enhance drainage. Spread this material evenly and compact it again to form a stable foundation for the turf, which is vital for maintaining the integrity of your installation. Neglecting these foundational steps in your artificial grass DIY installation can compromise its longevity and appearance.

Lay Out the Artificial Grass
Achieving a professional finish with artificial grass diy installation requires careful attention to detail and adherence to best practices.
- Unroll the Turf: Begin by carefully unrolling the synthetic turf, laying it out in the desired direction. Ensure that all grass blades are oriented the same way to achieve a uniform appearance.
- Trim the Edges: Utilize a utility knife to trim the edges of the grass to fit your specific area. Leave a slight excess to tuck under borders or edges for a clean finish.
- Align Seams: When working with several pieces of grass, align the seams meticulously. Avoid overlapping; instead, position them edge to edge to create a seamless look.
- Secure the Grass: Employ landscape staples or nails to fasten the grass firmly in place. Begin at the corners and move around the perimeter, placing staples every 6 to 12 inches to ensure the grass stays flat and secure.
- Check for Wrinkles: Smooth out any wrinkles or bubbles by pulling the material taut. This step is crucial for achieving a professional finish and preventing future issues.
Current Trends: In 2026, artificial turf colors and styles are evolving, with an emphasis on natural aesthetics and sustainability. Homeowners often struggle to find landscaping solutions that are both visually appealing and low-maintenance. Innovations in turf design are enhancing the visual appeal and performance of synthetic surfaces, making it an attractive option for homeowners. Industry experts emphasize that artificial grass diy installation and proper techniques are crucial for maximizing the longevity of synthetic grass, ensuring it meets the demands of pets, children, and everyday use. Hall Turf, a licensed contractor with over 15 years of experience and a client base of over 80,000 satisfied customers, emphasizes the importance of following these steps closely. One satisfied client, Dick Bryant, shared, “When I needed a solution for my grass issue, Brock assessed my needs and provided the perfect recommendation.” Neglecting these installation steps can lead to costly repairs and dissatisfaction with your investment.

Complete the Installation with Finishing Touches
Achieving a polished look in landscaping can be challenging without proper techniques. To achieve a clean finish, tuck the edges of the grass under any borders or hardscapes. A putty knife can assist in pushing the grass into tight spaces.
Distributing infill material is essential for maintaining the turf’s appearance. Evenly spread materials such as silica sand or rubber granules across the surface of the grass. This helps weigh down the turf and keeps the blades upright, resulting in a more natural look.
Brushing the grass against the grain is crucial for enhancing its appearance. Use a stiff-bristled broom to elevate the blades and distribute the infill effectively.
Conducting a final inspection ensures that the installation meets quality standards. Walk around the area to check for any loose spots or imperfections, making necessary adjustments to secure everything in place.
Cleaning up the installation area is vital for maintaining a professional look. Remove any debris or excess infill, as a tidy workspace not only enhances visual appeal but also contributes to the longevity of the installation.

Troubleshoot Common Installation Issues
Addressing common turf issues is essential for maintaining a healthy and attractive lawn.
- Wrinkles or Bubbles: To tackle wrinkles or bubbles in your grass, begin by pulling the grass tight to even out the top. If this approach doesn’t work, you may need to cut the affected area and reattach it to achieve a flat look.
- Irregular Surface: An irregular sensation in the grass often suggests problems with foundation preparation. Remove the grass and evaluate the underlying material; adding additional material may be required to obtain a flat area.
- Drainage Problems: Standing water on the turf surface indicates inadequate drainage. Inadequate drainage can lead to significant issues, including damage to the turf. Make sure the foundation is compacted well and that there are drainage holes in place. Adjusting the grading of the base can help facilitate better water flow. Failure to improve drainage may result in long-term damage to the grass and increased maintenance costs.
- Visible Seams: If seams between grass pieces are noticeable, check their alignment. Use seam tape to secure the edges more effectively, which can also help conceal the seams for a neater finish.
- Infill Issues: Uneven infill can detract from the turf’s appearance and functionality. Use a broom to redistribute the infill evenly across the surface, ensuring consistent coverage and performance. Neglecting these issues can lead to costly repairs and a less appealing outdoor space.

Conclusion
Mastering the installation of artificial grass is essential for transforming outdoor spaces into vibrant areas that require minimal upkeep. Homeowners can achieve a professional-looking result by following key steps:
- Preparing the installation area
- Laying out the grass
- Completing finishing touches
- Troubleshooting common issues
Thorough site preparation is crucial, as it lays the groundwork for durability and longevity. Proper leveling, the use of weed barriers, and effective drainage methods are vital for preventing future problems. Additionally, meticulous attention to detail during the grass layout and securing process ensures a seamless and visually appealing finish. Addressing common installation issues proactively can save time and resources in the long run.
With the ongoing evolution of artificial grass towards more natural aesthetics and sustainability, embracing these DIY installation techniques becomes increasingly valuable. Homeowners in regions like Kansas City and its suburbs can take pride in their outdoor spaces, knowing they have invested in a solution that combines beauty with practicality. For those seeking expert guidance or assistance, Hall Turf stands ready to provide support, leveraging over 15 years of experience and a commitment to customer satisfaction. Investing in these techniques not only enhances your outdoor space but also ensures long-term satisfaction and value.
Frequently Asked Questions
What is the first step in preparing the installation area for artificial grass?
The first step is to remove any existing grass, weeds, and debris from the installation area. This sets the stage for a solid foundation.
How deep should I excavate the soil for artificial grass installation?
You should excavate the top layer of soil about 2-4 inches deep, depending on your lawn’s specifications.
Why is leveling the ground important before installing artificial grass?
Proper leveling is essential for effective drainage and prevents uneven surfaces, which can lead to water pooling and uneven grass growth.
What should I do after leveling the ground?
After leveling, place a weed barrier fabric over the prepared area to inhibit weed growth through the artificial grass and secure it with landscaping staples.
How can I ensure the soil is compacted well?
You can use a plate compactor or a hand tamper to compact the soil, establishing a sturdy foundation that supports the grass and reduces settling over time.
Is it necessary to add crushed stone or gravel before installing artificial grass?
Yes, if needed, introducing a layer of crushed stone or gravel can enhance drainage. This material should be spread evenly and compacted again to form a stable foundation for the turf.
What could happen if I neglect the foundational steps in artificial grass installation?
Neglecting these foundational steps can compromise the longevity and appearance of the artificial grass installation.
List of Sources
- Prepare the Installation Area
- As the world heats up, so does the debate around artificial turf (https://thenewlede.org/2024/08/as-the-world-heats-up-so-does-the-debate-around-artificial-turf)
- 100+ Synthetic Turf Industry Statistics | Fact-Checked 2026 (https://wifitalents.com/synthetic-turf-industry-statistics)
- Artificial Turf Market Size And Share | Industry Report, 2033 (https://grandviewresearch.com/industry-analysis/artificial-turf-market)
- Artificial Turf Market Size, Share 2031 Industry Report (https://mordorintelligence.com/industry-reports/artificial-turf-market)
- Synthetic Turf Market Size & Share, Growth Trends 2026-2035 (https://gminsights.com/industry-analysis/synthetic-turf-market)
- Lay Out the Artificial Grass
- Is the Future Grim or Green for the Artificial Turf Industry? | Purchase Green Artificial Grass (https://purchasegreen.com/blog/is-the-future-grim-or-green-for-the-artificial-turf-industry)
- Artificial Turf Market Size 2026: Trends and Projections (https://integriturf.com/glossary/artificial-turf-market-size-2026-trends-and-projections)
- Articles (https://synlawn.com/articles)
- Artificial Turf Market Size And Share | Industry Report, 2033 (https://grandviewresearch.com/industry-analysis/artificial-turf-market)
- Artificial Grass News | American Syn-Turf Industry Updates (https://americansynturf.com/news)
- Complete the Installation with Finishing Touches
- Synthetic Turf News | News & Blog | Synthetic Turf International (https://synthetic-turf.com/news-blog)
- Turf Infill Comparison Chart: What You Need to Know (https://integriturf.com/glossary/turf-infill-comparison-chart-what-you-need-to-know)
- Infill’s Impact on Artificial Grass Performance & Longevity (https://artificialturfexpress.com/blog/artificial-grass-infill-performance-longevity)
- Artificial Turf Infill Market: Trends & Growth Analysis 2035 (https://wiseguyreports.com/reports/artificial-turf-infill-market)
- Expert Artificial Turf Installation Guide: Perfect Your Landscape with Synthetic Grass – Artificial Grass Installation | Putting Green | Brick Pavers (https://laturfandpaver.com/expert-artificial-turf-installation-guide-perfect-your-landscape-with-synthetic-grass)
- Troubleshoot Common Installation Issues
- Solve Artificial Turf Installation Issues: Expert Fixes (https://artificialturfexpress.com/blog/troubleshooting-guide-for-diy-installation-of-the-best-artificial-turf)
- Why Is My Artificial Turf Bubbling or Wrinkling? (https://turfresh.com/blog/artificial-turf-bubbling-wrinkling-fix)
- Guide to Solving Common Problems with Artificial Turf Installation (https://turffactorydirect.com/blog/potential-problems-with-artificial-grass-and-how-to-care-for-it?srsltid=AfmBOoqV9v45gedDxzD7OSP_ZOJ8PqLD1QbBAOGFgteGjJPKm_cA0KAA)
- Common Issues With DIY Installs | Synthetic Grass Warehouse (https://syntheticgrasswarehouse.com/resources/installing-artificial-grass/common-issues-with-diy-installs)