
Introduction
Transforming a yard into a lush, green oasis is an achievable goal, particularly with the installation of artificial lawn grass turf. This innovative landscaping solution enhances aesthetic appeal and offers practical benefits, including reduced maintenance and significant water savings. However, the journey from concept to completion can present challenges. Homeowners often find themselves asking: what essential steps must be taken to ensure a successful installation? This guide explores the intricacies of planning, executing, and troubleshooting the installation of artificial turf, providing readers with the knowledge necessary to create their ideal lawn.
Understand Your Project Requirements
Before starting the setup process, it is essential to clarify your project requirements. Follow these steps to ensure a successful installation:
- Assess the Area: Measure the dimensions of the intended installation space, considering any slopes or drainage issues that could impact the project.
- Determine the Purpose: Identify the primary use of the grass. Whether for a pet area, children’s playground, or decorative landscaping, each application may require different grass specifications. As one satisfied customer noted, “Brock evaluated my needs and came up with the perfect solution,” underscoring the importance of understanding the intended use for selecting the right product.
- Choose the Right Turf: Explore the various types of turf that are available. For instance, some turf is engineered to withstand the wear and tear from animals, while other turf is designed to be softer and safer for children. Successful projects often highlight the significance of matching turf to its intended purpose. Customers have praised Hall Turf for their tailored solutions, with one stating, “They did an exceptional job with our installation.”
- Check Regulations: Be aware of any regulations regarding artificial surface installations. Compliance is essential to avoid potential issues in the future.
- Plan for Drainage: Proper drainage is critical to prevent water pooling. Evaluate the natural incline of your yard and plan accordingly to ensure that water drains away from the grass area. Homeowners have reported that proper planning in this area has led to excellent results in their projects.
By following these steps, homeowners can ensure that their project involving artificial grass meets both aesthetic and functional requirements, as many satisfied clients have experienced with Hall Turf.

Follow Step-by-Step Installation Procedures
To achieve a successful installation, it is essential to follow these procedures after understanding your project requirements:
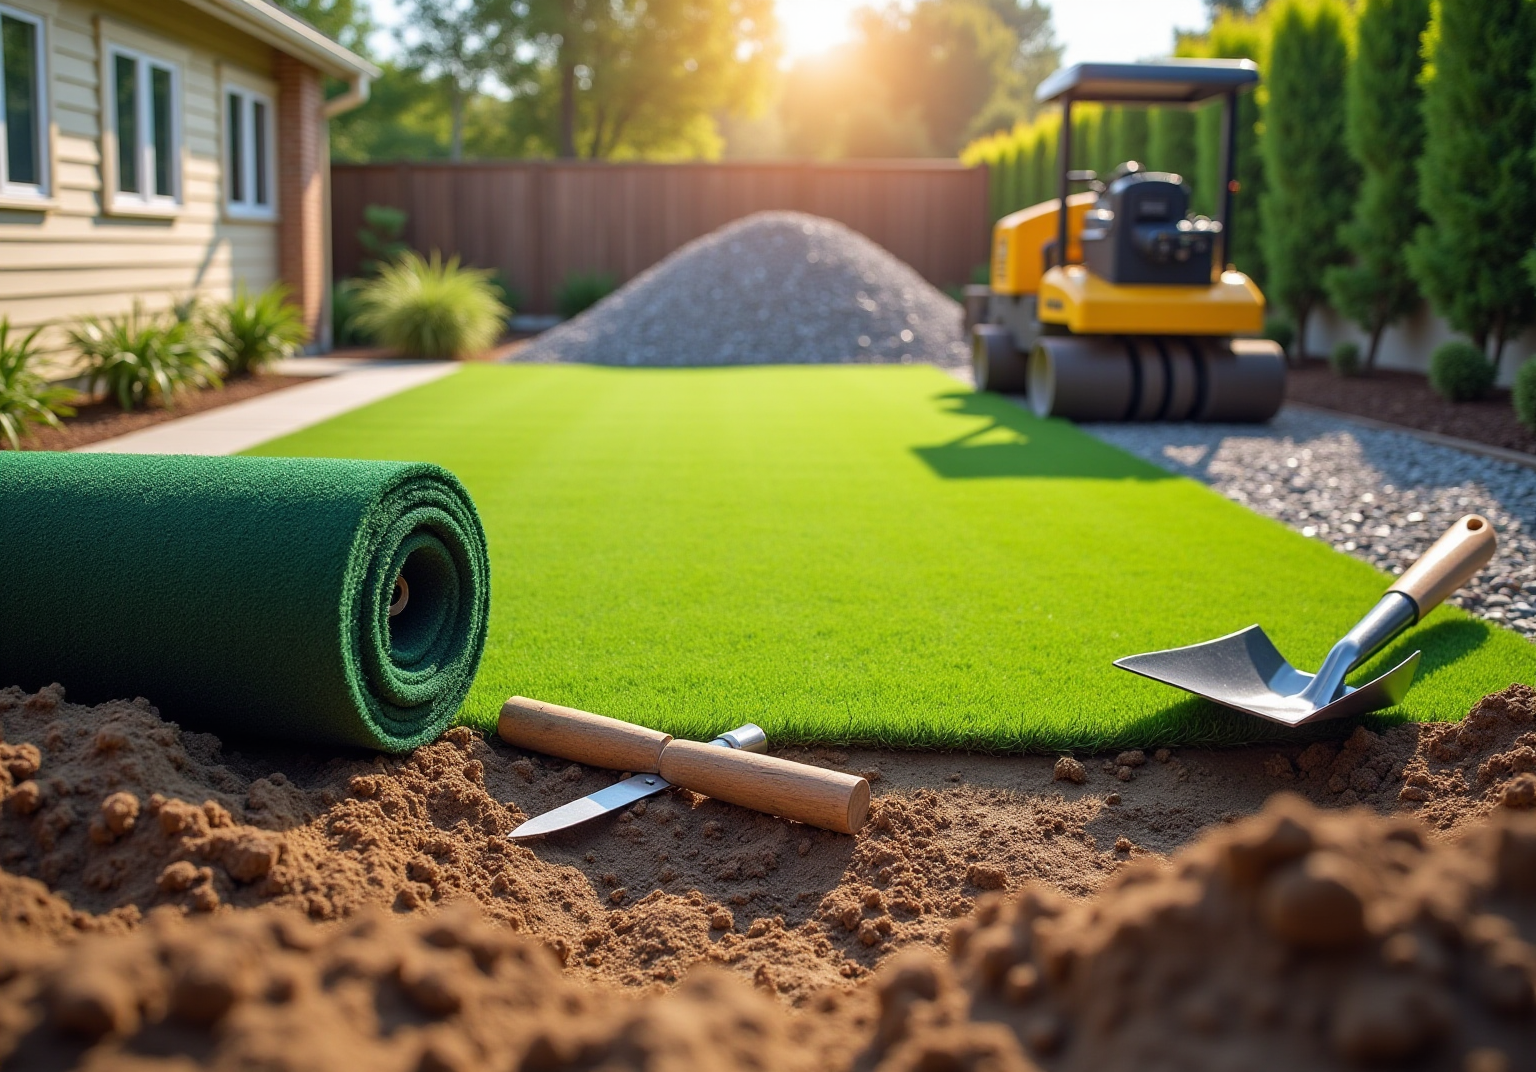
- Prepare the Site: Start by removing any existing grass, weeds, or debris from the area. Excavate the soil to a depth to create a stable base that encourages proper water flow.
- Install a Weed Barrier: Lay down a high-quality weed barrier over the excavated area. This layer is crucial as it prevents unwanted growth beneath the grass, ensuring a clean and healthy surface.
- Add Base Material: Fill the excavated area with base material, approximately 2-4 inches deep. This layer is vital for providing drainage and stability, which are important for the durability of your grass.
- Compact the Base: Use a plate compactor to firmly compact the base material. This step is necessary to avoid uneven surfaces and guarantee a stable base for the grass.
- Lay the Turf: Roll out the artificial grass over the prepared base, ensuring it fits snugly. Trim any excess material as needed to achieve a seamless look.
- Secure the Lawn: Use landscape staples to fasten the grass around the edges and seams. This prevents shifting and ensures a snug fit, which is crucial for preserving the grass’s appearance and functionality.
- Add Infill: Depending on the type of grass chosen, you may need to add infill material such as sand or rubber. This enhances durability and provides cushioning, making the surface more comfortable for use.
- Brush the Grass: Finally, use a stiff broom to brush the fibers upright. This step not only gives the grass a natural look but also helps maintain its appearance over time.
By adhering to these procedures, you can effectively install turf that enhances your outdoor area while minimizing maintenance requirements. Successful installations emphasize the importance of meticulous preparation and attention to detail, ensuring a beautiful and functional lawn for years to come.
Additionally, consider that the national average cost for artificial grass installation ranges from $12 to $18 per square foot in 2026. This investment can lead to savings on water bills, estimated between $500 and $1,200 annually, along with maintenance reduction savings of $300 to $800 yearly. Many satisfied clients have noted that working with Hall Turf ensures a professional and prompt setup, with specialists like Brock providing customized solutions tailored to your specific needs. Handling site preparation yourself can save you $2-4 per square foot on labor costs, making it a worthwhile consideration for homeowners.
Gather Essential Tools and Materials
Before you begin your installation, it is crucial to gather the tools and materials to ensure a smooth process.
Tools:
- Shovel: This tool is essential for digging and removing existing grass and vegetation.
- Plate Compactor: Use this to compact the soil, which will provide a stable foundation for your installation.
- Utility Knife: This is needed for cutting the grass to the desired size and shape.
- Landscape Staples or Nails: These will help secure the grass in position during the setup.
- Rake: A rake is important for leveling and smoothing the base, ensuring an even surface.
- Stiff Broom: After setup, use a stiff broom to brush the grass fibers upright.
- Measuring Tape: Accurate measurements of the installation area are vital, making this tool indispensable.
Materials:
- Turf: Choose a type that aligns with your specific project requirements, taking into account durability.
- Weed Barrier Fabric: This material is necessary to prevent unwanted weed growth beneath the grass.
- Drainage Gravel: This is recommended for effective drainage and stability.
- Infill Material: Depending on the type of turf, you may require sand or rubber infill to enhance performance and longevity.
Safety Gear:
Ensure you have gloves, knee pads, and safety glasses to protect yourself during the setup process. Adhering to proper safety protocols is essential for a successful installation.

Troubleshoot Common Installation Challenges
Even with careful planning, challenges may arise during installation. Here are some common issues:
- Uneven Surface: If the grass feels uneven, inspect the base for compactness. Recompact any loose areas and ensure the base is level before laying the grass. Regular checks can help identify and address unevenness early, enhancing the overall appearance. A slight slope from the center of the yard is necessary for adequate runoff, assisting in directing water away from the home.
- Water Accumulation: Water accumulation on the turf may suggest poor drainage. Ensure the base has a proper slope, ideally a slight incline from the center to direct water away from the home. If pooling persists, consider adding drainage channels or consulting a professional for further assessment. As specialists point out, ‘Incorrect measurements will throw off your entire yard,’ so ensuring proper grading is crucial.
- Seam Issues: If seams are not holding, verify that the correct adhesive or seam tape was used. Reapply as needed and secure with additional staples to reinforce the seams. Correct methods of setup are essential for preserving the quality of the grass.
- Wrinkling: If the surface wrinkles after installation, it may need to be stretched. Carefully pull the sod tight and secure it again to eliminate wrinkles. Regular brushing can also help maintain the turf’s appearance and prevent future issues.
- Weed Growth: If weeds appear, check that the barrier was installed correctly. A weed barrier is essential for preventing natural weeds from growing in synthetic lawns. If necessary, apply a weed killer to manage any growth effectively.
By being prepared for these challenges and implementing these solutions, you can ensure a successful installation and enjoy your new lawn for years to come.

Conclusion
Installing artificial lawn grass turf can significantly enhance your outdoor space, transforming it into a vibrant and low-maintenance oasis. By understanding the project requirements and following detailed installation procedures, homeowners can achieve a beautiful and functional lawn that adds value to their property.
Key steps in this process include:
- Assessing the installation area
- Selecting the appropriate turf type
- Meticulously preparing the site
The installation requires careful attention to detail, from laying down a weed barrier to securing the grass properly. Additionally, being aware of common installation challenges, such as uneven surfaces or water pooling, and knowing how to troubleshoot these issues is crucial for a successful outcome.
Ultimately, investing in artificial turf not only elevates the aesthetic appeal of a home but also offers long-term savings on maintenance and water bills. By adhering to this comprehensive guide, homeowners can confidently embark on their artificial lawn installation journey, ensuring a lush, green space that requires minimal upkeep and provides lasting enjoyment.
Frequently Asked Questions
What is the first step to take before starting an artificial turf installation?
The first step is to clarify your project requirements by assessing the area, determining the purpose of the grass, and choosing the right turf.
How should I assess the area for artificial turf installation?
Measure the dimensions of the intended installation space and consider any slopes or drainage issues that could impact the project.
Why is it important to determine the purpose of the artificial grass?
Identifying the primary use of the grass, such as for a pet area, children’s playground, or decorative landscaping, is crucial because each application may require different grass specifications.
What types of artificial turf are available for different purposes?
There are various types, including pet-friendly grass designed to withstand wear and tear from animals, and playground grass which is softer and safer for children.
What should I consider regarding local regulations before installation?
It is important to check local regulations regarding artificial surface installations to ensure compliance and avoid potential issues in the future.
How can I plan for effective drainage when installing artificial turf?
Evaluate the natural incline of your yard and plan accordingly to ensure that water drains away from the grass area to prevent pooling.
What have customers reported about their experiences with proper planning for artificial turf projects?
Homeowners have reported that proper planning, especially regarding drainage, has led to excellent results in their artificial turf projects.
List of Sources
- Understand Your Project Requirements
- palmbeachdailynews.com (https://palmbeachdailynews.com/press-release/story/17573/nick-ogilvie-advancing-installation-safety-and-long-term-performance-standards-nationwide)
- syntheticturfnorthwest.com (https://syntheticturfnorthwest.com/what-to-look-out-for-before-installing-synthetic-turf)
- Synthetic Playground Turf Covered in Proposed Standards | ASTM (https://astm.org/news/synthetic-playground-turf-covered-in-proposed-standard)
- xggrass.com (https://xggrass.com/news/2026-to-2030-the-artificial-turf-industry-ent-85312068.html)
- lowes.com (https://lowes.com/n/how-to/install-artificial-grass)
- Follow Step-by-Step Installation Procedures
- henshawsroofandbuild.com (https://henshawsroofandbuild.com/blogs/news/how-to-install-artificial-grass-a-step-by-step-guide?srsltid=AfmBOoppOek2C0JGBarlBa1z8MwfN2oDVbBUf_ebpjv1Ko7UxOjqfOJs)
- bhumicalculator.com (https://bhumicalculator.com/countries/united-states/artificial-grass-installation-cost-per-square-foot)
- turftekusa.com (https://turftekusa.com/blog/the-essential-residential-artificial-turf-installation-guide)
- Step-by-Step Guide to Installing Artificial Grass in California’s Diverse Climate (https://agsturf.com/artificial-turf-news/Step-by-Step-Guide-to-Installing-Artificial-Grass-in-California-s-Diverse-Climate-0108.html)
- bhumicalculator.com (https://bhumicalculator.com/countries/united-states/turf-cost-per-square-foot)
- Gather Essential Tools and Materials
- thisoldhouse.com (https://thisoldhouse.com/lawns/install-artificial-grass)
- syntheticturfnorthwest.com (https://syntheticturfnorthwest.com/a-helpful-guide-to-installing-synthetic-turf-diy)
- sgwtexas.com (https://sgwtexas.com/dallas/blog/2023/02/28/5-key-supplies-you-need-for-your-next-artificial-turf-installation)
- Artificial Turf Material Supply List For Any Installation (https://turfkingz.com/resources/artificial-turf-material-supply-list)
- lowes.com (https://lowes.com/n/how-to/install-artificial-grass)
- Troubleshoot Common Installation Challenges
- syntheticturfnorthwest.com (https://syntheticturfnorthwest.com/common-mistakes-diy-artificial-turf-installers-make)
- georgedaviesturf.co.uk (https://georgedaviesturf.co.uk/blog/common-artificial-turf-issues-how-to-solve-them?srsltid=AfmBOoo4IbhAapK6h1kAp1FkGdHP1bfRpL4IV-jwxFJmNrltnp3P3jd9)
- Artificial Grass Installation: Overcome Common Challenges (https://yavapailandscaping.com/overcoming-common-challenges-in-artificial-grass-installation)
- siteone.com (https://siteone.com/en/articles/turf-care/top-synthetic-turf-installation-problems-and-solutions?srsltid=AfmBOop2o7R5i7FVri8Vr2b6YNKmFHRZcue2P1jd4koV49Ja-tyMrnIP)