
Define the Use and Record the Starting Specification
Treat the first phase as a project brief for the connected putting-green system. The intended use sets the starting specification for area, shape, materials, and construction method. Distinguish occasional practice, repeated training, and shared recreation before any surface is selected.
A published planning guide estimates roughly 200–300 square feet for basic practice and 400–600 square feet for greater practice variety. Use those figures as planning references, not fixed requirements. The usable area also depends on the yard shape, approach to the green, surrounding landscape, and room to move around the surface.
Capture four entries in the starting specification:
- Practice purpose: State whether the surface is mainly for short-putt practice, a broader range of practice shots, or more than one household or business use.
- Intended users: Note who will use the green and how often. A private backyard project and a commercial installation may call for different layouts and planning conversations.
- Available area: Measure the space that can actually be built on. Mark trees, structures, paths, pool areas, property features, and areas that must remain accessible.
- Desired experience: Describe whether the project calls for a compact surface or more room for varied practice.
We help homeowners customize putting greens to their specific space and skill level. Carry that starting specification into the site record so later material and construction decisions answer a defined use.
Measure the Footprint and Map the Work Route
Convert the starting specification into a measured Kansas City site record. The record covers the proposed footprint and the route from the street or driveway to the work area, so the installation can be staged around the actual property rather than an unspecified turf area.
Build the record in this order:
- Mark the footprint. Show the proposed location and its relationship to the house, patios, fences, gardens, pools, walkways, and other features.
- Measure usable room. Record the length and width of the playing area, along with space around it for movement and maintenance.
- Describe the existing ground. Note visible slopes, low areas, uneven transitions, standing-water concerns, and retaining features. A level-looking area does not establish identical construction requirements for every site.
- Trace material access. Mark gates, narrow passages, steps, fences, overhead obstructions, and other limits between the delivery point and the proposed green.
- Document the connections. Show desired edge treatment, nearby landscape areas, and routes that must remain open after construction.
Slopes can complicate design and construction, while grading, retaining walls, and space around the green for maintenance can significantly increase the project price. Construction access also matters because equipment, soil or base material, and other supplies must reach the site; some backyard projects may require a crane for material delivery.
Use a sketch, measurements, and photographs as the staging reference for the next phase. This record makes the complete installation easier to discuss than a request based only on the visible turf area.

Run the Site-Readiness Screen
Use the site record as a pre-installation screen. A properly installed synthetic putting green requires precise grading, effective drainage, and turf selected for the intended use, so the visible surface cannot be separated from the conditions below and around it.
Complete the screen as five observations:
- Slope: Mark whether the ground rises, falls, or changes direction across the footprint. Slopes can complicate design and construction and may call for more grading or retaining work than a flat site.
- Drainage: Note where water moves during or after rain, where low areas collect it, and where the completed surface would need to direct runoff. Resolve this as a design question before the base and turf are selected.
- Edges and transitions: Show where the green meets soil, planting beds, paving, structures, or existing lawn. These points affect the installation shape and available maintenance space.
- Construction route: Trace the path for equipment, base material, soil, turf, and other supplies. A narrow gate or restricted passage can change the practical installation plan.
- Working room: Note whether installers can move around the proposed green during preparation and surface finishing.
Use the observations as a path decision. A noticeable slope, uncertain water path, restricted route, or more involved surface requirement belongs in a professional installation discussion before the surface is approved.
Write the Playing-Surface Specification
Turn the site record into a playing-surface specification. A backyard turf putting green depends on a stable, well-drained sub-base, turf selected for ball roll and durability, and properly calibrated silica sand infill. Treat those components as one system rather than purchasing a lawn covering first.
Choose specialized putting-green turf rather than general landscape turf. Landscape turf generally has longer blades and a plush design, while specialized putting-green turf has a short pile height and dense fibers intended to support a smoother golf-ball roll.
Record these lines in the surface specification:
- Ball roll: State whether smooth, consistent practice roll is the main purpose.
- Durability demand: Describe how often the surface will be used and whether several people will use it.
- Surface area: Match the footprint to the desired practice variety while retaining the site constraints already recorded.
- Infill approach: Identify silica sand infill as part of the playing system, not a finishing detail selected after turf placement.
- Landscape relationship: Describe how the putting area should sit within the yard or commercial property.
The specification therefore joins the intended use, site conditions, and desired practice experience before materials are finalized.
Prepare and Verify the Foundation
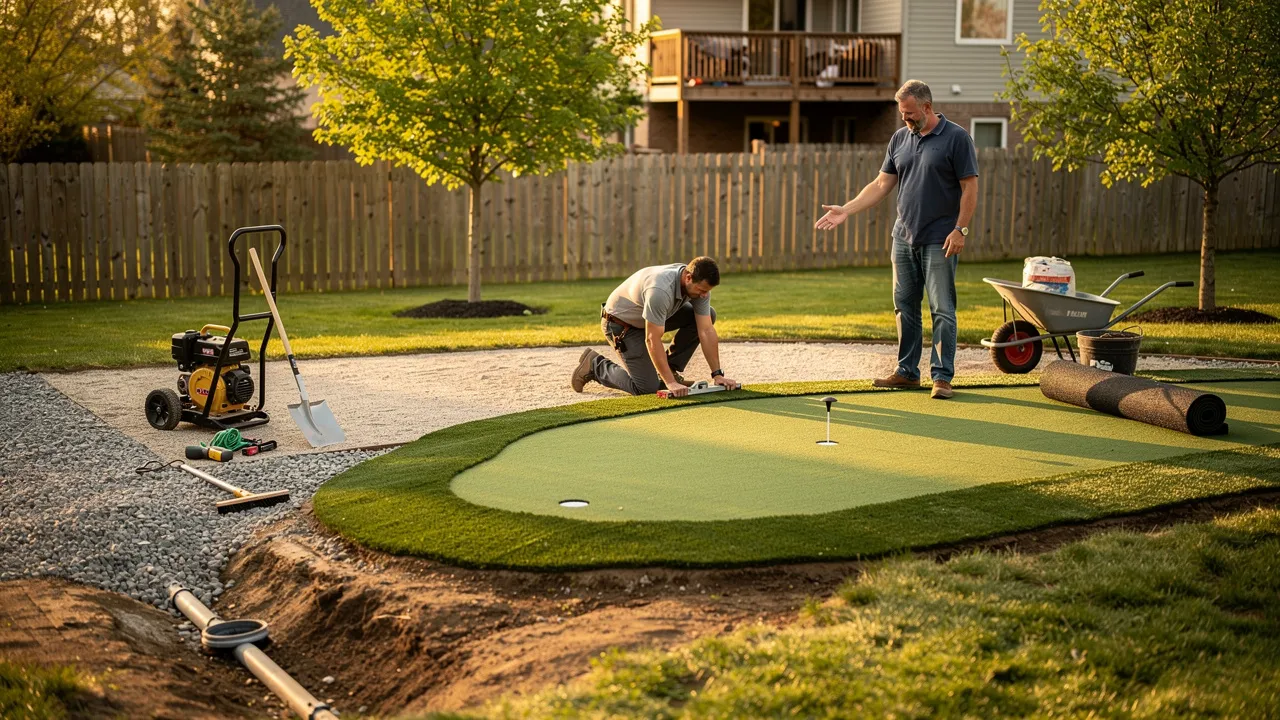
Use the site record and surface specification to prepare the foundation. The sequence starts with site preparation, continues through grading and drainage planning, and establishes a stable, well-drained sub-base before turf placement. We require the installation site to be prepared for artificial grass installation.
Stage the foundation work as follows:
- Prepare the footprint. Define the installation boundary and address the existing surface so it is ready for the planned system.
- Establish the grade. Shape the site according to the intended layout and drainage plan. Precise grading is part of a properly installed synthetic putting green.
- Create the sub-base. Use a base designed for stability and drainage, with the exact build determined by the site and chosen system.
- Compact and assess the base. Confirm that the foundation is stable and suitable before the playing surface covers it.
- Resolve access and edges. Recheck access, transitions, and drainage before turf work begins.
One installation guide identifies sub-base compaction to 95% density under ASTM D698 standards as a threshold for long-term surface integrity. Treat that figure as a specification to discuss for the proposed system, not a universal instruction that replaces site assessment.
The USGA describes putting-green construction as complicated and provides resources covering integral construction stages. Move to the visible surface only after the foundation has been prepared and the recorded access, edge, and drainage details have been addressed.
Stage Turf Placement and Infill
The surface stage begins when the foundation matches the planned system. It connects specialized putting-green turf to the stable, well-drained sub-base and uses silica sand infill as part of the playing surface.
Use these handoffs to stage the remaining work:
- Base handoff: Recheck grade, drainage approach, footprint, and access before placing the surface.
- Turf handoff: Place the turf specified for golf-ball roll and the project’s durability needs rather than substituting general landscape turf. Specialized putting-green turf has a short pile height and dense fibers intended to support smoother roll.
- Installation handoff: Resolve placement, joins, edges, and fit according to the selected system and site conditions.
- Infill handoff: Add and distribute silica sand infill as an installation decision within the playing system.
- Use handoff: Assess the completed surface against the practice purpose defined at the beginning of the project.
The selected guidance states that silica sand infill can be calibrated to deliver consistent green speed in the 9–11 Stimpmeter range. Treat that as a calibration possibility, not a promise that every project will reach a particular speed. The complete system and the way it is installed remain part of the assessment.
Keep the stages in sequence so each surface decision follows the prepared base and the recorded project purpose.
Complete the Surface and Record the Finish
The finishing phase converts the installed system into the defined practice setup. Use the available area, intended users, and site limits to settle the shape, cup locations, approach directions, edges, surrounding landscape, and any change in elevation. Precise grading and effective drainage remain part of a properly installed synthetic putting green.
Use the area estimates as a final reference: roughly 200–300 square feet supports basic practice, while 400–600 square feet allows greater practice variety. A smaller area can serve a defined practice need, and a larger area may allow more varied practice positions. These are estimates, not a rule for every property.
The finished-surface record should contain five entries:
- The playing boundary as compared with the measured footprint.
- The usable and accessible condition of the surrounding area.
- The planned transitions between the green and the rest of the property.
- Cup or other practice-feature locations in relation to the intended use and available space.
- The final surface and infill distribution before regular use.
The completed layout should show what practice experience the surface is intended to support.
We recommend using a stiff-bristled broom to brush turf fibers upright and distribute infill evenly for a finished appearance. Include that finishing step in the installation and care plan after grading, base preparation, and turf placement are complete.

Hand Off the Care Plan
Close the work plan with a care handoff that describes what happens after installation. Synthetic turf putting greens can develop wrinkles and bumps through wear and tear, which can make the surface difficult to maintain. Include a response for those changes when the system and installation path are discussed.
The care handoff should identify:
- Appearance work: Brushing that raises turf fibers and distributes infill evenly. We recommend using a stiff-bristled broom for that purpose.
- Surface observations: The signs of wrinkles, bumps, or other changes affecting the playing area.
- Infill observations: How to notice whether infill remains distributed as intended.
- Use pattern: How often the green will be used and who will maintain it.
- Follow-up questions: What should happen if wear and tear changes the surface.
This final handoff keeps the installation plan connected to the period after the work is complete. A putting green remains a surface system with an ongoing care approach, not only an installation-day task.
Use Site Complexity to Choose DIY or Professional Installation
DIY and professional installation suit different project conditions. The decision should follow the site, surface system, access route, and construction skills required rather than the appeal of a lower-complexity plan on paper.
| Decision factor | DIY construction | Professional installation |
|---|---|---|
| Site shape | May suit a simple, flat site | Better suited to a site where slope or grading needs careful coordination |
| Project size | The selected guidance says DIY may be viable for a simple, flat green under 400 square feet on a well-drained site | A larger or more involved layout needs a fuller review of the base, drainage, access, and surface sequence |
| Drainage and grade | Requires you to understand and execute the required site preparation and grading | Gives you a route for resolving complex grading or drainage questions before installation |
| Access | Works only when equipment and materials can reach the work area without creating an unresolved construction problem | Helps coordinate material delivery and restricted access, including projects where a crane may be required |
| Surface requirements | Requires the skills, patience, and golf knowledge needed for correct installation | Brings an installation process intended to coordinate the specialized surface with the foundation |
The comparison reflects several boundaries. Slopes can complicate design and construction, while grading, retaining walls, and maintenance space can significantly increase the project price. Equipment, soil or base material, and other supplies must reach the site.
DIY may be viable for a simple, flat green under 400 square feet on a well-drained site. If your project fits that description and you have the necessary construction skills, begin with a complete site and materials plan rather than ordering turf first.
Professional installation deserves serious consideration when the site has a slope, uncertain drainage, difficult access, a larger footprint, or a surface specification you cannot confidently build. One installation source cautions that inexperienced installation is a common cause of putting-green failures and that correct installation requires appropriate skills, patience, and golf knowledge. The USGA also describes putting-green construction as complicated and provides resources covering integral construction stages.
Choose the DIY path only when the site and your capabilities fit the simple-project boundary. Otherwise, prepare the build brief and request an installation assessment.
Prepare a Quote Request That Describes the Actual Build
A quote request is most useful when it describes the project conditions that will determine the build. Hall Turf offers putting-green installation in Kansas and Missouri. Before you contact an installer, assemble a short brief containing:
- The property location and proposed installation area.
- Approximate dimensions and the practice purpose.
- Intended users and expected use level.
- Photos or notes showing slope, drainage observations, edges, and surrounding landscape.
- The route available for equipment, base material, soil, turf, and other supplies.
- Desired surface features, practice layout, and relationship to the rest of the property.
- Any access restriction, retaining feature, or construction question that needs a site-specific answer.
- Whether you are exploring DIY or prefer installation help.
A complete brief lets the project discussion address the site, foundation, surface, finishing, and upkeep together. It also gives you a practical basis for comparing the proposed scope with the green you actually want to build.
What Should You Tell an Installer Before Requesting a Quote?
What are the key considerations for assessing a site for a putting green in Kansas City?
When assessing a site for a putting green, consider the slope of the land, drainage patterns, usable space, and access for construction materials. Ensure the area is flat or manageable for grading, and identify any potential water collection spots that could affect the green’s performance.
What materials are recommended for constructing a backyard putting green?
For a backyard putting green, use specialized putting-green turf with a short pile height and dense fibers for smooth ball roll. Additionally, a stable, well-drained sub-base and silica sand infill calibrated for consistent green speed are essential.
How can I determine whether to install a putting green myself or hire a professional?
Consider the complexity of your site, the size of the green, and your own construction skills. DIY may be viable for simple, flat greens under 400 square feet on well-drained sites, while professional installation is recommended for larger or more complex projects.
What tools are necessary for installing a putting green?
Necessary tools for installing a putting green include a shovel, rake, plate compactor, level, rubber mallet, utility knife, sharp scissors, measuring tape, and string line.
What maintenance is required for a synthetic putting green?
Maintenance for a synthetic putting green includes regular brushing to keep turf fibers upright, checking for wrinkles or bumps, ensuring infill is evenly distributed, and monitoring the overall condition of the surface.
What should I include in a quote request for a putting green installation?
A quote request should include the property location, proposed installation area, dimensions, intended use, access routes for materials, and any specific features or conditions that need to be addressed.