
Introduction
Laying artificial grass can significantly enhance the appearance of any yard, transforming it into a vibrant green space. Many homeowners underestimate the complexity of installing artificial grass, leading to potential challenges. This guide provides essential steps for a successful DIY installation, helping homeowners achieve both aesthetic appeal and durability. Navigating this project effectively can mean the difference between a beautiful lawn and a frustrating experience.
Prepare the Installation Area
Proper site preparation is crucial when it comes to laying artificial grass diy for a successful installation.
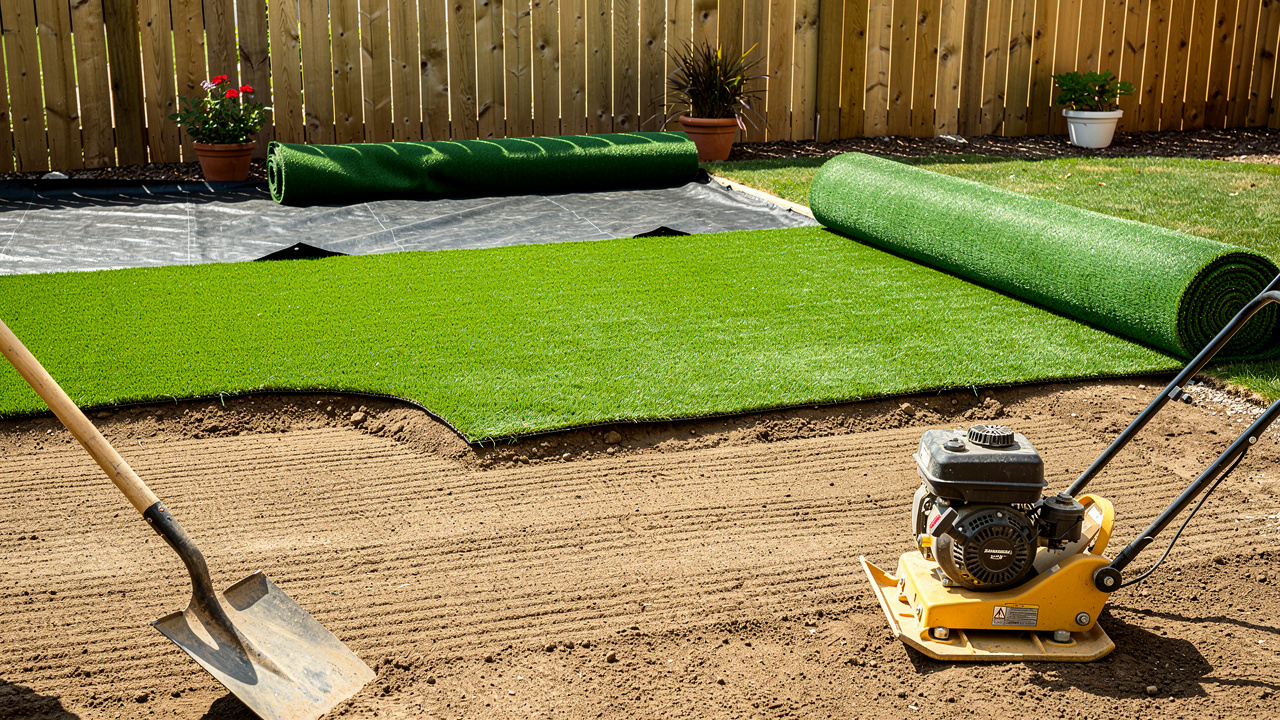
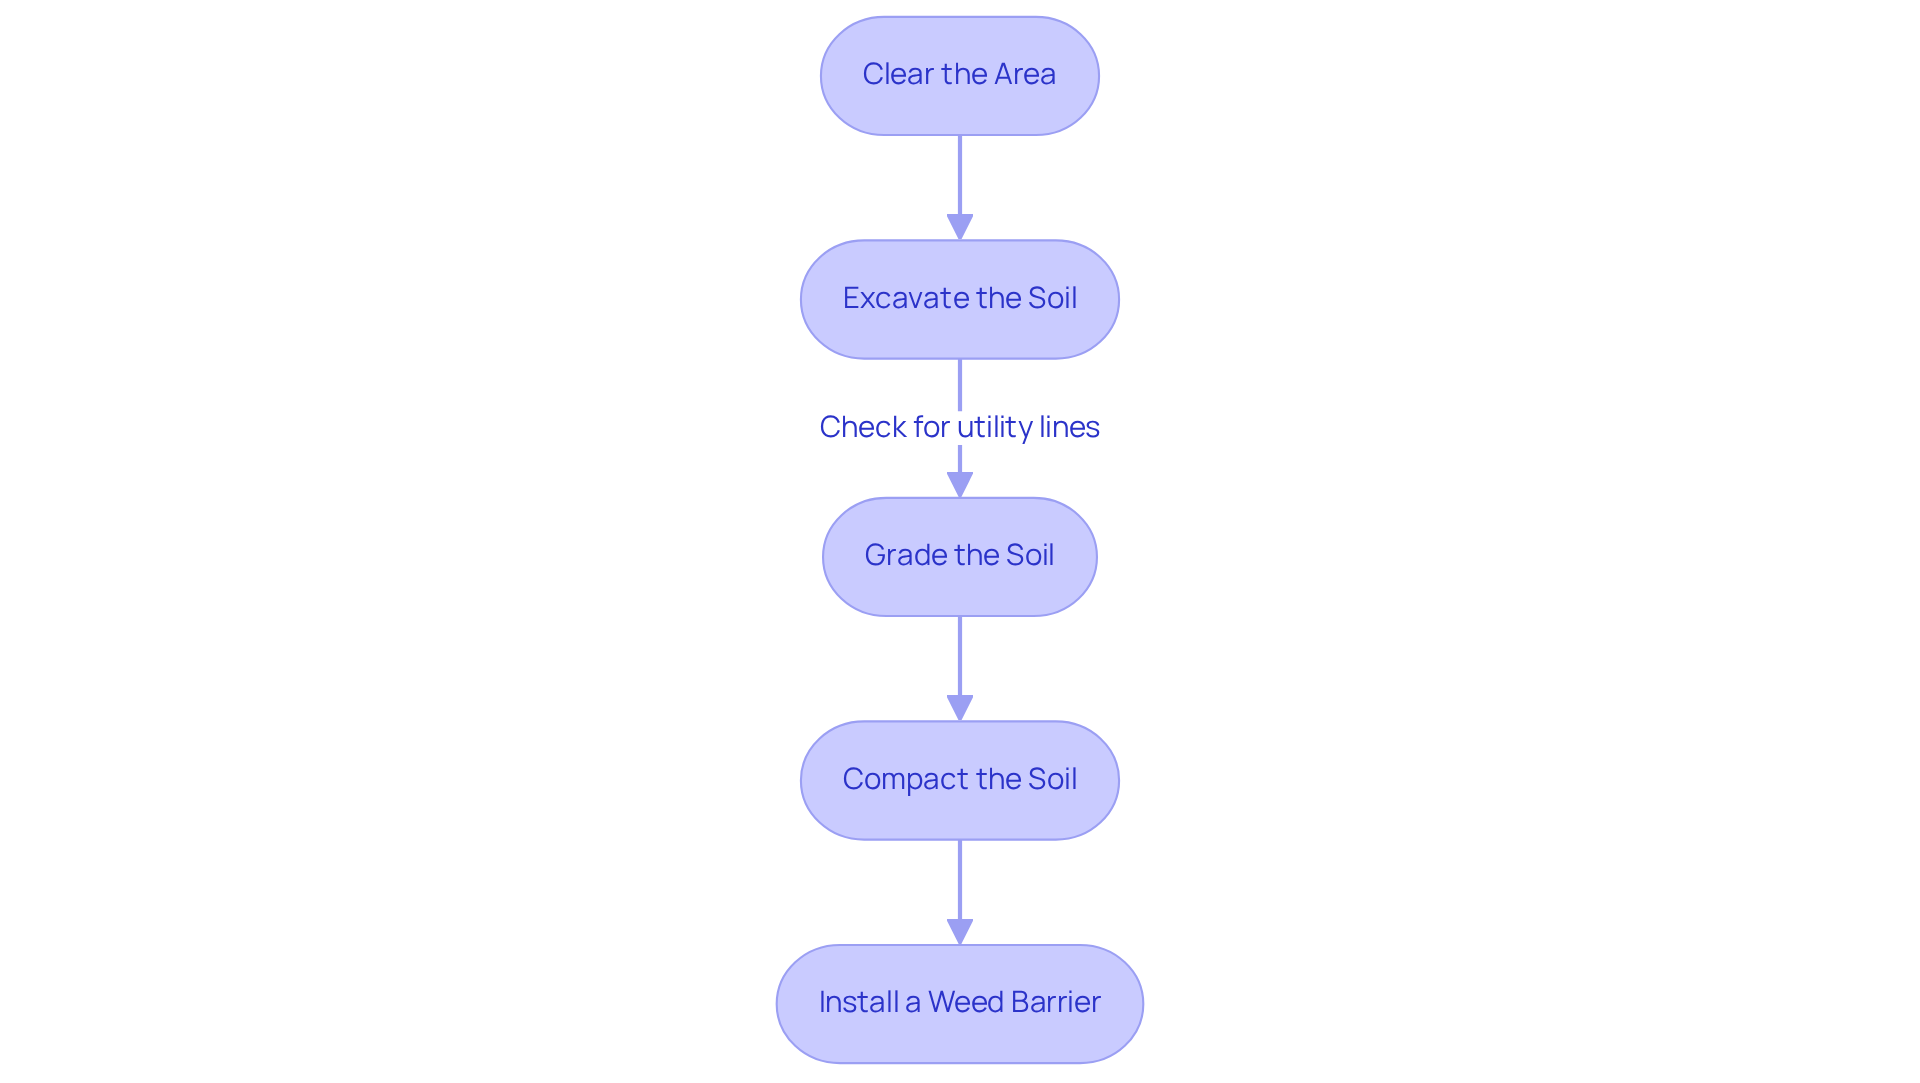
- Clear the Area: Begin by removing any existing grass, weeds, and debris from the setup site. Use a shovel or a sod cutter to ensure the area is clean. Removing vegetation is essential for establishing a clean foundation for the grass installation. Brock’s expertise ensures that site conditions are thoroughly evaluated for effective preparation.
- Excavate the Soil: Dig down approximately 3 to 4 inches to create a level base. This depth enables adequate drainage and prevents the grass from becoming uneven over time. Remember to check for utility lines before excavation to avoid any disruptions. Brock’s attention to detail ensures that this step is executed with precision.
- Grade the Soil: Ensure the ground slopes slightly away from any structures to facilitate drainage. A 2% slope is ideal to prevent water pooling, which can compromise the integrity of the turf. Brock’s professional approach guarantees that grading is done correctly.
- Compact the Soil: Use a plate compactor to compact the soil firmly. This step is essential for laying artificial grass diy by creating a stable base that will support the artificial grass and prevent settling in the future. After adding a layer of crushed stone or decomposed granite, compact it again to ensure stability. Brock’s experience in this area can help achieve optimal results.
- Install a Weed Barrier: Lay down a weed barrier fabric over the compacted soil to prevent weeds from growing through the turf. This will help maintain the appearance and integrity of your artificial grass over time. Using the right materials, as suggested by Brock, can significantly enhance the durability of your setup.
Note: The site preparation phase usually extends from 2 to 4 days, so plan accordingly to ensure a seamless setup process. Additionally, during installation, secure the grass every 4 to 6 inches to ensure its stability. Ensuring meticulous preparation can save time and resources in the long run.
Install the Artificial Grass
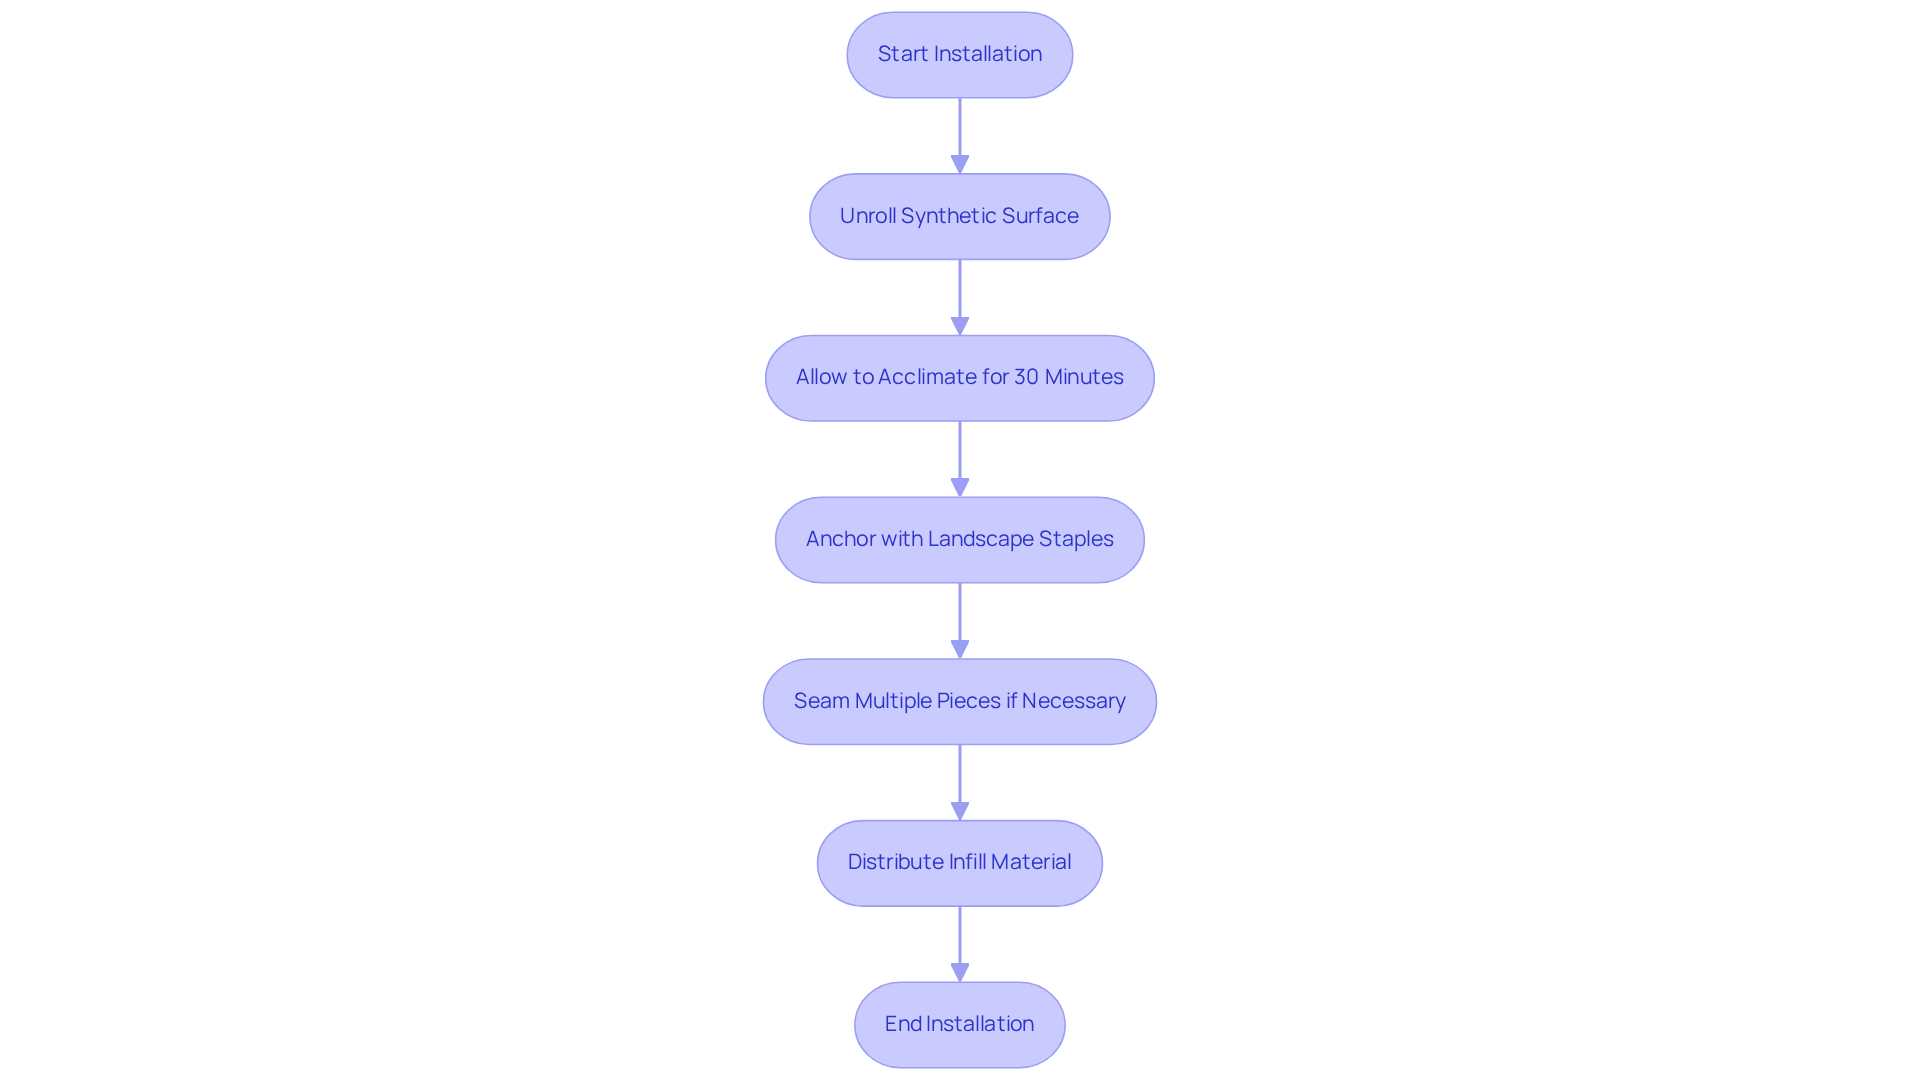
Laying artificial grass DIY requires careful preparation and precise execution to ensure a durable and visually appealing surface. Start the installation process of laying artificial grass DIY by unrolling the synthetic surface and placing it over the prepared section. Allow it to acclimate for about 30 minutes to minimize curling, making it easier to work with.
Next, to ensure the grass remains securely anchored, use landscape staples or grass nails. Position them every 6 inches along the perimeter and every foot in the center. This step is crucial; without proper anchoring, the turf may shift or become uneven over time.
If your installation involves multiple pieces, consider laying artificial grass DIY by seaming the turf effectively with seam tape and adhesive. Adhere to the manufacturer’s instructions for optimal results, as failure to follow these guidelines may result in seams that separate or wear prematurely.
Conclude the installation by evenly distributing infill material, such as silica sand or rubber granules, across the turf surface. This step not only assists in compressing the turf but also offers cushioning underfoot. Use a broom to work the infill into the grass fibers, enhancing the overall appearance and functionality. Proper installation not only enhances the aesthetic appeal but also extends the lifespan of your synthetic turf.
Finalize the Installation and Maintenance Tips
Ensuring the longevity and performance of your artificial grass through laying artificial grass DIY requires careful attention to its installation and maintenance.
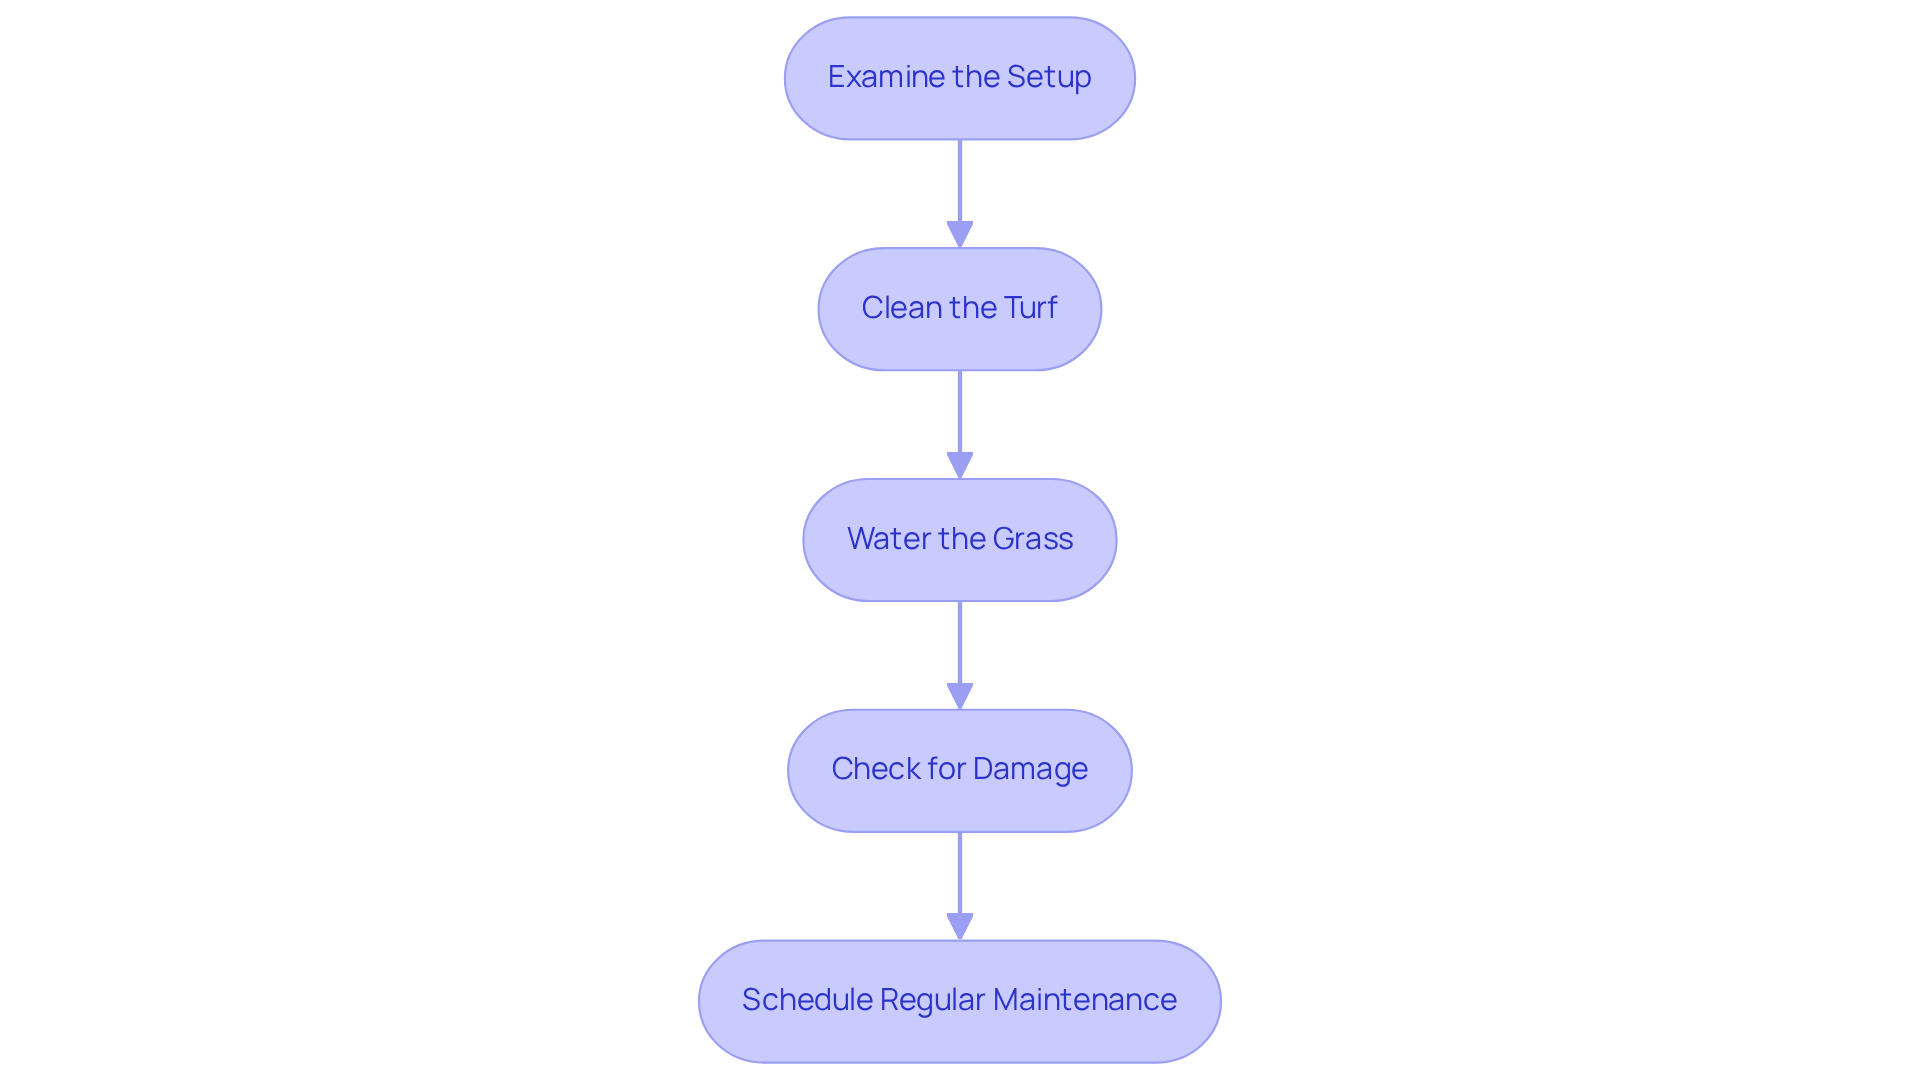
- Examine the Setup: Walk around the space to ensure the grass is securely fastened, with no visible seams or wrinkles. Adjust as necessary to maintain a smooth surface, as proper installation is crucial for effective maintenance and longevity when laying artificial grass DIY. Clients, including Dick Bryant, have found that professional assessments from Brock at Hall Turf lead to the best solutions for their grass needs, whether it’s a putting green, playground, or pet space.
- Clean the Turf: Make it a habit to clear away debris, leaves, and dirt with a leaf blower or a stiff broom. This routine cleaning helps preserve the surface’s appearance and prevents problems like matting, which can impact performance.
- Water the Grass: Occasionally rinse the grass with water to remove dust and allergens, especially in spots visited by pets. This simple step can significantly enhance the turf’s hygiene and visual appeal. For pet owners, it’s essential to rinse frequently used spots two to three times a week and perform daily solid waste collection to prevent odors. Brock focuses on both aesthetics and functionality, making installations suitable for pet areas.
- Check for Damage: Regularly inspect the turf for signs of wear or damage, such as flat blades or color fading. Neglecting to inspect the turf can lead to costly repairs and a shorter lifespan. Prompt attention to these issues can save homeowners from expensive replacements. Clients like Les Boatright appreciate the thoroughness of Hall Turf’s services, which help maintain the quality of their installations.
- Schedule Regular Maintenance: Depending on usage, consider professional cleaning or maintenance services every few years to keep the surface in optimal condition. Homeowners should perform maintenance checks at least once a year or every six months. Laying artificial grass DIY with a structured maintenance schedule can help maximize the lifespan of your synthetic turf, potentially extending it to 15-20 years with proper care. Keep in mind, synthetic surface upkeep usually demands around 5 to 10 hours annually, considerably fewer than the 100 to 150 hours necessary for natural vegetation. By prioritizing regular maintenance, homeowners can avoid unexpected costs and enjoy their synthetic turf for years to come.
Gather Essential Tools and Materials
Successfully laying artificial grass diy requires careful planning and the right tools to ensure a smooth process.
-
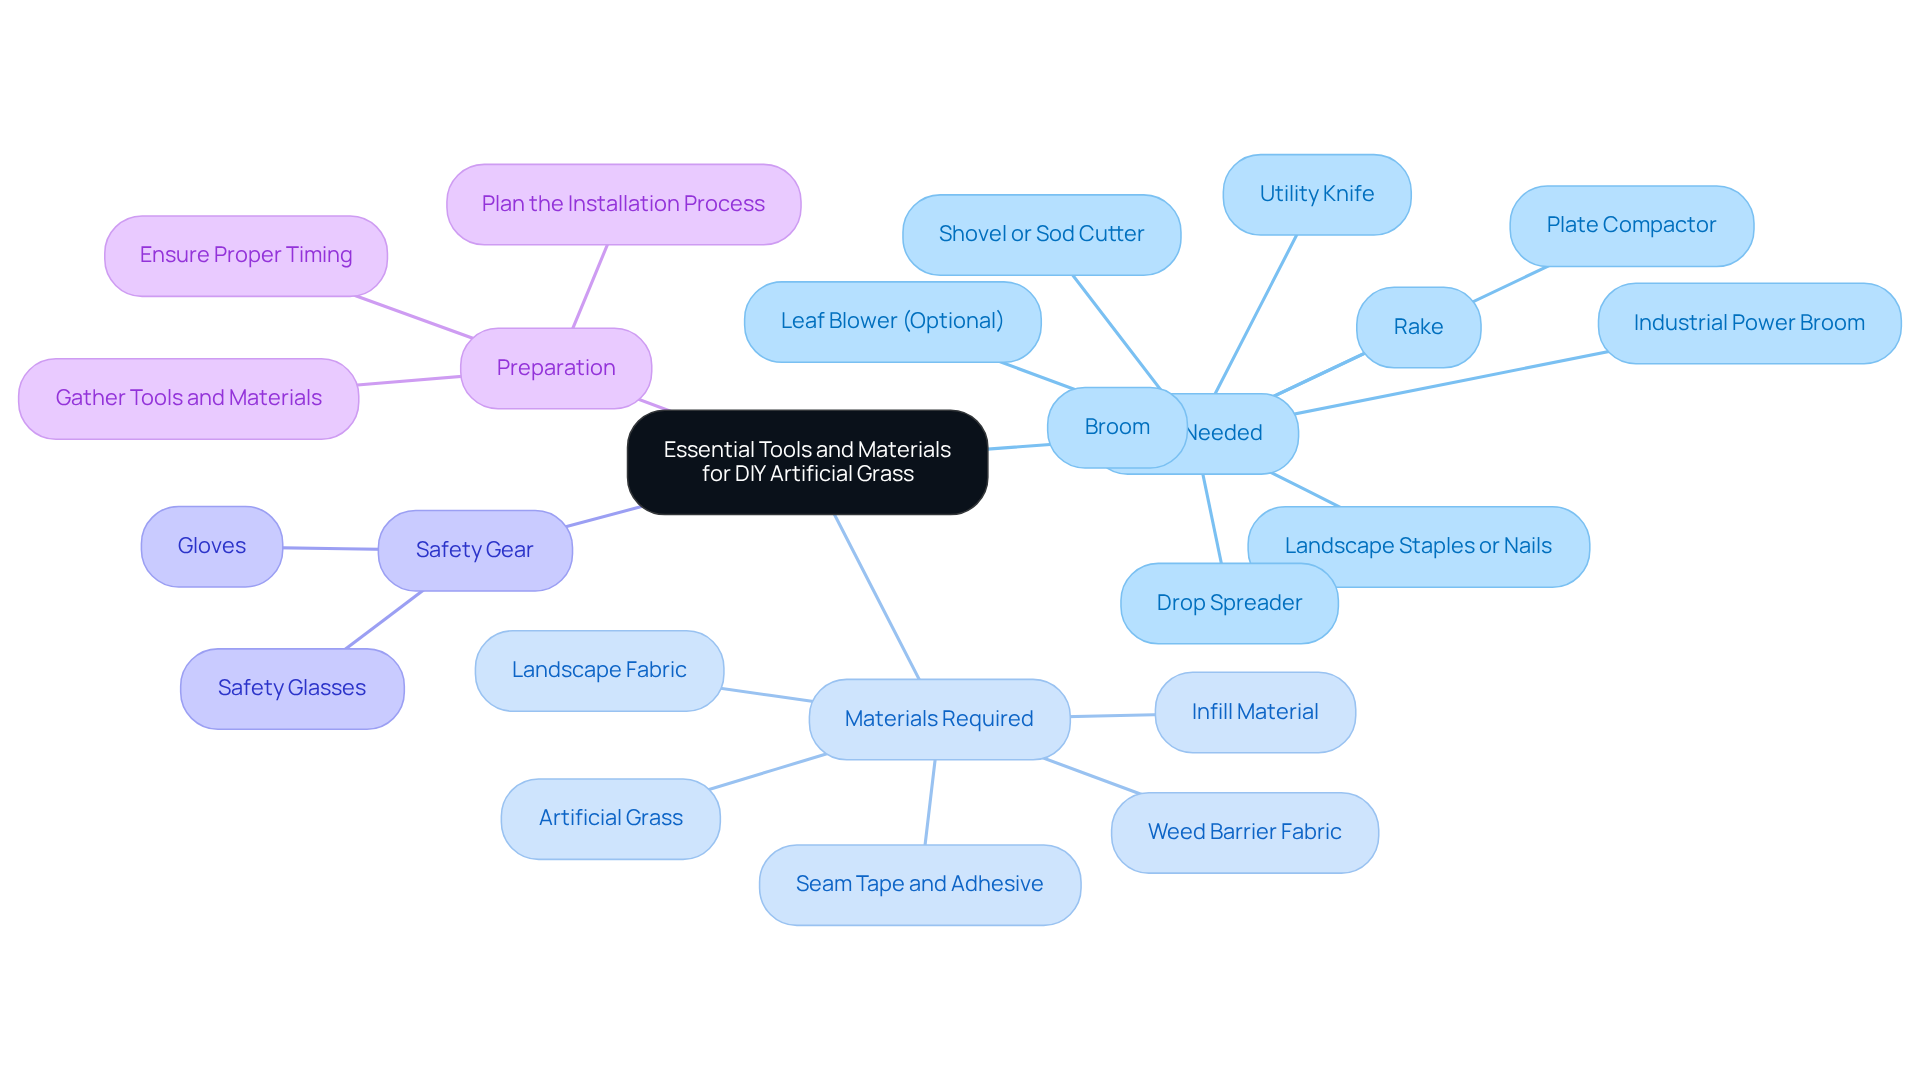
Tools Needed:
- Shovel or sod cutter for removing existing grass and soil.
- Plate compactor to create a solid base for the grass.
- Utility knife for precise cutting of the artificial grass.
- Landscape staples or nails to secure the grass in place.
- Rake for leveling the base material.
- Broom for cleaning the area and brushing infill into the turf.
- Leaf blower (optional) for clearing debris from the setup site.
- Drop spreader for even dispersion of infill material.
- Industrial Power Broom for efficient cleaning of the lawn before installation.
-
Materials Required:
- Artificial grass, which should be selected based on durability and appearance.
- Weed barrier fabric to prevent unwanted plants from sprouting through the grass.
- Infill material, such as silica sand or rubber granules, to support the grass blades and enhance stability.
- Seam tape and adhesive, if necessary, for securing seams between grass pieces.
- Landscape fabric to ensure proper drainage beneath the turf.
-
Safety Gear: Always wear gloves and safety glasses to protect yourself from sharp tools and debris during the setup process. This is crucial for ensuring your safety while working.
-
Preparation: To kick off your project smoothly, make sure you have all your tools and materials ready to go. This thorough preparation will simplify your setup and contribute to a successful outcome. Gathering the right tools is essential; as Eric Fullerton emphasizes, having a variety of tools is crucial for a successful installation. Additionally, the average costs for tools and materials in 2026 are expected to be lower than previous years, making this an ideal time for laying artificial grass DIY projects. With the right preparation and timing, you can achieve a professional-looking lawn at a fraction of the expected cost.
Conclusion
Transforming your yard with DIY artificial grass requires careful planning and execution to achieve lasting results. This guide emphasizes the importance of meticulous site preparation, precise installation, and ongoing care to ensure that the artificial turf remains attractive and functional for years to come.
The article outlines four essential steps:
- Preparing the installation area by clearing, excavating, grading, and compacting the soil.
- Installing the artificial grass with proper anchoring and infill.
- Finalizing the setup with inspections and maintenance.
- Gathering the right tools and materials for the job.
Each stage is crucial for achieving a professional-looking result, as this guide provides clear insights and actionable recommendations to ensure successful installation.
By following these steps and prioritizing regular maintenance, homeowners can enjoy a beautiful and durable lawn that requires significantly less upkeep than traditional grass. Taking on this DIY project allows homeowners to save money while creating a personalized outdoor space. Ultimately, a well-executed installation not only enhances the aesthetic of your home but also provides a sustainable solution for outdoor enjoyment.
Frequently Asked Questions
Why is site preparation important for laying artificial grass?
Proper site preparation is crucial for establishing a clean foundation, ensuring effective installation, and preventing future issues such as unevenness and drainage problems.
What steps should I take to clear the area before installation?
Begin by removing any existing grass, weeds, and debris using a shovel or a sod cutter to ensure the site is clean and ready for installation.
How deep should I excavate the soil for artificial grass installation?
You should dig down approximately 3 to 4 inches to create a level base that allows for adequate drainage and prevents the grass from becoming uneven over time.
What is the recommended slope for grading the soil?
The ground should slope slightly away from any structures, with a 2% slope being ideal to prevent water pooling and maintain the integrity of the turf.
Why is it necessary to compact the soil?
Compacting the soil is essential for creating a stable base that supports the artificial grass and prevents settling in the future.
Should I add any materials after compacting the soil?
Yes, after compacting the soil, you should add a layer of crushed stone or decomposed granite and compact it again to ensure stability.
What is the purpose of installing a weed barrier?
A weed barrier fabric is laid over the compacted soil to prevent weeds from growing through the turf, helping to maintain the appearance and integrity of the artificial grass over time.
How long does the site preparation phase typically take?
The site preparation phase usually extends from 2 to 4 days, so it’s important to plan accordingly for a seamless setup process.
How should I secure the artificial grass during installation?
During installation, the grass should be secured every 4 to 6 inches to ensure its stability.
List of Sources
- Prepare the Installation Area
- What to Expect During Artificial Turf Installation: Timeline, Equipment & Disruption – River Region Sports Fields (https://riverregionsportsfields.com/what-to-expect-during-artificial-turf-installation-timeline-equipment-disruption)
- A Step-by-Step Guide to Installing Artificial Turf Grass (https://lowes.com/n/how-to/install-artificial-grass)
- justanswer.com (https://justanswer.com/home-improvement/ixp28-prepare-area-artificial-grass.html)
- Artificial Grass Installation: Step-by-step Guide (2026) (https://whatgrassisthis.com/blog/artificial-grass-installation-step-by-step-guide-2026)
- Install the Artificial Grass
- Artificial Turf Market Size, Share & Trends Report, 2026-2033 (https://grandviewresearch.com/industry-analysis/artificial-turf-market)
- Artificial Grass Market Size, Share and Forecast, 2026-2033 (https://coherentmarketinsights.com/industry-reports/artificial-grass-market)
- Artificial Turf Market Size, Share & Analysis | Global Report 2035 (https://marketresearchfuture.com/reports/artificial-turf-market-7159)
- 2026 Artificial Grass Installation Cost | Angi (https://angi.com/articles/how-much-does-artificial-turf-cost.htm)
- How Much Does Artificial Grass Cost in 2026? (https://lawnstarter.com/blog/cost/artificial-grass-price)
- Finalize the Installation and Maintenance Tips
- 4 Essential Maintenance Tips for Artificial Turf Longevity (https://californiaturfco.com/4-essential-maintenance-tips-for-artificial-turf-longevity)
- Artificial Turf Maintenance Guide | Cleaning & Care Tips (https://fieldturflandscape.com/maintenance/artificial-turf-maintenance-guide)
- Artificial Turf Care: Top Tips for San Jose Homes (https://artificialturfexpress.com/blog/essential-artificial-turf-maintenance-tips-for-san-jose-homeowners-and-landscapers)
- Caring for Your Synthetic Turf Field (https://trackandturf.com/blog/caring-for-your-synthetic-turf-field)
- Artificial Grass Maintenance: How to Keep Your Turf Looking New in Texas and Florida (https://magnoliaturf.com/artificial-grass-maintenance-texas-florida)
- Gather Essential Tools and Materials
- 5 Tools That Contractors Installing Artificial Grass Should Use | Purchase Green Artificial Grass (https://purchasegreen.com/blog/crucial-tools-contractors-installing-artificial-grass-should-use)
- DIY Guide: Essential Tools for Installing (https://blog.artificialgrassrecyclers.com/diy-guide-tools-you-need-to-install-your-own-artificial-turf)
- The Ultimate Guide to Installing and Maintaining Artificial Grass 101 | Smart Turf® Artificial Grass (https://smartturf.com/artificial-grass-101-guide)
- 15 Crucial Tools for DIY Artificial Grass Installation in San Jose (https://artificialturfexpress.com/blog/15-important-tools-youll-need-for-diy-artificial-grass-installation-in-san-jose)