
Introduction
Transforming a yard with artificial turf enhances its aesthetic appeal and functionality, providing a lush, green space throughout the year without the challenges of traditional lawn care. This guide presents four essential steps for a successful DIY artificial turf installation:
- Careful planning
- Preparation of the area
- Installation of the turf
- Final touches that ensure a professional finish
Key considerations and potential pitfalls could derail this ambitious project. Explore the intricacies of turf installation and learn how to create an outdoor oasis that meets all expectations.
Prepare Your Turf Plan
-
Assess your space by measuring the area designated for the DIY artificial turf installation. Take into account the shape, size, and any existing features such as trees or pathways that may influence the layout. Expert guidance can be crucial; as highlighted by satisfied customers, professionals like Brock from Hall can assist in evaluating your requirements and recommending optimal solutions tailored to your specific space.
-
Choose Your Grass Type: Select the right type of artificial grass based on its intended use, whether for pet areas, playgrounds, or decorative landscaping. Consider essential factors such as durability, color, and texture. Hall Turf provides a diverse range of options designed for various applications, ensuring you find the ideal match for your project.
-
Design your layout: Draft a preliminary plan of your yard, indicating where the grass will be installed. This visualization aids in planning the project and ensures that all obstacles are accounted for. Consulting with experts can offer valuable insights into optimizing your layout for both aesthetic appeal and functionality.
-
Gather necessary materials for your DIY artificial turf installation by compiling a comprehensive list that includes turf, base materials, weed barriers, and tools. This preparation streamlines the setup process and minimizes potential delays. Clients have praised Hall Turf for their meticulous attention to detail and expertise, which can help ensure you have everything required for a successful installation.

Build Your Base
-
Excavate the Area: Start by removing the existing grass, roots, and topsoil to a depth of 4 inches. This excavation creates a solid base for your diy artificial turf installation, ensuring proper drainage and preventing issues like sinking or water accumulation. As noted by Dick Bryant, consulting a professional can lead to the most effective solution for your landscaping needs.
-
Install a Weed Barrier: Place a high-quality weed barrier fabric over the excavated area. This step is crucial as it prevents unwanted plants from growing beneath the grass, which could compromise the installation’s integrity. A properly installed weed barrier can significantly reduce maintenance efforts and extend the lifespan of your diy artificial turf installation.
-
Add Base Material: Distribute a layer of crushed stone or gravel, about 2 to 3 inches thick, across the area. This foundational material is essential for providing stability and enhancing drainage, ensuring that your grass remains level and functional over time.
-
Compact the Foundation: Utilize a plate compactor to thoroughly compress the foundation material. Proper compaction is critical in diy artificial turf installation to avoid settling and to create a level surface for the turf. A well-compacted foundation not only enhances the durability of the installation but also contributes to a lush, low-maintenance lawn capable of withstanding heavy use.

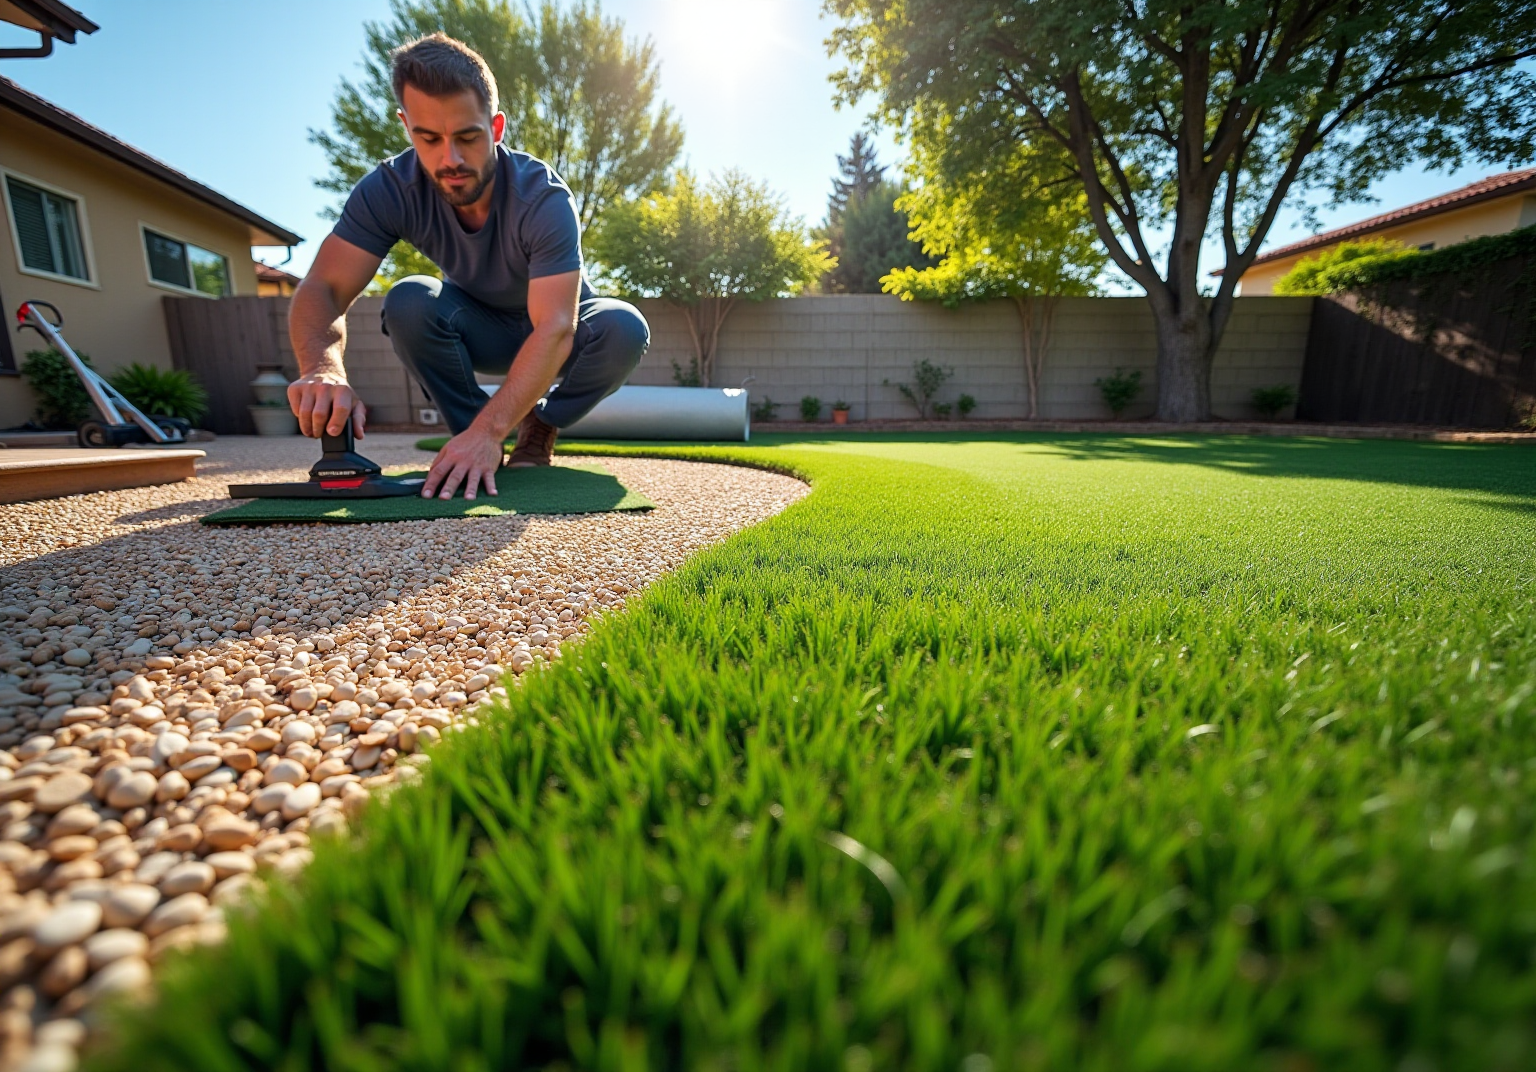
Install Your Artificial Grass
-
Unroll the Turf: Start by laying the artificial grass over the prepared base, ensuring it is oriented in the desired direction. Allow the grass to acclimate for a few hours to minimize curling, which can affect the process of diy artificial turf installation.
-
Trim the Edges: Use a utility knife to carefully trim the edges of the grass for a precise fit. Always cut from the back to protect the grass blades and achieve a clean edge. This step is essential for a polished appearance and seamless integration into your landscape.
-
Secure the Grass: Attach the grass to the base using landscape staples or nails, placing them every 6 to 12 inches along the edges and seams. This practice prevents shifting and ensures a tight fit, which is crucial for maintaining the integrity of your diy artificial turf installation.
-
Seam the Grass: If your project involves multiple sections of grass, utilize seam tape and adhesive to join them securely. Ensure that the seams are tight to avoid visible gaps, which can detract from the overall appearance of your artificial lawn. Properly seaming the grass enhances durability and visual appeal in your diy artificial turf installation, giving it a professional finish.

Complete Your Installation with Finishing Touches
-
Incorporate Infill Material: Depending on your grass type, adding infill material like silica sand or crumb rubber is crucial. Silica sand provides excellent drainage and stability, supporting the grass blades and keeping them upright while offering cushioning that enhances comfort and durability. Satisfied customers have noted, "Brock’s expert guidance helped us choose the right infill for our specific needs," which ensures long-term performance.
-
Brush the Grass: Use a stiff broom or a specialized grass brush to gently sweep the grass fibers against the grain. This technique revitalizes the blades, preventing matting and ensuring a lush, natural appearance. As Eric Fullerton states, "Brushing is crucial for maintaining the grass’s appearance." Homeowners have discovered that following Hall Turf’s expert advice results in a more vibrant and well-maintained lawn.
-
Check for Levelness: Walk across the ground to confirm it feels even and stable. If you notice any irregular sections, make the necessary adjustments to the foundation or turf to ensure a smooth surface, which is vital for both appearance and functionality. Remember to level and compact the base before adding infill to create a solid foundation. Brock from Hall Turf emphasizes, "This step is vital for a professional finish."
-
Clean Up: After setup, remove any debris or excess materials from the site. This final cleanup not only enhances the visual appeal but also allows you to enjoy your new turf immediately, ensuring it looks pristine from the start. Additionally, removing organic matter is essential to prevent mold and odors. Customers have praised Hall Turf for their thoroughness, stating, "They ensured a clean and beautiful installation process.

Conclusion
Successfully installing DIY artificial turf in your yard not only enhances your outdoor living experience but also requires careful planning and execution. By following the outlined steps:
- Assessing your space
- Selecting the right grass type
- Ensuring a solid foundation
- Applying finishing touches
Homeowners can achieve a beautiful and functional lawn.
Thorough preparation is crucial. This includes measuring the area and selecting appropriate materials, as well as building a stable base and properly installing the grass. A well-planned approach simplifies the installation process and leads to a durable, aesthetically pleasing result.
Embracing the DIY artificial turf installation journey offers numerous benefits, such as reduced maintenance and a vibrant outdoor space year-round. By applying the best practices highlighted in this guide and seeking expert advice when necessary, homeowners can transform their yards into lush, inviting landscapes. Take the first step toward a stunning lawn today and enjoy the long-term rewards of your hard work and creativity.