
Introduction
Transforming a backyard into a golfer’s paradise is an achievable goal, driven by the undeniable appeal of lush, synthetic greens. Homeowners are increasingly choosing artificial turf for its numerous advantages, such as low maintenance and exceptional durability, which enhance outdoor spaces significantly. However, the path from initial concept to successful installation involves several critical steps and considerations. This guide explores the essential elements of artificial greens golf installation, providing readers with the insights necessary to create a stunning and functional backyard oasis.
Understand the Benefits and Considerations of Artificial Greens
Synthetic plants provide numerous advantages for homeowners aiming to enhance their outdoor spaces. The key benefits include:
- Low Maintenance: Unlike natural grass, artificial greens require minimal upkeep. Homeowners can skip mowing, watering, and fertilizing, allowing them to enjoy a vibrant outdoor area without the associated hassle.
- Durability: High-quality synthetic turf is engineered to endure heavy foot traffic and harsh weather, ensuring that your putting surface remains pristine throughout the year. This durability makes it an excellent choice for families and active lifestyles. Artificial greens golf offers a consistent playing surface that mimics the uniformity of professional golf courses, providing a reliable surface that promotes consistent ball roll and enhances practice sessions.
- Environmental Benefits: By eliminating the need for pesticides and fertilizers, synthetic greens contribute to a healthier ecosystem, reducing chemical runoff and promoting sustainability.
However, potential buyers should consider the following factors:
- Initial Cost: Although the upfront investment for high-quality artificial turf may surpass that of natural grass, the long-term savings on maintenance and water bills can significantly offset this initial expense. Homeowners often discover that the durability and low upkeep of synthetic options lead to cost savings over time. For example, long-term savings from synthetic turf include reduced water bills and eliminated lawn care expenses.
- Installation Requirements: To achieve optimal performance from synthetic turf, proper installation is crucial, particularly regarding drainage and base preparation. Engaging professional services, such as those provided by Hall Turf, can ensure that these essential aspects are addressed, enhancing the longevity and functionality of the installation. Brock, recognized for his expertise and professionalism, has received positive feedback from clients like Dick Bryant, who commended his ability to assess needs and deliver effective solutions. Common mistakes in base preparation include shallow excavation and inadequate compaction, which can lead to higher long-term costs.
By carefully evaluating these advantages and considerations, homeowners can make informed decisions about integrating synthetic putting surfaces into their backyards, ultimately transforming their outdoor areas into practical and visually appealing environments.

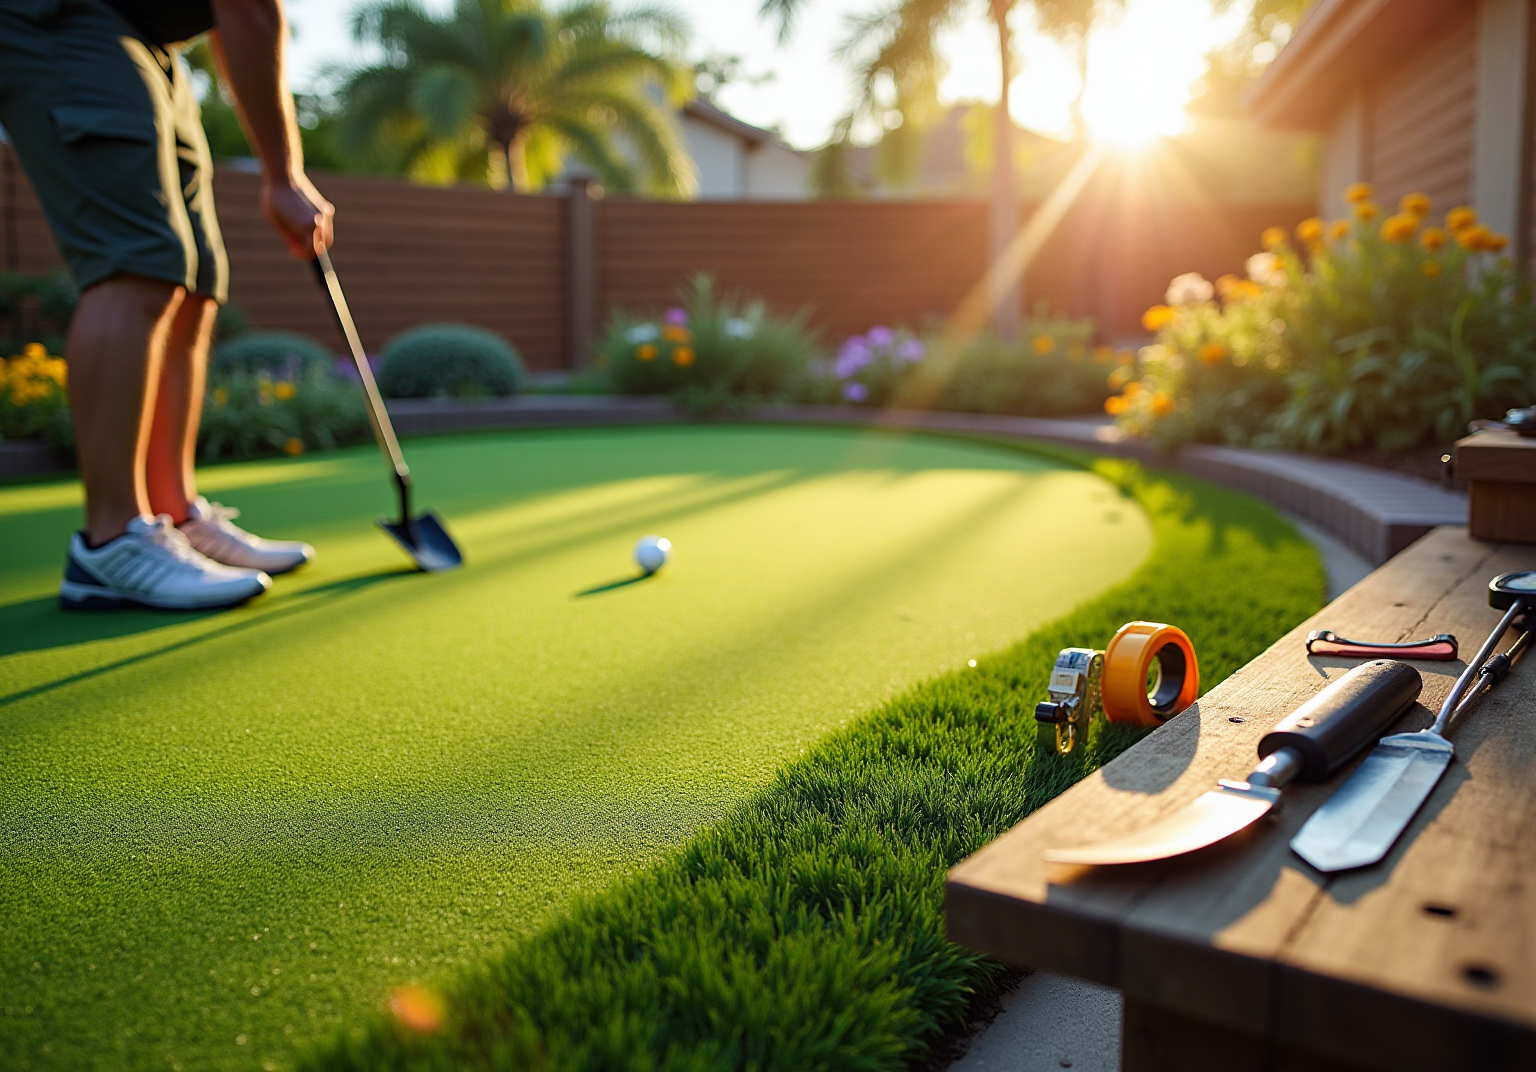
Gather Necessary Tools and Materials for Installation
Before starting your artificial greens golf installation with Hall Turf, it is essential to gather the right tools and materials to ensure a smooth and successful project.
Tools:
- Sod Cutter: This tool is crucial for removing existing grass and vegetation, creating a clean slate for your installation.
- Tiller: A tiller is useful for breaking up hard soil, making it easier to prepare the ground.
- Shovel: Necessary for digging and leveling the ground, a shovel ensures a proper foundation.
- Plate Compactor: This tool compacts the base material, providing a solid foundation that minimizes the risk of uneven surfaces.
- Utility Knife: Ideal for trimming the grass to size, a utility knife enables accurate fitting around edges and obstacles.
- Carpet Kicker: This tool ensures the surface is tightly fitted, preventing wrinkles and air pockets that can affect performance.
- Measuring Tape: For precise measurements of the installation space, a measuring tape ensures that your grass fits flawlessly.
Materials:
- Artificial Turf: Choose high-quality turf specifically designed for putting greens, which enhances both aesthetics and functionality. Hall Turf specializes in artificial greens golf that mimic PGA Tour-caliber greens, ensuring an authentic playing experience.
- Weed Barrier Fabric: This fabric prevents weed growth beneath the grass, maintaining a clean and professional appearance.
- Crushed Stone or Decomposed Granite: Used for the base layer, these materials ensure proper drainage and stability for the grass.
- Landscape Fabric: This separates the base material from the soil, preventing contamination and promoting longevity.
- Seaming Tape and Adhesive: These are crucial for firmly connecting sections of grass together, providing a smooth appearance.
- Landscape Spikes: Used to anchor the grass in place, landscape spikes provide stability and prevent shifting over time.
- 40-D 5 inch Non-Galvanized Grass Nails: These are suggested for anchoring the grass to the base, maintaining stability over time.
Before installation, excavate the existing soil and grass up to 4 inches to prepare the area properly. This step is vital for ensuring a smooth ball roll on the green. Additionally, when installing the grass, ensure all pieces are aligned in the same grain direction to avoid an uneven appearance. For added protection against gophers, consider placing gopher wire beneath the grass.
Having these tools and materials prepared will simplify your installation process, enabling you to create a beautiful and long-lasting putting surface with artificial greens golf that enhances your backyard, supported by Hall Turf’s expertise in synthetic turf solutions.

Prepare Your Backyard for Artificial Greens Installation
Preparing your backyard for the installation of artificial greens involves several critical steps to ensure a successful outcome:
-
Choose the Right Location: Select a flat area with excellent drainage. Avoid spots that are heavily shaded or prone to water pooling, as these conditions can lead to drainage issues that compromise the integrity of your greens. Working with knowledgeable professionals like Brock from Hall Turf can help you identify the best location for your project.
-
Clear the Area: Remove any existing grass, plants, rocks, and debris from the installation site. Using a sod cutter can streamline this process, providing a clean slate for your project.
-
Level the Ground: Use a shovel to level the ground, ensuring it is smooth and even. Fill in any low areas with soil and compact it thoroughly to create a solid foundation, which is essential for the longevity of your synthetic grass.
-
Install a Weed Barrier: Lay down a weed barrier fabric to prevent unwanted growth beneath the grass. This step is crucial for maintaining the integrity and appearance of your putting surface over time.
-
Create a Base Layer: Add a layer of crushed stone or decomposed granite, approximately 2-3 inches deep. Use a plate compactor to thoroughly compact this base, ensuring it is level and stable, which is vital for proper drainage and turf performance.
-
Check Drainage: Ensure that the base is graded correctly to facilitate water runoff. Adequate drainage is crucial to avoid pooling and to ensure the durability of your synthetic turf. Hall Turf’s attention to detail in ensuring proper drainage enhances the overall performance of the installation, as noted by satisfied customers.
By adhering to these preparation steps and taking expert guidance into account, you will create an optimal base for your artificial greens golf surface, enhancing both its functionality and visual attractiveness.

Install the Artificial Greens: Step-by-Step Instructions
To successfully install your artificial greens, follow these detailed steps:
- Measure and Cut the Turf: Begin by accurately measuring the installation area. Use a utility knife to cut the synthetic grass, allowing for a slight overlap at the edges to ensure a seamless fit.
- Lay the Grass: Position the grass over the prepared base, ensuring it is laid out evenly. Allow the grass to acclimate in the sun for 1-2 hours to minimize wrinkles and ensure flexibility during installation.
- Secure the Edges: To prevent shifting, secure the edges of the grass using landscape spikes. Position these spikes every 12 inches around the perimeter, ensuring the grass stays securely in place.
- Seam the Turf: If your installation involves multiple pieces, use seaming tape and adhesive to join them securely. Follow the manufacturer’s guidelines for proper application to avoid gaps and ensure durability.
- Add Infill (if necessary): Depending on the grass type, you may need to apply infill material, such as silica sand, to help the blades stand upright and enhance the natural feel. Spread the infill evenly across the surface for optimal performance.
- Brush the Grass: Utilize a broom or grass brush to lift the blades and evenly distribute the infill, promoting a vibrant appearance and helping the surface maintain its shape.
- Final Inspection: Conduct a thorough walk-around of the installation to confirm that everything is secure and visually appealing. Make any necessary adjustments to ensure a flawless finish before completing the project.
By adhering to these steps, you will create a stunning and functional addition to your backyard, enhancing both its aesthetic appeal and usability with artificial greens golf.

Finalize Installation and Maintain Your Artificial Greens
To maintain your artificial greens in optimal condition, follow these essential maintenance practices:
- Inspect the Installation: Regularly check for loose edges or seams to ensure the surface is securely fastened, free from visible wrinkles or bumps.
- Regular Cleaning: Keep your putting green clean by routinely removing debris such as leaves and twigs. A leaf blower or broom can facilitate efficient cleanup.
- Rinse the Surface: Periodically rinse the grass with water to remove dust and dirt, preserving its appearance and performance.
- Brush the Grass: Use a stiff-bristle broom to brush the grass, especially in high-traffic areas, to keep the blades upright and vibrant.
- Check for Weeds: Inspect edges and seams for weed growth, removing any promptly to prevent spread. For moss or algae, treat affected areas with a 50/50 solution of white vinegar and water.
- Inspect Infill: For grass that requires infill, periodically check levels and replenish as necessary to maintain optimal performance. Consistent upkeep can extend the lifespan of synthetic grass from 10-15 years to 20 years or more.
- Avoid Heavy Objects: Do not place heavy furniture or equipment on the turf to prevent blade compression and maintain a smooth playing surface.
- Consider Professional Maintenance: Arrange for professional upkeep services every 6-12 months to ensure the longevity and optimal performance of your synthetic plants.
By implementing these maintenance tips, you can ensure your artificial greens golf remain in excellent condition, providing enjoyment for years to come.

Conclusion
In conclusion, transforming a backyard with artificial greens golf installation presents a valuable opportunity to enhance outdoor spaces while reaping the benefits of synthetic turf. Homeowners can cultivate a lush, low-maintenance environment that not only boosts the aesthetic appeal of their property but also provides a functional area for leisure and practice. By investing in high-quality artificial greens, individuals can enjoy a pristine putting surface year-round, contributing to environmental sustainability in the process.
This article has highlighted key considerations, including the advantages of low maintenance, durability, and the environmental impact of synthetic turf. The importance of proper installation and preparation has been emphasized, ensuring that homeowners are equipped with the necessary tools and materials for a successful project. Additionally, maintenance tips have been provided to help extend the life of the greens, allowing for a long-lasting investment that can be enjoyed by families and golf enthusiasts alike.
Ultimately, the decision to install artificial greens in a backyard transcends mere property enhancement; it’s about creating a personal oasis that harmonizes beauty, functionality, and sustainability. By embracing this innovative landscaping trend, homeowners can enjoy a vibrant outdoor space that fosters relaxation and recreation, positively impacting their lifestyle and the environment. Embrace the opportunity to transform your backyard into a golfing paradise today.
Frequently Asked Questions
What are the main benefits of artificial greens?
The main benefits of artificial greens include low maintenance, durability, and environmental advantages. They require minimal upkeep, can withstand heavy foot traffic and harsh weather, and eliminate the need for pesticides and fertilizers, contributing to a healthier ecosystem.
How does the durability of synthetic turf compare to natural grass?
High-quality synthetic turf is engineered to endure heavy foot traffic and harsh weather, ensuring a consistent and pristine playing surface throughout the year, unlike natural grass which can wear down more quickly.
What should homeowners consider regarding the initial cost of artificial turf?
Although the upfront investment for high-quality artificial turf may be higher than natural grass, the long-term savings on maintenance and water bills can offset this initial expense, leading to cost savings over time.
Why is proper installation important for synthetic turf?
Proper installation is crucial for optimal performance, particularly concerning drainage and base preparation. Engaging professional services can enhance the longevity and functionality of the installation, preventing common mistakes that can lead to higher long-term costs.
What tools are necessary for installing artificial greens?
Necessary tools include a sod cutter, tiller, shovel, plate compactor, utility knife, carpet kicker, and measuring tape. These tools help in removing existing vegetation, preparing the ground, and ensuring a smooth installation.
What materials are required for the installation of artificial greens?
Required materials include high-quality artificial turf, weed barrier fabric, crushed stone or decomposed granite, landscape fabric, seaming tape and adhesive, landscape spikes, and non-galvanized grass nails for anchoring.
What preparation steps should be taken before installing artificial greens?
Before installation, it is essential to excavate the existing soil and grass up to 4 inches to prepare the area properly. This ensures a smooth ball roll on the green and aligns all grass pieces in the same grain direction to avoid an uneven appearance.
How can homeowners protect their artificial greens from pests like gophers?
Homeowners can consider placing gopher wire beneath the grass during installation to provide added protection against gophers.