
Introduction
Choosing the right putting kit is not merely a purchase; it represents an investment in enhancing your golfing experience at home. Various features warrant consideration – from grass material and pile height to installation techniques and maintenance strategies. Understanding these elements can significantly influence both performance and longevity. However, the choice between professional installation and a DIY approach adds a layer of complexity that many homeowners encounter. What key factors can assist in navigating this decision effectively while ensuring a high-quality putting green?
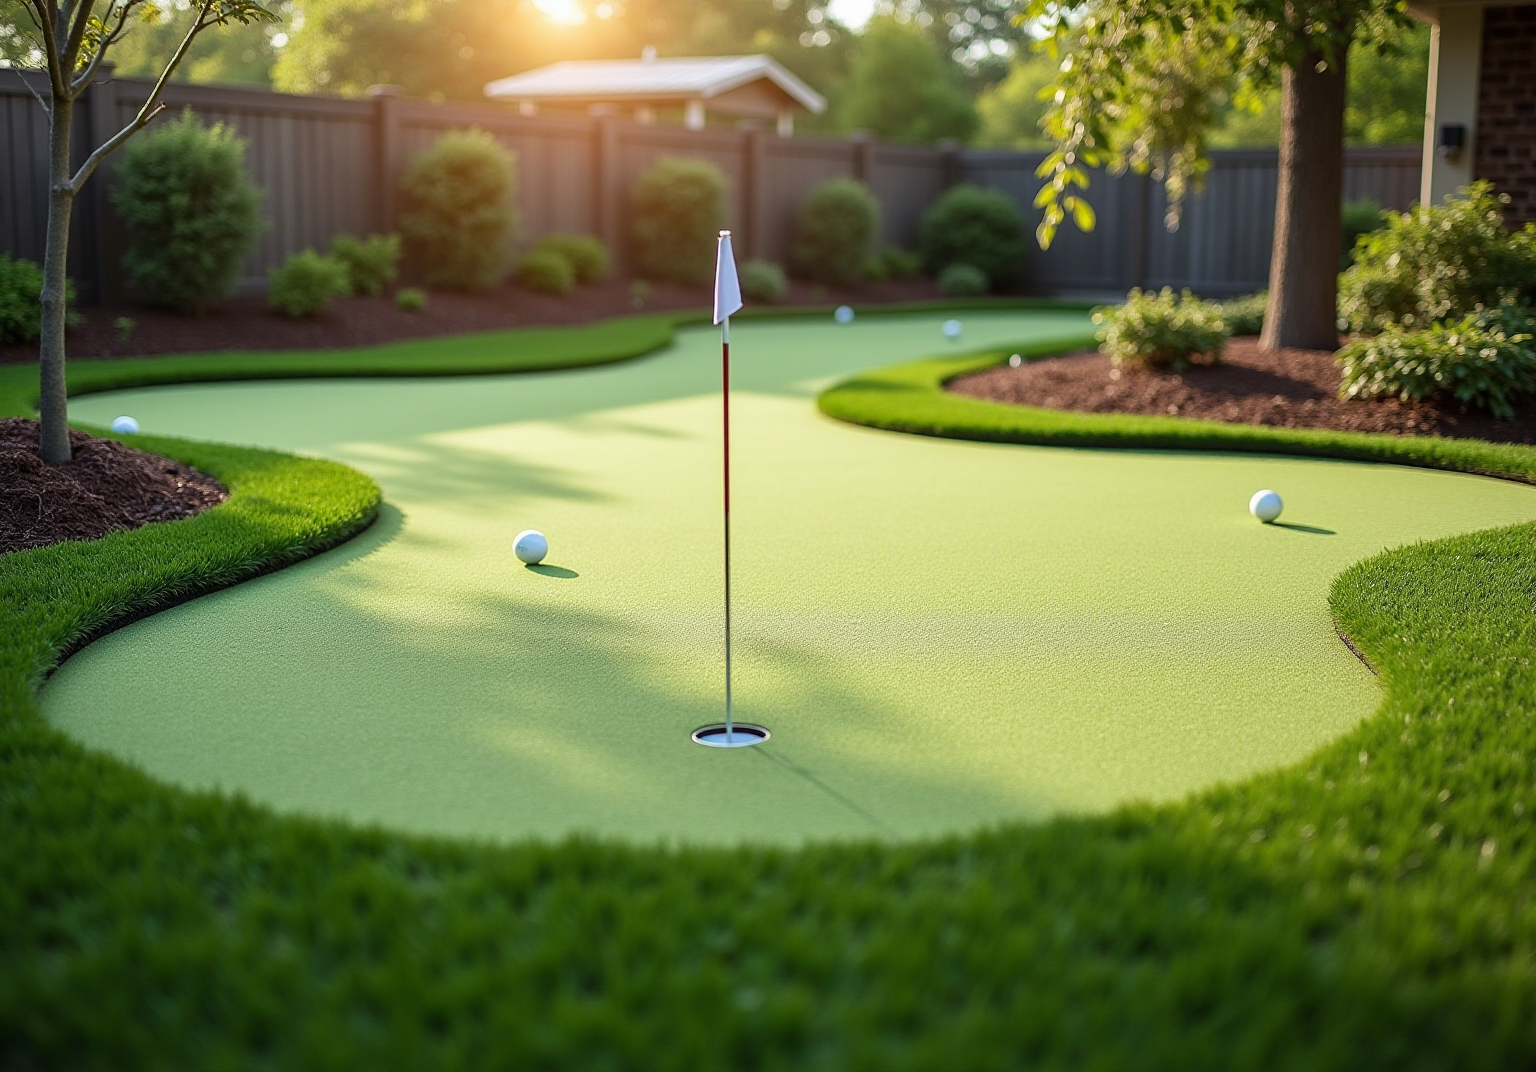
Identify Key Features of Putting Kits
When selecting a putting kit, it is essential to consider several key features:
- Grass Material: Opt for premium synthetic fibers that closely mimic natural grass. Nylon is often preferred for its durability and performance, while polypropylene provides a softer feel at a more budget-friendly price. Turf experts emphasize that the choice of fiber significantly impacts the durability and playability of the surface.
- Pile Height: The ideal pile height for residential golf practice areas typically ranges from ½ inch to ¾ inch. However, for artificial grass surfaces, the recommended height is between 3/8 inch to 1/2 inch (10-12 mm). This height ensures a smooth ball roll and consistent speed, which are crucial for effective practice. Taller fibers can disrupt the ball’s trajectory, making it vital to select the appropriate height for optimal performance.
- Many golf kits come with a putting kit that includes infill materials to enhance stability and performance. It is important to choose an infill that promotes drainage and maintains turf integrity, ensuring the lawn’s durability. Proper infill can also help regulate the speed of the ball, allowing for a more tailored playing experience.
- Base Construction: A solid foundation is critical for efficient drainage and the overall longevity of the golf surface. Ensure that the putting kit provides clear guidelines for creating a compacted base that prevents sinking or uneven surfaces, which can negatively affect playability.
- Cup and Flag Placement: Look for a putting kit that offers flexible options for cup placement to replicate real putting conditions. Adjustable features enable homeowners to customize the layout of their green, enhancing the practice experience.
- Warranty and Support: A comprehensive warranty indicates the manufacturer’s confidence in their product. It is also important to ensure that customer support is readily available for installation and maintenance inquiries, providing peace of mind for your investment.
In addition to these features, many customers have praised Hall Turf for their exceptional service and expertise. For instance, Dick Bryant noted that Brock assessed his needs and provided the ideal solution for his landscaping challenge. Scott Sachse expressed gratitude for the expert setup of his practice area, highlighting the courteous and skilled team. Les Boatright appreciated Brock’s attention to detail and commitment to delivering a high-quality product on time and within budget. These testimonials underscore Hall Turf’s dedication to customer satisfaction and their reputation as a leading provider of artificial turf solutions in Kansas City.

Understand the Installation Process
To install your putting green effectively, follow these steps:
- Select the Location: Choose a flat area with good drainage, avoiding spots with heavy shade or excessive moisture. A well-chosen location enhances playability and prevents moisture retention.
- Prepare the Site: Clear the area of debris, grass, and rocks. Level the ground and create a slight slope for drainage. Proper grading ensures water flows away from the area, preventing pooling or erosion.
- Create a Base: Use crushed stone or gravel to form a solid base, compacting it to prevent settling. Aim for a depth of 2-4 inches. A putting kit with a well-constructed base is critical for stability and drainage, promoting longevity and proper performance.
- Place the Grass: Unroll the grass, ensuring it rests smoothly without creases. Cut the edges to fit the desired shape of your green, maintaining precision for a seamless appearance.
- Fasten the Grass: Use landscape staples or adhesive to secure the grass edges. Ensure the seams are tight and well-aligned to prevent movement or wrinkling over time.
- Install Cups and Flags: Arrange the cups based on your layout, ensuring they are level with the ground surface for an authentic golfing experience. Multiple cup placements allow for varied practice angles.
- Final Touches: Brush the turf to lift the fibers and ensure an even surface. Regular brushing helps sustain consistent ball roll and prevents matting, enhancing the overall playability of your turf.
Additionally, consider that the cost to build a backyard putting green typically ranges from $15 to $40 per square foot. Using a geotextile fabric beneath the base material can help prevent weed growth. Skipping the base layer can lead to uneven surfaces and reduced turf lifespan, so ensure this step is not overlooked. With Hall’s expert guidance, as highlighted by satisfied clients such as Dick Bryant and Scott Sachse, you can expect a professional installation that incorporates a putting kit to meet your requirements and enhance your outdoor area.

Evaluate Professional Installation vs. DIY
When considering whether to opt for professional installation or a DIY approach for your putting green, several critical factors warrant attention:
- Cost: Professional installation typically incurs higher upfront costs, generally ranging from $25 to $45 per square foot. This reflects the labor and expertise involved. Conversely, a DIY approach can be more economical, with material-only projects costing around $6 to $12 per square foot. However, it’s important to factor in the additional expenses of purchasing tools and materials, such as the putting kit, which can elevate the overall cost.
- Time and Effort: Engaging in a DIY project can be both labor-intensive and time-consuming. For example, site excavation and initial grading may require approximately 6 to 12 hours, while the entire installation process could extend from 3 to 10 days or even weekends, particularly for those without prior experience.
- Quality Assurance: Professionals, such as those at Hall, bring valuable experience and knowledge to ensure a high-quality installation that adheres to industry standards. Satisfied customers have noted that choosing Hall Turf significantly reduces the risk of common installation errors. One customer remarked, “Brock’s professionalism and attention to detail contributed to an exceptional installation experience.” In contrast, mistakes may occur during DIY installations involving a putting kit, such as improper grading or drainage, which can adversely affect the turf’s performance and longevity.
- Customization: A DIY approach offers greater flexibility in design and layout, allowing you to tailor the area to your specific preferences. However, professional installers at Hall also provide customization options, ensuring that your putting green meets your unique needs while leveraging their expertise.
- Long-term Performance: Professional installations often come with warranties and guarantees, providing peace of mind regarding durability and maintenance. Customers have expressed satisfaction with the long-term performance of their installations by Hall, highlighting a contrast with the potential lack of assurances in DIY projects, which may lead to higher long-term costs due to repairs or replacements.
- Skill Level: Assessing your own skills and comfort level with home improvement projects is essential. If you have doubts about your ability to execute the installation correctly, hiring a professional like Brock from Hall Turf may be the most prudent choice to avoid costly errors and ensure a successful outcome.

Implement Effective Maintenance Strategies
To maintain your putting green in optimal condition, implement the following maintenance strategies:
- Regular Debris Removal: Regularly clear leaves, twigs, and other debris to prevent drainage issues and maintain a clean surface. This practice is crucial as it helps avoid the buildup of organic matter, which can lead to odors and bacterial growth.
- Brushing: Utilize a stiff-bristled brush to lift the grass fibers and keep them upright. This technique helps maintain a smooth putting surface and prevents matting, which can compromise playability. Consistent brushing can significantly extend the lifespan of grass fibers.
- Infill Checks: Periodically assess the infill levels to ensure even distribution. Proper infill maintenance is essential for optimal grass performance and appearance, as uneven infill can adversely affect ball roll and overall playability.
- Spot Cleaning: Promptly address stains or spills using a mild detergent and water. Rinse thoroughly to prevent residue buildup, which can lead to discoloration and odors over time.
- Seasonal Deep Cleaning: Schedule a deep clean at least once a year, including thorough brushing and rinsing to remove dust and pollen. This deep cleaning is vital for maintaining the turf’s aesthetic and functional qualities.
- Inspect for Damage: Regularly check for loose seams, holes, or other damage. Taking prompt action is essential to prevent further decline and ensure the durability of your golf course.
- Professional Maintenance: Consider hiring professionals from Hall Turf for seasonal maintenance or repairs to ensure your putting green remains in peak condition. With their expertise, as noted by satisfied customers like Scott Sachse and Les Boatright, you can trust that your turf will be well cared for, keeping it looking great and performing optimally.

Conclusion
Selecting and maintaining a putting kit is essential for enhancing the golfing experience at home. Prioritizing key features such as high-quality grass material, appropriate pile height, and solid base construction can significantly improve both playability and longevity. By creating an effective practice environment that mirrors real course conditions, golfers can elevate their skills.
This article has shared essential insights, including the importance of choosing the right infill materials, ensuring proper drainage, and weighing professional versus DIY installation options. Testimonials from satisfied customers underscore the value of expert guidance, highlighting that professional installation can prevent common mistakes and provide peace of mind through warranties and support. Furthermore, effective maintenance practices, such as regular debris removal and infill checks, are crucial for preserving the quality of the putting surface.
Ultimately, investing time and resources into mastering your putting kit will yield rewarding results, whether through a professionally installed green or a well-executed DIY project. Embracing these best practices not only enhances the enjoyment of the game but also ensures the durability and performance of the putting surface, making every practice session both effective and enjoyable.
Frequently Asked Questions
What should I consider when selecting a putting kit?
When selecting a putting kit, consider the grass material, pile height, infill materials, base construction, cup and flag placement, and warranty and support.
What type of grass material is recommended for putting kits?
It is recommended to choose premium synthetic fibers that closely mimic natural grass. Nylon is preferred for its durability and performance, while polypropylene offers a softer feel at a lower cost.
What is the ideal pile height for residential golf practice areas?
The ideal pile height for residential golf practice areas typically ranges from ½ inch to ¾ inch, while for artificial grass surfaces, it is recommended to be between 3/8 inch to 1/2 inch (10-12 mm) for optimal ball roll and speed.
Why is infill material important in putting kits?
Infill materials enhance stability and performance, promote drainage, maintain turf integrity, and help regulate the speed of the ball for a tailored playing experience.
What is the significance of base construction in putting kits?
A solid foundation is critical for efficient drainage and the longevity of the golf surface. Proper base construction prevents sinking or uneven surfaces that can negatively affect playability.
How does cup and flag placement affect the practice experience?
Flexible options for cup placement allow homeowners to replicate real putting conditions and customize the layout of their green, enhancing the overall practice experience.
What should I look for in terms of warranty and support when purchasing a putting kit?
Look for a comprehensive warranty that indicates the manufacturer’s confidence in their product, and ensure that customer support is available for installation and maintenance inquiries.
What have customers said about Hall Turf’s service and expertise?
Customers have praised Hall Turf for their exceptional service, expertise, and attention to detail, noting positive experiences with personalized solutions and quality installations.
List of Sources
- Identify Key Features of Putting Kits
- The Best Putting Green Turf: Buyer’s Guide (https://synlawn.com/articles/best-putting-green-turf-buyers-guide)
- Best Artificial Putting Green Turf: What to Look For (https://aglgrass.com/blogs/best-artificial-putting-green-turf)
- 2026’s Biggest Artificial Turf Putting Green Design Trends – OC Turf & Putting Greens (https://octurfandputtinggreens.com/2026s-biggest-artificial-turf-putting-green-design-trends)
- Why Luxury Backyard Putting Greens Are Becoming Popular USA (https://backninegreens.com/blog/why-luxury-backyard-putting-greens-are-becoming-popular-in-the-usa)
- 5 Popular Artificial Turf Putting Green Design Trends to Try in 2026 – SGW Sacramento (https://sgwsacramento.com/blog/5-popular-artificial-turf-putting-green-design-trends-to-try-in-2026)
- Understand the Installation Process
- A Guide To Installing An Artificial Putting Green (https://turftekusa.com/blog/a-guide-to-installing-an-artificial-putting-green)
- How To Build a Backyard Putting Green (https://xgrass.com/how-to-build-putting-green.html)
- Backyard Putting Green Guide: Cost, Materials & DIY Installation (https://fieldturflandscape.com/turf-tips/how-do-i-make-my-grass-a-putting-green-a-step-by-step-guide)
- When It Comes To Putting Greens There Is No Such Thing As Keeping It Simple (https://usga.org/content/usga/home-page/course-care/forethegolfer/2018/when-it-comes-to-putting-greens-there-is-no-such-thing-as-keepin.html)
- Putting Green Installation Timeline: 1 to 5 Days | FusionTurf (https://find.fusionturf.com/answers/how-long-does-putting-green-installation-take)
- Evaluate Professional Installation vs. DIY
- Professional Putting Green Installer vs DIY: Which Is Better? (https://dlsturfcourts.com/professional-putting-green-installer)
- DIY Backyard Putting Green vs Pro Install: Which is Best? (https://aglgrass.com/blogs/diy-backyard-putting-green)
- DIY vs Pro: Backyard Putting Green Installation Costs #Golf (https://heavenlygreens.com/blog/backyard-putting-green-diy-vs-professional)
- Cost To Install Artificial Turf: DIY VS Pro | Lawn Kings Inc (https://lawnkingsinc.com/diy-vs-professional-cost-to-install-artificial-turf-which-option-is-worth-it)
- DIY vs Professional Putting Green Turf Installation | Which Is Better (https://mrcleanturf.com/diy-vs-professional-putting-green-turf-installation)
- Implement Effective Maintenance Strategies
- Importance of Regular Turf Maintenance | TurFresh (https://turfresh.com/blog/the-importance-of-regular-artificial-grass-maintenance-for-longevity-and-appearance)
- How Often Should You Clean Artificial Turf? | TurFresh (https://turfresh.com/blog/how-often-should-you-schedule-a-professional-turf-cleaning-the-expert-guide)
- Artificial Golf Greens Maintenance Tips (https://southwestgreens.com/blog/artificial-golf-greens-maintenance-tips)
- 10 Tips for Maintaining an Artificial Grass Putting Green (https://wintergreengrass.com/10-tips-for-maintaining-an-artificial-grass-putting-green)
- Artificial Turf Maintenance: How Often to Clean and Why (https://amazingturfandlawn.com/turf-cleaning/how-often-to-clean-artificial-turf)