
Introduction
Maintaining a lush, green lawn can be appealing, yet the reality of synthetic grass maintenance often presents challenges. Over time, synthetic grass may experience various forms of damage, including burns, tears, or matting, which can detract from the visual appeal of outdoor spaces. This guide outlines essential steps for effectively repairing synthetic grass, ensuring both aesthetic quality and longevity. However, the repair process may sometimes uncover unexpected challenges or complications. This article will help you navigate these common issues and restore your synthetic turf to its original condition.
Understand Common Types of Synthetic Grass Damage
Before initiating any repairs, it’s crucial to accurately assess the type of damage your artificial turf has sustained. Common issues include:
- Burns: These often arise from hot objects or chemicals, leading to discolored or melted patches on the surface. Research indicates that approximately 30% of property owners have encountered synthetic grass burns, underscoring the importance of caution when placing items on the turf. As Peter Wierzba, a design expert for Tough Turtle Grass, notes, ‘Synthetic surfaces can reach temperatures over 160°F in summer, causing skin burns,’ which further emphasizes the need for vigilance.
- Tears and Cuts: Sharp objects or heavy foot traffic can create visible gaps in the grass, compromising both its integrity and appearance.
- Matting: This issue occurs when grass fibers flatten due to excessive weight or inadequate maintenance, diminishing the lawn’s visual appeal.
- Wrinkles and Lifting: Poor installation or ground settling may result in sections of turf lifting or wrinkling, leading to an uneven surface that can be both unsightly and unsafe.
Recognizing these issues is essential for selecting appropriate restoration techniques and materials for synthetic grass repair. Timely maintenance not only preserves the aesthetic quality of your artificial grass but also ensures its durability and performance.

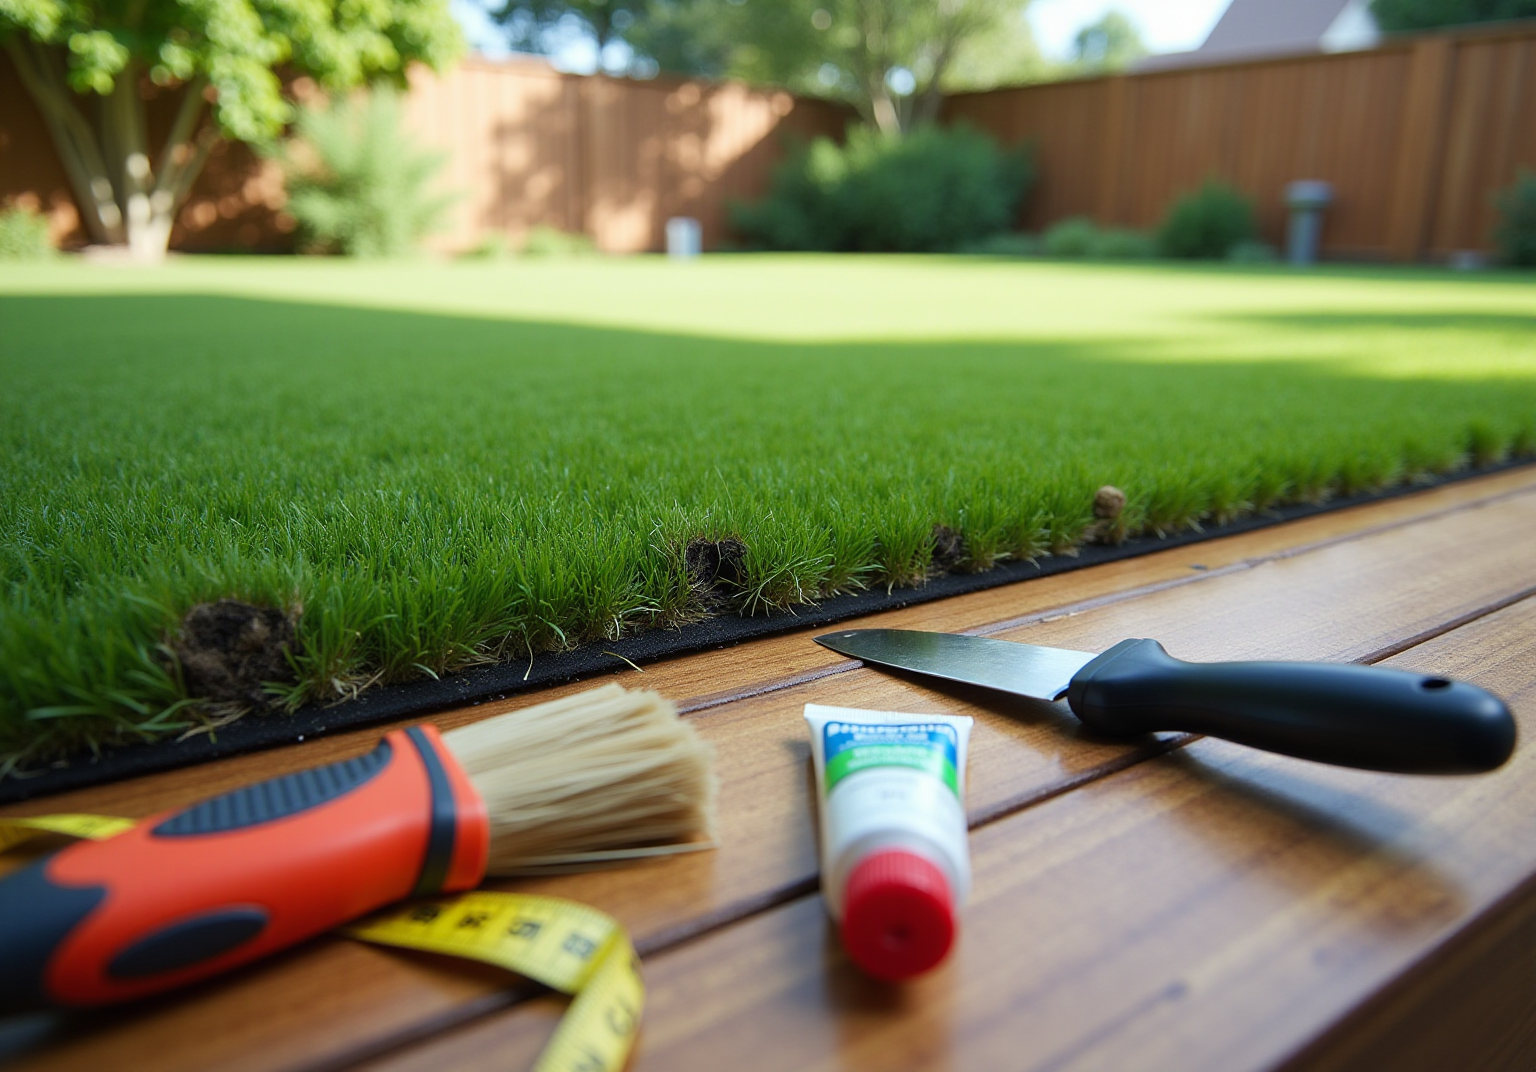
Gather Essential Tools and Materials for Repair
To effectively perform synthetic grass repair, it is crucial to gather the right tools and materials. Here’s a list of essentials:
- Utility Knife: This tool is ideal for cutting damaged turf and replacement pieces with precision.
- Turf Adhesive: A high-strength adhesive specifically designed for synthetic lawn repairs, ensuring a durable bond.
- Seam Tape: Essential for joining edges seamlessly, providing a clean and professional finish.
- Stiff-Bristled Brush: Used to fluff up grass fibers after repairs, restoring the turf’s natural appearance and reviving flattened blades, which is vital for maintaining a fresh look in high-traffic areas.
- Measuring Tape: Ensures accurate measurements when cutting replacement pieces, preventing waste and ensuring a proper fit.
- Gloves: Protect your hands during the maintenance process, ensuring safety and hygiene.
Investing in these tools not only simplifies your maintenance process but also enhances the durability and visual appeal of your artificial grass. With proper upkeep, homeowners can maintain their lawn’s pristine condition for over 15 years. Assembling these essential maintenance tools can cost approximately $200, making this investment worthwhile for achieving a beautiful and long-lasting lawn. According to turf installation experts, effective synthetic grass repair is essential and requires using appropriate materials to ensure that your artificial lawn remains in optimal condition.

Follow Step-by-Step Instructions for Effective Repairs
To effectively repair your synthetic grass, follow these step-by-step instructions:
-
Evaluate the Damage: Begin by assessing the type and extent of the damage to determine the most suitable restoration method. Industry statistics indicate that approximately 30% of homeowners make mistakes during this evaluation phase, leading to ineffective repairs.
-
Remove the Damaged Area: Carefully use a utility knife to excise the damaged portion of grass, ensuring that the edges are clean and precise. As repair specialist Mike Drennon emphasizes, "Clean cuts are crucial for a seamless fix."
-
Prepare the Replacement Piece: Cut a new section of grass that matches the size and shape of the removed part, ensuring a seamless fit. This step is vital to prevent gaps that could lead to further damage.
-
Apply Seam Tape: Lay seam tape along the edges of the cut area to prepare for bonding the new piece. This tape is essential for creating a strong bond.
-
Apply Adhesive: Use grass adhesive on both the seam tape and the edges of the replacement piece to ensure a strong and durable bond. Selecting the right adhesive can help prevent common issues such as lifting or peeling.
-
Press and Secure: Firmly press the replacement piece into place, ensuring it aligns perfectly with the surrounding grass. Proper alignment is critical for a successful restoration.
-
Brush the Area: Utilize a stiff-bristled brush to fluff up the plant fibers, blending the restoration seamlessly with the existing turf. This step helps restore the natural appearance of your lawn.
-
Allow to Cure: Let the adhesive cure according to the manufacturer’s instructions before using the area again. This is essential for ensuring the longevity of your restoration.
By following these steps for synthetic grass repair, you can restore your artificial grass to its original condition, ensuring it remains functional and visually appealing. For instance, a case study involving a homeowner in Cumming, Georgia, demonstrated that adhering to these restoration techniques transformed their lawn, providing a beautiful and low-maintenance solution that complemented their renovated home.

Troubleshoot Common Repair Issues and Solutions
During your synthetic grass repair, you may encounter several common issues. Addressing these effectively can help you troubleshoot:
- Uneven Seams: If seams do not align properly, gently lift the turf and reapply adhesive to ensure a tight fit. Seam separation can frequently occur, leading to visible gaps that may pose tripping hazards if left untreated.
- Bubbles or Wrinkles: Should bubbles form, use a utility knife to puncture them and press out the air. Afterward, reapply adhesive if necessary to secure the area. Wrinkles often arise from improper installation or shifting on an uneven base, which can detract from the surface’s appearance and longevity.
- Inadequate Adhesion: If the grass fails to stick, ensure that the surfaces are clean and free of debris before reapplying adhesive. Proper adhesion is vital for maintaining the integrity of the turf, as inadequate bonding can lead to further complications.
- Flattened Fibers: If the plant fibers seem flattened after repair, brush them against the grain to restore their upright position. Regular maintenance, including power brooming high-traffic areas, can help keep fibers standing tall and enhance the overall look of your lawn.
By proactively addressing these common issues, you can ensure a successful synthetic grass repair, preserving both the appearance and functionality of your lawn.

Conclusion
Mastering synthetic grass repair is crucial for homeowners who want to maintain a beautiful and functional outdoor space. Understanding the types of damage that can occur – such as burns, tears, and matting – enables homeowners to effectively address these issues. This guide offers a comprehensive overview of the necessary tools and step-by-step instructions for a successful repair process.
Key insights include:
- The importance of gathering the right materials, like turf adhesive and seam tape
- Following a structured approach to repairs
- Evaluating damage accurately
- Troubleshooting common issues, such as uneven seams and inadequate adhesion
By adhering to these best practices, homeowners can restore their synthetic grass to its original condition, enhancing both its aesthetic appeal and longevity.
Investing time and resources into synthetic grass maintenance ultimately pays off, ensuring a vibrant lawn that withstands the test of time. Embracing these repair techniques not only protects your investment but also contributes to the overall enjoyment of your outdoor environment. Take action today to safeguard your synthetic turf and enjoy a lush, green space for years to come.