
Introduction
Transforming a yard with astro turf offers homeowners a lush, green landscape without the burdens of traditional lawn care. This guide outlines the essential steps for a successful installation, including:
- Assessing the area
- Gathering the necessary tools
- Laying down the turf
- Maintaining its pristine condition
However, several factors must be considered, such as:
- Drainage
- Surface leveling
- Seam security
What common pitfalls could derail the project? This article reveals the secrets to achieving a flawless installation and ensuring your synthetic grass remains vibrant for years.
Plan Your Installation: Assess Area and Gather Tools
-
Measure the Area: Start by using a tape measure to accurately determine the dimensions of the area designated for . Mark the boundaries with stakes and string to create a visual layout, ensuring clarity in your project scope.
-
Clear the Area: Before preparing the base for sod, it is essential to clear the area of existing grass, weeds, rocks, or debris. This step ensures a seamless setup and helps avoid future issues with the .
-
Evaluate the Ground: Assess the ground for any slopes, dips, or obstacles such as trees or rocks. This evaluation is crucial for determining whether further leveling or excavation is necessary, as uneven surfaces can affect the final appearance and functionality of the grass.
-
Gather Necessary Tools: Prepare the following :
- Utility knife or turf cutter
- Shovel or spade
- Rake
- Plate compactor or tamper
- Landscape staples or nails
- Measuring tape
- Level
- Weed barrier fabric
- Infill material (if required)
-
Plan for Drainage: is vital to prevent , which can lead to uneven surfaces and damage. If the area is prone to water accumulation, consider incorporating drainage solutions into your installation strategy to ensure effective water flow and maintain the quality of your grass. As noted by specialist Jessica Reyes, ensuring is essential to prevent issues such as puddling and bumps in the grass. Furthermore, can conserve significant amounts of water, making it an for homeowners. Clients like Dick Bryant and Scott Sachse have praised for their exceptional service and professionalism, highlighting the team’s commitment to delivering top-notch setups that meet client needs.

Prepare the Ground: Level, Clean, and Install Base
- : Start by removing any existing grass, weeds, and debris from the installation site. Tools such as a shovel or turf cutter can facilitate this process, providing a clean slate for your new turf. Homeowners can rely on , as Brock has a proven track record of assessing needs and delivering tailored solutions.
- : Dig down approximately 3-4 inches to create sufficient space for the base material. Achieving a level surface is crucial; use a rake and a level to ensure the area is even. Clients have praised Brock for his meticulous attention to detail, ensuring that every setup is executed flawlessly.
- : Lay down a weed barrier fabric to prevent unwanted growth beneath the turf. This step is vital as it protects the integrity of the installation by blocking weeds while allowing for . Secure the fabric with landscape staples to keep it in place. this practice in their installations.
- : Fill the excavated area with crushed stone or decomposed granite, approximately 2-3 inches deep. This layer is essential for providing both drainage and stability, forming a solid base for the grass. guarantees that the appropriate materials are used for optimal results.
- : Thoroughly material using a plate compactor or tamper. This step is critical to prevent settling and ensure a stable foundation, minimizing the risk of undulations and bumps in the future. Customers have noted Brock’s commitment to completing tasks on schedule and within budget, reflecting Hall’s dedication to quality service.

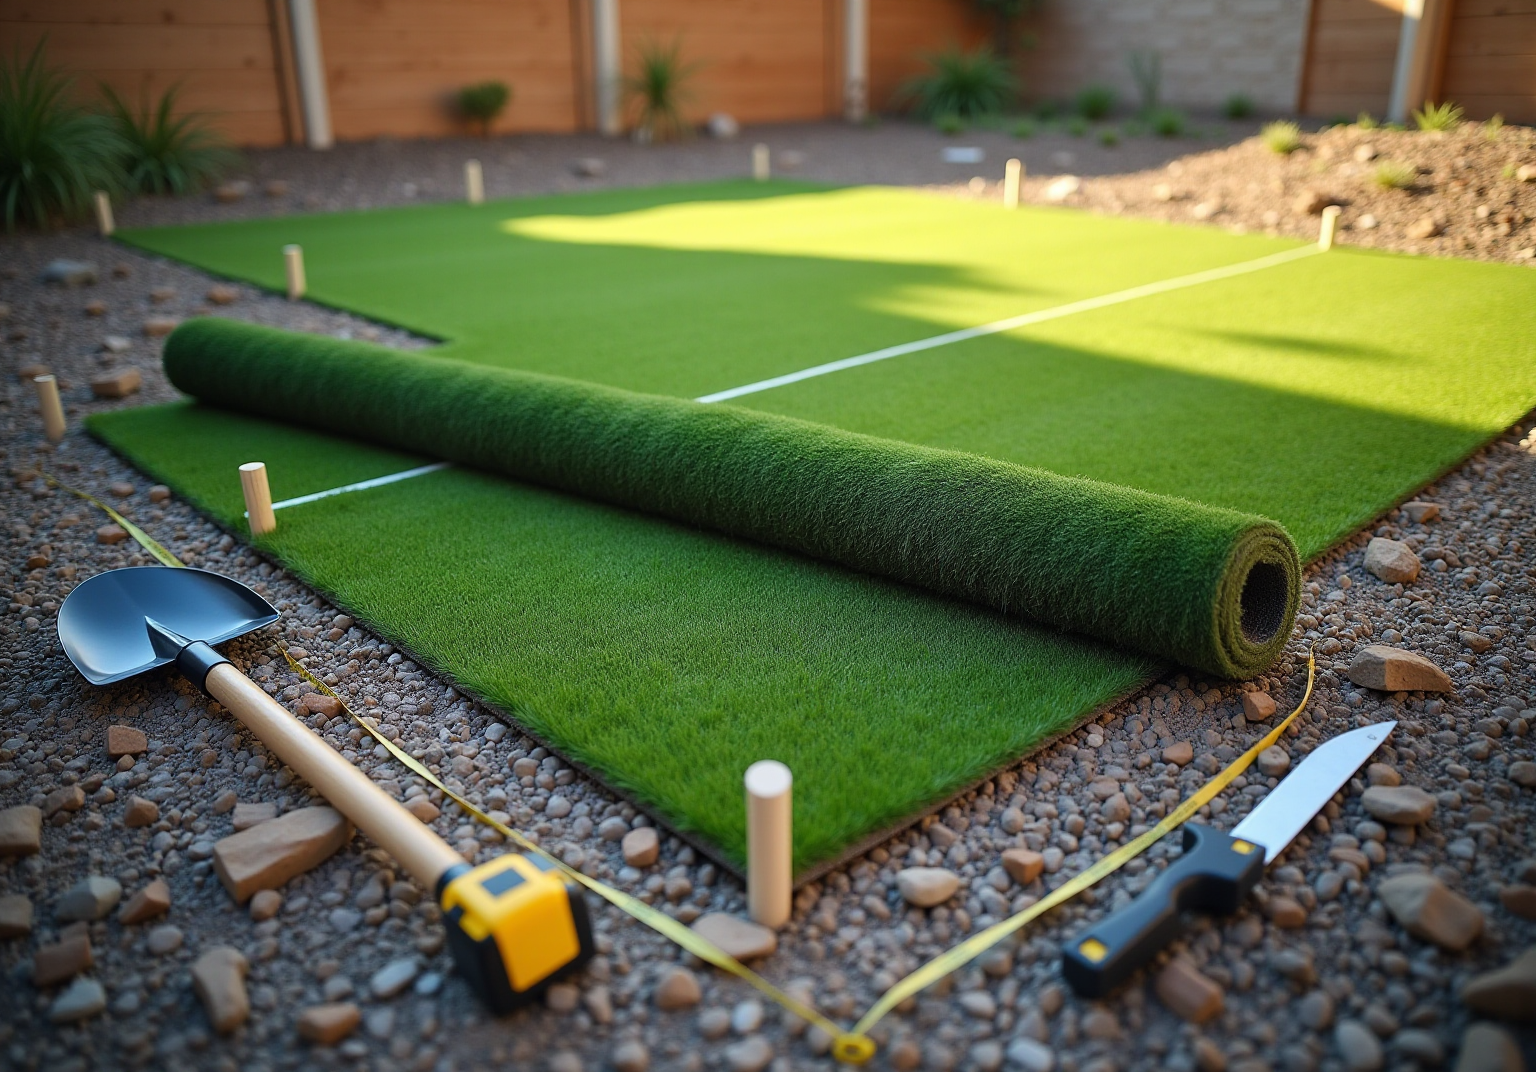
Lay the Turf: Position, Cut, and Secure
- Roll Out the Grass: Start by unrolling the over the prepared base, ensuring it aligns with the marked area. To ensure a smooth installation when installing , allow the grass to relax for at least one hour to eliminate any creases.
- Cut to Fit: Use a utility knife to of the grass for a precise fit. Always cut from the back of the grass to protect the fibers and maintain a clean edge.
- Secure the Area: Secure the area by placing landscape staples or nails around the perimeter and along seams, spacing them approximately 3-4 inches apart for edges and about 6-8 inches apart elsewhere. A good rule of thumb is to use about one nail or staple per square foot of grass. Ensure the surface is taut without being overly stretched to prevent wrinkling.
- Seam the Grass: For setups involving several sections of grass, overlap the edges by at least 2 inches. Secure these overlaps with seam tape and adhesive to create a . Adhering to the manufacturer’s precise setup guidelines is essential for preserving warranty validity and ensuring a successful setup.
- Consider : While DIY installation is feasible, employing expert installers from can guarantee a more seamless process and improved outcomes. Customers like Scott Sachse have praised the professionalism and responsiveness of Turf’s team, noting their exceptional work on projects such as . , are also essential to safeguard your investment in .

Finish and Maintain: Secure Seams and Care for Your Turf
- : After installing , it is crucial to inspect all seams for security. Apply additional adhesive as necessary to prevent lifting, ensuring a seamless and durable finish. Properly securing seams is vital; poorly executed seams can lead to gaps and fraying, which compromise the surface’s integrity over time.
- (if applicable): If your grass requires infill, spread it uniformly over the surface using a broom. Infill not only adds weight to the grass but also supports the blades, helping them stand upright. is essential for maintaining the grass’s structural integrity and performance, as low infill can lead to fiber wear and reduced cushioning.
- : Use a stiff-bristle broom to . This action fluffs the fibers, restoring their upright position and enhancing the grass’s natural appearance. Regular brushing is a key maintenance task that prevents matting and ensures even distribution of infill, which is crucial for stability.
- : To keep your grass in optimal condition, routinely remove debris and rinse the surface with water to prevent odors and bacteria buildup. For any stains, conduct spot cleaning using a mild soap and water solution. By installing , you can significantly prolong the lifespan of , which typically lasts between 10 to 15 years with proper care. Engaging in these routines not only preserves the aesthetic appeal of your turf but also ensures a safe and enjoyable environment for family and pets.

Conclusion
Installing Astro Turf offers a transformative opportunity for outdoor spaces, turning them into beautiful, low-maintenance areas. This guide outlines the essential steps for a successful installation, covering everything from planning and preparation to laying the turf and ongoing maintenance.
- Accurate area assessment
- Proper ground preparation
- Use of quality materials and tools
Each stage, from clearing the site to securing seams, significantly impacts the durability and visual appeal of the final result. Furthermore, regular maintenance practices, such as brushing and replenishing infill, are vital for ensuring the longevity and performance of the synthetic lawn.
By adhering to these detailed steps and recommendations, homeowners can establish a stunning synthetic lawn that enhances their property while conserving water and reducing upkeep. Embracing this environmentally friendly choice fosters a more sustainable and enjoyable outdoor experience. Consider the advantages of Astro Turf installation and enjoy the benefits of a vibrant, hassle-free lawn for years to come.
Frequently Asked Questions
What is the first step in planning for grass installation?
The first step is to measure the area using a tape measure to determine the dimensions and mark the boundaries with stakes and string for clarity.
Why is it important to clear the area before installing grass?
Clearing the area of existing grass, weeds, rocks, or debris is essential to ensure a seamless setup and to avoid future issues with the grass’s performance.
How should I evaluate the ground before installation?
You should assess the ground for slopes, dips, or obstacles such as trees or rocks to determine if further leveling or excavation is necessary, as uneven surfaces can affect the final appearance and functionality of the grass.
What tools are necessary for a successful grass installation?
The essential tools needed include a utility knife or turf cutter, shovel or spade, rake, plate compactor or tamper, landscape staples or nails, measuring tape, level, weed barrier fabric, and infill material if required.
Why is proper drainage important in grass installation?
Proper drainage is vital to prevent water pooling, which can lead to uneven surfaces and damage. Incorporating drainage solutions helps ensure effective water flow and maintains the quality of the grass.
What are some benefits of installing astro turf?
Installing astro turf can conserve significant amounts of water, making it an environmentally friendly choice for homeowners.
What do clients say about Hall Turf’s service?
Clients like Dick Bryant and Scott Sachse have praised Hall Turf for their exceptional service and professionalism, highlighting the team’s commitment to delivering top-notch setups that meet client needs.
List of Sources
- Plan Your Installation: Assess Area and Gather Tools
- A Helpful Guide to Installing Synthetic Turf DIY – Synthetic Turf (https://syntheticturfnorthwest.com/a-helpful-guide-to-installing-synthetic-turf-diy)
- shawgrass.com (https://shawgrass.com/about/news-blog/how-to-prep-for-artificial-grass-installation)
- imarcgroup.com (https://imarcgroup.com/united-states-artificial-turf-market)
- Artificial Turf Market, Industry Size Forecast [Latest] (https://marketsandmarkets.com/Market-Reports/artificial-turf-market-121486580.html)
- industryresearch.biz (https://industryresearch.biz/market-reports/artificial-grass-turf-market-110392)
- Prepare the Ground: Level, Clean, and Install Base
- Exploring the Prep Work for Artificial Grass Installation (https://realturf.com/us/a-look-at-the-prep-work-needed-for-artificial-grass-installation-on-lawns)
- How to Install Artificial Grass Step by Step and Achieve a Lush, Green Garden (https://turfgrass.net/inspiracion/how-to-install-artificial-grass)
- shawgrass.com (https://shawgrass.com/about/news-blog/how-to-prep-for-artificial-grass-installation)
- Lay the Turf: Position, Cut, and Secure
- syntheticturftc.com (https://syntheticturftc.com/pro-tips-for-a-successful-artificial-turf-grass-installation-expert-advice-for-a-perfect-outcome)
- How Long Does It Take to Install Artificial Grass (https://syntheticturftc.com/how-long-does-it-take-to-install-artificial-grass)
- Ultimate Guide to Securing Artificial Turf (https://premiumgrassblades.com/the-ultimate-guide-to-securing-artificial-turf-spiral-nails-staples-and-proper-installation)
- How To Lay Artificial Turf (https://thisoldhouse.com/lawns/21017144/how-to-lay-artificial-turf)
- How to Install Artificial Turf: Step-by-Step Guide | US Turf (https://usturfsandiego.com/news/how-to-install-artificial-turf)
- Finish and Maintain: Secure Seams and Care for Your Turf
- The Importance of Professional Installation for Artificial Turf – H2I Group (https://h2igroup.com/blogs/the-importance-of-professional-installation-for-artificial-turf)
- Artificial Turf Lifespan: How Long Does Fake Grass Last? (https://ideal-turf.com/artificial-turf-lifespan)
- How to Keep Artificial Turf Clean Year-Round | US Turf (https://usturfsandiego.com/news/how-to-keep-artificial-turf-clean)
- Artificial Turf Maintenance Guide | Cleaning & Care Tips (https://fieldturflandscape.com/maintenance/artificial-turf-maintenance-guide)
- How Long Do Turf Fields Last? – Keystone Sports Construction (https://keystonesportsconstruction.com/how-long-do-turf-fields-last)