
Introduction
Transforming a patch of earth into a lush, green oasis is an achievable goal, particularly with the installation of synthetic turf. This guide clarifies the process, outlining four essential steps that enable homeowners to create a beautiful, low-maintenance lawn. However, the success of this endeavor relies heavily on proper site preparation. Understanding the nuances of material selection and installation techniques is crucial. Are homeowners prepared to face the challenges of laying synthetic turf and reap the benefits of a vibrant, durable landscape?
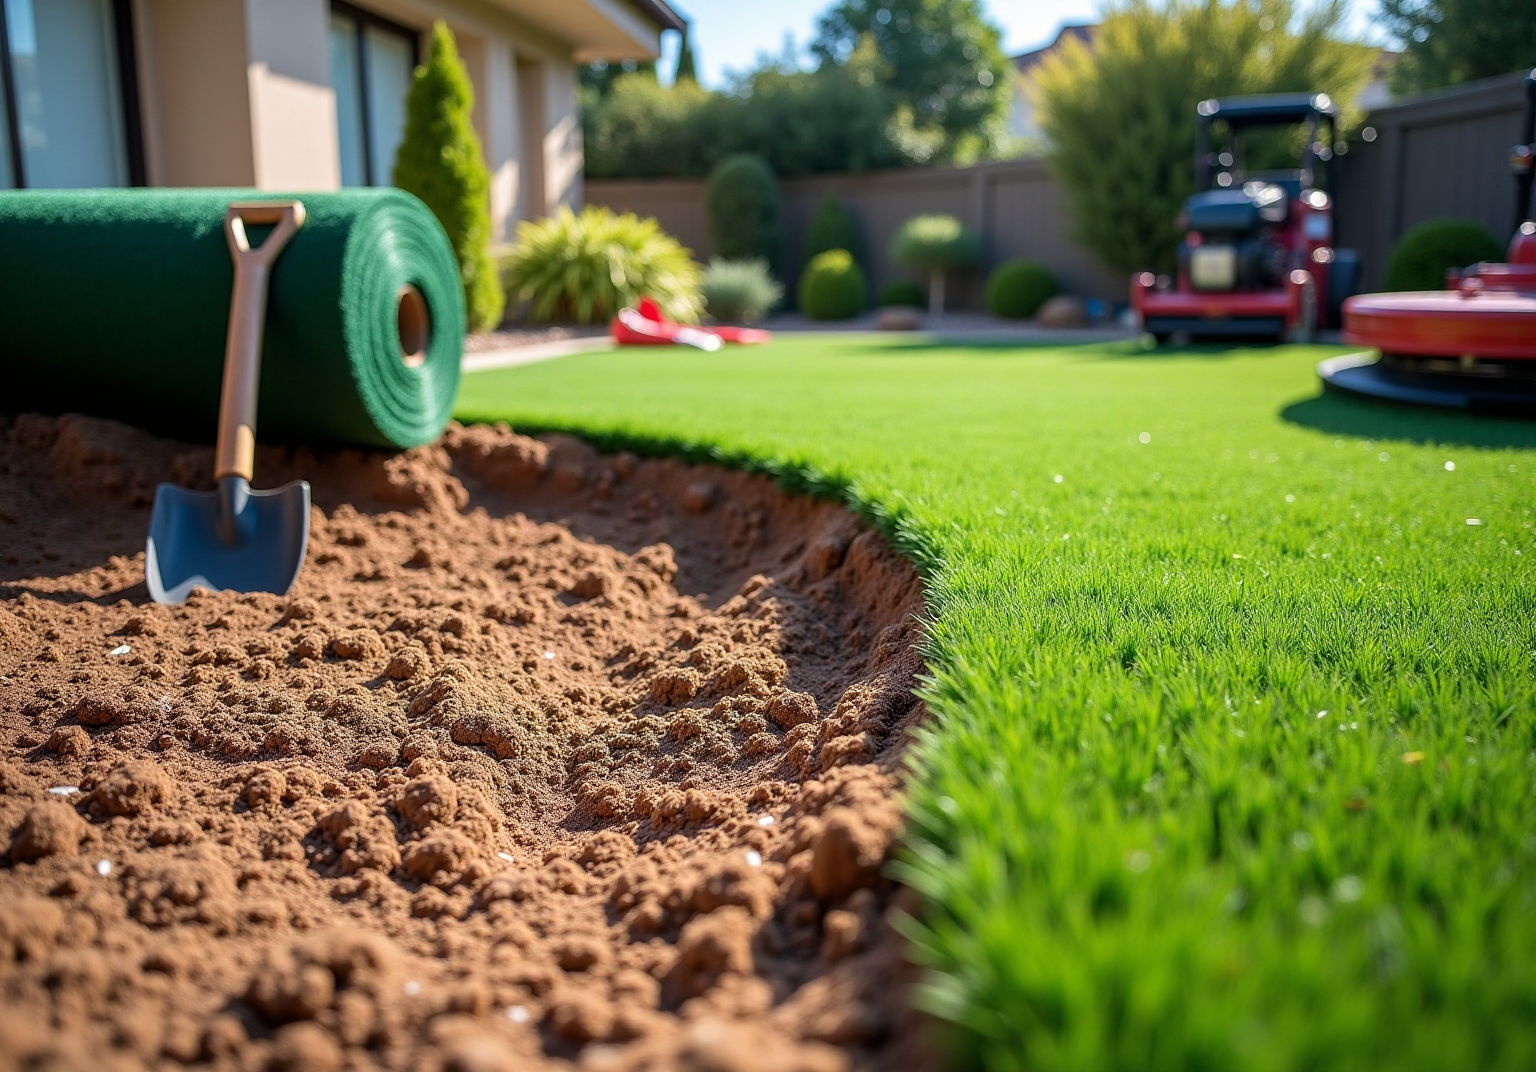
Prepare the Installation Area
-
Clear the Area: Start by removing any existing grass, weeds, or debris from the installation site. Utilize a sod cutter or shovel to extract the top layer of soil, approximately 3-4 inches deep, ensuring a clean surface for the installation.
-
Check for Drainage: Verify that the area has adequate drainage. If the ground is flat, consider grading it slightly to direct water away from structures. Understanding how to lay synthetic turf will prevent water from accumulating beneath the grass.
-
Install a Weed Barrier: Place a weed barrier fabric to inhibit unwanted growth beneath the turf. This measure will help maintain the integrity of your installation over time.
-
Compact the Soil: After clearing the area, compact the soil to create a stable foundation. This can be accomplished using a plate compactor or a hand tamper. A well-compacted foundation is crucial when learning how to lay synthetic turf to minimize the risk of settling and shifting.

Build a Solid Base for Turf
-
Choose the Right Materials: Begin by selecting a suitable mixture of crushed stone or gravel for the foundation. A widely recommended option is Class II Road Base or decomposed granite, both of which offer excellent drainage and stability.
-
Layer the Foundation: Next, spread a layer of the chosen foundation material, approximately 3-4 inches thick, across the installation area. Utilize a rake to ensure the material is leveled evenly.
-
Compact the Foundation: After leveling, it is essential to compact the foundation using a plate compactor. This step is critical for achieving a firm and stable foundation, which helps prevent future settling.
-
Check for Levelness: Finally, use a level to verify that the foundation is even. Any dips or raised areas can lead to uneven surface placement, potentially affecting both drainage and aesthetics.

Lay Out the Synthetic Turf
-
To learn how to lay synthetic turf, start by rolling out the synthetic grass over the prepared base. Allow the grass to acclimate to the temperature for about three hours, which makes handling and installation easier. When I faced a challenge with my grass installation, Brock from Hall assessed my needs and provided the optimal solution, ensuring a perfect fit for my project.
-
Align the Turf: Position the turf so that the grain of the grass fibers consistently faces the same direction. This alignment is essential for achieving a natural appearance once you understand how to lay synthetic turf, thereby enhancing the overall aesthetic appeal of your space. Customers have commended Brock for his professionalism and attention to detail, which contributed to a smooth and efficient installation process.
-
Trim the Edges: Use a sharp utility knife to trim the edges of the grass, ensuring it fits the designated area. It is advisable to leave an additional 2-3 inches around the perimeter to allow for secure anchoring of the grass later on.
-
Check for Fit: Before securing the turf, step back to evaluate the overall fit and appearance. Make any necessary adjustments to ensure a seamless and visually appealing layout, as understanding how to lay synthetic turf with proper alignment is crucial for a successful installation. Customers have expressed satisfaction with the final product, emphasizing the importance of completing the job on time and within budget.
For added odor control and to protect real grass from damage caused by pet urine, consider using zeolite infill during installation. This will help maintain the grass’s condition and enhance its durability, ensuring that your investment in Hall’s solutions remains beneficial for years to come.

Secure and Infill the Turf
-
Secure the Grass: Start by fastening the edges of the grass using galvanized landscape nails or staples. Position them approximately 6 to 12 inches apart around the perimeter to ensure the grass remains securely in place. This method effectively prevents shifting and maintains a tidy appearance.
-
Infill the Surface: After securing the edges, apply an appropriate infill material, such as silica sand or rubber granules. This step is essential as it not only weighs down the ground cover but also supports the grass fibers, helping them stand upright and enhancing the overall aesthetic.
-
Brush the Grass: Use a broom to evenly distribute the infill into the grass fibers. This action ensures that the infill is well-integrated, contributing to a more natural look and feel of the synthetic lawn.
-
Final Inspection: Once the infill is applied, conduct a thorough inspection of the installation. Verify that all edges are securely fastened and that the turf is evenly filled. Make any necessary adjustments to ensure a flawless finish before enjoying your new synthetic lawn.

Conclusion
Successfully laying synthetic turf offers numerous benefits that extend beyond mere aesthetics. Homeowners can achieve a durable and visually appealing landscape by meticulously preparing the installation area, building a solid base, expertly laying out the turf, and securing it properly. This careful approach transforms outdoor spaces into lush, low-maintenance environments.
Key steps in the installation process include:
- Clearing and compacting the soil
- Selecting appropriate materials for the foundation
- Ensuring proper alignment and infill of the turf
Each phase is crucial for achieving optimal results, preventing issues such as uneven surfaces and inadequate drainage. Furthermore, the use of infill materials not only enhances the grass’s appearance but also improves its performance, reinforcing the value of investing in quality installation practices.
In summary, the advantages of synthetic turf encompass long-term savings in maintenance and water usage. Homeowners are encouraged to approach their turf installation with careful planning and attention to detail, ensuring a successful transformation that enhances their property’s value and enjoyment for years to come. By embracing these best practices, they not only elevate their outdoor spaces but also contribute to sustainable landscaping solutions.
Frequently Asked Questions
What is the first step in preparing the installation area for synthetic turf?
The first step is to clear the area by removing any existing grass, weeds, or debris. This can be done using a sod cutter or shovel to extract the top layer of soil, approximately 3-4 inches deep.
How can I ensure proper drainage in the installation area?
To ensure proper drainage, verify that the area has adequate drainage. If the ground is flat, consider grading it slightly to direct water away from structures.
Why is it important to install a weed barrier?
Installing a weed barrier is important to inhibit unwanted growth beneath the turf, which helps maintain the integrity of your installation over time.
What should be done after clearing the area?
After clearing the area, you should compact the soil to create a stable foundation. This can be accomplished using a plate compactor or a hand tamper.
Why is compacting the soil crucial for synthetic turf installation?
Compacting the soil is crucial because it minimizes the risk of settling and shifting, ensuring a stable foundation for the synthetic turf.