
Introduction
As artificial turf gains popularity, homeowners are increasingly looking for efficient and effective methods to install it in their outdoor spaces. This guide provides essential insights into the step-by-step process of preparing, installing, and maintaining artificial grass, ensuring a beautiful and low-maintenance lawn. However, with numerous options and techniques available, how can one navigate the complexities of turf installation to achieve a flawless result?
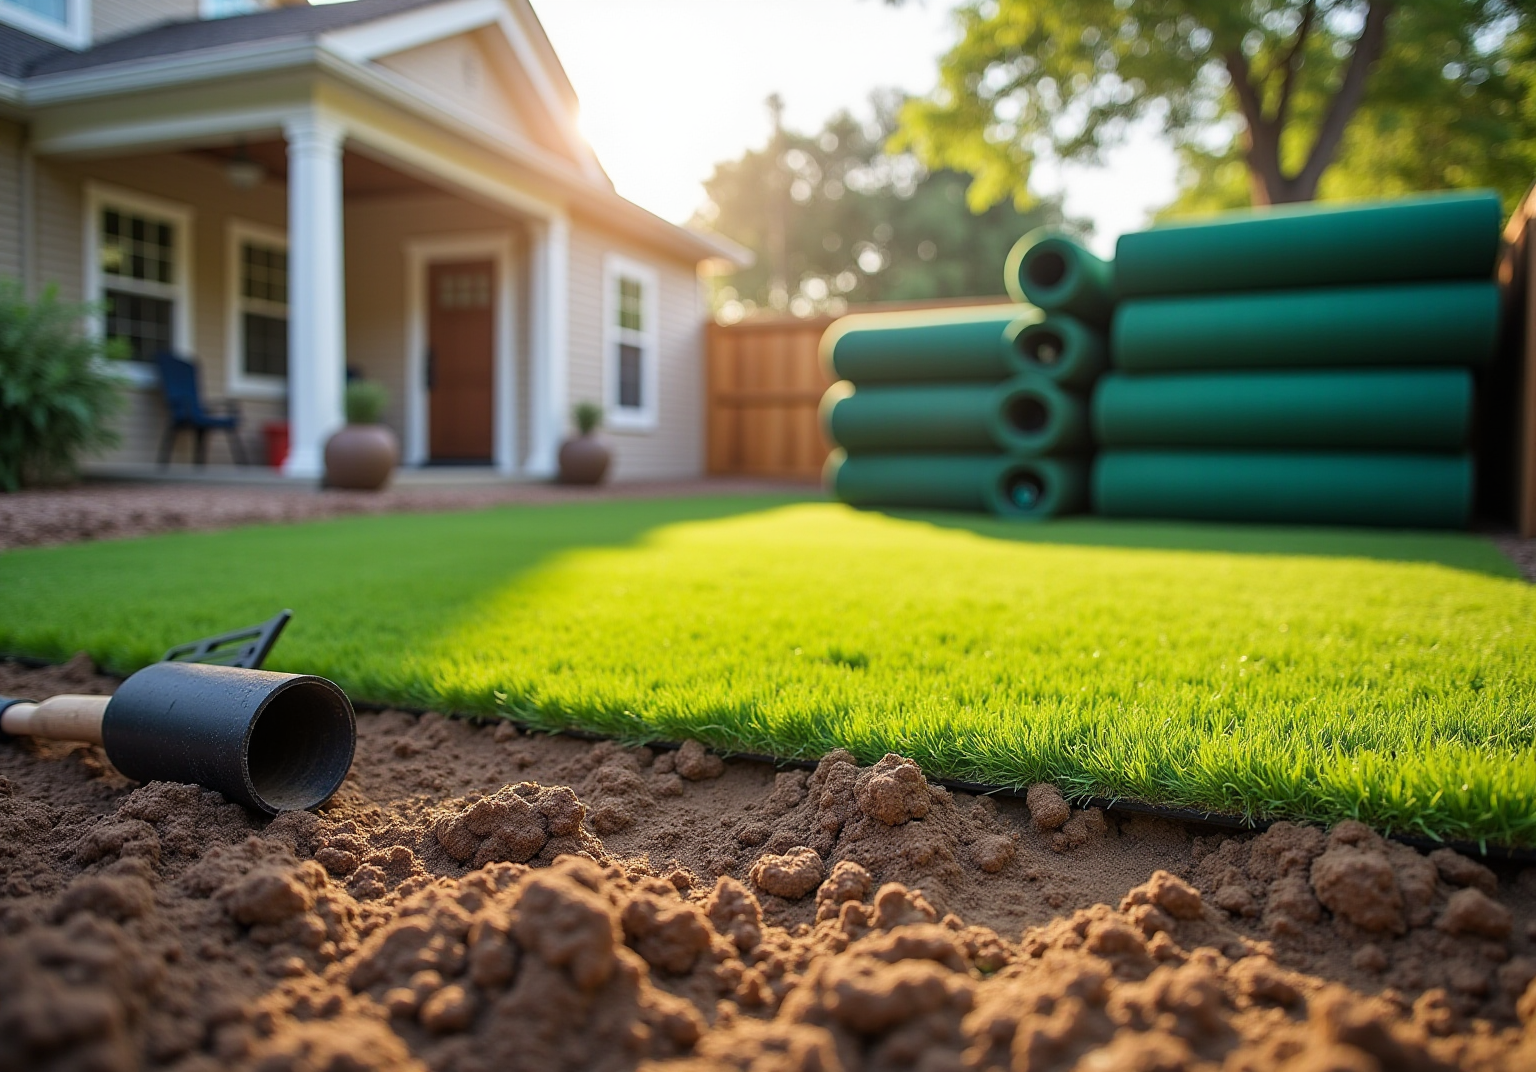
Prepare Your Site for Turf Installation
- Assess the Area: Start by evaluating the space designated for turf installation. Examine for any existing vegetation, debris, or uneven surfaces that require attention. This initial assessment is vital for gathering the necessary for a . As noted by satisfied customers, having an expert like Brock evaluate your needs can lead to tailored solutions for your project.
- Clear the Ground: Remove all existing grass, weeds, and debris from the area. This can be accomplished using a shovel or a sod cutter for larger spaces. Ensure that you dig down approximately 2-4 inches to create a clean surface for the grass.
- Level the Ground: After clearing, utilize a rake to level the soil. This step is essential to , enhancing its durability and performance. Customers have praised the meticulous attention to detail that professionals like Brock bring to this process.
- Compact the Soil: Employ a plate compactor or a hand tamper to compact the soil. This will establish a stable foundation for the grass and prevent settling over time. , a point emphasized by clients who appreciated the thoroughness of the installation crew.
- : Lay down a weed barrier fabric to inhibit future weed growth. This is particularly important for preserving the appearance and integrity of your grass.
- Check Drainage: Ensure that the area has . If necessary, create a slight slope away from structures to facilitate water runoff. This is essential for preventing water accumulation and maintaining grass quality.
Preparation Timeline: , which includes planning and securing necessary permits. As Sullivan pointed out, “The keeps advancing and improving,” underscoring the importance of proper setup preparation. By following the , homeowners can save an average of 55 hours each year on lawn upkeep after transitioning to synthetic grass, making the effort worthwhile. With the right guidance from experts like Brock, the can be seamless and rewarding.

Select and Lay Down Your Artificial Turf
- : Selecting the appropriate , along with understanding the , is essential for achieving the desired outcome. Factors such as pile height, density, and color should be considered. For instance, areas designated for pets may benefit from more , while designed for optimal performance and ball roll. As noted by Dick Bryant, Brock provided a tailored solution that met his needs, ensuring satisfaction with the choice.
- Determining the space is crucial, as are important for the . Use a measuring tape to assess the length and width of the space, which will aid in calculating the needed for your grass purchase. This step is vital to prevent over- or under-buying materials.
- According to the , after unrolling the grass, carefully cut it to fit the designated area using a sharp utility knife. Ensure clean edges for a , leaving a slight excess around the edges to allow for adjustments during installation.
- According to the , position the grass in the desired location, ensuring that all blades face the same direction to create a natural appearance. To minimize wrinkles, allow the grass to acclimate in the sun for approximately 30 minutes before securing it in place. Scott Sachse commended the exceptional work done by Brock and his crew, highlighting their professionalism throughout the installation process.
- To ensure stability in the artificial turf installation details, use around its perimeter. Space these fasteners about 6-8 inches apart to help keep the grass in place and prevent shifting over time. Les Boatright expressed his satisfaction with Brock’s and within budget.

Secure and Finalize Your Turf Installation
- : Use a utility knife to carefully trim any excess grass along the edges. This ensures a clean and precise finish, with edges aligning seamlessly with borders or pathways for a polished appearance.
- : For installations that require multiple pieces of grass, apply seam tape and a strong adhesive to securely join them. To achieve optimal results and enhance durability, it is essential to follow the provided by the manufacturer.
- Add Infill: Depending on the type of grass, – such as silica sand or rubber granules – is crucial. This step helps keep the blades upright and provides , improving both the feel and performance of the surface.
- Brush the Grass: Utilize a stiff-bristle broom to brush the upright. This action enhances visual appeal and aids in evenly distributing the infill, ensuring optimal performance.
- : Conduct a thorough walk-around of the installation to identify any loose areas or imperfections. Make necessary adjustments to achieve a perfect finish, ensuring your looks and performs at its best.

Maintain Your Artificial Turf for Longevity
is essential for preserving the beauty and functionality of . To ensure your lawn remains in top condition, consider the following key practices:
- : Rinse the surface with a garden hose every one to two weeks to eliminate dust, debris, and pet waste. This routine helps maintain hygiene and prevents bacteria buildup, ensuring a safe environment for children and pets.
- : Utilize a stiff-bristle broom to groom the grass fibers regularly. This action prevents matting and keeps the blades upright, enhancing the lawn’s visual appeal. Industry experts emphasize that regular grooming, as highlighted in the , is the most critical maintenance task for artificial grass.
- : Periodically check for signs of wear, such as tears or loose seams. Addressing these issues swiftly can prevent further damage and prolong the lifespan of your lawn. Minor repairs can often be managed by homeowners using grass adhesive and seam tape.
- : Clear leaves, branches, and other organic matter from the grass to prevent decomposition, which can lead to odors and weed growth. A flexible leaf rake or a leaf blower can be effective tools for this task.
- : Ensure that the infill material is evenly distributed and topped up as necessary. Proper infill levels are crucial for maintaining cushioning and the overall appearance of the turf. Regularly checking infill depth helps ensure optimal performance, especially in high-traffic areas.
By following these maintenance tips, homeowners can enjoy a vibrant and functional for years to come. Consistent care not only enhances the aesthetic appeal but also contributes to the longevity of the turf, making it a worthwhile investment.

Conclusion
In conclusion, successfully installing artificial turf is a strategic investment that enhances the aesthetic appeal of a home while minimizing lawn care efforts. By adhering to essential installation details-from site preparation to ongoing maintenance-homeowners can create a stunning outdoor space that endures over time.
Key steps in this process include:
- Assessing and clearing the area
- Selecting the appropriate turf
- Employing effective installation techniques
Each phase, from leveling the ground to securing the grass and maintaining it regularly, plays a crucial role in ensuring the quality and longevity of the installation. Expert guidance, such as that provided by professionals like Brock, can significantly enhance the outcome, delivering a seamless result tailored to individual needs.
Ultimately, embracing artificial turf not only contributes to a visually pleasing environment but also fosters a more manageable outdoor space. By implementing these best practices and committing to regular maintenance, homeowners can enjoy a vibrant, functional lawn for years to come.
Frequently Asked Questions
What is the first step in preparing my site for turf installation?
The first step is to assess the area designated for turf installation, examining for existing vegetation, debris, or uneven surfaces that need attention.
How should I clear the ground before installing turf?
You should remove all existing grass, weeds, and debris from the area using a shovel or a sod cutter for larger spaces, digging down approximately 2-4 inches to create a clean surface.
Why is leveling the ground important before turf installation?
Leveling the ground is essential to prevent water accumulation and provide a smooth surface for the grass, which enhances its durability and performance.
How can I compact the soil effectively?
You can compact the soil using a plate compactor or a hand tamper to establish a stable foundation for the grass and prevent settling over time.
What is the purpose of installing a weed barrier?
A weed barrier fabric is laid down to inhibit future weed growth, preserving the appearance and integrity of your grass.
How can I ensure proper drainage in the area?
You should check that the area has adequate drainage and, if necessary, create a slight slope away from structures to facilitate water runoff.
How long should I allocate for site preparation before turf installation?
Homeowners should allocate approximately 4-8 weeks for site preparation, which includes planning and securing necessary permits.
What benefits can I expect from transitioning to synthetic grass?
By following proper turf installation details, homeowners can save an average of 55 hours each year on lawn upkeep after transitioning to synthetic grass.
List of Sources
- Prepare Your Site for Turf Installation
- Top Trends in Artificial Turf for 2025: What to Expect – The Turf Yard (https://theturfyard.com/top-trends-in-artificial-turf-for-2025-what-to-expect)
- Plastic Turf Fields Are Taking Over America (https://nytimes.com/2025/07/26/business/artificial-turf-grass-sports.html)
- How Long Should It Take To Plan, Budget, & Install New Turf Fields – Keystone Sports Construction (https://keystonesportsconstruction.com/how-long-should-it-take-to-plan-budget-install-new-turf-fields)
- County school board renews debate over artificial turf vs. grass fields during proposed capital budget review (https://bethesdamagazine.com/2025/11/13/mcps-turf-debate)
- Select and Lay Down Your Artificial Turf
- Modern Artificial Turf Technologies: What’s New for 2025 (https://allseasonslandscapingla.com/modern-artificial-turf-technologies-whats-new-for-2025)
- Artificial Turf Innovations: What’s New in 2025? – The Turf Yard (https://theturfyard.com/artificial-turf-innovations-whats-new-in-2025)
- How Much Does Artificial Grass Cost in 2026? (https://lawnstarter.com/blog/cost/artificial-grass-price)
- How Much Does Artificial Grass Cost: Pricing Guide in 2026 (https://siteprep.com/articles/artificial-grass-installation-cost)
- Secure and Finalize Your Turf Installation
- Fixing 5 Challenges in Commercial Artificial Turf Installations (https://velcro.com/news-and-blog/2024/07/fixing-5-challenges-in-artificial-turf-installation)
- How to Install Artificial Grass Step-by-step Guide | Jcturf Manufacturer (https://jcturf.com/artificial-grass/installation/guide)
- Considering synthetic turf? What homeowners should know before installation – News (https://blogs.ifas.ufl.edu/news/2025/07/15/considering-synthetic-turf-what-homeowners-should-know-before-installation)
- dataintelo.com (https://dataintelo.com/report/global-sports-turf-infill-market)
- Artificial Turf Installation Times | Lawnpop (https://lawnpop.com/installation-times-what-to-expect-from-artificial-turf)
- Maintain Your Artificial Turf for Longevity
- Artificial Turf Maintenance Guide | Cleaning & Care Tips (https://fieldturflandscape.com/maintenance/artificial-turf-maintenance-guide)
- How Long Do Turf Fields Last? – Keystone Sports Construction (https://keystonesportsconstruction.com/how-long-do-turf-fields-last)
- How to Keep Artificial Turf Clean Year-Round | US Turf (https://usturfsandiego.com/news/how-to-keep-artificial-turf-clean)
- Turf Care in LA: Simple Maintenance Tips for a Picture-Perfect Lawn | Triangle Gardener Magazine (https://trianglegardener.com/5-artificial-turf-maintenance-tips-for-la-homeowners)
- How Long Does Artificial Turf Last? What Homeowners Need to Know – Synthetic Turf (https://syntheticturfnorthwest.com/how-long-odes-turf-last)