
Introduction
Transforming a yard into a lush, green oasis presents a significant opportunity for homeowners in Kansas considering artificial turf. This guide simplifies the installation process while emphasizing the long-term savings and low maintenance associated with synthetic grass. Importantly, it raises the question: can one achieve a professional-looking lawn without the assistance of experts? Understanding the key elements of successful turf installation may provide the answer.
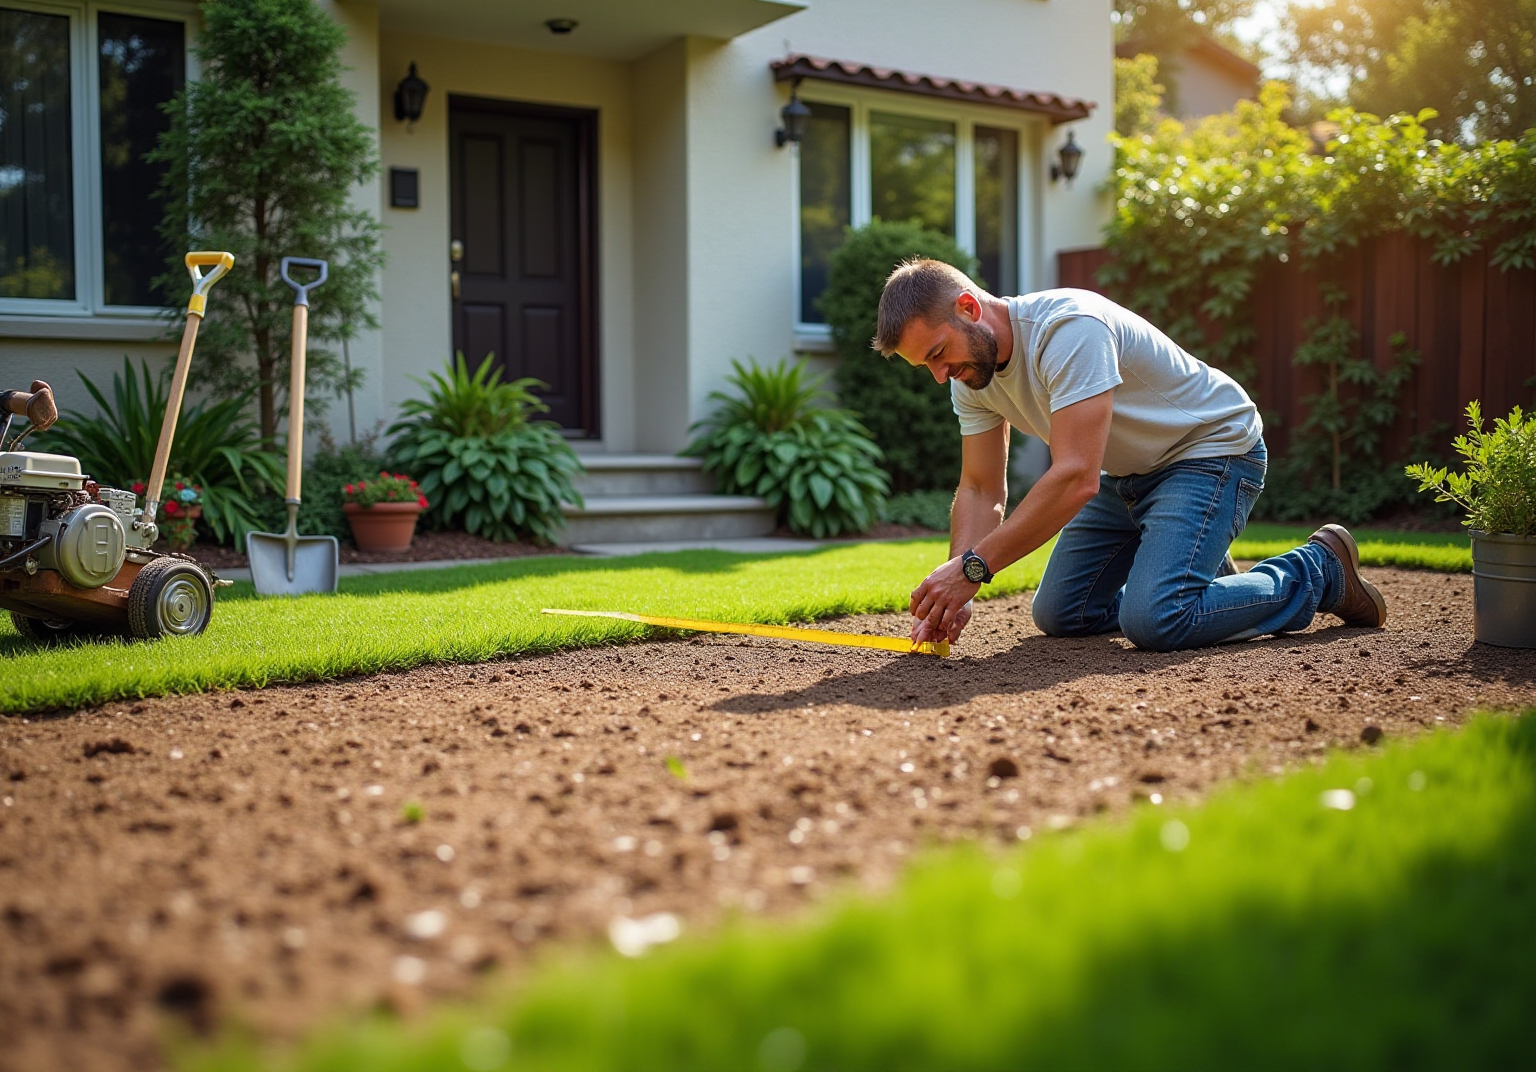
Plan Your Layout and Prepare the Area
-
Measure Your Space: Start by using a measuring tape to accurately determine the dimensions of the area designated for grass installation. Be sure to account for obstacles such as trees, flower beds, and pathways to ensure a precise fit.
-
Sketch Your Layout: Create a simple drawing of your yard, marking the areas where grass will be installed. This visual representation will help you gain a clearer insight into how the grass integrates into your landscape design.
-
Check for Drainage: Proper drainage is essential for the longevity of your grass. If the ground is flat, consider creating a slight slope (1-2%) away from buildings to prevent water pooling, which can lead to issues over time.
-
Clear the Area: Remove any existing grass, weeds, or debris from the setup site using a shovel or sod cutter. A clean and level space is crucial for a successful installation, as it ensures the grass lays flat and functions optimally. Additionally, adding a weed barrier and a layer of crushed rock about 3-4 inches thick will enhance stability and drainage.
-
Compact the Soil: After adding the base material, compact the soil to create a stable surface. This step is vital to prevent shifting and sinking of the grass over time.
-
Consider Sunlight: Observe how sunlight interacts with the area throughout the day. This will assist you in selecting the appropriate type of grass that can endure the specific sun exposure in your yard, ensuring durability and aesthetic appeal.
-
Average Setup Expense: In 2026, the typical expense for installing synthetic grass in Kansas residences is approximately $6,365 for a 500-square-foot lawn, with setup costs ranging from $2,725 to $10,000. By installing turf diy, this investment can significantly reduce long-term maintenance costs by $1,000 to $2,500 annually, making it a financially sound choice for homeowners seeking low-maintenance landscaping solutions.
When considering your grass installation, it is beneficial to seek advice from specialists like Brock from Hall Turf, who has a proven track record of achieving outstanding results. Customers have praised his professionalism, attention to detail, and ability to provide tailored solutions that meet specific needs, ensuring a smooth and satisfying installation experience.

Build a Stable Base for Your Turf
-
Excavate the Area: Begin by removing the existing grass, roots, and debris from the designated ground area. Excavate 3 to 4 inches of soil, which is essential for supporting the base layer and facilitating effective drainage, thereby preventing moisture accumulation beneath the grass.
-
Add Base Material: Fill the excavated area with a base material such as crushed stone or gravel. Aim for a 2 to 3-inch layer, spreading it evenly to create a solid foundation that supports the grass and enhances drainage capabilities.
-
Compact the Base: Use a plate compactor or hand tamper to thoroughly compact the base material. Achieving a minimum density of 90% is crucial, as this step ensures a stable base that prevents shifting or sinking of the grass over time.
-
Level the Surface: After compacting, utilize a rake to level the surface, ensuring it is smooth and even. Incorporate a slight slope of 1-2% away from any structures to facilitate effective drainage, which is vital for maintaining the integrity of the grass.
-
Install a Weed Barrier: Consider laying down a weed barrier fabric over the compacted base. While this step is not mandatory, it is strongly recommended to prevent weeds from growing through the grass, aiding in long-term maintenance and visual appeal.
-
Secure the Grass: Once the grass is installed, secure it around the perimeter using galvanized steel stakes every 4-6 inches. This step is critical for ensuring stability and preventing shifting.
-
Mist the Area: Lightly mist the area with water to help bind the particles and prevent shifting, creating a stable base for your artificial turf.
For those interested in installing turf DIY, Hall Lawn offers expert solutions tailored to your needs, whether for a putting green, playground, or pet area. Customers like Dick Bryant and Scott Sachse have praised Hall’s team for their professionalism and attention to detail, ensuring a seamless installation process. With Hall Grass, you can confidently achieve a beautiful and functional outdoor area.

Install and Secure the Artificial Turf
-
Roll Out the Lawn: Begin by unrolling the synthetic grass and placing it over the prepared base. Allow the grass to acclimate for a few hours; this process helps reduce curling and ensures it lays flat for a seamless installing turf diy project.
-
Cut the Grass: Utilize a utility knife to trim the edges of the grass to fit your specific area. Always cut from the back to avoid damaging the grass blades, ensuring a clean edge that enhances the final appearance.
-
Secure the Area: To secure the area, employ landscape staples or 6-inch galvanized nails around the perimeter and at seams. Space these fasteners approximately 3 to 6 inches apart to maintain stability and prevent movement, which is crucial for long-lasting performance.
-
Join Seams: If your installation involves multiple pieces of grass, use seam tape and adhesive to join the edges. Ensure that the seams are tight and secure to prevent gaps, which can lead to unsightly appearances and potential wear over time. Experts recommend using a seaming tool for precision in this step.
-
Add Infill: Finally, spread infill material, such as silica sand or rubber granules, over the grass. This helps weigh it down and keeps the blades upright, enhancing the grass’s natural appearance. Use a broom to evenly distribute the infill across the surface, ensuring optimal performance and durability.
-
Common Issues: Be aware of frequent problems related to DIY turf setups, such as wrinkles and improper infill application. Addressing these challenges early can lead to a more successful outcome when installing turf diy.
When professional assistance is required, consider contacting Hall Lawn. Brock, known for his professionalism and meticulousness, has helped numerous homeowners achieve outstanding results with their landscaping projects, ensuring that installations are completed on time and within budget.

Complete Finishing Touches and Maintenance Tips
-
Brush the Grass: After setup, utilize a power broom or a stiff-bristled broom to sweep the grass. This action elevates the blades, improving the grass’s natural appearance and preventing matting, particularly in high-traffic areas.
-
Rinse the Grass: Lightly rinse the grass with a garden hose to remove dust and debris from the installation process. This step also aids in settling the infill material, ensuring optimal performance and hygiene.
-
Regular Maintenance: To maintain cleanliness, routinely remove debris such as leaves and dirt. Rinsing the grass monthly can help prevent the buildup of dust and allergens, contributing to a healthier environment for pets and children.
-
Inspect for Damage: Conduct regular inspections of the surface for signs of wear or damage. Addressing minor issues promptly can prevent more significant problems later, promoting the longevity of your installation.
-
Adjust Infill as Needed: Over time, infill may settle or wash away, especially in high-traffic areas. Regularly check and replenish the infill to maintain the turf’s appearance and performance, ensuring it remains safe and functional for all users.

Conclusion
Installing artificial turf can transform a Kansas home into a lush, low-maintenance oasis, offering both aesthetic appeal and practical benefits. This DIY guide has outlined the essential steps for laying down turf, from planning and preparing the area to securing the grass and performing routine maintenance. By following these detailed instructions, homeowners can confidently tackle the installation process and create a beautiful outdoor space.
Key points discussed include:
- The importance of careful planning, such as measuring the area and ensuring proper drainage.
- The need for a solid base, detailing the excavation and compaction processes crucial for long-lasting results.
- Installation techniques and finishing touches that enhance the turf’s appearance and functionality.
- Common issues that may arise during the DIY process.
Ultimately, embracing the DIY approach to turf installation not only saves money but also empowers homeowners to take control of their landscaping projects. With the right preparation and attention to detail, achieving a stunning, functional lawn is within reach. By investing time and effort into this project, individuals can enjoy a vibrant outdoor area that requires minimal maintenance, making it a worthwhile endeavor for any Kansas homeowner.