
Introduction
Creating a backyard putting green can transform any outdoor space into a golfer’s paradise, seamlessly blending leisure with skill development. This guide presents five straightforward steps to design and install an artificial turf putting green, allowing enthusiasts to enjoy a realistic and functional practice area right at home. However, homeowners must consider various factors – from sunlight exposure to drainage solutions – to achieve the perfect setup.
Select the Ideal Location for Your Putting Green
- Assess Sunlight Exposure: Choose a location that receives at least . Avoid shaded areas from trees or buildings, as these can significantly affect the performance and longevity of the turf. Landscape architects emphasize that adequate sunlight exposure is crucial for maintaining the vibrant appearance and functionality of . Collaborating with professionals like can help ensure your selected location optimizes sunlight exposure for your .
- Evaluate Drainage: Confirm that the chosen area has , which can damage the grass. Look for natural slopes that promote drainage, or consider installing a , such as perforated pipes beneath the base layer, to effectively manage excess water. Customers have commended Hall Turf for their meticulous , which is vital for the longevity of your turf.
- Consider Accessibility: Position your practice area in a location that is for both maintenance and play. Avoid areas that are hard to reach or far from your home, as convenience is key to enhancing usage and enjoyment. Brock’s expertise ensures that the layout of your will be both practical and accessible.
- Check for Underground Utilities: Before beginning any excavation, verify that there are no underground utilities in the selected area. Contact local utility companies to ensure safety and compliance, preventing potential disruptions during installation. Hall Turf can assist you in navigating this process to avoid complications.
- Visualize the Layout: Use stakes and string to outline the proposed area for your golf practice. This visualization helps in understanding the size and shape of the space, allowing for adjustments before finalizing the installation. Customers have found that leads to improved planning and execution of their projects.

Prepare the Site: Measure and Clear the Area
- Measure the Area: Begin by using a tape measure to determine the dimensions of your intended . Mark the corners with stakes to outline the shape, ensuring it aligns with your practice objectives, whether for short shots, chipping, or both. A typical backyard suitable for a , providing ample space for a functional setup.
- Remove Existing Grass and Debris: , weeds, and debris. Employ a shovel or sod cutter to effectively remove the top layer of soil. This step is vital, as recent studies show that many homeowners underestimate the associated with , which can exceed $10,000 annually for public courses.
- Level the Ground: After clearing, utilize a rake to level the ground. Fill in any low spots with soil to create a smooth surface. on your .
- : to prevent unwanted growth through the . This not only helps maintain the integrity of your lawn area but also contributes to its longevity by providing a stable foundation.
- Double-Check Measurements: Before proceeding to the next step, re-measure the space to confirm accuracy. This final check is , as even minor inconsistencies can affect the overall performance of your lawn.

Level and Compress the Ground for Stability
- Use a : Start by using a or a long board to assess the evenness of the area. Adjust the soil as necessary to create a , which is crucial for a .
- : Employ a plate compactor or hand tamper to thoroughly compress the soil. This step is and ensuring a , which is essential for the longevity of your putting green. Experts emphasize that a compact and even soil base is critical for the performance of an .
- Check for Drainage: After compacting, confirm that the ground slopes slightly away from the center to facilitate . is necessary to prevent water buildup, which can lead to muddy conditions and compromise the quality of the grass over time. It is important to recognize that water pooling near foundations after rainfall is a common issue that can be addressed with checks.
- Add Base Material: If necessary, introduce a layer of crushed stone or gravel, ideally 2-3 inches deep, to improve drainage and stability. Distribute this material evenly and pack it well to establish a robust base that supports the grass.
- Final Level Check: Conduct a final check of the ground level after compaction to ensure it meets your desired specifications. This meticulous attention to detail will significantly contribute to the overall success and durability of your . Additionally, remember to overlap seams of the by 3-6 inches to prevent weed growth.

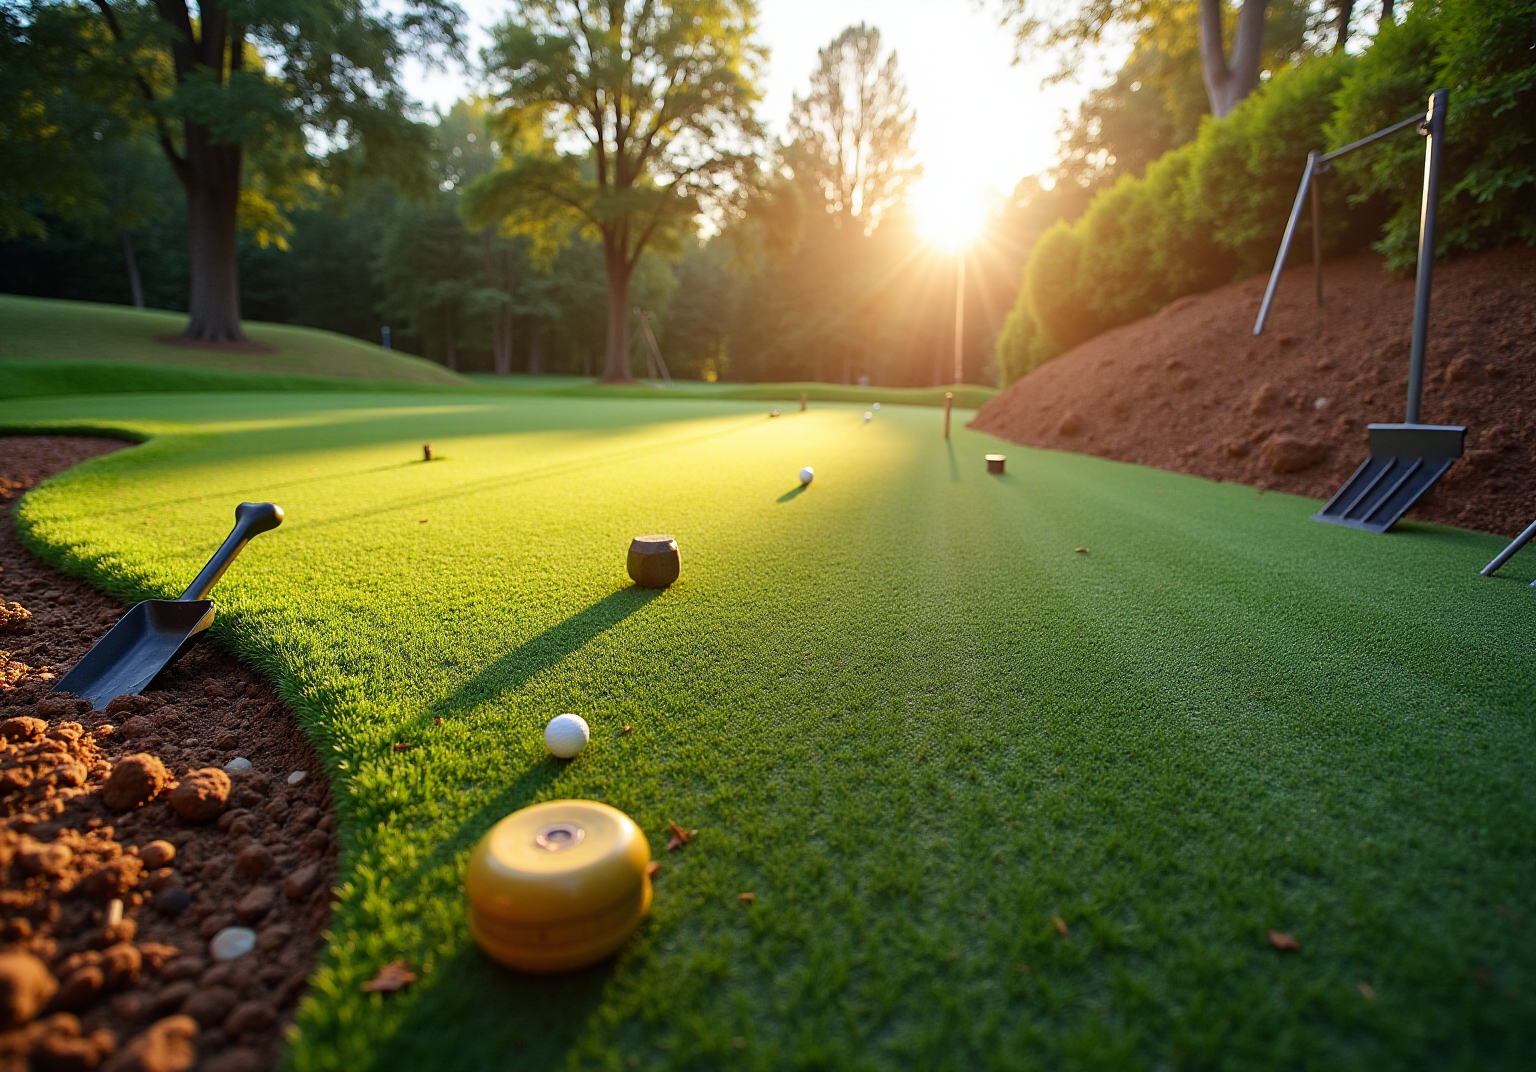
Install the Artificial Turf for Your Putting Green
- Roll Out the Surface: Start by rolling out the , ensuring it is laid in the desired direction for optimal appearance. As noted by Dick Bryant, Brock assessed his needs and provided the best solution, reflecting the attention to detail in the installation process.
- Cut to Fit: Use a utility knife to trim the edges of the grass to match the shape of your . Leave a slight overhang to secure the edges later, ensuring a .
- Secure the Grass: Fasten the grass using landscape staples or nails around the perimeter and at seams, spacing them approximately every 6 to 12 inches for optimal stability. Scott Sachse commended Brock’s professionalism and the crew’s courteousness, evident in their meticulous work.
- Check for Alignment: Verify that the grass is properly aligned and that seams are tightly joined. Make any necessary adjustments before proceeding to ensure a flawless appearance.
- Prepare for Infill: After securing the grass, ensure the surface is smooth and free of wrinkles in preparation for the . Regular maintenance, such as cleaning and brushing the surface, is crucial for ensuring a smooth surface for . Be mindful that burrowing creatures like moles can create bumps or holes in the ground, so regular inspections are recommended.
With Hall Turf’s , as highlighted by satisfied customers like Les Boatright, who appreciated Brock’s creativity and commitment to completing the job on time and within budget, you can trust that your will be a beautiful and functional addition to your backyard.

Secure the Turf and Add Infill for Optimal Performance
- Spread the Infill: Begin by using a broadcast spreader to evenly distribute the , across the surface of the grass. Aim for a to ensure optimal coverage.
- Brush the Grass: After spreading the infill, utilize a stiff-bristled broom to work the material into the grass fibers. This process stabilizes the surface and enhances the ball’s roll, contributing to a .
- Check for Evenness: It is crucial to ensure that the infill is evenly distributed and that the grass stands upright. Make any necessary adjustments to achieve a consistent and level surface.
- Final Inspection: Conduct a thorough examination of the entire surface for any areas that may require additional infill or modifications. Confirm that the surface is .
- The project includes the installation of an . Enjoy your : Once all steps are completed, your is prepared for use. Take pleasure in in the comfort of your own backyard!

Conclusion
In conclusion, creating a personal artificial turf putting green is a rewarding endeavor that significantly enhances the enjoyment and practice for golf enthusiasts. By selecting an appropriate location, preparing the site meticulously, and adhering to a systematic installation process, individuals can successfully transform their backyards into functional and visually appealing practice areas.
Key considerations include:
- Assessing sunlight exposure
- Ensuring adequate drainage
- Preparing the ground for stability
Each step, from measuring the area to securing the turf and incorporating infill, is vital for achieving a high-quality putting green. Diligence in the preparation and installation phases guarantees that the final outcome meets expectations for both performance and durability.
Ultimately, dedicating time and effort to establish a backyard putting green yields numerous advantages, ranging from enhanced golf skills to a dedicated space for relaxation and enjoyment. Whether for personal use or entertaining guests, a well-designed putting green can elevate any outdoor environment. Seize the opportunity to enrich your golfing experience at home, and take pride in the accomplishment of a successful DIY project.
Frequently Asked Questions
What factors should I consider when selecting the location for my putting green?
You should assess sunlight exposure, evaluate drainage, consider accessibility, check for underground utilities, and visualize the layout.
How much sunlight does my putting green need?
Your putting green should receive at least 6-8 hours of direct sunlight daily to maintain its vibrant appearance and functionality.
Why is drainage important for a putting green?
Adequate drainage prevents water accumulation that can damage the grass. Natural slopes or a drainage system can help manage excess water effectively.
What should I keep in mind regarding accessibility for my putting green?
Choose a location that is easily accessible for maintenance and play to enhance usage and enjoyment.
How can I ensure there are no underground utilities in my chosen area?
Before excavation, contact local utility companies to verify that there are no underground utilities to prevent disruptions during installation.
How can I visualize the layout of my putting green?
Use stakes and string to outline the proposed area, helping you understand the size and shape of the space before finalizing the installation.
What is the first step in preparing the site for my putting green?
Begin by measuring the area with a tape measure and marking the corners with stakes to outline the desired shape.
How do I clear the area for my putting green?
Remove existing grass, weeds, and debris using a shovel or sod cutter to clear the top layer of soil.
Why is leveling the ground important for my putting green?
Properly leveling the ground ensures consistent ball roll and playability on your turf.
What should I use as a weed barrier for my putting green?
Lay down a geotextile fabric as a weed barrier to prevent unwanted growth through the turf and maintain its integrity.
Why is it important to double-check measurements before installation?
Re-measuring the space ensures accuracy and helps avoid costly errors during installation, as minor inconsistencies can affect performance.
List of Sources
- Select the Ideal Location for Your Putting Green
- 37 Inspirational Gardening Quotes (https://treehugger.com/inspirational-gardening-quotes-4868813)
- A Guide To Installing An Artificial Putting Green (https://turftekusa.com/blog/a-guide-to-installing-an-artificial-putting-green)
- fieldturflandscape.com (https://fieldturflandscape.com/golf-putting-green/how-to-position-your-backyard-putting-green)
- What To Consider Before Installing Backyard Putting Green Turf (https://grizzlyoutdoor.com/blog/what-to-consider-before-installing-backyard-putting-green-turf)
- Case Studies (https://urbanturfsolutions.co.nz/case-studies)
- Prepare the Site: Measure and Clear the Area
- A Guide To Installing An Artificial Putting Green (https://turftekusa.com/blog/a-guide-to-installing-an-artificial-putting-green)
- How To Make Your Backyard Putting Green Dream a Reality (https://usga.org/content/usga/home-page/course-care/green-section-record/62/issue-17/how-to-make-your-backyard-putting-green-dream-a-reality.html)
- octurfandputtinggreens.com (https://octurfandputtinggreens.com/the-dos-and-donts-of-installing-an-artificial-turf-putting-green)
- allamericanturfsolutions.com (https://allamericanturfsolutions.com/putting-green-in-my-backyard-how-much-space-do-i-need)
- Level and Compress the Ground for Stability
- How to Install Artificial Grass on Soil | US Turf (https://usturfsandiego.com/news/how-to-install-artificial-grass-on-soil)
- Leveling the Field: How to Ensure an Even Surface During Your Artificial Turf Installation | Synthetic Grass Warehouse (https://syntheticgrasswarehouse.com/blog/leveling-the-field-how-to-ensure-an-even-surface-during-your-artificial-turf-installation)
- turfrocks.com (https://turfrocks.com/backyard-drainage-turf-case-study)
- Install the Artificial Turf for Your Putting Green
- DIY Putting Green Installation: A Step-by-Step Guide (https://artificialturfexpress.com/blog/installing-the-best-putting-greens-in-your-yard-the-ultimate-diy-guide)
- Synthetic Turf & Backyard Putting Greens | Synthetic Turf Northwest (https://syntheticturfnorthwest.com/everything-you-need-to-know-about-synthetic-turf-and-backyard-putting-greens)
- How Much Does Turf Cost in California? (2026 Guide) (https://bigbullyturf.com/how-much-does-turf-cost-in-california)
- Tour Greens | Backyard Putting Green Cost in 2025 (https://tourgreens.com/backyard-putting-green-cost.html)
- Backyard Putting Green Cost Breakdown 2026 | Artificial Golf Turf Pricing Explained – Mighty Grass (https://mightygrass.com/how-much-does-it-cost-to-install-an-artificial-turf-putting-green)
- Secure the Turf and Add Infill for Optimal Performance
- themotzgroup.com (https://themotzgroup.com/infill_blog/how-many-pounds-of-infill-do-you-need-per-square-foot-of-turf)
- american-greens.com (https://american-greens.com/infill)
- bellaturf.ca (https://bellaturf.ca/blog/artificial-grass-how-much-infill-do-i-need)
- Why Is Infill Crucial for Synthetic Turf Putting Green Installations? – SGW Sacramento (https://sgwsacramento.com/blog/why-is-infill-crucial-for-synthetic-turf-putting-green-installations)
- Infill Matters When Installing Artificial Grass Putting Greens — Here’s Why | Synthetic Grass Warehouse (https://syntheticgrasswarehouse.com/blog/infill-matters-when-installing-artificial-grass-putting-greens-heres-why)