
Introduction
Investing in AstroTurf can lead to a stunning outdoor space, but it’s essential to understand the potential challenges involved in installation and maintenance. This guide will detail the steps necessary for a successful installation and outline the benefits of choosing synthetic grass.
Challenges during installation and maintenance can lead to frustration and dissatisfaction with the lawn. By proactively addressing these challenges, homeowners can enjoy a vibrant lawn that enhances their outdoor living experience for years to come.
Prepare Your Yard for AstroTurf Installation
Proper preparation is crucial for a successful artificial grass installation, as it sets the foundation for long-term performance.
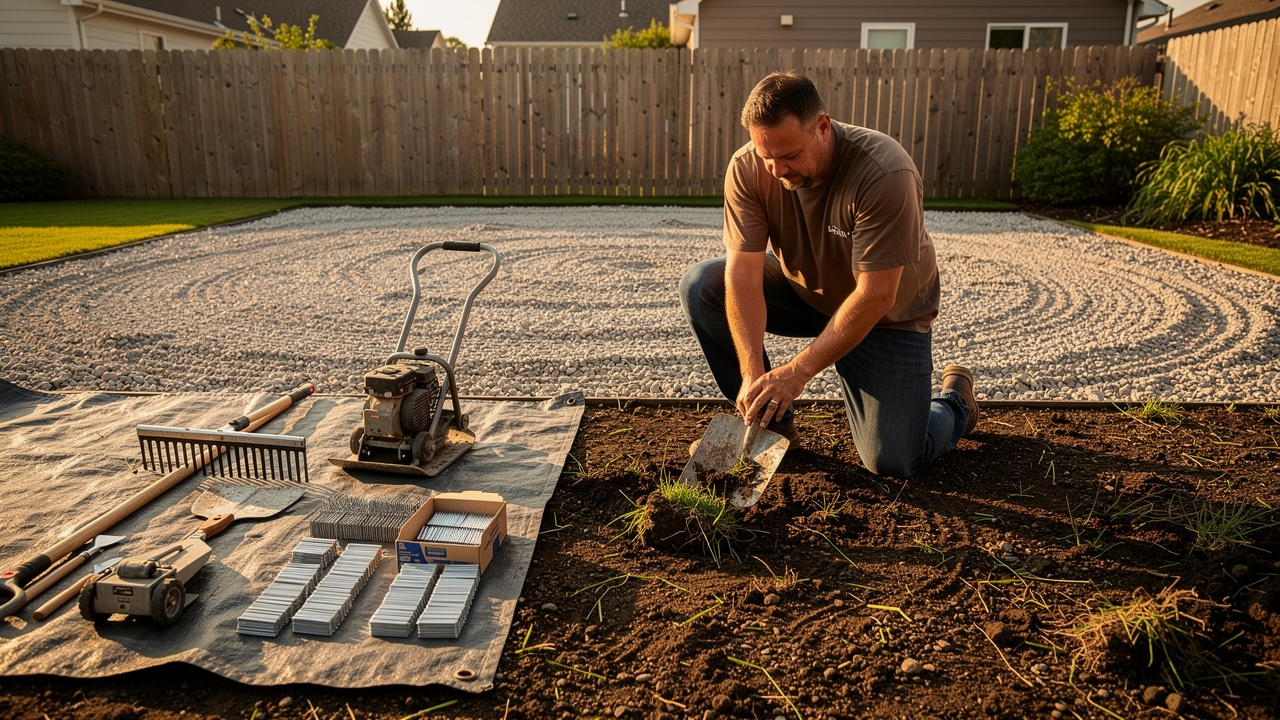
- Clear the Area: Begin by removing any existing grass, weeds, and debris from the installation site. Use a shovel or spade to dig out the top layer of soil, ensuring a clean and level surface for the grass.
- Assess Drainage: Evaluate the area for any drainage issues. Without proper drainage, water can accumulate, leading to potential damage to the grass installation. If water tends to pool in specific spots, consider installing a drainage system or grading the land to facilitate proper water flow.
- Level the Ground: Use a rake to smooth out the ground, filling in any low spots with soil. A uniform surface is essential to avoid bumps and guarantee an even installation of the grass.
- Compact the Soil: After leveling, compact the soil using a plate compactor or a heavy roller. This step is crucial for creating a stable base that supports the artificial grass.
- Install a Weed Barrier: Lay down a weed barrier fabric to inhibit weed growth beneath the grass. This will keep your AstroTurf looking great and structurally sound for years to come.
- Add Base Material: Spread a layer of crushed stone or gravel, approximately 2 to 4 inches thick, across the area. This base layer improves drainage and offers a sturdy base for the grass.
- Compact the Base: Once the base material is in place, compact it again to ensure it is firm and stable. Failing to compact the soil may result in uneven settling, compromising the integrity of the grass installation.
- Conduct a Final Inspection: After completing the setup, perform a final inspection to ensure seams are tight, edges are secure, and the area is free of debris. This step is essential for guaranteeing the quality and longevity of your AstroTurf.
When you select Hall Grass for your setup, you can anticipate outstanding service. Customers like Dick Bryant and Scott Sachse have praised Brock for his professionalism and attention to detail, ensuring that every project is completed on time and to the highest standards. Choosing Hall Grass means investing in a reliable and expertly managed synthetic grass installation that stands the test of time.

Install AstroTurf: Step-by-Step Instructions
Installing AstroTurf requires careful attention to detail to ensure a professional finish.
- Measure and Cut the Grass: Start by precisely gauging the space intended for grass installation. Cut the AstroTurf to size, ensuring a slight overlap at the edges for a seamless finish.
- Lay Out the Grass: Unroll the grass in the prepared area, ensuring the grain faces the desired direction. Allow the grass to acclimate for about an hour to settle into place.
- Secure the Grass: Use landscape staples or grass nails to fasten the edges of the grass to the ground. Position these fasteners every 3-4 inches along the perimeter and seams to ensure stability. Failure to secure the grass can lead to shifting and an uneven surface over time.
- Seam the Grass: For installations involving multiple pieces of grass, utilize seam tape and adhesive to join them. Ensure that the seams are tight and properly aligned to prevent visible gaps.
- Add Infill Material: Evenly distribute infill material, such as silica sand or rubber granules, across the surface of the grass. This step is key for keeping the grass looking great and standing tall.
- Brush the Grass: Utilize a stiff broom or power broom to brush the grass fibers upright. This action improves the look and ensures even infill distribution.
- Final Inspection: Conduct a thorough walk-around of the setup to identify any loose areas or imperfections. Make necessary adjustments to ensure a polished and complete installation. The AstroTurf installation available right now is meticulous, enhancing the visual appeal and extending the lifespan of your AstroTurf.

Maintain Your AstroTurf for Long-Lasting Use
Maintaining the appearance and health of your lawn requires consistent care and attention.
- Regular Cleaning: Rinse the surface with a hose at least once a week to remove dust, debris, and pet waste. This task greatly improves both the look and cleanliness of your lawn.
- Brush the Grass: Utilize a stiff broom to sweep the grass fibers consistently, particularly in high-traffic areas. High-traffic zones can lead to wear and tear on your lawn, making regular maintenance essential. This prevents matting and keeps the blades standing upright, maintaining the natural look of your lawn.
- Spot Clean Stains: For spills or stains, use a mild soap solution and a soft cloth to clean the affected area. Rinse thoroughly with water afterward to maintain the grass’s appearance.
- Check for Weeds: Periodically inspect the grass for any weeds that may have penetrated the seams. Neglecting to remove weeds can lead to their rapid spread, compromising the overall health of your lawn. Removing them promptly is crucial to prevent spreading and maintain the integrity of your artificial grass.
- Replenish Infill: Over time, the infill material may settle or wash away. Consistently monitor the infill levels and add more as needed to ensure optimal performance and appearance of the grass.
- Professional Maintenance: Consider hiring Hall Turf for professional maintenance services at least once a year. Scott Sachse emphasizes the value of professional help, noting that it keeps your lawn in top condition and prolongs its life.

Troubleshoot Common Installation Issues
Maintaining artificial grass requires attention to various common issues that can arise post-installation.
- Uneven Surface: If the grass appears uneven after installation, inspect the base preparation. You may need to lift the grass to re-level the base before securing it again. Regularly checking the turf helps spot any flattened fibers or bumps, which can usually be fixed by compacting the sub-base properly.
- Visible Seams: Noticeable seams can detract from the overall appearance of your artificial grass. To address this, ensure that seams are tightly joined by cutting three stitches off both pieces before joining them. Apply seam tape and adhesive to strengthen the connection, and brush the section to blend the fibers for a seamless look. This method minimizes visual discrepancies and enhances the aesthetic quality of the installation.
- Bubbles or Wrinkles: If bubbles or wrinkles develop, gently pull back the affected area and re-secure it, ensuring the base is smooth and compacted. Bubbles or wrinkles can disrupt the smooth appearance of your turf, making it essential to address them promptly. Regular brushing with a stiff broom helps spread the infill evenly and keeps the surface smooth, which can prevent future problems.
- Infill Issues: Uneven infill can lead to an inconsistent appearance. Use a broom to redistribute the infill evenly across the surface. If infill has eroded, adding more as necessary is essential for preserving the grass’s performance and longevity. Adhering to suggested infill guidelines guarantees the grass stays supported and aesthetically pleasing.
- Drainage Problems: Water pooling on the surface indicates potential drainage issues. Check the drainage system and ensure the base is properly graded. Adjusting the slope or adding drainage solutions may be necessary to prevent mold and unpleasant odors. Neglecting drainage issues can lead to mold growth and unpleasant odors, compromising the turf’s integrity. Proper installation with adequate drainage is essential for the longevity of synthetic grass.
- Odor Issues: Unpleasant odors can arise from pet waste or poor drainage. Quickly remove any pet waste and consider using a lawn deodorizer to eliminate lingering odors. Regular maintenance, including rinsing the turf weekly, can help prevent odors and maintain a fresh appearance. Addressing these issues promptly not only preserves the aesthetic appeal but also extends the lifespan of your artificial grass.

Conclusion
Installing AstroTurf requires meticulous planning and execution to achieve the desired outcome. By following the outlined steps for preparation, installation, and maintenance, homeowners can ensure a successful transformation of their outdoor spaces, leading to a lawn that is both visually appealing and easy to maintain.
Key insights include the importance of proper ground preparation, which involves:
- Clearing the area
- Assessing drainage
- Compacting the soil to create a solid foundation
The installation process itself requires precision in:
- Measuring
- Cutting
- Securing the grass
- Ensuring proper infill distribution for optimal aesthetics and performance
Regular maintenance practices, such as:
- Cleaning
- Brushing
- Monitoring infill levels
are crucial to prolonging the life of the synthetic grass and maintaining its appearance.
Investing in AstroTurf not only beautifies your yard but also offers a hassle-free solution that lasts. Homeowners are encouraged to embrace these best practices and consider professional assistance to achieve the finest results, ensuring their outdoor spaces remain inviting and functional for years to come.
Frequently Asked Questions
Why is proper preparation important for AstroTurf installation?
Proper preparation is crucial as it sets the foundation for long-term performance and ensures a successful artificial grass installation.
What steps should I take to clear the area before installation?
Begin by removing any existing grass, weeds, and debris from the installation site. Use a shovel or spade to dig out the top layer of soil, creating a clean and level surface.
How can I assess drainage issues in my yard?
Evaluate the area for any drainage problems. If water tends to pool in specific spots, consider installing a drainage system or grading the land to facilitate proper water flow.
What is the process for leveling the ground?
Use a rake to smooth out the ground and fill in any low spots with soil to create a uniform surface, which is essential for an even installation of the grass.
Why is it necessary to compact the soil?
Compaction of the soil is crucial for creating a stable base that supports the artificial grass, preventing uneven settling.
What is the purpose of installing a weed barrier?
A weed barrier fabric inhibits weed growth beneath the grass, helping to maintain the appearance and structural integrity of the AstroTurf.
What type of base material should I use, and how thick should it be?
Spread a layer of crushed stone or gravel approximately 2 to 4 inches thick across the area to improve drainage and provide a sturdy base for the grass.
How do I ensure the base material is properly compacted?
After placing the base material, compact it again to ensure it is firm and stable, as failing to do so may result in uneven settling.
What should I do after completing the installation setup?
Conduct a final inspection to ensure seams are tight, edges are secure, and the area is free of debris, which is essential for guaranteeing the quality and longevity of your AstroTurf.
What can I expect when choosing Hall Grass for installation?
Customers can expect outstanding service, professionalism, and attention to detail, ensuring that every project is completed on time and to high standards.
List of Sources
- Prepare Your Yard for AstroTurf Installation
- How To Prepare Your Home for Artificial Grass Installation: 5 Expert Tips – SGW Colorado (https://sgwcolorado.com/blog/2025/08/28/how-to-prepare-your-home-for-artificial-grass-installation-5-expert-tips)
- usturf.com (https://usturf.com/blogs/news/preparing-lawn-for-artificial-turf-installation?srsltid=AfmBOorfP2kfzbZY_J1rGet6bo_K6vL4Njrl0duApzwn7RUdwKCLDwRo)
- 5 Steps to Prep for Artificial Turf Installation at Home (https://californiaturfco.com/5-steps-to-prep-for-artificial-turf-installation-at-home)
- Artificial Grass Installation: Step-by-step Guide (2026) (https://whatgrassisthis.com/blog/artificial-grass-installation-step-by-step-guide-2026)
- Install AstroTurf: Step-by-Step Instructions
- How to Install Artificial Turf: Step-by-Step Guide | US Turf (https://usturfsandiego.com/news/how-to-install-artificial-turf)
- jsgrass.com (https://jsgrass.com/news/how-to-lay-artificial-turf-the-best-tutorial-80581849.html)
- stmworld.co.uk (https://stmworld.co.uk/blog/post/A-Step-By-Step-Guide-To-Installing-Astro-Turf)
- Artificial Grass Installation: Step-by-step Guide (2026) (https://whatgrassisthis.com/blog/artificial-grass-installation-step-by-step-guide-2026)
- Maintain Your AstroTurf for Long-Lasting Use
- Keep Your Artificial Grass Fresh: 8 Easy Maintenance Tips (https://artificialturfexpress.com/blog/8-artificial-grass-maintenance-tips-to-extend-longevity)
- Tips for Artificial Grass Maintenance [Extend Longevity] (https://groundsguys.com/blog/artificial-grass-maintenance-tips)
- turfresh.com (https://turfresh.com/blog/how-does-artificial-grass-maintenance-help-your-turf-last-longer)
- How To Proactively Care for AstroTurf and Artificial Turf: A Comprehensive Guide (https://astroturf.com/how-to-proactively-care-for-astroturf-and-artificial-turf-a-comprehensive-guide)
- Artificial Turf Maintenance Guide | Cleaning & Care Tips (https://fieldturflandscape.com/maintenance/artificial-turf-maintenance-guide)
- Troubleshoot Common Installation Issues
- georgedaviesturf.co.uk (https://georgedaviesturf.co.uk/blog/common-artificial-turf-issues-how-to-solve-them?srsltid=AfmBOoqU00OhpWBOriXi67T2bt6NoQ5RWgg-el3K1hTYoxfiIVRMBSKz)
- 18 Artificial Grass Installation Mistakes (and How to Solve Them) (https://neograss.co.uk/18-artificial-grass-installation-mistakes-and-how-to-solve-them)
- Common Issues With DIY Installs | Synthetic Grass Warehouse (https://syntheticgrasswarehouse.com/resources/installing-artificial-grass/common-issues-with-diy-installs)
- Fixing 5 Challenges in Commercial Artificial Turf Installations (https://velcro.com/news-and-blog/2024/07/fixing-5-challenges-in-artificial-turf-installation)
- Top Synthetic Turf Installation Problems (and Solutions) (https://siteone.com/en/articles/turf-care/top-synthetic-turf-installation-problems-and-solutions)