
Introduction
Transforming a pool area into a low-maintenance oasis with astroturf not only enhances aesthetics but also improves functionality. Despite this, many homeowners hesitate due to concerns about the complexity of the installation process. This guide outlines the six essential steps for installing astroturf around a pool, ensuring a seamless and durable setup that can withstand the rigors of poolside life.
However, what common pitfalls can turn this straightforward project into a frustrating endeavor? By understanding these challenges, you can navigate the installation process effectively and avoid the most frequent mistakes.
Plan and Measure Your Pool Area
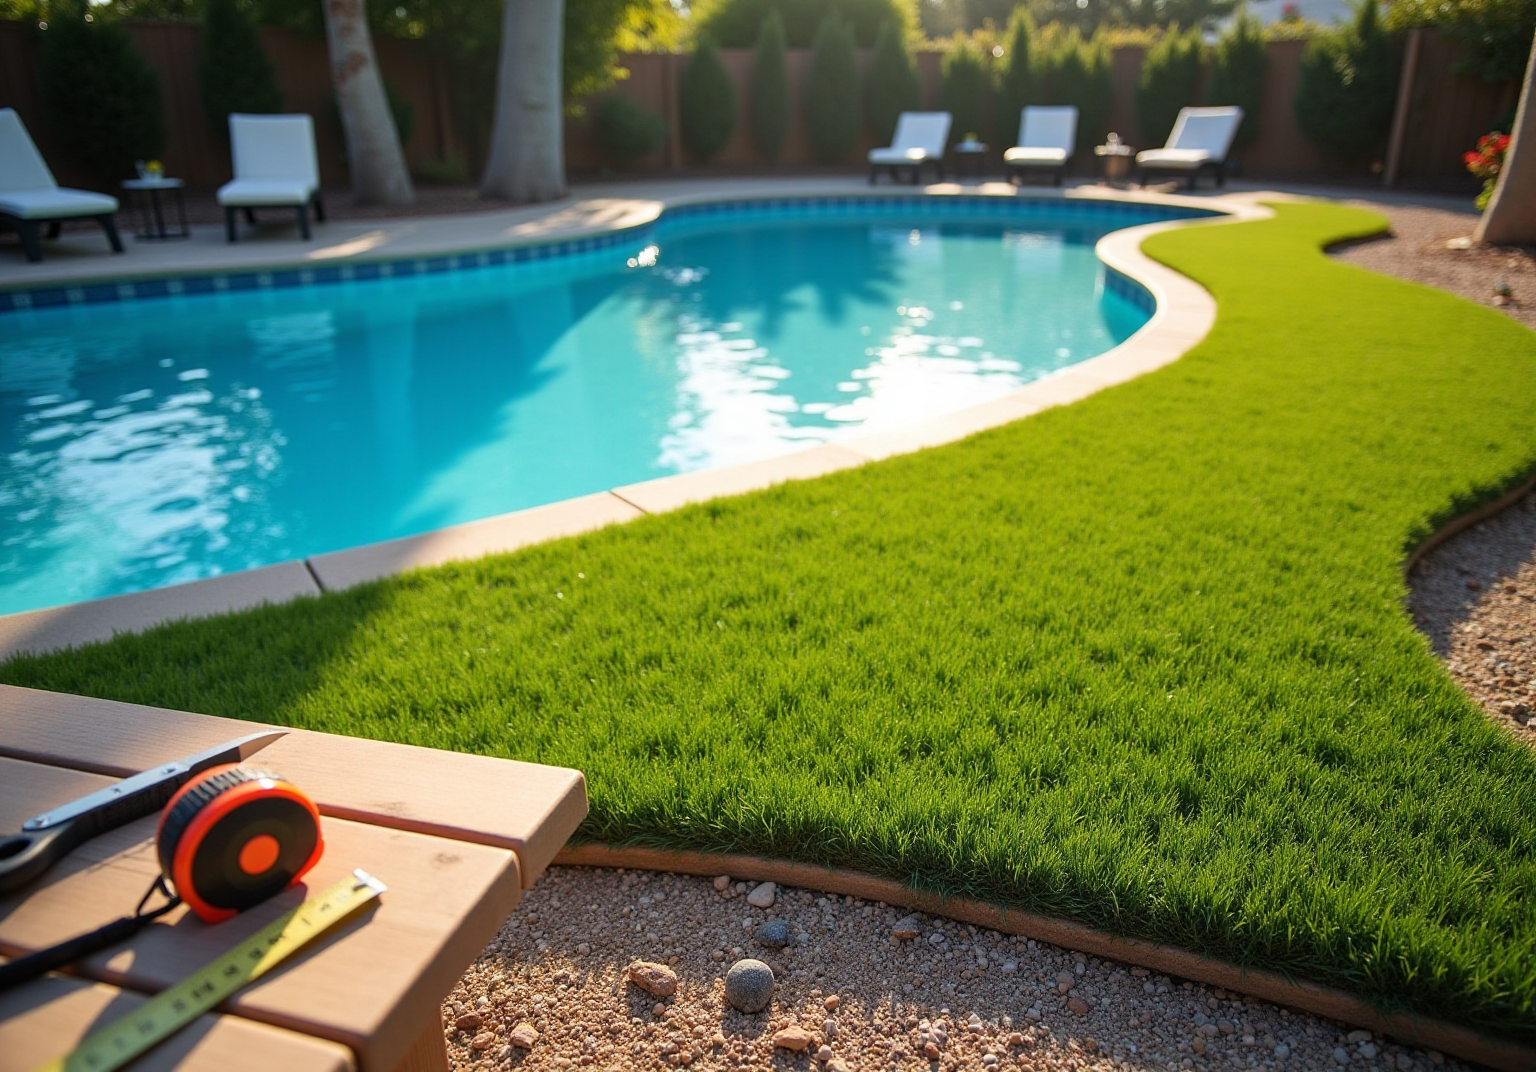
- Gather Your Tools: Equip yourself with a measuring tape, notepad, and pencil. A sketchpad can also be beneficial for visualizing the layout.
- Measure the Area: Start by measuring the length and width of your swimming area. For uniquely shaped water features, divide the area into smaller sections – rectangles or circles – and measure each segment individually. In Kansas City, the average dimensions of residential swimming areas can vary, but many homeowners find that a 12×24 ft. structure is common, which can help guide your measurements.
- Consider Adjacent Elements: Identify and measure any steps, landscaping, or other components around the pool that may affect the grass layout. These features are essential for ensuring a smooth setup. As note, “The difference between a mediocre and an exceptional installation often comes down to planning.” At our company, our team, led by experts like Brock, is dedicated to providing exceptional service and ensuring that every detail is meticulously planned.
- Create a Layout Sketch: Draft a simple diagram of your pool area, marking the dimensions and any obstacles. This sketch will serve as a valuable reference during the installation process.
- Determine the Turf Size: Using your measurements, determine the turf size needed. It’s wise to add a little extra to accommodate trimming and fitting around curves or edges. Additionally, ensure you select quality turf, such as our premium options designed specifically for poolside areas. Our clients, including Scott Sachse, have commended our capability to produce outstanding outcomes, ensuring that the grass not only appears attractive but also functions effectively in poolside settings.
- Double-Check Measurements: Before moving forward, meticulously verify all measurements to ensure accuracy. This step is essential to avoid costly mistakes during the installation. Additionally, consider drainage solutions to prevent water accumulation around the grass, which can lead to future problems. As Les Boatright noted, our attention to detail and commitment to getting the job done right is what sets us apart.

Gather Materials and Tools for Installation
-
Materials Needed:
- turf specifically designed for pools, ensuring resistance to chlorine, chemicals, and UV rays.
- infill material, such as silica sand or rubber granules, enhances drainage and stability; incorporating silica sand improves both drainage and visual consistency of the surface.
- landscape fabric is essential to prevent weed growth beneath the grass.
- Adhesive or seam tape may be required for securing grass seams.
-
Tools Required:
- A measuring tape is necessary for accurate measurements of the installation area.
- A utility knife or carpet cutter allows for precise cutting of the grass.
- Landscape staples or nails, which should be used to secure the grass edges, spaced about 6-12 inches apart.
- A hammer or mallet is needed for driving in staples or nails.
- A rake and shovel are important for preparing the base and leveling the surface.
- A plate compactor ensures a solid base for the turf.
- A power broom is useful for evenly distributing infill over the grass.
-
Optional Tools:
- A turf cutter provides more precise cutting of the turf to fit around pool contours.
- A trowel is helpful for spreading adhesive if necessary.
- A level guarantees a smooth and uniform surface for the grass setup.
-
Purchase Locations:
- Local hardware stores or online vendors are ideal for obtaining grass and setup materials.
- It is advisable to choose quality materials for optimal performance. The right choices can significantly impact the longevity of the installation, which can save time and money.

Prepare the Ground: Clear and Excavate
- Begin by evaluating the ground conditions to identify the soil type, drainage capabilities, and any necessary aggregates. This assessment is crucial for ensuring a successful setup.
- Remove any grass, weeds, rocks, or debris from the installation site. Utilize a shovel or soil cutter for an effective cleanup, ensuring a clean workspace.
- Dig down approximately 3 to 4 inches to create a base layer. This depth is vital as it accommodates both the base material and the infill, promoting optimal drainage and stability for the grass.
- Level the Ground: Use a rake to smooth the excavated area, ensuring there are no high or low spots. A flat surface is essential for proper installation and the overall success of the grass installation.
- Compact the Base: Employ a plate compactor to thoroughly compact the soil. This step is necessary to prevent settling and to ensure a stable foundation that will support the turf over time.
- After compacting the soil, lay down a weed barrier fabric to prevent unwanted growth beneath the turf. Secure the barrier with landscape staples to keep it in place.
- Spread a 2 to 4-inch layer of aggregate, such as gravel or crushed stone, over the compacted soil to enhance drainage and stability.
- Finally, ensure that the area is graded to facilitate drainage away from the water feature. A slight incline of 1-2% away from the water feature edge is recommended to prevent water accumulation and maintain the integrity of the setup.

Install and Secure the Artificial Turf
- Lay Out the Grass: Unroll the turf and position it over the prepared area. Allow it to acclimate for a few hours to minimize wrinkles and ensure a proper fit.
- Cut to Fit: Utilize a utility knife to trim the grass, ensuring it fits snugly with the edges and any obstacles. Leave a slight excess for tucking under the edges, which will provide a clean finish.
- Secure the Grass: Begin securing the grass by placing staples or nails around the perimeter, spacing them approximately 6 inches apart. To maintain a tight fit, ensure that the turf is taut and free of wrinkles.
- Seam the Grass: For installations involving multiple pieces of grass, use seam tape to effectively join them. Following the manufacturer’s instructions is crucial for achieving a strong bond and a seamless look.
- Check Alignment: Step back to evaluate the positioning of the grass. Make any necessary adjustments to ensure a uniform appearance before proceeding to the next step.
- Reinforce the Edges: Once satisfied with the layout, reinforce the edges with additional staples or nails, ensuring the grass is firmly anchored to withstand use and weather.

Finish the Installation: Spread Infill and Secure
- Spread Infill: Use a drop spreader to evenly distribute the infill material across the grass. This step is essential as it helps maintain stability, ensuring the blades remain upright and visually appealing. A typical recommendation is to apply 1 to 2 pounds of infill per square foot for landscape model surfaces.
- Brush the Grass: Employ a power broom or a stiff-bristled brush to work the infill into the grass fibers. This action not only promotes even distribution but also assists in keeping the blades upright, thereby enhancing the overall appearance of your setup.
- Check for Evenness: After brushing, inspect the grass for any uneven areas. It is crucial to add more infill where necessary to achieve a consistent and polished appearance, as uneven surfaces can detract from the aesthetic quality. Experts emphasize that proper maintenance is key.
- Secure Edges: Fasten all edges securely using staples or nails. This precaution prevents the turf from lifting or shifting over time, ensuring durability.
- Final Inspection: Conduct a thorough inspection of the pool area to ensure everything is in place and presents a neat appearance. Make any final adjustments as needed.
- Clean Up: Remove any excess infill from the surrounding area and dispose of debris from the installation process. A tidy conclusion not only enhances the overall look but also helps preserve the integrity of your new grass.
Maintenance Tip: Remember to perform maintenance approximately every eighteen months for optimal performance.

Troubleshooting and Common Mistakes to Avoid
- Uneven Surface: If the grass appears uneven, inspect the base for settling. It may be necessary to add more infill or re-compact the base to achieve a level surface. Proper preparation accounts for 80% of installation success; an even base is crucial.
- Grass Stretching: If the grass is wrinkled, try stretching the grass and securing it more tightly. A heat gun can gently warm the grass, helping it relax and conform to the base.
- Drainage Issues: Proper drainage is essential. If water pools on the surface, assess the slope of the base and make necessary adjustments. Poor drainage can lead to mold and early deterioration of the grass, causing significant long-term damage.
- Infill Problems: For unevenly distributed infill, use a broom to spread it evenly, ensuring it adequately fills the grass fibers. Insufficient infill can lead to bare spots, compromising the grass’s performance.
- Lifting Edges: If the edges of the grass are lifting, ensure they are secured properly with sufficient staples or nails. Re-secure any loose areas to prevent further lifting, which can create tripping hazards.
- Maintenance Routine: Regularly brush the turf to keep the blades upright and remove debris. Occasional rinsing helps maintain cleanliness and freshness, ensuring the turf remains visually appealing and functional. Additionally, allow the artificial grass to acclimatize for at least 24 hours after unrolling to prevent installation issues.
Conclusion
In conclusion, installing astroturf around a pool is a strategic choice that transforms the area into a beautiful, low-maintenance oasis. This guide has provided a comprehensive approach, covering everything from planning and measuring your pool area to the final touches of installation. By adhering to these steps, homeowners can ensure that their astroturf not only enhances the aesthetic appeal of their poolside but also withstands the rigors of outdoor conditions.
Key considerations include:
- The necessity of careful measurement and planning to prevent costly mistakes
- The selection of high-quality materials specifically designed for poolside use
- The importance of proper ground preparation to establish a stable foundation
Additionally, addressing common installation challenges, such as uneven surfaces and drainage issues, is vital for ensuring the longevity and functionality of the turf.
Ultimately, the installation of astroturf is not solely about aesthetics; it offers ease of maintenance and enhances the overall enjoyment of the outdoor space. By investing time in meticulous planning and executing the installation correctly, homeowners can create a stunning pool area that is both inviting and practical. Embrace the advantages of astroturf and enjoy a beautiful, hassle-free environment for years to come.
Frequently Asked Questions
What tools do I need to plan and measure my pool area?
You will need a measuring tape, notepad, pencil, and optionally a sketchpad for visualizing the layout.
How do I measure the dimensions of my swimming area?
Measure the length and width of your swimming area. For uniquely shaped features, divide the area into smaller sections, such as rectangles or circles, and measure each segment individually.
What are the average dimensions of residential swimming areas in Kansas City?
Many homeowners in Kansas City find that a 12×24 ft. structure is a common size for their swimming areas.
What should I consider when measuring adjacent elements around the pool?
Identify and measure any steps, landscaping, or other components that may affect the grass layout, as these features are essential for ensuring a smooth setup.
Why is it important to create a layout sketch?
A layout sketch helps visualize the pool area by marking dimensions and obstacles, serving as a valuable reference during the installation process.
How do I calculate the grass requirements for my pool area?
Determine the total square footage needed for the grass using your measurements, and add extra to accommodate trimming and fitting around curves or edges.
What type of grass should I choose for poolside areas?
Select high-quality grass that can withstand chlorine and pool chemicals, specifically designed for poolside use.
Why is it important to double-check measurements before installation?
Verifying all measurements ensures accuracy and helps avoid costly mistakes during the installation process.
What materials are needed for poolside turf installation?
You will need artificial turf designed for poolside use, infill material (like silica sand or rubber granules), weed barrier fabric, and adhesive or seam tape.
What tools are required for the installation process?
Essential tools include a measuring tape, utility knife or carpet cutter, landscape staples or nails, hammer or mallet, rake, shovel, plate compactor, and power broom.
Are there any optional tools that can assist in the installation?
Optional tools include a turf cutter for precise cutting, a trowel for spreading adhesive, and a level for ensuring a smooth surface.
Where can I purchase materials for my poolside turf installation?
You can obtain grass and setup materials from local hardware shops or online vendors, and it’s advisable to choose high-quality materials for durability.
List of Sources
- Plan and Measure Your Pool Area
- Swimming Pool Statistics (2026) (https://rubyhome.com/blog/swimming-pool-stats)
- Easy Fixes: Installing Artificial Grass Around Your Pool (https://artificialturfexpress.com/blog/the-ultimate-troubleshooting-guide-for-installing-artificial-grass-around-your-pool)
- goodreads.com (https://goodreads.com/quotes/tag/landscape-architecture)
- fromthegrounduptampabay.com (https://fromthegrounduptampabay.com/blog/how-to-plan-artificial-turf-installation-around-pool)
- Gather Materials and Tools for Installation
- Artificial Turf Market, Industry Size Forecast [Latest] (https://marketsandmarkets.com/Market-Reports/artificial-turf-market-121486580.html)
- rootsanalysis.com (https://rootsanalysis.com/artificial-turf-market)
- Artificial grass around the pool: how to lay it step by step and enjoy its permanent greenness (https://turfgrass.net/inspiration/artificial-grass-around-the-pool)
- DIY Guide: Installing Artificial Grass Around Your Pool (https://artificialturfexpress.com/blog/diy-guide-how-to-install-artificial-grass-around-your-pool-area)
- artificialturfsupply.com (https://artificialturfsupply.com/how-to/how-to-install-artificial-turf-for-pool-decks)
- Prepare the Ground: Clear and Excavate
- Easy Fixes: Installing Artificial Grass Around Your Pool (https://artificialturfexpress.com/blog/the-ultimate-troubleshooting-guide-for-installing-artificial-grass-around-your-pool)
- 4 Steps to Prepare the Base for Artificial Grass Installation – Hall Turf | Artificial Turf Installation Kansas City KS & MO (https://hallturf.com/4-steps-to-prepare-the-base-for-artificial-grass-installation)
- How to Install Artificial Turf on Dirt | US Turf (https://usturfsandiego.com/news/how-to-install-artificial-turf-on-dirt)
- shawgrass.com (https://shawgrass.com/about/news-blog/how-to-prep-for-artificial-grass-installation)
- A Step-by-Step Guide to Installing Artificial Turf Grass (https://lowes.com/n/how-to/install-artificial-grass)
- Install and Secure the Artificial Turf
- Artificial Turf Installation: 5 Rules to Know | US Turf (https://usturfsandiego.com/news/artificial-turf-installation)
- DIY Artificial Turf Installation: Top Tips and Common Fixes (https://artificialturfexpress.com/blog/common-fixes-shopping-tips-for-diy-installation-of-the-best-artificial-turf)
- keystonesportsconstruction.com (https://keystonesportsconstruction.com/turf-field-safety-standards-and-best-practices)
- A Step-by-Step Guide to Installing Artificial Turf Grass (https://lowes.com/n/how-to/install-artificial-grass)
- Artificial grass around the pool: how to lay it step by step and enjoy its permanent greenness (https://turfgrass.net/inspiration/artificial-grass-around-the-pool)
- Finish the Installation: Spread Infill and Secure
- The Importance of Professional Installation for Artificial Turf – H2I Group (https://h2igroup.com/blogs/the-importance-of-professional-installation-for-artificial-turf)
- How Much Infill for Artificial Grass: A Homeowner’s Guide – Hall Turf | Artificial Turf Installation Kansas City KS & MO (https://hallturf.com/how-much-infill-for-artificial-grass-a-homeowners-guide)
- blog.turfdistributors.com (https://blog.turfdistributors.com/infill-for-artificial-grass)
- tierrasupplyco.com (https://tierrasupplyco.com/blogs/news/how-do-you-install-artificial-turf?srsltid=AfmBOoq5Oh3mKHnoeNwpb4uctuqy2DIvDq18LYZFXuq-PjX8UpVXoRvd)
- Top 5 Turf Installation Quote Mistakes Contractors Keep Making (https://aglgrass.com/blogs/turf-installation-quote-mistakes)
- Troubleshooting and Common Mistakes to Avoid
- 7 Common Artificial Grass Problems and How to Fix Them (https://ccgrass.com/problems-with-artificial-grass)
- Case Studies: Landscape & Recreation – Synthetic Turf Council (https://syntheticturfcouncil.org/page/Case_Studies_2)
- turftekusa.com (https://turftekusa.com/blog/artificial-turf-gone-wrong-setup-errors-to-avoid)
- eliteturfsupply.com (https://eliteturfsupply.com/blogs/top-10-mistakes-to-avoid-when-installing-artificial-grass-in-landscaping-projects)
- 18 Artificial Grass Installation Mistakes (and How to Solve Them) (https://neograss.co.uk/18-artificial-grass-installation-mistakes-and-how-to-solve-them)