
Introduction
Transforming a backyard into a personal putting green presents both opportunities and challenges. This guide offers a comprehensive, step-by-step approach to installing putting green turf, ensuring that homeowners can create a space that enhances their outdoor environment and provides a perfect practice area for golf enthusiasts. Many homeowners underestimate the complexity of creating a putting green. What essential steps can ensure a successful installation, and how can one avoid common pitfalls? Understanding these steps can mean the difference between a successful installation and a disappointing outcome.
Prepare Your Space for Installation
- Choose the Right Location: Choosing the right location for your golf practice area is crucial for optimal performance and longevity. Select a flat area in your backyard for putting green turf that receives ample sunlight and is free from overhanging branches. Choosing the wrong location can lead to poor turf performance.
- Clear the Area: Remove any existing grass, weeds, rocks, and debris. Use a shovel or sod cutter to clear the ground completely, preparing for a successful installation.
- Level the Ground: Use a rake to level the soil, filling in any low spots with additional soil to create a smooth surface. Compact the soil with a plate compactor to prevent settling later, ensuring a stable base for your grass.
- Check for Drainage: Proper drainage is essential for preserving the integrity of your golf surface. Without proper drainage, your investment in turf could be compromised. If necessary, install drainage pipes or create a slight slope to direct water away from the area, preventing water pooling that can damage the turf.
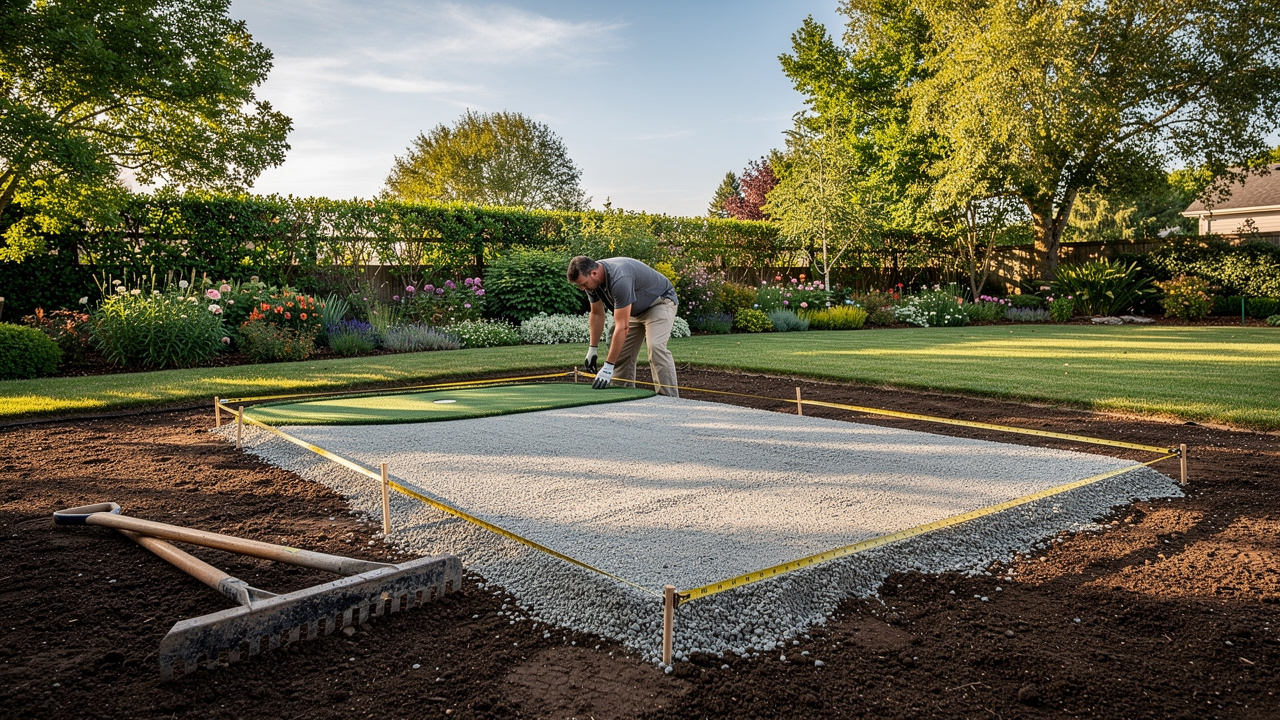
- Mark the Area: Use stakes and string to outline the dimensions of your golf practice area. This visual aid will assist you in precisely measuring and planning the installation of the putting green turf, ensuring that the final product fits seamlessly into your overall backyard layout. Ignoring these steps may lead to a golf surface that does not perform as desired.

Gather Necessary Tools and Materials
Successful turf installation hinges on having the right tools and materials at your disposal. Here’s what you’ll need:
- Shovel: Essential for digging and removing existing grass, ensuring a clean slate for your putting green.
- Rake: Used to level the ground and evenly spread materials, creating a smooth surface for installation.
- Plate Compactor: Important for compacting the soil, providing a solid base that enhances the durability of the grass.
- Utility Knife: Essential for slicing the grass to the desired dimensions, providing a precise fit around edges and cup holes.
- Measuring Tape: Crucial for taking accurate dimensions, helping to avoid mistakes during installation.
- Staple Gun: Used to secure the grass in place, preventing shifting and ensuring a stable surface.
- Broom: Ideal for brushing the grass fibers after installation, helping to maintain a natural appearance.
High-quality materials are essential for a successful installation, as they contribute to the durability and performance of your putting green:
- Putting Green Turf: Choose synthetic turf specifically designed for putting greens, which enhances performance and durability.
- Weed Barrier Fabric: Crucial for stopping weed growth under the grass, providing a clean and low-maintenance surface.
- Crushed Stone or Decomposed Granite: Recommended for the base layer, promoting proper drainage and stability.
- Silica Sand: Used to fill in the turf, providing stability and a natural feel underfoot.
- Turf Adhesive: Necessary for securing seams, ensuring a seamless and professional finish.
Optional accessories can enhance your putting green experience:
- Putting Cups and Flags: These essential accessories can elevate your practice sessions.
- Landscape Fabric: Helpful for extra drainage and weed control, enhancing the overall durability of your golf course.
Hall Turf, a licensed contractor with over 15 years of experience and a client base of over 80,000 satisfied customers worldwide, has a reputation built on quality and professionalism. As Scott Sachse observed, ‘They recently set up a golf practice area at our new residence, and they did an outstanding job. Brock is extremely professional, timely, and responsive.’ When you work with Hall Turf, you can expect a commitment to professionalism and meticulous attention to detail. For inquiries and quotes, feel free to contact Hall Turf at (816) 555-7890 or email info@hallturf.com.

Follow Step-by-Step Installation Instructions
Proper preparation is essential for a successful turf installation, as it sets the foundation for a high-quality playing surface.
- Excavate the Area: Start by digging down around 2-3 inches to eliminate any current grass and establish a flat surface for your golf area.
- Install the Base Layer: Spread a 2-4 inch layer of crushed stone or decomposed granite evenly across the area. Use a rake to level it out, then compact it thoroughly with a plate compactor to ensure stability.
- Lay the Weed Barrier: Place a weed barrier fabric over the compacted base to prevent any weeds from growing through the grass, ensuring a clean and low-maintenance surface.
- Cut and Lay the Grass: Roll out the putting green grass over the prepared area. Use a utility knife to cut the grass to fit, making sure that seams are tight and aligned for a seamless appearance.
- Secure the Grass: Utilize a staple gun to fasten the edges of the grass to the ground. Ensure that the surface is taut and free of wrinkles to maintain a professional appearance.
- Fill with Sand: Spread silica sand evenly over the grass, brushing it into the fibers to provide stability and a natural feel. A broom can help ensure even distribution across the surface.
- Install Holes for the Cups: Cut openings for the cups and place them into the grass, ensuring they are level with the surface for a smooth experience.
- Final Touches: Brush the turf fibers to stand them upright, enhancing the natural appearance. Conduct a thorough inspection of the installation to make any necessary adjustments before use.
In Missouri, installing turf areas typically takes between 6 and 11 days, depending on the design complexity and site preparation needed. It’s important for homeowners to know that getting the excavation and base preparation right is key to a successful installation. Limited access for machinery can complicate the installation process, potentially leading to delays and increased costs. Investing in professional installation not only enhances accuracy but also ensures a durable and high-quality playing surface. As Scott Sachse remarked, ‘Brock and his team performed an outstanding job on my turf installation, showcasing professionalism and meticulousness throughout the process.’ Similarly, Les Boatright expressed satisfaction with the project, stating, ‘Brock was always on-time and followed through on his commitments, resulting in an end product that exceeded my expectations.’ Ultimately, the choice between DIY and professional installation can significantly impact the longevity and quality of your turf area.

Implement Maintenance Best Practices
Maintaining your putting green turf backyard is essential for optimal performance and longevity.
- Regular Cleaning: Utilize a leaf blower or broom to clear away debris such as leaves and dirt from the grass surface. This practice prevents buildup that can hinder playability and lead to odors. Try to set aside about 15 to 30 minutes each week for this maintenance.
- Brushing: Regularly brush the grass fibers with a stiff-bristled broom to keep them upright and maintain a natural appearance. This helps spread the infill evenly for better performance. Brushing is essential for maintaining softness and leveling the infill for a true roll.
- Rinsing: Lightly rinse the grass with water every few weeks to wash away dust and pollen. A gentle spray with a garden hose is sufficient for maintenance; avoid harsh chemicals that could damage the fibers.
- Weed Control: Inspect the edges of the grass for any signs of weed growth. If weeds appear, remove them manually or apply a turf-safe herbicide to prevent them from taking root. Regular inspections can help catch these issues early.
- Infill Maintenance: Regularly check the silica sand infill levels, especially in high-use areas. Add more infill as needed to maintain the desired level and ensure optimal playability. This is essential as infill aids in drainage and keeps the grass fibers upright.
- Avoid Heavy Objects: Refrain from placing heavy furniture or equipment on the turf, as this can cause indentations and damage the fibers, affecting the overall appearance and functionality. Heavy items should not be left on the turf for extended durations to prevent damaging the fibers.
- Seasonal Inspections: Conduct seasonal inspections to identify any damage or wear. Address any issues promptly to prevent further deterioration. With proper care, your putting green turf backyard can last over a decade, making regular maintenance crucial.

Conclusion
Installing putting green turf in your backyard enhances its beauty and provides a dedicated space for golf enthusiasts to practice and enjoy their game. Homeowners can achieve lasting results by carefully preparing, installing, and maintaining their putting green turf. Key considerations include:
- Selecting the right location
- Clearing and leveling the ground
- Using high-quality materials and tools for installation
Regular maintenance practices are crucial to keep the turf in optimal condition, ensuring a great playing experience for years to come. Many satisfied customers have shared how Hall Turf’s professionalism and attention to detail made their projects successful, reinforcing the value of expert installation.
Investing in quality putting green turf ensures that your backyard becomes a source of joy and a standout feature for years to come. For those considering this upgrade, reaching out to Hall Turf for expert guidance and support can make all the difference in achieving a high-quality installation that meets individual needs and preferences.
Frequently Asked Questions
What is the first step in preparing my space for a golf practice area installation?
The first step is to choose the right location. Select a flat area in your backyard that receives ample sunlight and is free from overhanging branches to ensure optimal performance and longevity of the turf.
How do I clear the area for installation?
You should remove any existing grass, weeds, rocks, and debris. This can be done using a shovel or sod cutter to completely clear the ground in preparation for installation.
What should I do to level the ground before installing the turf?
Use a rake to level the soil, filling in any low spots with additional soil to create a smooth surface. It’s important to compact the soil with a plate compactor to prevent settling later, ensuring a stable base for the grass.
Why is checking for drainage important before installation?
Proper drainage is essential for preserving the integrity of your golf surface. Without it, your investment in turf could be compromised. If necessary, install drainage pipes or create a slight slope to direct water away from the area to prevent water pooling that can damage the turf.
How can I mark the area for my golf practice installation?
You can mark the area by using stakes and string to outline the dimensions of your golf practice area. This visual aid will help you measure and plan the installation accurately, ensuring that the final product fits seamlessly into your backyard layout.
List of Sources
- Prepare Your Space for Installation
- 5 Backyard Putting Green Installation Mistakes & How to Fix Them (https://aglgrass.com/blogs/backyard-putting-green-mistakes)
- How to Make a Backyard Putting Green with Artificial Turf (https://themotzgroup.com/infill_blog/how-to-make-a-backyard-putting-green-with-artificial-turf)
- How to Install Artificial Turf: A Step-by-Step Guide for Homeowners – Hall Turf | Artificial Turf Installation Kansas City KS & MO (https://hallturf.com/how-to-install-artificial-turf-a-step-by-step-guide-for-homeowners)
- How To Make Your Backyard Putting Green Dream a Reality (https://usga.org/content/usga/home-page/course-care/green-section-record/62/issue-17/how-to-make-your-backyard-putting-green-dream-a-reality.html)
- Best Synthetic Grass: Essential Practices for Your Home in Kansas – Hall Turf | Artificial Turf Installation Kansas City KS & MO (https://hallturf.com/best-synthetic-grass-essential-practices-for-your-home-in-kansas)
- Gather Necessary Tools and Materials
- Artificial Turf Material Supply List For Any Installation (https://turfkingz.com/resources/artificial-turf-material-supply-list)
- 4 Steps to Install Artificial Grass Near You in Kansas City – Hall Turf | Artificial Turf Installation Kansas City KS & MO (https://hallturf.com/4-steps-to-install-artificial-grass-near-you-in-kansas-city)
- How To Build a Backyard Putting Green (https://xgrass.com/how-to-build-putting-green.html)
- Essential Tools for DIY Artificial Grass Installation (https://artificialturfexpress.com/blog/15-important-tools-youll-need-for-diy-artificial-grass-installation-in-san-jose)
- DIY Putting Green Installation: A Step-by-Step Guide (https://artificialturfexpress.com/blog/installing-the-best-putting-greens-in-your-yard-the-ultimate-diy-guide)
- Follow Step-by-Step Installation Instructions
- How Long Does a Putting Green Installation Take? Timeline for USA Homes (https://backninegreens.com/blog/how-long-does-a-putting-green-installation-take-step-by-step-timeline)
- Artificial Grass, Market Trends, Business Insights, and Analysis (https://installartificial.com/how/artificial-grass-business-insights-market-trends)
- News – Xtreme Green Synthetic Turf (https://xgreensynthetic.com/news)
- Tour Greens | Backyard Putting Green Cost in 2025 (https://tourgreens.com/backyard-putting-green-cost.html)
- Implement Maintenance Best Practices
- Artificial Putting Green Maintenance: Year-Round Care Guide (https://aglgrass.com/blogs/artificial-putting-green-maintenance)
- Compare Artificial Sport Turf vs. Natural Grass for Your Yard – Hall Turf | Artificial Turf Installation Kansas City KS & MO (https://hallturf.com/compare-artificial-sport-turf-vs-natural-grass-for-your-yard)
- Artificial Golf Greens Maintenance Tips (https://southwestgreens.com/blog/artificial-golf-greens-maintenance-tips)
- Essential Tips to Care for Artificial Grass in Kansas Homes – Hall Turf | Artificial Turf Installation Kansas City KS & MO (https://hallturf.com/essential-tips-to-care-for-artificial-grass-in-kansas-homes)
- Tour Greens | Putting Green Maintenance (https://tourgreens.com/putting-green-maintenance.html)