
Introduction
Transforming your backyard into a golfer’s paradise with a putting green requires meticulous planning and execution. This guide outlines the key steps for installing putting green sod, helping you achieve a professional finish while improving the longevity and performance of your turf.
Many enthusiasts underestimate the complexity involved in creating a putting green, leading to potential pitfalls in the installation process. Understanding the critical elements of this project can significantly influence the outcome, ensuring a successful installation that enhances your outdoor space.
Gather Essential Tools and Materials for Installation
To ensure a smooth and efficient installation process, gathering essential tools and materials beforehand is crucial. Hall Turf emphasizes the importance of preparation, drawing on their extensive experience in artificial turf solutions in Kansas City. Satisfied clients highlight Brock and his team’s meticulous approach, ensuring every installation, including putting green sod, is executed flawlessly. Regularly checking the levelness of the surface during installation is essential to maintain a consistent grade.
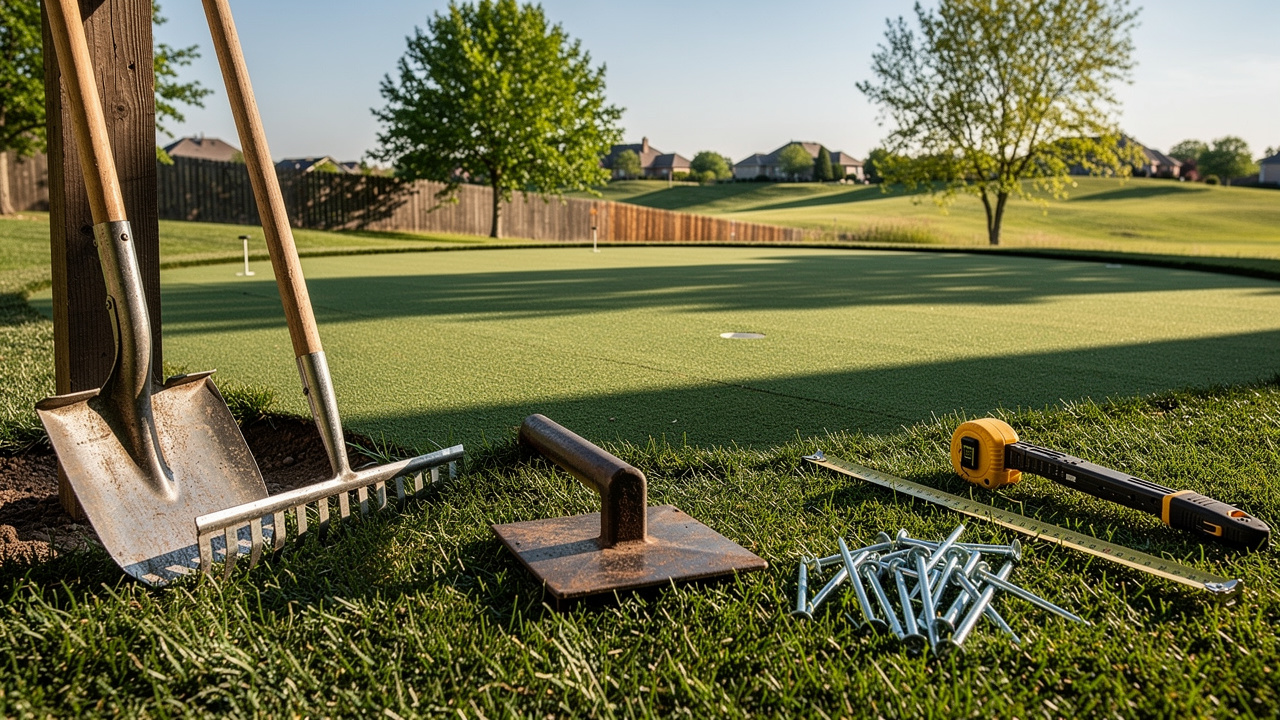
- Shovel: Essential for digging and moving soil to prepare the site.
- Rake: Utilized to smooth the ground, ensuring a flat and uniform surface for the grass.
- Tamper: Important for compacting the soil, creating a stable base that prevents shifting.
- Utility Knife: Necessary for cutting the grass to fit the specific design and layout of your putting green.
- Tape Measure: Essential for precisely gauging the space to guarantee appropriate dimensions of the grass.
- Landscape Spikes: Used to secure the grass in place, preventing movement and ensuring durability.
- Crushed Stone or Gravel: Offers drainage and acts as a sturdy base material for the grass installation.
- Weed Barrier Fabric: Assists in stopping weed development beneath the grass, preserving the integrity and look of your golf surface.
By preparing adequately, you set the stage for a successful installation that meets your expectations and enhances your outdoor space.

Prepare the Site for Your Putting Green
Creating a putting green sod requires careful planning and execution to ensure optimal conditions for the turf. To prepare your site for a putting green, follow these essential steps:
- Select the Location: Choose an area that receives at least six hours of direct sunlight daily and has good drainage. Choosing the wrong location can lead to poor turf health due to insufficient sunlight. Avoid spots with heavy tree cover that may obstruct sunlight, as this can adversely affect turf health.
- Clear the Area: Remove any existing grass, plants, or debris from the selected site. Utilize a shovel or sod cutter to ensure a clean slate for your installation.
- Level the Ground: Use a rake to level the ground, ensuring it is smooth and even. Fill in any low spots with soil and compact the surface using a tamper or plate compactor to create a stable base for the artificial grass. Excavate the area to a depth of about 3-4 inches to accommodate the sub-base materials.
- Add Sub-Base Materials and Install a Drainage System: Incorporate a layer of crushed stone or gravel, about 2-3 inches deep, to provide additional support and stability for the artificial grass. If necessary, create a slight slope in the ground to facilitate water drainage away from the green, preventing water pooling.
- Lay Down Weed Barrier Fabric: Place a weed barrier fabric over the prepared area to prevent weeds from growing through the grass, ensuring a clean and low-maintenance surface.
- Secure the Surface: After the surface is placed, fasten it with landscaping stakes or adhesive according to the manufacturer’s guidelines to prevent shifting and ensure a stable setup.
Following these steps creates a solid foundation for your golf area, enhancing its durability and functionality. Hall Turf provides a range of artificial turf options designed to meet your specific requirements, ensuring a professional installation that meets your expectations. Our experienced team, including experts like Brock, is committed to delivering outstanding service and support for your project. A well-prepared site not only enhances the aesthetic appeal but also significantly extends the lifespan of your putting green sod.

Install the Putting Green Sod
Installing a putting green requires careful attention to detail to achieve a professional finish. To successfully install your putting green sod, adhere to the following steps:
- Excavate the Area: Begin by excavating the existing soil and grass up to 4 inches to prepare a smooth base for the putting green. This step ensures a smooth ball roll and prevents surface irregularities.
- Measure and Cut the Grass: Measure the designated area for the grass. Use a utility knife to cut the sod to fit, ensuring that the edges are straight and clean for a professional appearance.
- Lay the Grass: Start placing the grass from one end of the area, ensuring that the seams of the grass pieces are staggered. This technique helps avoid visible lines and enhances the overall aesthetic. Press the grass down firmly to eliminate any air pockets, which can affect the surface’s integrity.
- Secure the Grass: Use landscape spikes to anchor the edges of the grass to the ground. Place the spikes every 12 inches along the perimeter and at seams for stability. Properly securing the surface is crucial, as spikes provide greater grip and prevent shifting over time. Experts agree that using spikes effectively enhances the durability of the installation.
- Install a Weed Barrier: Lay a weed barrier over the base to prevent weed growth and ensure proper drainage, securing it with galvanized nails or landscape pins.
- Trim Excess Grass: After laying the grass, trim any excess material around the edges to achieve a clean finish. This step is essential for a polished look.
- Install Putting Cups: Cut holes for the putting cups and position them at your desired locations. Ensure that the cups are flush with the surface of the grass to create a seamless appearance.
- Permit to Dry: After setup, let the turf dry for at least 24 hours to allow the infill to settle properly.
By adhering to these steps, you can avoid common pitfalls and ensure the longevity of your putting green sod. Trusting in expert guidance can make all the difference in the quality of your installation.

Maintain Your Putting Green for Optimal Performance
To maintain the quality and longevity of your putting green, implementing effective maintenance strategies is essential:
- Regular Cleaning: Consistently remove debris such as leaves, twigs, and dirt from the surface. Utilizing a leaf blower or a soft-bristled broom is effective for this task, helping to maintain a clean and smooth playing surface.
- Brush the Grass: Regularly brush the grass fibers with a stiff-bristle broom or grass brush. This practice keeps the blades upright, enhancing the natural appearance and ensuring consistent ball roll.
- Check Infill Levels: Periodically inspect the infill layer of your golf course. Maintaining proper infill levels is crucial for optimal performance; add infill as necessary to ensure the turf retains its height and functionality.
- Inspect for Damage: Conduct regular inspections for any signs of wear or damage. Neglecting regular inspections can lead to costly repairs and a shorter lifespan for your putting green. Addressing issues promptly can save you money and extend the lifespan of your putting green sod, which can last 10-15 years with proper care. Brock’s meticulous maintenance practices, supported by positive customer feedback, ensure that your putting green sod remains in top condition.
- Watering: If the grass feels compacted or the infill seems low, give it a light watering. But be careful not to overwater, since that can cause drainage problems and affect how well the grass performs.
By applying these maintenance suggestions, you can guarantee that your golf surface remains a stunning and practical enhancement to your outdoor area, improving both your practice experience and property value. Investing in proper maintenance not only enhances your practice experience but also significantly boosts your property’s value. Research indicates that 78% of homeowners investing in artificial turf for their backyards select golf surfaces for leisure and resale value reasons. With Hall Turf’s expert solutions, you can trust that your putting green sod will be installed and maintained to the highest standards.

Conclusion
Successfully installing putting green sod requires a methodical approach that ensures a beautiful and functional outcome. By following the outlined steps, from gathering essential tools and materials to executing proper maintenance, anyone can create a putting green that enhances their outdoor space. Preparation and attention to detail are crucial for a successful installation, as they ensure the quality of the sod and the groundwork laid beforehand.
Key points discussed include:
- The importance of selecting the right location
- Preparing the site meticulously
- Adhering to best practices during installation
Each step, from measuring and cutting the grass to securing it properly, plays a pivotal role in achieving a professional finish. Furthermore, regular maintenance practices, such as cleaning and inspecting for damage, are crucial to extending the lifespan and performance of the putting green.
By investing in proper installation, homeowners can enjoy a beautiful putting green for years to come. Not only does it provide a fantastic recreational area, but it also adds significant value to the property. The effort you invest in creating and maintaining your putting green will not only enhance your outdoor space but also elevate your property’s value.
Frequently Asked Questions
Why is it important to gather tools and materials before installation?
Gathering essential tools and materials beforehand is crucial for a smooth and efficient installation process, as emphasized by Hall Turf’s experience in artificial turf solutions.
What tools are essential for installing artificial turf?
Essential tools for installation include a shovel, rake, tamper, utility knife, tape measure, landscape spikes, crushed stone or gravel, and weed barrier fabric.
What is the purpose of a shovel in the installation process?
A shovel is essential for digging and moving soil to prepare the site for the artificial turf installation.
How does a rake contribute to the installation?
A rake is utilized to smooth the ground, ensuring a flat and uniform surface for the grass.
What role does a tamper play in the installation?
A tamper is important for compacting the soil, creating a stable base that prevents shifting.
Why is a utility knife necessary during installation?
A utility knife is necessary for cutting the grass to fit the specific design and layout of the putting green.
How does a tape measure assist in the installation process?
A tape measure is essential for precisely gauging the space to guarantee appropriate dimensions of the grass.
What are landscape spikes used for?
Landscape spikes are used to secure the grass in place, preventing movement and ensuring durability.
What is the function of crushed stone or gravel in the installation?
Crushed stone or gravel offers drainage and acts as a sturdy base material for the grass installation.
How does weed barrier fabric benefit the installation?
Weed barrier fabric assists in stopping weed development beneath the grass, preserving the integrity and appearance of the golf surface.
What is the significance of checking the levelness of the surface during installation?
Regularly checking the levelness of the surface during installation is essential to maintain a consistent grade.
List of Sources
- Gather Essential Tools and Materials for Installation
- What Tools Do I Need to Install Artificial Turf? (https://integriturf.com/glossary/what-tools-do-i-need-to-install-artificial-turf)
- 15 Crucial Tools for DIY Artificial Grass Installation in San Jose (https://artificialturfexpress.com/blog/15-important-tools-youll-need-for-diy-artificial-grass-installation-in-san-jose)
- DIY Putting Green Installation: A Step-by-Step Guide (https://artificialturfexpress.com/blog/installing-the-best-putting-greens-in-your-yard-the-ultimate-diy-guide)
- Don’t Start Your Artificial Turf Installation Without These Important Install Tools – SGW Las Vegas (https://sgwnevada.com/las-vegas/blog/2023/07/31/dont-start-your-artificial-turf-installation-without-these-important-install-tools)
- Master Ground Prep: DIY Turf Installation Made Easy (https://artificialturfexpress.com/blog/the-diyers-guide-to-ground-prep-for-turf-installation-and-accessories)
- Prepare the Site for Your Putting Green
- Master Ground Prep: DIY Turf Installation Made Easy (https://artificialturfexpress.com/blog/the-diyers-guide-to-ground-prep-for-turf-installation-and-accessories)
- Light The Way To Healthy Putting Greens (https://usga.org/course-care/green-section-record/57/19/light-the-way-to-healthy-putting-greens.html)
- Expert Tips to Prevent Common Synthetic Grass Putting Green Installation Mistakes | Synthetic Grass Warehouse (https://syntheticgrasswarehouse.com/blog/expert-tips-to-prevent-common-synthetic-grass-putting-green-installation-mistakes)
- 4 Best Practices for Your Outdoor Golf Putting Green – Hall Turf | Artificial Turf Installation Kansas City KS & MO (https://hallturf.com/4-best-practices-for-your-outdoor-golf-putting-green)
- Install the Putting Green Sod
- DIY Putting Green Installation: A Step-by-Step Guide (https://artificialturfexpress.com/blog/installing-the-best-putting-greens-in-your-yard-the-ultimate-diy-guide)
- Case Studies: Landscape & Recreation – Synthetic Turf Council (https://syntheticturfcouncil.org/page/Case_Studies_2)
- Artificial Turf Market Size, Share & Trends Report, 2026-2033 (https://grandviewresearch.com/industry-analysis/artificial-turf-market)
- laturfandpaver.com (https://laturfandpaver.com/turf-spikes-the-essential-component-for-a-durable-synthetic-turf-installation)
- The Dos and Don’ts of Installing an Artificial Turf Putting Green – OC Turf & Putting Greens (https://octurfandputtinggreens.com/the-dos-and-donts-of-installing-an-artificial-turf-putting-green)
- Maintain Your Putting Green for Optimal Performance
- Backyard Putting Green Maintenance: Keep Your Roll True (https://turfresh.com/blog/helpful-artificial-grass-maintenance-tips-for-your-backyard-putting-green)
- Artificial Golf Greens Maintenance Tips (https://southwestgreens.com/blog/artificial-golf-greens-maintenance-tips)
- Artificial Putting Green Maintenance: Year-Round Care Guide (https://aglgrass.com/blogs/artificial-putting-green-maintenance)
- visionturfandlighting.com (https://visionturfandlighting.com/how-to-maintain-your-outdoor-putting-green-year-round)
- Tour Greens | Putting Green Maintenance (https://tourgreens.com/putting-green-maintenance.html)