
Introduction
Transforming an ordinary backyard into a golfer’s paradise is achievable through the creation of a personal putting green. However, the journey from concept to completion necessitates meticulous planning and execution. This guide delineates the essential steps for a successful turf putting green installation, ensuring that enthusiasts enhance their outdoor space while enjoying optimal playability and longevity.
Critical factors can significantly influence the success of this ambitious project. By exploring the nuances of location selection, site preparation, and installation techniques, we uncover the complexities that must be navigated to achieve a flawless putting surface.
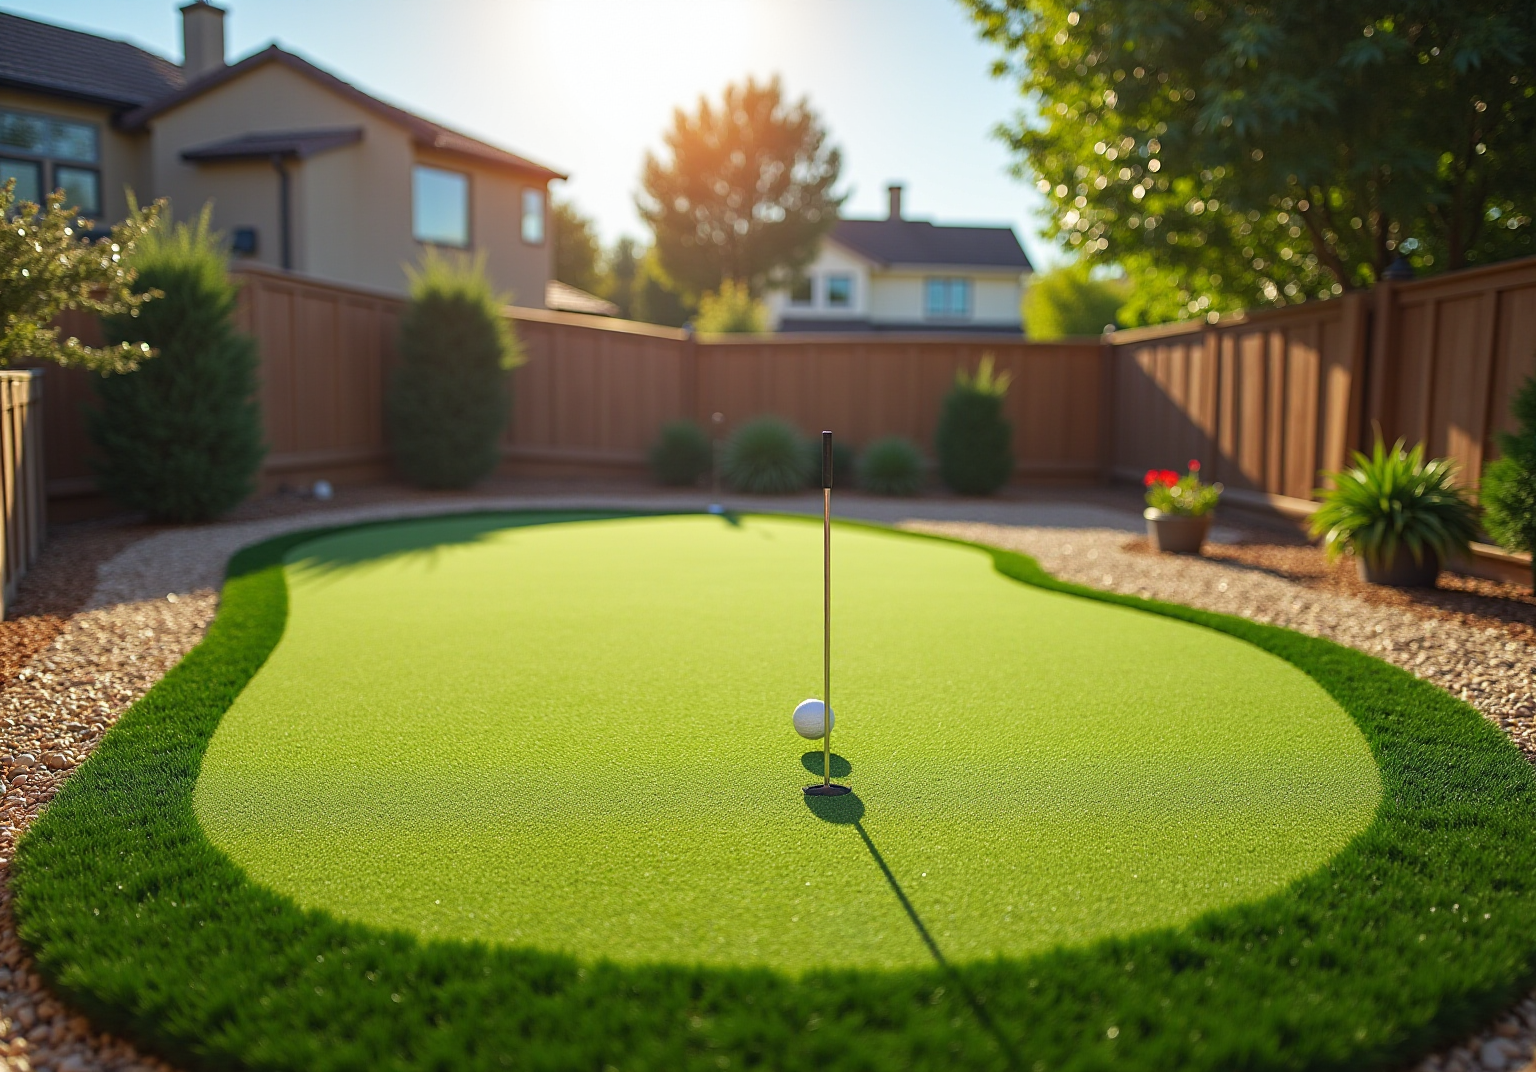
Select the Ideal Location for Your Putting Green
- Assess Sunlight Exposure: Choose a location that receives ample sunlight throughout the day. Sunlight is crucial for maintaining the health of artificial turf, as it helps prevent moisture buildup that can lead to mold and deterioration. A south-facing area is ideal, as it provides better visibility and reduces shadows during peak hours.
- Evaluate Drainage: Confirm that the area has proper drainage to prevent water pooling, which can harm the turf. A gentle slope away from buildings is preferable, as it facilitates proper water runoff and extends the lifespan of the turf.
- Consider Accessibility: The golf area should be easily accessible for regular use and maintenance. Avoid placing it in high-traffic areas that could damage the surface, ensuring it remains in excellent condition for practice.
- Check for Obstacles: Identify any trees, fences, or other structures that may obstruct play or create unwanted shade. A clear area maximizes the sunlight exposure and ensures that the turf receives adequate sunlight, which is essential for its health and performance. As noted by professionals, unobstructed sunlight is vital for the longevity of artificial turf. Scott Sachse, with his experience at Hall Turf, emphasized that the team responsible for installation was meticulous in ensuring the area was prepared correctly for optimal performance.
- Visualize the Layout: Sketch the proposed arrangement of the golf area to assess how it integrates with your yard. This planning step helps determine the best location, ensuring it enhances the overall landscape while providing an enjoyable playing experience. Consulting with a professional, such as Brock from Hall Turf, can offer valuable insights into the best design practices for your specific space, given his reputation for detail-oriented approaches and creativity.

Prepare the Site: Measure and Clear the Area
- Start by using stakes and string to outline the dimensions of your putting green. This visual guide is essential for maintaining accuracy during installation and ensuring the green fits perfectly within the designated area.
- Remove Existing Grass and Debris: Clear the location of any existing grass, plants, rocks, or debris. Use a shovel or a sod cutter for larger sections to create a clean slate for your new turf. This step is critical, as any leftover materials can compromise the integrity of the base.
- Check for Utilities: Before any excavation, confirm that there are no underground utilities present. Contact local utility companies to avoid potential hazards and ensure a safe installation process.
- Measure the Space: Utilize a measuring tape to double-check the dimensions of the marked section. This will help prevent any costly modifications later.
- Level the Ground: After clearing the space, use a rake to make the ground as even as possible. A level surface is crucial, which will enhance the performance and longevity of your putting green.
Brock, a key member of the Hall Turf team, exemplifies the professionalism and attention to detail that homeowners can expect during the installation process. His commitment to quality has earned praise from clients, ensuring that your project will be handled with care and expertise.

Level the Ground and Build a Solid Base
- Excavate the Zone: Start by digging down about 4-6 inches to establish a consistent depth throughout the section. This excavation is crucial for accommodating the base material that will support the turf.
- Add Base Material: Next, fill the excavated area with a layer of gravel, approximately 2-4 inches deep. This base layer is vital for drainage, as it provides a foundation, ensuring stability and proper drainage. High-quality base material often incorporates a mix of materials to enhance durability and performance.
- Compact the Base: Thoroughly compact the base material using a plate compactor. This step is essential to prevent settling and to create a surface that can endure foot traffic and weather conditions. A well-compacted base is critical for maintaining the integrity of the surface during use over time.
- Check for Levelness: After compacting, use a level to verify that the surface is even. Adjustments may be necessary during installation to achieve a flat playing surface, which is crucial for putting.
- Install a Weed Barrier: Finally, lay down a weed barrier over the compacted base. This barrier prevents weeds from growing through the grass, which can disrupt the surface and impact playability. A properly installed weed barrier contributes to the putting green installation.

Install and Secure the Artificial Turf
- Roll Out the Surface: Start by rolling out the turf over the prepared base. It is crucial that the base is properly compacted and has a slight slope of 1-2% to facilitate water drainage from the surface. Allow the grass to acclimate for several hours to minimize creasing and ensure optimal performance. Homeowners can rely on Hall Turf, as numerous clients have commended the team’s expertise and commitment to quality during installation.
- Cut to Fit: Utilize a utility knife to cut the turf to fit the designated area, ensuring clean edges that align with the layout. It is important to pay attention to the grain and direction of the fibers to achieve a seamless appearance when joining pieces. Clients, such as Les Boatright, have remarked on the team’s creativity and thoroughness in ensuring a perfect fit for their projects.
- Secure the Grass: Employ high-quality galvanized nails or landscape staples to secure the grass around the perimeter and at seams. Space these fasteners approximately 6 inches apart to ensure stability and withstand foot traffic and weather conditions. Scott Sachse has highlighted the professionalism of the crew, which contributes to a secure and durable installation.
- Join Seams: If your project consists of multiple pieces of grass, use seam tape and adhesive to connect them securely. Ensure that the fibers align for a seamless appearance, which enhances both aesthetics and functionality. Proper installation accessories are essential for the longevity and performance of the turf, a point emphasized by satisfied customers who appreciate the long-lasting results.
- Check for Levelness: After securing the grass, assess the surface for any uneven areas. Make necessary adjustments to guarantee a smooth playing surface, which is vital for a pleasant experience on the green. Keep in mind that the lifespan ranges between 15 and 25 years, making it a valuable investment for your property. Homeowners appreciate a product that enhances their outdoor area with Hall Turf’s expert installation.

Add Infill and Make Final Adjustments
- Choose the Right Infill: Selecting the appropriate infill material, such as silica sand or rubber granules, is crucial for your grass type and desired performance. Choosing silica sand for its durability or rubber granules for shock absorption is essential for maintaining the longevity and performance of the putting green. Industry experts emphasize that proper infill contributes to stability and energy restitution, both vital for optimal play conditions. Hall Turf’s team, led by Brock, offers expert guidance in selecting infill tailored to your specific needs.
- Spread the Infill: Use a drop spreader to evenly distribute the infill across the grass surface. Aim for a depth of approximately 1/4 inch, as this is essential for optimal ball bounce and consistent playing conditions. Regular monitoring with an infill depth gauge can help ensure that the depth remains consistent and effective during the installation, ensuring a high-quality result.
- Brush the Turf: Utilize a stiff-bristled broom to work the infill down into the turf fibers. Brush in multiple directions to ensure even distribution, which enhances traction and minimizes the risk of slipping during play. Experts recommend this technique to maintain a safe playing surface. Brock’s expertise in turf installation ensures that this stage is executed flawlessly, which contributes to a dependable and enjoyable golf surface experience.
- Check for Levelness Again: After adding the infill, inspect the surface for any uneven spots. Make adjustments as necessary to maintain a smooth and level playing surface, as inconsistent infill depth can negatively impact ball behavior and overall performance. Health and safety concerns regarding certain infill materials, particularly recycled rubber, should also be considered during this process. Hall Turf’s commitment to quality in turf installation means they take these factors seriously, ensuring a safe and effective playing environment.
- Final Inspection: Walk around the putting green to check for any loose seams or areas needing additional securing. Make final adjustments to ensure the surface is even, providing a reliable surface for practice and enjoyment. Customers have expressed satisfaction with Hall Turf’s thorough final inspections, which guarantee that every installation meets high standards of quality and performance.

Conclusion
In conclusion, selecting the right steps for a successful turf putting green installation is essential for creating a high-quality and enjoyable golfing experience in your backyard. By thoughtfully considering factors such as location, site preparation, and the installation process, homeowners can ensure that their putting green not only enhances their outdoor space but also remains functional and visually appealing for years to come.
Key steps include:
- Assessing sunlight exposure
- Ensuring proper drainage
- Meticulously preparing the site
Each phase, from leveling the ground to adding infill, significantly impacts the longevity and performance of the putting green. Insights from professionals, including those from Hall Turf, highlight the importance of expert guidance and attention to detail throughout the installation process.
Ultimately, investing time and effort into the installation of a turf putting green can yield substantial rewards, transforming your property into a personal golfing oasis. By adhering to these steps and consulting with experienced professionals, homeowners can create a beautiful and functional putting green that enhances their outdoor enjoyment and practice. Seize the opportunity to elevate your home and golfing experience by embarking on this rewarding project today.
Frequently Asked Questions
What factors should I consider when selecting a location for my putting green?
You should assess sunlight exposure, evaluate drainage, consider accessibility, check for obstacles, and visualize the layout.
Why is sunlight exposure important for a putting green?
Adequate sunlight exposure helps maintain the health of synthetic grass by preventing moisture buildup that can lead to mold and deterioration. A south-facing orientation is ideal for maximizing sunlight.
How can I ensure proper drainage for my putting green?
Confirm that the area has effective drainage to prevent water pooling. A gentle slope away from buildings is preferable to facilitate proper water runoff and extend the lifespan of the turf.
What should I avoid when choosing a location for my putting green?
Avoid placing the putting green in high-traffic areas that could damage the surface and ensure there are no trees, fences, or structures that may obstruct play or create unwanted shade.
How can I visualize the layout of my putting green?
You can sketch the proposed arrangement of the golf area to assess how it integrates with your yard. This helps determine the size and shape of the area to enhance the overall landscape.
What are the initial steps to prepare the site for a putting green?
Start by marking the area with stakes and string, removing existing grass and debris, checking for underground utilities, measuring the space, and leveling the ground.
Why is it important to remove existing grass and debris before installation?
Clearing the location of any existing materials is critical, as leftover grass, plants, or rocks can compromise the integrity of the turf putting green installation.
How can I ensure accurate measurements for my putting green?
Use a measuring tape to double-check the dimensions of the marked section to verify that your golf area will fit properly, preventing costly modifications later.
What role does leveling the ground play in the installation process?
A smooth, even surface is crucial for turf putting green installation, as it enhances the performance and longevity of the putting green.
List of Sources
- Select the Ideal Location for Your Putting Green
- How To Choose The Right Location For Your Putting Green | Northeast Synthetic Turf (https://northeastsyntheticturf.com/how-to-choose-the-right-location-for-your-putting-green)
- syntheticturfnorthwest.com (https://syntheticturfnorthwest.com/what-to-know-when-installing-a-putting-green-in-your-yard)
- Ensure a Perfect Outdoor Putting Green Installation With These 5 Tips – SGW Texas (https://sgwtexas.com/blog/2023/09/28/ensure-a-perfect-outdoor-putting-green-installation-with-these-5-tips)
- Backyard Putting Green Design: Best Tips & Ideas (https://aglgrass.com/blogs/backyard-putting-green-design)
- fieldturflandscape.com (https://fieldturflandscape.com/golf-putting-green/how-to-position-your-backyard-putting-green)
- Prepare the Site: Measure and Clear the Area
- 5 Backyard Putting Green Installation Mistakes & How to Fix Them (https://aglgrass.com/blogs/backyard-putting-green-mistakes)
- Expert Tips to Prevent Common Synthetic Grass Putting Green Installation Mistakes | Synthetic Grass Warehouse (https://syntheticgrasswarehouse.com/blog/expert-tips-to-prevent-common-synthetic-grass-putting-green-installation-mistakes)
- usturfsandiego.com (https://usturfsandiego.com/news)
- Plastic Turf Fields Are Taking Over America (https://nytimes.com/2025/07/26/business/artificial-turf-grass-sports.html)
- Level the Ground and Build a Solid Base
- ccgrass.com (https://ccgrass.com/how-to-lay-artificial-grass-on-soil)
- lowes.com (https://lowes.com/n/how-to/install-artificial-grass)
- Answering Every Question You Have About Artificial Grass Installation – OC Turf & Putting Greens (https://octurfandputtinggreens.com/answering-every-question-you-have-about-artificial-grass-installation)
- maslandscaping.com (https://maslandscaping.com/artificial-grass-outdoor-installation)
- Install and Secure the Artificial Turf
- syntheticturfnorthwest.com (https://syntheticturfnorthwest.com/what-to-know-when-installing-a-putting-green-in-your-yard)
- How To Install the Ultimate Artificial Turf Putting Green | Synthetic Grass Warehouse (https://syntheticgrasswarehouse.com/blog/how-to-install-the-ultimate-artificial-turf-putting-green)
- lawnpop.com (https://lawnpop.com/installation-times-what-to-expect-from-artificial-turf)
- 5 Backyard Putting Green Installation Mistakes & How to Fix Them (https://aglgrass.com/blogs/backyard-putting-green-mistakes)
- Fixing 5 Challenges in Commercial Artificial Turf Installations (https://velcro.com/news-and-blog/2024/07/fixing-5-challenges-in-artificial-turf-installation)
- Add Infill and Make Final Adjustments
- replaymaintenanceusa.com (https://replaymaintenanceusa.com/post/the-importance-of-infill-depth-in-synthetic-turf-fields-ensuring-longevity-and-performance)
- Choosing the Perfect Putting Green Infill: Why It Matters – SGW Bay Area (https://sgwbayarea.com/blog/choosing-the-perfect-putting-green-infill-why-it-matters)
- dataintelo.com (https://dataintelo.com/report/global-sports-turf-infill-market)
- Artificial Turf Infill Market: Trends & Growth Analysis 2035 (https://wiseguyreports.com/reports/artificial-turf-infill-market)
- Why Is Infill Crucial for Synthetic Turf Putting Green Installations? – SGW Sacramento (https://sgwsacramento.com/blog/why-is-infill-crucial-for-synthetic-turf-putting-green-installations)