
Introduction
Transforming an outdoor space with artificial grass significantly enhances its appeal and functionality. However, the journey to achieving a lush, green lawn begins long before the first blade of turf is laid. This guide provides homeowners with a step-by-step approach to ensure a successful installation. It covers everything from meticulously preparing the ground to applying the final touches that elevate the look of the finished product.
With numerous factors to consider – from selecting the right materials to avoiding common pitfalls – how can homeowners ensure that their artificial grass installation not only looks great but also stands the test of time?
Prepare Your Installation Area
-
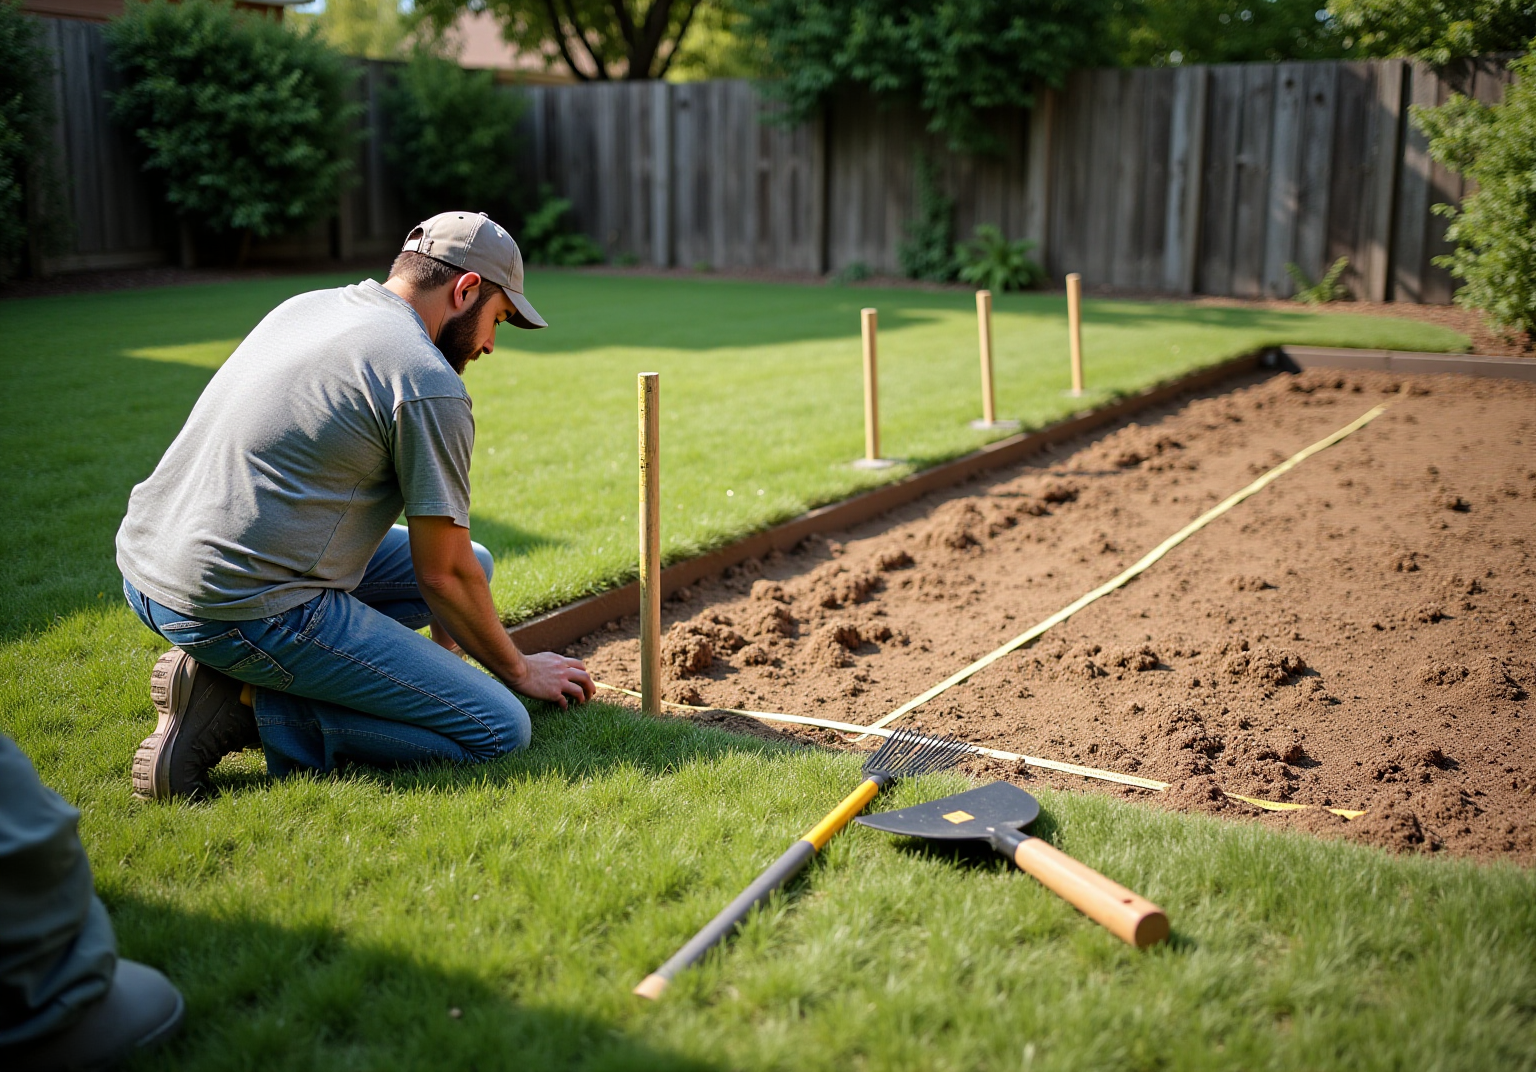
Measure and Mark the Area: Begin by determining the dimensions of the space designated for synthetic turf installation. Utilize stakes and string to outline the perimeter, ensuring it remains straight and even.
-
Remove Existing Grass and Debris: Clear the area of any existing grass, weeds, rocks, or debris. This can be accomplished using a shovel or a sod cutter. Aim to remove at least 2-3 inches of soil to establish a clean base.
-
Level the Ground: After clearing the area, employ a rake to level the ground. Fill in any low spots with soil to create a flat surface. This step is essential for proper drainage and to prevent unevenness in the turf. As specialists emphasize, “leveling the ground is crucial for a successful setup.”
-
Install a Weed Barrier: To inhibit weeds from growing through the artificial grass, lay down a weed barrier fabric over the entire area. This measure will help preserve the integrity of your setup over time.
-
Compact the Soil: Utilize a plate compactor or a hand tamper to compact the soil. This step ensures a solid foundation and minimizes the risk of settling after the turf is installed.
Average Preparation Time: Homeowners can anticipate spending approximately 1-2 days preparing the setup area, depending on the size and condition of the site.
Successful Preparation Example: For instance, a recent project in Kansas City involved a homeowner who meticulously followed these steps, resulting in a flawless setup that significantly enhanced their outdoor space. Clients have commended Hall Turf for their exceptional service, with one homeowner noting, “Brock came out, evaluated my needs and came up with the best solution.” Another client highlighted the professionalism of the crew, stating, “They did an exceptional job… beyond professional, polite, and courteous.”
With the artificial turf market projected to reach USD 9.97 billion by 2030, proper setup preparation is increasingly crucial to ensure a durable and visually appealing surface.

Build a Strong Base Layer
-
Selecting the appropriate base material is crucial for a successful artificial grass installation very near me. Crushed stone, gravel, or decomposed granite are excellent options, providing both stability and drainage. For most applications, a depth of 3 to 4 inches is recommended, as this sub-base layer accommodates drainage needs and supports foot traffic. Class II road base is considered the best all-around sub-base for synthetic grass due to its solid foundation and effective drainage capabilities.
-
Spread the Base Material: After preparing the area, evenly distribute the selected base material across the surface. Use a rake to ensure a consistent thickness, which is essential for achieving a stable foundation.
-
Compact the Base: Once the base material is spread, thoroughly compact it using a plate compactor. This step is vital to prevent future settling and to create a strong, durable base for the grass. Proper compaction enhances the longevity of the artificial grass installation very near me and reduces maintenance issues.
-
Check for Levelness: Following compaction, verify the level of the base with a level or straight edge. Make any necessary adjustments to ensure the surface is flat and even, which is critical for preventing uneven wear and drainage problems.
-
Create a Slight Slope for Drainage: If applicable, establish a slight slope of about 1-2% away from structures. This gradient is important for directing water away from the turf surface, helping to prevent pooling and ensuring effective drainage, which is essential for maintaining the turf’s appearance and functionality. Additionally, consider adding a weed barrier to inhibit weed growth without obstructing drainage, thereby enhancing the system’s effectiveness.

Install and Secure the Artificial Grass
-
Roll Out the Grass: Start by rolling out the artificial grass over the prepared base. Allow it to acclimate for about three hours to minimize curling from packaging, which facilitates a smoother setup process and helps prevent wrinkles. Hall’s team, known for their meticulous attention to detail, ensures this step is executed flawlessly, laying the groundwork for a successful installation.
-
Cut the Grass to Fit: Utilize a sharp utility knife to trim the edges of the grass for an accurate fit. Always cut from the back to safeguard the grass blades and maintain a clean edge. Brock, a seasoned expert at Hall Grass, underscores the significance of precision in this step to achieve a seamless appearance.
-
Secure the Grass: Fasten the grass around the perimeter using landscape staples or 7-inch galvanized nails, spacing them 6 to 8 inches apart. This spacing is essential for keeping the grass securely in place and preventing movement over time. Customers have praised Hall’s team for their professionalism and thoroughness in effectively securing the grass.
-
Seam the Surface (if necessary): For installations that require multiple pieces, use seaming tape and adhesive to join the sections. Ensure that the seams are tight and aligned to create a seamless look, as poorly installed seams can detract from the overall appearance of the lawn. Brock’s expertise guarantees that seams are handled expertly, enhancing the overall aesthetic.
-
Brush the Grass: After securing the area, employ a power broom or a stiff-bristled broom to lift the grass fibers upright. This step not only enhances the natural appearance of the grass but also aids in evenly distributing any infill material, contributing to a lush, realistic look. Customers have remarked on how Hall’s attention to detail in this step results in a beautiful finish.
-
Install a Weed Barrier: To prevent weeds from growing through the artificial turf, lay a weed barrier on top of the compacted base before rolling out the turf. This step is vital for ensuring the durability and appearance of the setup, a practice that Hall consistently follows to maintain high standards.
-
Common Mistakes to Avoid: Be aware of common setup errors such as inadequate ground preparation and poor drainage planning, which can lead to issues later on. Proper preparation is crucial for a successful artificial grass installation very near me, and Hall Turf’s experienced team is well-equipped to prevent these pitfalls.

Apply Finishing Touches for a Perfect Finish
-
Add Infill Material: If your synthetic turf requires infill, distribute it evenly across the surface using a drop spreader. Infill is essential as it weighs down the grass and keeps the blades upright, which enhances both appearance and durability.
-
Brush the Surface Again: After applying the infill, brush the surface again to ensure even distribution and to help the grass blades stand tall, creating a vibrant and natural appearance.
-
Trim Edges and Seams: Inspect the edges and seams for any unevenness. Trim any excess grass or adjust seams as necessary to achieve a clean, finished appearance that blends seamlessly with the surrounding landscape.
-
Install Edging (if desired): For a polished look, consider installing edging around the perimeter of the turf. Options include landscape timbers, metal edging, or plastic borders, which help define the area and prevent shifting.
-
Final Inspection: Conduct a thorough inspection of the installation. Check for any loose areas, uneven spots, or visible seams. Make any final adjustments to ensure a flawless finish, as these finishing touches significantly contribute to the longevity and aesthetic appeal of your artificial grass.

Conclusion
Successfully installing artificial grass requires careful preparation and execution to ensure a durable and visually appealing lawn. This guide has outlined essential steps, from preparing the installation area and building a strong base layer to securing the grass and applying finishing touches. Each phase is crucial in achieving a flawless result that enhances outdoor spaces.
Key insights highlight the importance of thorough site preparation, including:
- Measuring
- Leveling
- Compacting the ground
- Selecting the right base materials for stability and drainage
The installation process emphasizes precision in:
- Cutting and securing the grass
- Proper infill application for a natural appearance
By adhering to these best practices, homeowners can avoid common pitfalls and enjoy a beautiful, low-maintenance lawn.
Ultimately, investing time and effort into the installation process not only enhances the aesthetic appeal of outdoor areas but also contributes to the longevity and functionality of artificial grass. Following these guidelines ensures that the installation withstands the test of time, allowing homeowners to reap the benefits of their synthetic turf for years to come. For those considering artificial grass, taking the first step toward installation can transform outdoor spaces into vibrant, usable areas that require minimal upkeep.
Frequently Asked Questions
What is the first step in preparing the installation area for synthetic turf?
The first step is to measure and mark the area by determining the dimensions of the designated space and using stakes and string to outline the perimeter.
How should existing grass and debris be removed from the installation area?
Existing grass, weeds, rocks, and debris should be cleared using a shovel or a sod cutter, aiming to remove at least 2-3 inches of soil to create a clean base.
Why is leveling the ground important before installing synthetic turf?
Leveling the ground is crucial for proper drainage and to prevent unevenness in the turf. It involves using a rake to create a flat surface and filling in any low spots with soil.
What is a weed barrier and why should it be installed?
A weed barrier is a fabric laid over the entire area to inhibit weeds from growing through the artificial grass, helping to preserve the integrity of the setup over time.
How should the soil be compacted during the preparation process?
The soil should be compacted using a plate compactor or a hand tamper to ensure a solid foundation and minimize the risk of settling after the turf is installed.
How much time should homeowners expect to spend preparing the installation area?
Homeowners can anticipate spending approximately 1-2 days preparing the setup area, depending on its size and condition.
Can you provide an example of successful preparation for synthetic turf installation?
A recent project in Kansas City involved a homeowner who meticulously followed the preparation steps, resulting in a flawless setup that enhanced their outdoor space. Clients praised the service, highlighting the professionalism and courtesy of the crew.
Why is proper setup preparation increasingly important in the synthetic turf market?
Proper setup preparation is crucial to ensure a durable and visually appealing surface, especially as the artificial turf market is projected to reach USD 9.97 billion by 2030.