
Introduction
Transforming a backyard into a lush, green oasis with turf grass is a rewarding endeavor that enhances both the aesthetic and functionality of outdoor spaces. This guide provides a clear, step-by-step approach to ensure successful turf grass installation at home, covering everything from the removal of existing grass to the application of finishing touches.
However, rushing the process or cutting corners can lead to disappointing results. The difference between a thriving lawn and a patchy one often lies in meticulous preparation and execution. By following the essential steps outlined in this guide, homeowners can achieve a beautifully manicured lawn that not only elevates their outdoor environment but also stands the test of time.
Remove Existing Grass and Prepare the Area
-
Clear the Area: Start by removing any furniture, decorations, or obstacles from the work site. This creates an open workspace essential for your project.
-
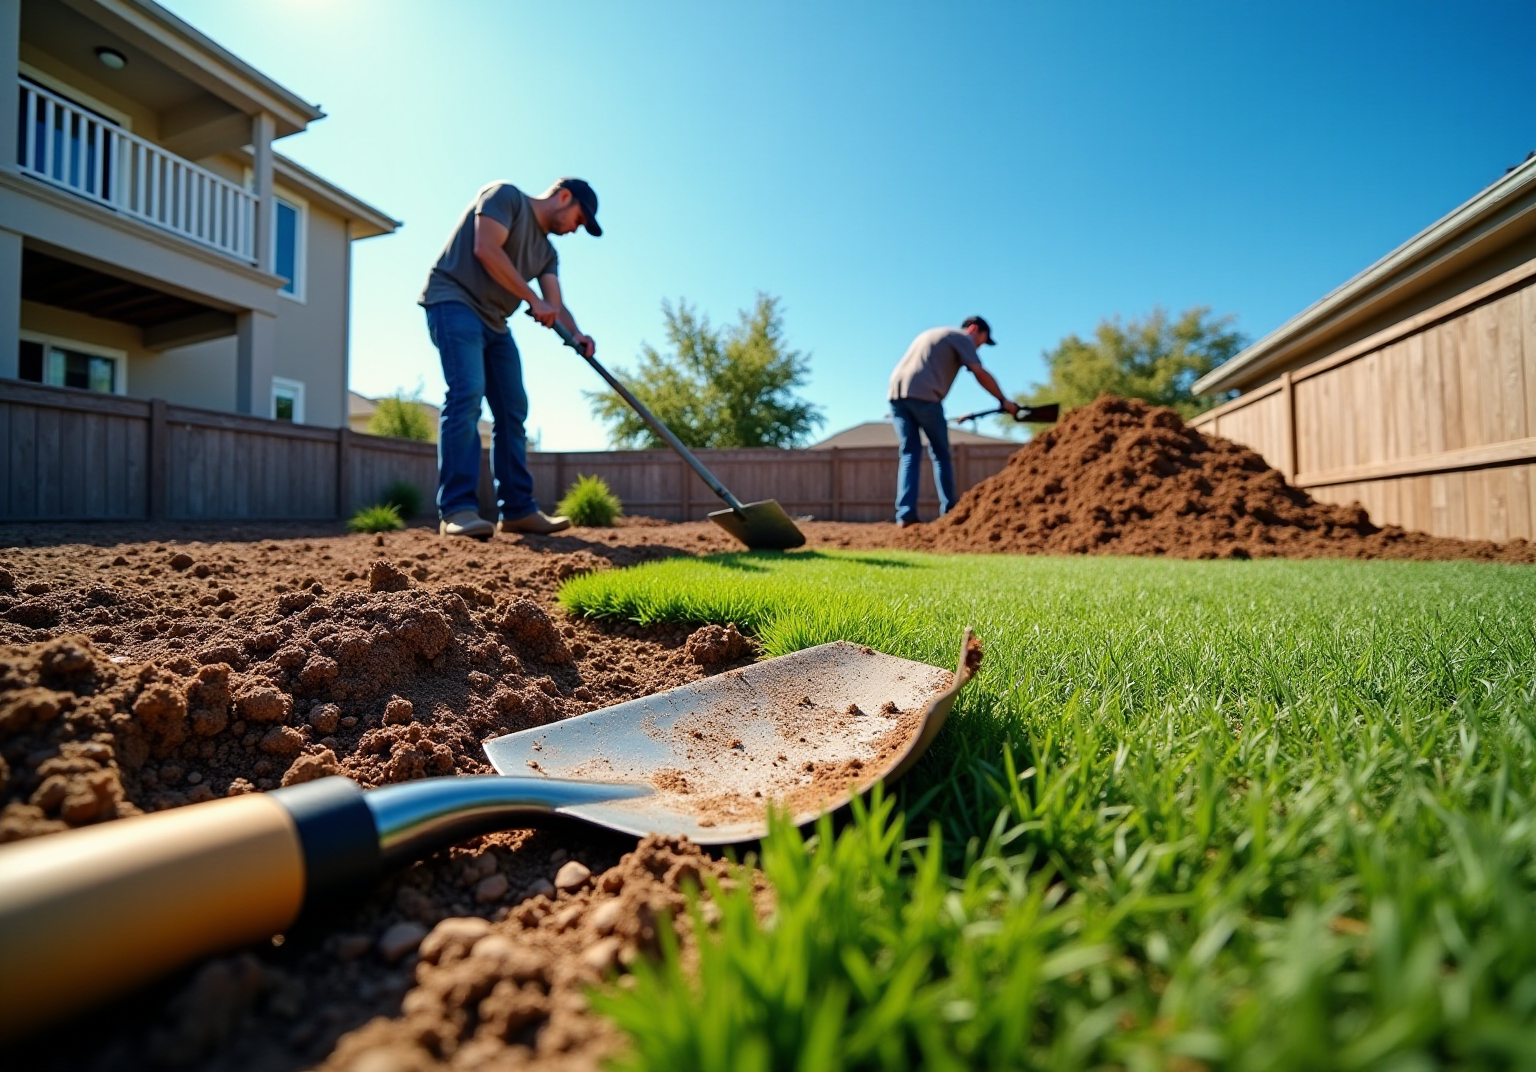
Remove Existing Grass: Use a sod cutter or shovel to remove the top layer of grass and soil, approximately 3-4 inches deep. For larger areas, consider renting a machine to expedite the process.
-
Dispose of Debris: Collect and dispose of the removed grass and soil according to local regulations. Ensure the area is free of roots, rocks, and other debris that could interfere with the turf grass installation.
-
Level the Ground: After clearing the area, use a rake to level the ground. This step is crucial for creating a smooth surface for the turf grass installation, helping to prevent uneven patches after the installation.
-
Check for Drainage: Confirm that the area has adequate drainage. If you notice any low spots, fill them with soil to achieve a more level surface, which is vital for the durability and functionality of your artificial grass.

Prepare the Base Layer for Turf Installation
-
Choose Base Material: Selecting the right base material is essential for effective surface installation. Recommended options include crushed stone or gravel, known for their excellent drainage and stability. Additionally, using hypoallergenic and anti-microbial materials can enhance the safety of the environment for pets. The Association of Synthetic Grass Installers recommends a 70:30 ratio of solid mass to fines for optimal performance.
-
Excavate the Site: Start by excavating the site to a depth of 3-4 inches, tailored to the specific base material selected. This depth is crucial for ensuring proper drainage and support, preventing issues such as standing water and uneven surfaces, which can affect both the grass’s performance and the comfort of pets.
-
Spread the Base Material: After excavation, evenly distribute the base material across the area. Use a rake to achieve a consistent layer, which is vital for establishing a sturdy base that will support the grass and its drainage system, ensuring a clean and safe environment for pets.
-
Compact the Base: Compacting the base material is a critical step. Employ a plate compactor or tamper to ensure the base is solid and stable. Proper compaction minimizes settling and enhances the durability of the turf grass installation, which is essential for maintaining a pleasant environment for dogs and cats.
-
Check for Levelness: Once compacted, verify the surface’s levelness using a level tool. Make necessary adjustments by adding or removing material to ensure an even surface, which is vital for a successful turf grass installation. Accurate leveling significantly impacts the overall appearance and usability of the grass, especially in pet areas.
-
Consider Infill and Weed Barriers: To enhance comfort and usability, particularly in pet zones, consider using infill materials that improve the grass’s texture and incorporate deodorizers to reduce ammonia odors from pet urine. Additionally, implementing a weed barrier can prevent weeds from growing through the turf while still allowing for proper drainage.
-
Verify Contractor Credentials: Before proceeding with installation, ensure you verify the credentials of any contractors you plan to hire. This step is crucial for confirming that you are working with reputable professionals capable of delivering quality results. Hall Turf’s expertise can provide peace of mind throughout this process.

Cut and Fit the Artificial Turf to Size
-
Measure the Area: Start by accurately measuring the length and width of the space with a measuring tape. Record these measurements to ensure precision, as research indicates that accurate measuring is crucial for a successful turf grass installation, minimizing the chances of gaps or overlaps.
-
Clear the Area: Prior to laying the sod, remove any existing vegetation, rocks, and debris from the lawn. This step is vital for proper ground preparation in turf grass installation, providing a stable base for the grass and preventing future complications.
-
Lay Out the Turf: Roll out the artificial turf in the designated area, allowing it to relax and settle for a few hours. This step is important to reduce any curling that may have occurred during packaging, facilitating a smoother setup process. Clients like Scott Sachse have praised Hall Turf for their exceptional setup work, noting the professionalism and courtesy of the team.
-
Ensure Proper Drainage: While leveling the ground, create a slight slope (1-2%) away from structures to promote drainage. This detail is essential for preventing water accumulation and ensuring the longevity of the turf grass installation.
-
Cut the Grass: Use a sharp utility knife or grass cutter to carefully trim the grass to fit the measured area. Always cut from the back of the grass to avoid fraying at the edges, which can detract from the overall appearance. Les Boatright emphasized Brock’s attention to detail and commitment to delivering a high-quality end product, which is crucial during this step.
-
Fit the Pieces Together: When working with multiple sections of grass, ensure that the grain direction of the fibers is consistent across all areas. This alignment is key to achieving a natural look, preventing noticeable differences in texture and color.
-
Trim Excess: After fitting the pieces together, trim any excess material around the edges to create a snug fit against borders or obstacles. This final adjustment not only enhances the aesthetic appeal of the area but also contributes to the durability of the turf grass installation by preventing shifting over time.
-
Add a Base Layer: For added stability, consider applying a base layer of materials such as kiln dried sand or crushed stone. This layer is crucial for maintaining the performance of turf grass installation over time.
-
Routine Maintenance: Following installation, regular maintenance is essential to keep the artificial grass looking its best. This includes rinsing off dust and debris and brushing the grass periodically to maintain its appearance. Brock’s expertise ensures that customers receive guidance on maintaining their grass, further enhancing their satisfaction with Hall Turf’s services.

Secure the Turf Edges and Seams
-
Choose a Securing Method: Determine whether to use nails, staples, or adhesive for securing the grass edges. Each method of turf grass installation provides distinct advantages depending on the installation environment.
-
Secure the Edges: Begin at one end of the grass and fasten the edges using galvanized landscape nails or staples, spaced approximately 6-8 inches apart to ensure stability. This closer spacing is preferred as it provides a more secure hold, minimizing the risk of shifting over time. Ensure the surface is taut without being overly stretched.
-
Join the Seams: When using multiple pieces, apply seam tape and adhesive to the seams. Firmly press the edges of the turf together to create a strong bond, which is essential for achieving a seamless appearance and durability.
-
Check for Gaps: Inspect the seams and edges for any gaps or loose areas. Re-secure as necessary to ensure a tight fit, which is crucial for both aesthetics and functionality.
-
Tuck the Edges: For a polished finish, tuck the edges of the grass under any borders or adjacent surfaces to create a seamless transition.
Additionally, ensure that the base layer is thoroughly compacted to a thickness of 3-4 inches, as this is vital for successful turf grass installation. Remember, artificial grass not only enhances the beauty of your yard but also promotes environmental sustainability by reducing water usage and maintenance needs. As noted by satisfied clients like Dick Bryant and Scott Sachse, Hall Turf’s team, led by Brock, is recognized for their professionalism and attention to detail, ensuring that your turf grass installation is executed flawlessly and meets your specific requirements.

Brush and Apply Infill for a Perfect Finish
-
Brush the Grass: Use a power broom or a stiff-bristle brush to lift the grass fibers upright. This technique helps the grass appear denser and more natural. Customers like Dick Bryant have reported excellent results by following these steps, noting that the recommendations from Hall Turf for turf grass installation perfectly suited his needs.
-
Choose Infill Material: Select an appropriate infill material, such as silica sand or rubber granules, based on the intended use of the surface (e.g., pet areas, playgrounds). Scott Sachse valued the professionalism and expertise of the Hall Turf team in assisting him with the decision regarding the turf grass installation for his putting green.
-
Distribute the Infill: Evenly distribute the infill material across the grass surface using a drop spreader for uniformity. Les Boatright emphasized the meticulous attention to detail that Hall Turf demonstrated during the turf grass installation, ensuring flawless execution at every stage.
-
Work the Infill In: After application, use the broom to work the infill into the grass fibers. This step ensures that the infill settles correctly and supports the blades. Brock’s commitment to thoroughness and creativity has been acknowledged by clients, ensuring that the setup meets high standards.
-
Final Grooming: Once the infill is applied, conduct a final grooming with the broom to achieve an even surface and fluff up the turf fibers for a natural appearance. Clients have expressed satisfaction with the final product, highlighting that Hall Turf consistently delivers turf grass installation on time and within budget, making the process smooth and enjoyable.

Conclusion
In conclusion, successfully installing turf grass at home not only results in a stunning lawn but also contributes to environmental sustainability. By investing time and effort into each step of the installation process, homeowners can create a beautiful outdoor space that enhances their property while minimizing maintenance needs.
The essential steps outlined in the article begin with:
- Removing existing grass and preparing the area
- Securing the turf edges
- Applying infill for a perfect finish
Key insights emphasize the importance of:
- Proper drainage
- Selecting suitable base materials
- Ensuring a seamless fit of the turf
Each phase, from leveling the ground to securing seams, is crucial for achieving a durable and aesthetically pleasing result.
Homeowners are encouraged to take these steps seriously and consider enlisting professional help if needed. This approach ensures that their turf grass installation is executed flawlessly, providing years of enjoyment.